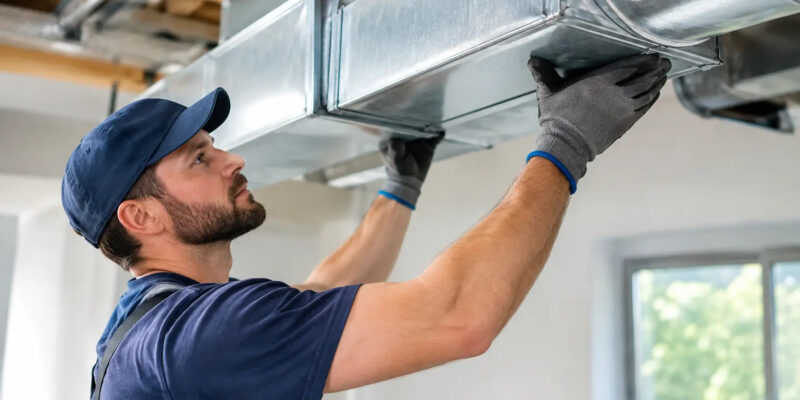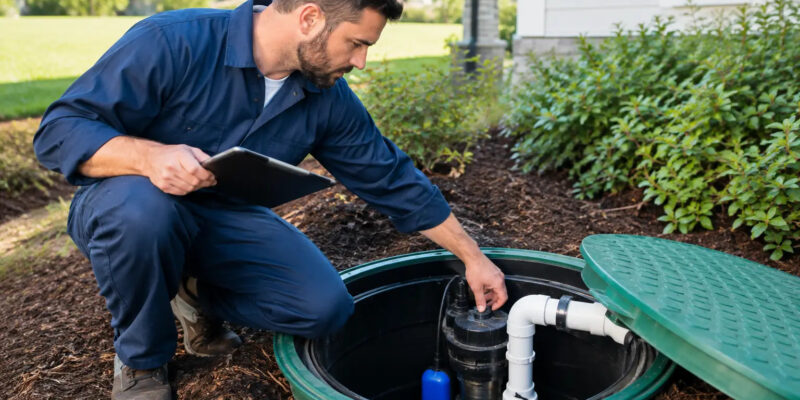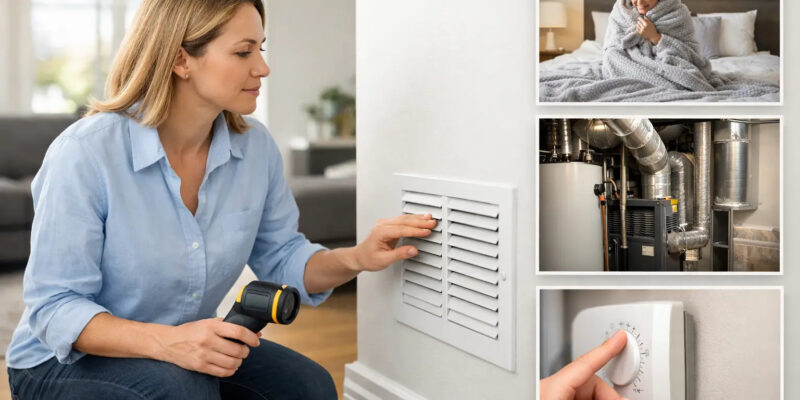
A/C Maintenance That Prevents Summer Breakdowns

The first hot, humid stretch of a Northeastern Pennsylvania summer is a poor time to learn that an air conditioner has been running with a clogged drain, weak capacitor, or restricted airflow. Regular a/c maintenance gives your system the attention it needs before high demand exposes a small issue as a no-cooling call. For homeowners, that means more dependable comfort. For businesses, property managers, and industrial facilities, it means fewer interruptions to occupants, equipment, and daily operations.

A cooling system does more than lower the temperature. It removes humidity, moves conditioned air through the building, and manages heat through electrical and refrigeration components that work hard during peak weather. Preventative service helps each of those functions work together as intended.

What Professional A/C Maintenance Should Address

A useful maintenance visit goes beyond changing a filter and confirming that cool air is coming from a supply register. A technician should inspect the condition, performance, and safety of the system, then identify concerns that could affect reliability, efficiency, or equipment life.

The indoor and outdoor equipment both require attention. On a central air conditioning system, this commonly includes checking thermostat operation, electrical connections, capacitors, contactors, blower components, refrigerant performance, condensate drainage, coils, filters, and overall airflow. Ductless mini-splits, heat pumps, rooftop units, and commercial cooling equipment need the same practical approach, although the components and access requirements vary by system.

Airflow Is a Major Part of Cooling Performance

Many comfort complaints begin with restricted airflow. A dirty air filter can make the blower work harder, reduce the amount of air reaching occupied spaces, and contribute to coil problems. A blocked return, damaged ductwork, dirty indoor coil, or failing blower component can produce similar symptoms.

An air conditioner may still run when airflow is limited, but it will not necessarily cool or dehumidify the space properly. Rooms may feel uneven, the system may run longer than usual, and utility costs can rise. In commercial spaces, poor airflow can also create comfort complaints across offices, retail areas, or tenant spaces even when the thermostat appears to be operating normally.

Condensate Drains Need More Attention Than They Get

Air conditioning creates condensation as warm indoor air passes over the cold evaporator coil. That moisture needs a clear path out of the system. Algae, dirt, and debris can restrict a condensate drain line or trap, causing water to back up near the indoor unit.

A drain issue can lead to water damage, unwanted shutdowns, and high indoor humidity. For systems installed in attics, mechanical rooms, ceilings, or areas above finished spaces, checking drainage before the cooling season is particularly worthwhile. A technician can inspect the drain assembly, clear restrictions when needed, and verify that the system is draining properly.

Electrical and Refrigeration Components Deserve Inspection

The outdoor condensing unit relies on electrical components to start and operate the compressor and fan. A weakening capacitor or worn contactor may not fail during a mild day, yet it can become the reason a system will not start during the first heat wave. Maintenance helps identify signs of wear before a component leaves a home or building without cooling.

Refrigerant performance should also be evaluated carefully. Refrigerant is not a routine item that should simply be topped off every year. A properly operating system is sealed. If refrigerant is low, the system may have a leak or another underlying concern that should be diagnosed and repaired. Adding refrigerant without addressing the cause can postpone the problem rather than solve it.

When to Schedule A/C Maintenance

For most homes, annual cooling maintenance is a sensible baseline. Spring is often the best time because it allows the system to be inspected before hot weather arrives and before service schedules become crowded with emergency calls. If your home uses a heat pump for both heating and cooling, service may be appropriate twice a year since the equipment operates through every season.

Commercial and industrial maintenance schedules depend on operating hours, equipment type, occupancy, and the consequences of downtime. A small office with one rooftop unit does not have the same needs as a facility with multiple rooftop systems, process cooling, refrigeration equipment, or areas that must maintain specific temperatures. High-use equipment may need seasonal inspections and additional checks throughout the year.

Property managers should also consider maintenance timing around tenant turnover, seasonal occupancy, and planned building work. Coordinating service before peak cooling demand can reduce disruption and allow time to plan repairs or replacements if an aging unit is nearing the end of its dependable service life.

Signs Your System Should Be Checked Sooner

Do not wait for a scheduled appointment if the system is giving clear warning signs. Cooling equipment often shows changes in performance before it fails completely. A prompt inspection may help avoid more extensive damage, especially if the compressor, blower motor, or electrical controls are under strain.

Call for service if you notice weak airflow, warm air from supply vents, short cycling, unusual buzzing or rattling, ice on refrigerant lines, water around the indoor unit, persistent humidity, or a sudden increase in cooling costs. A system that repeatedly trips a breaker should also be evaluated rather than reset and left to run.

Some issues are simple, such as a dirty filter or incorrectly programmed thermostat. Others require professional diagnosis. The practical value of service is determining which situation you have before operating the equipment causes further trouble.

A/C Maintenance for Homes, Businesses, and Facilities

The basic goals of maintenance are similar in every setting: reliable cooling, safe operation, controlled energy use, and longer equipment life. The details differ considerably.

Residential systems are often evaluated around comfort, humidity control, noise, and utility costs. Homeowners may need advice on filter changes, thermostat settings, ductless mini-split cleaning, or whether an older central air conditioner should be repaired or replaced. The right answer depends on the condition of the equipment, repair history, efficiency, and how well the system serves the home.

Commercial properties may require attention to rooftop units, multiple zones, tenant comfort, ventilation concerns, and access planning. A failure can affect employees, customers, inventory, or lease obligations. Maintenance records also help property owners make informed decisions about budget planning and equipment replacement.

Industrial facilities can have additional demands, including specialized heating and cooling equipment, refrigeration, production areas, and mechanical systems that must support consistent operations. In these environments, maintenance should be built around the actual equipment load and the operational cost of unexpected downtime, not a one-size-fits-all checklist.

What You Can Do Between Service Visits

Property owners and facility staff can support system performance without attempting repairs. Keep outdoor equipment clear of leaves, grass clippings, stored materials, and other obstructions that limit airflow. Replace or clean filters on the schedule recommended for the equipment and building conditions. A home with pets, construction dust, or frequent system use may need more frequent filter attention than a lightly occupied space.

Inside, keep supply and return vents open and unobstructed. Pay attention to new sounds, odors, moisture, or changes in how long the system runs. These details give a technician useful information and can make troubleshooting more efficient.

Avoid using a garden hose, chemical cleaner, or high-pressure spray on coils unless you understand the equipment and cleaning method. Coil fins bend easily, electrical components can be damaged, and improper cleaning can create a larger repair issue. Routine owner care is valuable, but it does not replace a full professional inspection.

Maintenance, Repair, or Replacement?

Maintenance helps prevent many avoidable failures, but it cannot make every older system new again. Equipment age, corrosion, repeated breakdowns, compressor condition, refrigerant type, and repair cost all matter when deciding whether to repair or replace a unit.

A newer system with a worn electrical component or drainage issue is often a straightforward repair. An older unit with recurring refrigerant leaks, major compressor trouble, or a history of expensive service calls may justify a replacement discussion. The goal should be a practical recommendation based on the system’s condition and your needs, not pressure to replace equipment that can still be repaired responsibly.

Hydrodynamics Inc. provides preventative maintenance and service for residential, commercial, and industrial cooling systems throughout Northeastern Pennsylvania, with support for central air conditioners, heat pumps, ductless systems, rooftop equipment, and related mechanical needs.

A well-timed service visit is one of the simplest ways to protect a system that works hardest when you need it most. Schedule a/c maintenance before summer demand builds, and address small changes in performance while there is still time to make a measured decision.

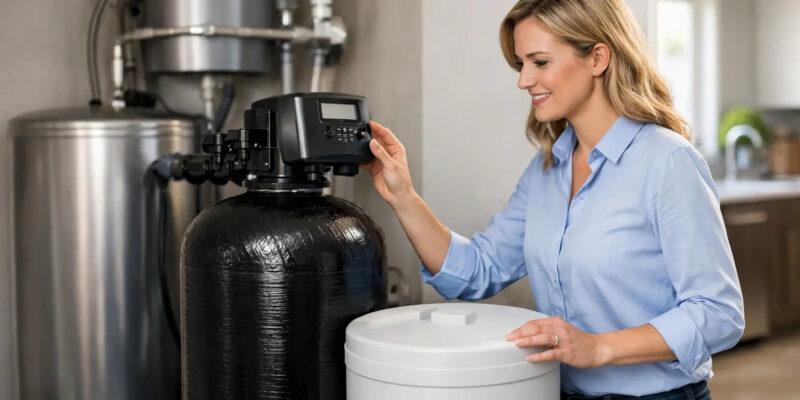
Water Conditioning for Better Well Water

A glass of water can look perfectly clear and still create problems throughout a home or facility. Orange staining on fixtures, scale inside a water heater, a sulfur smell at the tap, or recurring sediment in filters all point to a water-quality issue that deserves more than a guess. Water conditioning addresses the specific minerals, particles, odors, and contaminants affecting your supply, helping protect both the people using the water and the equipment that depends on it.

For properties across Northeastern Pennsylvania, the right approach often depends on whether water comes from a private well or a public system. A well may produce hard water, iron, manganese, sediment, sulfur, or bacteria concerns. Municipal water may be disinfected and safe to drink but still have hardness, chlorine taste, or mineral content that affects plumbing fixtures and appliances. The solution should fit the water, the building, and the way the property is used.

What Water Conditioning Actually Does

Water conditioning is a broad term for equipment and treatment methods that improve water quality or reduce the effects of undesirable water characteristics. It is not one single product. A properly designed system may include a sediment filter, a water softener, an iron-removal unit, carbon filtration, ultraviolet disinfection, or several components working together.

The goal is practical: cleaner-feeling water, fewer stains, better-performing fixtures, and less wear on mechanical equipment. For homeowners, that may mean soap rinses more easily and white laundry stays brighter. For a restaurant, apartment building, or industrial facility, it can mean less scale on water heaters, boilers, ice machines, process equipment, and plumbing components.

Not every concern requires the same level of treatment. Water that is hard but otherwise clean calls for a different system than water with elevated iron, bacterial risk, or heavy sediment. Installing equipment before identifying the actual issue can lead to disappointing results and unnecessary service costs.

Start With the Water Source and a Proper Test

A water test provides the starting point for any water-conditioning decision. Appearance and taste can offer clues, but they cannot confirm what is in the water or how much of it is present. Iron can turn water yellow, orange, or brown. Manganese may leave dark stains. Hydrogen sulfide can create a rotten-egg odor. Hardness often shows up as white scale, cloudy glassware, dry skin, and reduced soap performance.

A thorough evaluation can also identify pH, sediment, total dissolved solids, and other factors that affect treatment equipment selection. This matters because treatment components interact. For example, ultraviolet equipment works best when water is clear enough for UV light to reach microorganisms. If sediment or iron is present, prefiltration may be needed before the UV unit.

Private well owners should also recognize that water quality can change. Heavy rain, flooding, nearby construction, a damaged well cap, seasonal groundwater changes, or a shift in well performance can alter the supply. Testing is particularly worthwhile after a property has been vacant, after well or pump work, or when a new odor, taste, stain, or health concern appears.

Common Signs Your Property May Need Treatment

Hard water and iron issues often build gradually, so the warning signs can be easy to dismiss. Consider an evaluation if you notice persistent scale around faucets, shortened water-heater life, staining in toilets or sinks, reduced water flow from fixtures, unpleasant odor, cloudy water, or frequent sediment in aerators and appliance screens.

For commercial and industrial properties, the signs may appear as higher maintenance needs, inefficient water heating, damaged valves, inconsistent equipment performance, or scale buildup on equipment surfaces. These issues are not always caused by water quality, but untreated water should be part of the investigation.

Choosing the Right Water-Conditioning Equipment

The best water-conditioning system is based on the test results, water usage, flow rate, plumbing layout, and service needs of the property. A household with two occupants and a well has different demands than a busy commercial kitchen, multi-unit property, or manufacturing operation.

Water Softeners for Hard Water

A water softener is one of the most common water-conditioning solutions. It reduces hardness minerals, primarily calcium and magnesium, that create scale. Softened water can help extend the service life of water heaters, dishwashers, washing machines, tankless water heaters, faucets, and fixtures.

Most conventional softeners use ion exchange and require periodic salt replenishment. This is an effective and proven approach, but it does require regular attention. The unit must be sized correctly so it can handle expected water use without regenerating excessively or running out of capacity during high-demand periods.

Some properties need a softener alone. Others need iron treatment before or alongside softening. High iron levels can foul softener resin over time if the system is not designed for the actual water conditions.

Iron, Manganese, Sulfur, and Sediment Treatment

Iron and manganese can stain plumbing fixtures, laundry, and equipment. Sulfur odors can make otherwise clear water unpleasant to use. Sediment can clog filters, reduce flow, and interfere with valves, water heaters, and ultraviolet treatment.

Treatment may involve filtration media, oxidation, aeration, chemical-free systems, or specialty equipment selected for the concentration and type of contaminant. There is no universal answer. Clear-water iron behaves differently from iron that is already visible as particles, and sulfur treatment can depend on whether the odor comes from the well water, plumbing, or a water heater.

A well-planned system also considers maintenance access. Filters need replacement, treatment media has a service life, and control valves need inspection. Equipment that cannot be easily serviced is less likely to provide dependable long-term results.

Ultraviolet Water Treatment for Added Protection

Ultraviolet, or UV, water-treatment equipment uses UV light to deactivate microorganisms. It is often installed on private well systems when bacterial protection is a concern or when a treatment plan calls for an added disinfection barrier.

UV is not a filter and does not remove hardness, iron, sediment, or chemical contaminants. It also does not leave a residual disinfectant in the plumbing. That makes system design especially important. The water reaching the UV chamber must be adequately pretreated, and the lamp and sleeve must be maintained according to the equipment requirements.

For well owners, UV treatment can be a valuable part of a broader plan, especially after water testing and after any well or plumbing conditions that raise concerns about bacteria. It should not replace proper well construction, a secure well cap, sound plumbing practices, or appropriate testing.

Why Water Quality Affects More Than the Faucet

Water moves through much more than a kitchen sink. It feeds water heaters, boilers, ice makers, humidification equipment, dish machines, washing machines, mop sinks, break rooms, and process systems. When hardness or sediment is left untreated, the damage often develops where it cannot be seen.

Scale acts as insulation on heat-transfer surfaces. A water heater or boiler may need more energy to do the same work, while components experience higher operating stress. Sediment can settle in tanks, clog strainers, and reduce the performance of valves and fixtures. For businesses, these issues can become an uptime problem rather than a simple water-quality complaint.

There are trade-offs to consider. More treatment is not automatically better treatment. A system should address the documented problem without adding unnecessary complexity, water use, salt use, or maintenance demands. The right equipment is the equipment that performs reliably for the property and can be properly supported over time.

Plan for Service, Not Just Installation

Water-conditioning equipment is not a set-it-and-forget-it purchase. Salt levels, filters, UV lamps, treatment media, bypass valves, pressure settings, and system controls all need periodic attention. Preventative maintenance helps avoid the common situation where a system is still in place but no longer delivering the water quality it was installed to provide.

For homeowners, a service plan can keep routine tasks from being overlooked and help catch changes in water conditions before staining or equipment damage returns. For commercial and industrial facilities, maintenance scheduling can be coordinated with plumbing, heating, pump, and mechanical service needs to reduce unexpected disruptions.

Hydrodynamics Inc. helps property owners throughout Northeastern Pennsylvania evaluate water concerns and install, repair, and maintain treatment systems suited to the property. Whether the issue is hard water, iron staining, sediment, odor, or the need for ultraviolet treatment, the most dependable next step is to test the water and build the solution around what the results show.

Clean, usable water supports everyday comfort and protects the systems that keep a property running. When the water changes, or the signs of trouble begin to show, early evaluation is usually easier and less costly than waiting for plumbing fixtures, pumps, water heaters, or production equipment to feel the effects.

Plumbing Problems That Shouldn’t Wait for Repairs

A slow drain may seem like a minor inconvenience until it becomes a backup during a busy morning, a business day, or a production shift. Plumbing problems rarely improve when ignored. Water follows the path of least resistance, and a small leak, partial blockage, failing pump, or worn valve can become a larger repair when pressure, usage, or cold weather exposes the weakness.

For homeowners, business owners, property managers, and facility teams across Northeastern Pennsylvania, the goal is not simply to restore water service after a failure. It is to protect the building, maintain safe water flow and drainage, and avoid disruptions that cost more than a planned repair.

Plumbing Warning Signs That Need Attention

Some plumbing issues are obvious, such as water on the floor or a toilet that will not flush. Others develop quietly behind walls, below floors, or inside mechanical spaces. Knowing what to watch for can help property owners act before a small issue affects finishes, equipment, inventory, or daily operations.

A recurring drain clog is one of the clearest signs that the problem may be beyond a single fixture. Plunging a sink or toilet can be appropriate for a simple, isolated blockage. But if several drains are slow, a toilet bubbles when another fixture runs, or wastewater returns through a low drain, the issue may involve a branch line, main sewer line, venting problem, or grinder pump system. Repeated use of chemical drain cleaners can also damage certain piping and does little to address a physical obstruction farther down the line.

Unexpected changes in water pressure deserve attention as well. Low pressure at one faucet may point to a clogged aerator or localized fixture problem. Low pressure throughout the property can indicate a pressure tank concern, a well pump issue, a partially closed valve, treatment equipment restriction, or a supply-side problem. On well systems, pressure that cycles rapidly while water is running can be a sign that the pressure tank or pump controls need evaluation.

Water stains, peeling paint, musty odors, and warped flooring are often treated as cosmetic problems first. They can be evidence of a concealed plumbing leak. Even a slow leak can feed mold growth, damage framing, and raise water costs over time. In commercial buildings, hidden leaks may also affect tenant spaces, electrical components, stored materials, or finished areas that are costly to restore.

Changes in Water Quality Matter

Cloudy water, staining, unpleasant odor, or a metallic taste may be caused by mineral content, sediment, iron, sulfur, bacteria concerns, or aging plumbing components. The right response depends on the water source and the actual cause. A water softener, filtration system, ultraviolet treatment unit, or other water-conditioning equipment should be selected based on a practical assessment, not guesswork.

For homes with private wells, water quality and water delivery are closely connected. A treatment system can only perform as intended when the well pump, pressure tank, controls, and plumbing connections are operating properly. That is one reason an experienced mechanical contractor can be valuable when water issues overlap with pump or treatment equipment.

Why Small Leaks Create Large Costs

A dripping fixture is easy to notice. A leak under a vanity, behind a refrigerator line, at a water heater connection, or inside a wall is different. The damage may spread for weeks before it becomes visible. By that point, the repair can involve more than plumbing work. Drywall, flooring, cabinetry, insulation, and structural materials may all need attention.

Leaks also place strain on water systems. A well pump that runs more often than necessary can experience additional wear. A commercial property with a hidden toilet leak or failed flush valve can waste a significant amount of water over time. In facilities with several restrooms, break rooms, process areas, or tenant spaces, minor fixture problems multiply quickly.

Watch for a water bill that rises without a clear change in usage, the sound of water moving when fixtures are off, damp areas near piping, or a water meter that continues to register flow when the building is not using water. These signs do not identify the exact cause, but they justify a timely inspection.

Plumbing Maintenance Is Different for Every Property

There is no single maintenance schedule that fits a small home, an apartment building, a restaurant, a warehouse, and an industrial facility. The right approach depends on the age of the piping, water source, number of occupants, fixture use, drainage demands, and equipment installed at the property.

A homeowner may benefit from checking exposed supply lines, testing sump or grinder pump operation where applicable, watching for changes in water pressure, and having water-treatment equipment serviced on schedule. Seasonal planning is especially useful in Northeastern Pennsylvania, where unprotected pipes in crawl spaces, garages, exterior walls, and vacant areas can be vulnerable during cold weather.

Commercial and industrial properties need a broader view. Restroom fixtures, water heaters, backflow-related components, pumps, floor drains, specialized process connections, and water-treatment equipment can all affect operations. Preventative service allows facility teams to address worn components during planned work rather than after a restroom closure, water interruption, or equipment shutdown.

Do Not Treat Pumps as Separate From Plumbing

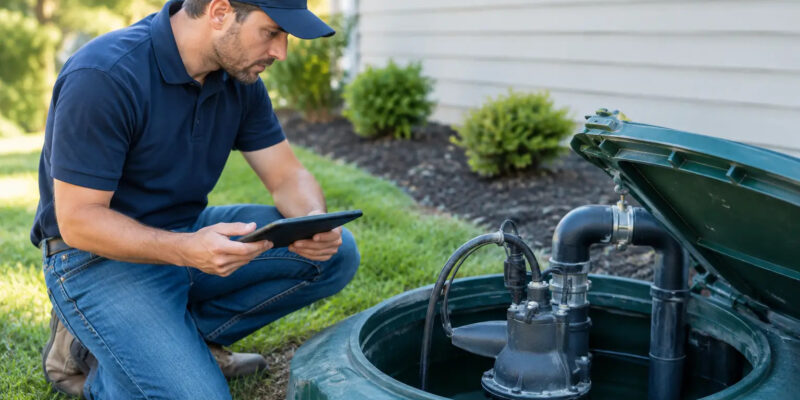
Pumps are often the overlooked part of a property’s water and drainage system. A well pump delivers water. A sump pump helps manage groundwater. A grinder pump moves wastewater where gravity drainage is not practical. When one fails, the plumbing fixtures connected to it may stop functioning as expected.

Warning signs vary by system. A well pump may cause pressure loss, cycling, or no water service. A sump pump may fail to run during heavy rain or may run continuously without lowering the water level. A grinder pump may trigger an alarm, produce unusual noise, or lead to slow drainage and backups. These are not problems to postpone, particularly where wastewater or flooding could affect occupied areas.

When Repair Makes Sense and When Replacement Is Better

A repair is often the right answer when a system has a clear, isolated issue and the remaining equipment is in good condition. Replacing a cartridge, valve, supply line, pump switch, or section of damaged pipe may restore dependable service without unnecessary expense.

Replacement becomes worth considering when repairs are frequent, equipment is nearing the end of its expected service life, corrosion is widespread, or the existing system no longer fits the building’s needs. For example, a property that has added bathrooms, tenants, equipment, or water demand may need changes to its pressure, pumping, or water-heating capacity. Similarly, older piping can create repeat leaks in different locations, making a targeted repair less economical over time.

The best recommendation should explain the trade-off clearly. A lower immediate repair cost may be sensible for a newer component. A planned replacement may offer better value when reliability, operating demands, and the cost of repeated service calls are considered together.

What a Professional Plumbing Evaluation Should Cover

Good plumbing service begins with identifying the actual source of the problem. Symptoms can be misleading. A slow drain does not always mean the clog is directly below that sink, and low water pressure does not always mean the fixture is at fault.

A thorough evaluation considers fixture performance, visible piping, valves, drainage behavior, water pressure, pumps, water heaters, and related equipment as needed. In a commercial or industrial setting, it should also account for occupancy patterns, process needs, downtime concerns, and access to mechanical areas. The goal is to provide a repair or replacement recommendation that works for the full system, not just the most visible symptom.

Hydrodynamics Inc. has served the region since 1994 with plumbing, pumps, water conditioning, HVAC, refrigeration, and mechanical services that often intersect in real buildings. That broader experience matters when a water concern involves more than a pipe or fixture.

If a plumbing issue is disrupting comfort, creating water damage, or raising concern about wastewater, pumping, or water quality, early service is usually the practical choice. Addressing the cause while the repair is manageable helps protect the property and keeps the people who depend on it moving forward.

HVAC Systems That Fit Your Building and Budget

A furnace that runs constantly, an air conditioner that cannot keep up on a humid afternoon, or uneven temperatures across a facility are not simply comfort problems. They are signs that an HVAC system may need attention. For homeowners, business owners, and facility managers in Northeastern Pennsylvania, the right response depends on the equipment, the building, the fuel source, and how the system is being used.

Heating and cooling equipment is a long-term investment, but it is also a working mechanical system. A sound decision considers more than the price of a new unit. It accounts for reliability during severe weather, operating costs, ventilation needs, repair history, and the service support available after installation.

What an HVAC System Is Responsible For

HVAC stands for heating, ventilation, and air conditioning. In practice, it covers the equipment and distribution systems that keep indoor spaces warm, cool, ventilated, and manageable throughout the year. That can include a furnace, boiler, heat pump, air conditioner, ductwork, thermostats, rooftop units, exhaust equipment, and air-handling components.

In a home, the goal is usually consistent comfort, reasonable energy use, and dependable operation. A commercial building may also need to account for occupancy changes, ventilation requirements, server rooms, refrigeration loads, operating hours, and tenant comfort. Industrial spaces can involve even more specialized needs, including process heating, make-up air, equipment protection, and systems that must support continuous operations.

That difference matters. A system that is appropriate for a modest home may not provide the control, capacity, or durability required in a warehouse, restaurant, office building, or production area. Equipment should be selected for the building it serves, not simply for what was installed before.

Choosing the Right HVAC Equipment

There is no single best heating and cooling system for every property. The practical choice depends on the building layout, available utilities, insulation levels, existing equipment, budget, and the owner’s priorities.

Furnaces and central air systems

Gas, propane, and oil furnaces remain a familiar option across the region. When paired with properly designed ductwork and a central air conditioner, they can provide reliable whole-building comfort. For a property with existing ducts in good condition, replacement can be straightforward compared with changing to an entirely different system type.

Fuel availability and cost should be part of the discussion. Natural gas may be practical in one location, while propane or oil may be more realistic in another. Older oil-fired equipment can sometimes be repaired and maintained effectively, but replacement may make sense if efficiency, repair frequency, or parts availability becomes a concern.

Heat pumps and geothermal systems

Modern heat pumps provide both heating and cooling, moving heat rather than generating it through combustion. They can be an efficient option for many homes and light commercial spaces, especially when paired with a backup heat source for the coldest weather. Performance has improved significantly, but system design still matters in Pennsylvania winters.

Geothermal systems use stable underground temperatures to heat and cool a building. They can offer strong long-term efficiency and quiet operation, though installation costs and site conditions must be evaluated carefully. A geothermal system is not automatically the right answer for every property, but it deserves consideration when a building owner is planning a major replacement or new construction project.

Ductless mini-splits and zoned comfort

Ductless mini-splits are useful where extending ductwork would be difficult or disruptive. They can serve additions, finished basements, workshops, older homes, individual offices, and rooms that are consistently too hot or too cold. Because they allow zone-by-zone temperature control, they can reduce the need to condition unused areas.

The trade-off is that indoor heads must be located thoughtfully, and a whole-building solution may require multiple zones. For some properties, a mini-split is the best supplement to an existing system rather than a full replacement.

Rooftop and specialized systems

Commercial properties commonly use packaged rooftop units because they combine heating and cooling components in one accessible location. They can be a practical fit for retail spaces, offices, and other buildings with flat or low-slope roofs. Proper maintenance is essential because weather exposure, belts, electrical components, drains, and filters all affect performance.

Facilities with specialized loads may require industrial heating, waste-oil heating, refrigeration support, or custom mechanical work. These systems need a contractor who understands how comfort equipment, ventilation, controls, and operational demands interact. Treating each piece of equipment as an isolated issue can leave the underlying problem unresolved.

Why Proper Sizing Matters More Than Bigger Equipment

An oversized system is not a safer choice. Equipment that is too large can start and stop frequently, wear components prematurely, and struggle to remove humidity during cooling season. An undersized system may run continuously and still fail to maintain the desired temperature when weather conditions are extreme.

Proper sizing starts with the building itself. Square footage matters, but so do ceiling height, window area, insulation, air leakage, occupancy, sun exposure, and internal heat from appliances or equipment. Duct condition also matters. A high-efficiency unit cannot deliver its expected performance through undersized, leaking, or poorly balanced ducts.

For commercial and industrial properties, a load calculation should also consider business operations. A building that is quiet most of the day has different needs than one with kitchen equipment, production machinery, frequent door openings, or changing occupancy. The right system is based on actual demand, not a guess based on the nameplate of the equipment being replaced.

Maintenance Protects Comfort and Equipment Life

Most HVAC failures do not happen without warning. Restricted airflow, dirty coils, worn motors, loose electrical connections, drainage issues, and neglected filters can turn a manageable service visit into an emergency repair. Preventative maintenance gives a technician the opportunity to identify those issues before a heat wave, cold snap, or busy operating period exposes them.

For homes, seasonal service before heating and cooling demand peaks is a sensible approach. The visit should include an inspection of key mechanical and safety components, along with filter and airflow checks. Homeowners can help between visits by using the right filter, replacing it on schedule, keeping outdoor units clear of debris, and reporting unusual noises or performance changes early.

Commercial and industrial maintenance often needs a more structured plan. Equipment may operate longer hours, serve more people, or support essential processes. Filters, belts, electrical connections, refrigerant operation, condensate drains, combustion components, controls, and rooftop-unit condition should be reviewed according to the system’s workload and environment.

Four signs deserve a service call rather than a wait-and-see approach:

  • Temperatures vary significantly from room to room or shift without a thermostat adjustment.
  • The system cycles often, runs continuously, or makes new banging, grinding, or squealing sounds.
  • Utility costs rise without a clear change in weather, occupancy, or operating hours.
  • Water appears around indoor equipment, airflow drops, or cooling and heating performance declines.

These symptoms do not always mean replacement is necessary. They do mean the system should be evaluated before a small problem becomes an interruption.

Repair or Replace? Make the Decision With the Full Picture

Repair is often the right choice when equipment is relatively young, the issue is isolated, and the system has been maintained. Replacing a failed capacitor, motor, ignition component, thermostat, or refrigerant-related part may restore dependable operation without requiring a major investment.

Replacement becomes more reasonable when repairs are frequent, critical components are failing, efficiency is poor, or parts are difficult to obtain. Age matters, but it is not the only factor. A well-maintained older system may continue serving a property effectively, while a newer unit with incorrect sizing or installation problems may require more serious attention.

For a facility operator, downtime may carry a larger cost than the repair invoice. Loss of heating can affect employees, customers, inventory, plumbing protection, and production schedules. A planned replacement can be easier to manage than a failure during peak demand. Reviewing equipment condition before the season begins gives owners more choices and avoids rushed decisions.

One Mechanical Partner Can Simplify Building Care

Heating and cooling rarely operate independently from the rest of a property’s mechanical systems. A drainage problem can affect air-conditioning equipment. A water-quality issue can shorten the life of plumbing components. A failed well pump, grinder pump, or water heater can create a disruption that reaches far beyond one fixture.

That is why many property owners prefer a contractor with broad mechanical capabilities. Hydrodynamics Inc. supports heating, cooling, plumbing, refrigeration, water treatment, and pump-system needs across Northeastern Pennsylvania, helping customers address connected system issues without coordinating multiple service providers.

The most useful next step is often simple: pay attention to how the building feels and how the equipment behaves. If comfort is uneven, costs are climbing, or a system is becoming less dependable, schedule an evaluation while there is still time to plan the right repair, maintenance visit, or replacement.

HVAC Airflow Balancing Guide & Tips

Ultimate Guide to HVAC Airflow Balancing

Uneven room temperatures? High energy bills? Weak airflow? These are all signs of poor HVAC airflow balancing, a common issue that disrupts comfort and costs you money. Proper balancing ensures your system distributes air evenly, reducing energy waste, improving indoor comfort, and extending equipment life. Here’s what you need to know:

  • What it is: HVAC airflow balancing, or Testing, Adjusting, and Balancing (TAB), fine-tunes air distribution to match design specifications.
  • Key benefits: Lower energy costs, consistent temperatures, and longer system lifespan.
  • How it works: Technicians use tools like flow hoods and manometers to measure and adjust airflow until it meets target values.
  • DIY vs. professional: While you can handle basic maintenance, professional balancing ensures precise results and avoids system strain.

If you’re noticing uneven temperatures, rising bills, or airflow issues, it might be time to consider professional TAB services. Proper balancing can make a noticeable difference in comfort and efficiency. Keep reading for a full breakdown of the process, tools, and solutions.

Flow Hood: How to Properly Balance an HVAC System

What Is HVAC Airflow Balancing?

HVAC airflow balancing, also known as testing, adjusting, and balancing (TAB), ensures that air is distributed throughout a system according to design specifications. This process fine-tunes how conditioned air flows to each room, helping to eliminate temperature inconsistencies, reduce energy waste, and maintain system efficiency. Let’s dive into the core principles and technical aspects of airflow balancing.

When a single damper is closed, it increases static pressure in the trunk duct, which can raise airflow at other open vents. To achieve balance, technicians must measure and adjust airflow repeatedly until all outlets are within ±10% of their target cubic feet per minute (CFM). This interconnected nature of duct systems highlights why professional balancing requires precise tools and a thorough understanding of how adjustments impact the entire network.

Basic Airflow Balancing Concepts

Three primary measurements guide the balancing process: CFM, static pressure, and damper position.

  • CFM (Cubic Feet per Minute): This measures the airflow at each vent, helping technicians ensure it meets the intended design.
  • Static Pressure: Measured in inches of water column (IWC), static pressure reflects the resistance within the duct system. For instance, a dirty MERV 13 filter can add 0.20 to 0.35 IWC of resistance, potentially disrupting airflow.
  • Dampers: These adjustable components control airflow to specific zones or rooms. By restricting airflow at over-performing vents, air can be redistributed to underperforming areas without compromising the overall system.

Residential branch ducts typically operate at velocities between 600 and 900 feet per minute (FPM). This range helps technicians gauge whether the system is functioning properly or if there are underlying design issues.

How System Design Affects Airflow

The design of an HVAC system plays a crucial role in airflow balance. Proper duct sizing is essential: ducts that are too small create friction losses, while oversized ducts reduce airflow velocity, leading to uneven distribution.

The layout of the duct system also matters. Longer or more complex duct runs, especially those with multiple 90-degree bends, create additional pressure drops. For example, a room located at the end of a 50-foot duct run with several bends will naturally receive less airflow compared to a room 10 feet from the air handler with a straight duct. To address these challenges, technicians often identify the “index terminal” – the vent with the highest pressure demand – and use it as a reference point for proportional balancing.

Duct leakage can further complicate balancing efforts. In commercial systems, leakage may reduce delivered airflow by over 10% compared to what the fan produces. Air lost through unsealed joints cannot be redirected, making damper adjustments ineffective. For this reason, technicians start by ensuring all dampers are fully open, filters are clean, and the fan operates at the correct speed. These steps establish a reliable baseline before fine-tuning begins.

Benefits of Proper Airflow Balancing

Getting the airflow just right in your HVAC system isn’t just about comfort – it can save money, protect your equipment, and create a more consistent indoor environment. When every room gets the right amount of conditioned air, you’ll notice lower energy bills, better comfort, and fewer repairs. Let’s break it down.

Lower Energy Costs

Balanced airflow ensures your HVAC system doesn’t have to work harder than necessary. When fans and compressors operate as intended, you avoid the problems of overcooling or overheating in certain areas, which can waste energy .

“When the system is out of balance, some areas of the building are overcooled and others are undercooled, resulting in unnecessary extended operation of the system.” – Schnackel Engineers

In fact, systems that operate outside their design parameters can lose up to 20% of their efficiency. For example, schools have managed to cut their total energy use by as much as 10% by focusing on maintenance tasks like airflow balancing.

Better Indoor Comfort

Comfort isn’t just about temperature – it’s about consistency. Balanced airflow ensures that every room receives the right amount of conditioned air, leading to steady temperatures throughout the building. This reduces drafts, minimizes indoor allergens, and prevents moisture buildup that could lead to mold or mildew.

Proper balancing also brings in the right amount of outdoor air, keeping spaces fresh and preventing stale air. In commercial settings, it can even help protect office equipment like printers by maintaining stable airflow and humidity levels.

Longer Equipment Life

When your HVAC system operates outside its intended range, it puts extra strain on components like fans and compressors, wearing them out faster. An unbalanced system often runs longer in areas that aren’t getting enough air, which can lead to mechanical fatigue .

“If the airflow is too high or too low, it can put stress on the system and cause it to wear and break down more quickly.” – Schnackel Engineers

Since most HVAC systems are designed to last 10 to 15 years, keeping the airflow balanced is key to hitting that full lifespan. Plus, the balancing process helps technicians spot potential issues – like duct leaks or stuck dampers – before they turn into costly repairs.

Tools for Measuring HVAC Airflow

When it comes to balancing airflow in HVAC systems, precise measurement is key. To ensure systems perform as designed, technicians rely on tools that measure velocity, pressure, and volume. The three main instruments used for this purpose are flow hoods, manometers, and anemometers.

Flow Hoods

Flow hoods measure air volume in cubic feet per minute (CFM) by capturing airflow at supply or return diffusers. They’re indispensable for confirming that vents deliver the correct amount of conditioned air based on system specifications.

These tools are particularly effective for ceiling diffusers and floor registers, especially in commercial setups with 24″×24″ diffusers. However, accuracy can decrease when measuring multi-cone or high-induction diffusers unless you apply the manufacturer’s K-factor correction. Professional-grade models, like the TSI Alnor EBT731, are priced around $3,510.00, while more portable options, such as the CPS ABM EasyHood (commonly called capture hoods), are available for about $494.02.

Next, let’s look at how manometers help pinpoint pressure-related issues.

Manometers

Manometers are used to measure static and velocity pressure within ductwork, which helps identify problems such as blockages, dirty filters, or restrictive fittings. When paired with a Pitot tube, manometers calculate air velocity using the formula V = 4,005 × √VP (where VP stands for velocity pressure).

For example, a clogged MERV 13 filter can cause a pressure drop of 0.20 to 0.35 inches of water column (IWC), which can significantly reduce airflow. Digital pressure gauge kits, like the TEC Minneapolis DG-8, are commonly used and cost approximately $699.00. Technicians often take pressure readings at 16 traverse points or more for larger rectangular ducts to ensure accurate results.

Finally, anemometers provide direct velocity measurements at grilles and registers.

Anemometers

Vane anemometers are designed to measure air velocity through a rotating turbine, making them ideal for residential systems and smaller outlets like 4″×10″ floor registers.

“A vane anemometer works on the principle that a freely spinning turbine will rotate at a speed directly proportional to the wind speed.” – Peter Diperna, Mechanical Technical Specialist, Fitzmeyer & Tocci Associates Inc.

When using an anemometer, applying the manufacturer’s AK (grille) factor converts velocity readings into CFM. These tools typically provide accuracy within ±2% to 5%. For applications requiring finer resolution, such as measuring low-velocity airflow in VAV systems, thermal (hot-wire) anemometers are a better choice, offering accuracy from ±1% to 5%. Entry-level smart probes like the Testo 410i are priced around $160.65, while advanced models like the TSI 5725 can cost up to $963.00.

How to Balance HVAC Airflow: Step-by-Step Process

HVAC Airflow Balancing Step-by-Step Process Guide

HVAC Airflow Balancing Step-by-Step Process Guide

Balancing an HVAC system takes careful planning, precise measurements, and thorough documentation to ensure the airflow meets the design specifications.

Preparing the System for Balancing

Start by gathering all necessary materials, including mechanical drawings, duct layouts, equipment specifications, and the design CFM (cubic feet per minute) targets. Make sure filters are clean to avoid inaccurate airflow readings, and check that vents are free from any blockages.

Set all volume and splitter dampers to their fully open positions before taking any measurements. Confirm the fan is operating at the correct speed and record the air handler’s nameplate data. To keep track of your progress, create a comparison chart that lists the design airflows alongside the actual measured values for each inlet and outlet.

“Every forced air system should be balanced upon initial startup… air balancing, done correctly, can alleviate [performance] issues and help ensure the equipment is operating as efficiently as possible.” – Jason Rende, HVAC Air Balancing Specialist

Once the system is prepared, you’re ready to move on to measuring and adjusting airflow.

Measuring and Adjusting Airflow

With the system prepped, begin assessing its performance. Start by conducting a fan performance test, measuring total external static pressure (TESP) and fan RPM, and compare these readings to the manufacturer’s fan curves. For duct measurements, use a pitot tube for traverses in main trunks – rectangular ducts typically require at least 16 measurement points for accurate results. For terminal outlets, use a capture hood or vane anemometer, depending on the situation.

Locate the index terminal, which is usually the outlet farthest from the fan and has the highest design CFM requirement relative to the available static pressure. Focus on adjusting dampers at outlets where airflow exceeds design specifications by the largest margin. This helps redistribute air to underperforming areas without over-restricting the system. Remember, closing one damper increases static pressure in the trunk duct, which can boost airflow at other open terminals. You’ll likely need to make several adjustments and re-measure until the system is balanced. When using anemometers, always apply the manufacturer’s AK factors to ensure accurate CFM calculations.

Recording and Verifying Results

After completing the adjustments, take final measurements at every supply and return outlet to confirm the delivered airflow. According to ASHRAE Standard 111, the acceptable range for balanced airflow is within ±10% of the design CFM. Record additional data, such as total external static pressure, fan RPM, and motor amperage, to confirm the equipment is functioning properly. For commercial systems, verify that the Building Automation System (BAS) airflow tracking and VAV box actuator readings align with your field measurements.

Once all outlets are within the 10% tolerance, lock the manual dampers into their final positions to prevent future drift. Document both the “as-found” and “final” conditions in your comparison chart. This record not only confirms the system is balanced but also serves as a reference for future maintenance.

Common Airflow Problems and How to Fix Them

Even the most well-designed HVAC systems can run into issues that disrupt airflow balance, leading to discomfort and inefficiency. Spotting these problems early and addressing them properly can save energy and prevent equipment from wearing out too soon.

Uneven Room Temperatures

If some rooms in your home are too hot or too cold, the culprit is often duct leaks or poorly adjusted dampers. These issues can let 20%–30% of conditioned air escape before it reaches certain areas. As a result, distant rooms may not get enough airflow to stay comfortable.

To fix this, seal duct leaks using mastic or foil tape (avoid cloth duct tape, as it doesn’t hold up well). Adjust branch dampers to direct more airflow to rooms that need it. In homes with multiple stories, you can further improve airflow by opening upper-floor registers more in summer (since heat rises) and reversing this in winter. Also, ensure vents have at least 18 inches of clearance from furniture, curtains, or other obstructions. If your thermostat sits in direct sunlight or near heat-generating appliances, it might give false readings, causing the system to shut off too early and creating uneven temperatures.

These imbalances don’t just affect comfort – they can also lead to higher energy costs.

High Energy Bills

When duct leaks are present, your HVAC system has to work harder and run longer cycles to make up for the lost air. This extra effort drives up energy usage and costs. Sealing gaps in the ductwork can help your system run more efficiently, ensuring every room gets the airflow it needs without overworking the fan.

Another key step is replacing furnace filters every 1–3 months. A clogged filter can restrict airflow, forcing the blower motor to use more energy and even causing the evaporator coil to freeze. For a more comprehensive solution, consider professional whole-home airflow balancing, which typically costs between $750 and $2,000. While it’s an upfront expense, it can lower your utility bills and extend the life of your equipment.

Beyond energy and cost concerns, airflow issues can also mess with your home’s humidity levels.

Poor Humidity Control

Signs of poor humidity control include condensation, musty odors, and an overall feeling of stuffiness. Proper airflow is essential for effective dehumidification, as it ensures humid air reaches the cooling coils where moisture is removed. Blocked vents or dirty filters can prevent this process, making it difficult to maintain an ideal indoor relative humidity of 30%–50%.

Start by inspecting and replacing filters regularly, and adjust branch dampers to ensure larger or more distant rooms receive enough airflow. Sealing duct leaks is also critical, as leaks can pull in humid outdoor air through cracks, bypassing the system’s filtration and dehumidification processes. Additionally, use kitchen and bathroom exhaust fans to remove excess moisture from the air .

Professional Balancing vs. DIY Methods

Getting airflow just right in your HVAC system is no small task. While basic maintenance like changing filters or cleaning vents is manageable for most homeowners, balancing airflow demands a completely different level of precision. This process isn’t just about comfort; it directly affects energy efficiency and the lifespan of your equipment. That’s why it’s worth weighing the benefits of professional balancing against the limitations of DIY methods.

Why Professional Balancing Works Better

When it comes to accuracy and reliability, professionals have a clear edge. They use advanced tools to measure airflow down to the smallest detail, tools that simply aren’t part of a typical homeowner’s toolkit. Beyond the equipment, they also rely on duct design calculations, layout drawings, and manufacturer specifications to determine the ideal airflow for each room.

“Professional HVAC maintenance is vital for the longevity, efficiency, and safety of your system. Technicians have the expertise and tools to ensure everything is running smoothly and prevent costly breakdowns down the road.” – Stanley Heating Cooling & Plumbing

Professionals also take into account technical factors like grille AK factors – manufacturer-specific data that ensures airflow measurements are mathematically accurate. They monitor key metrics like total static pressure and CFM limits during the process, ensuring adjustments don’t strain the system. Their goal is to get airflow within 10% of the design values, ensuring optimal performance. Plus, they follow the manufacturer’s guidelines to keep your warranty intact. DIY methods, by comparison, just can’t achieve this level of precision or reliability.

Drawbacks of DIY Balancing

DIY balancing often involves guesswork. Without the right tools or benchmarks, homeowners might solve one issue – like a hot or cold room – only to create new problems elsewhere in the system. Most people don’t have the training to evaluate the entire system, which goes far beyond routine tasks like cleaning filters or vents.

There’s also a safety risk. Making adjustments without proper knowledge can lead to dangerous situations. For example, closing too many dampers can increase pressure in the system, forcing it to work harder and potentially causing damage. While DIY fixes might seem like a way to save money, they can lead to higher energy bills and costly repairs down the line. For anything beyond basic maintenance, professional balancing is the safer and more effective choice.

In short, professional expertise offers the precision and safety needed for long-term HVAC performance, making it a worthwhile investment.

When to Schedule Airflow Balancing with Hydrodynamics

Hydrodynamics

Call in the experts sooner rather than later to avoid discomfort and wasted energy.

Signs You Need Airflow Balancing

Are some rooms too hot while others are freezing? These temperature inconsistencies often point to poor air distribution in your HVAC system. Another red flag is weak airflow from certain vents, which suggests air isn’t circulating as it should.

If your energy bills are climbing unexpectedly, your system might be overworking due to imbalances, and a professional evaluation could help. For new installations, balancing is critical right from the start to ensure the system aligns with its design specs. In fact, some engineers or city inspectors may even require a balancing report before signing off on the project.

“Every forced air system should be balanced upon initial startup, and some engineers or city officials may require it before final approval.” – Jason Rende, HVAC Air Balancing Specialist

For older systems – especially those 10–15 years old – balancing can help maintain efficiency as wear and tear set in. To decide if it’s worth it, use the $5,000 rule: multiply your system’s age by the estimated service cost. If the result exceeds $5,000, it might be time to replace the unit instead.

If any of these issues sound familiar, it’s time to bring in a professional.

Hydrodynamics’ HVAC Services

Noticing these signs is your cue to call Hydrodynamics. Since 1994, they’ve been providing expert HVAC services to residential, commercial, and industrial clients. Their offerings go beyond basic heating and cooling, covering advanced systems like geothermal setups and ductless heat pumps. Airflow balancing is a key part of their maintenance programs, which aim to boost energy efficiency and extend the life of your equipment.

Whether you’re setting up a new system or troubleshooting an existing one, Hydrodynamics has the tools and know-how for precise airflow balancing. Their technicians adhere to industry standards, ensuring all vents operate within 10% of the design specifications. For businesses with complex ductwork or rooftop systems, their deep experience guarantees a thorough and professional job every time.

Conclusion

Getting the airflow balance right is key to making your HVAC system run efficiently and keeping your home comfortable. When air is distributed evenly, you benefit from lower energy costs, consistent temperatures throughout your space, and an HVAC unit that lasts longer. On the flip side, poor balancing forces your system to work overtime, leading to frequent cycling and unnecessary wear on components.

Balanced airflow also reduces hot and cold spots, prevents strain on equipment, and stops stagnant areas where dust and allergens often build up. Professional technicians achieve this by fine-tuning branch dampers, ensuring that each outlet operates within 10% of its intended airflow values. These precise adjustments highlight why thorough Testing, Adjusting, and Balancing (TAB) procedures are so important.

“A well-balanced system not only improves comfort but also reduces callbacks, increases equipment lifespan, and demonstrates your professionalism to customers.”

  • Jason Rende, HVAC Designer and Air Balancing Specialist

While small vent adjustments can be done at home, full TAB requires specialized tools like manometers and flow hoods to ensure accurate results. As explained in this guide, proper measurements and adjustments are essential to meet design specifications. Since 1994, Hydrodynamics has been providing expert HVAC services, using advanced tools and proven methods to make sure your system works exactly as it should.

FAQs

How do I know if my HVAC system is out of balance or just undersized?

To figure out if your HVAC system is out of balance or possibly undersized, start by checking the airflow at each outlet and compare it to the design specifications. If the airflow differs by more than 10%, your system may be out of balance. Try adjusting the branch dampers and recheck the airflow.

If the problem persists even after balancing, it could indicate that the system is undersized. On the other hand, if the airflow remains uneven despite proper system sizing, the issue might lie with balancing or duct design flaws.

Will closing vents or adjusting dampers damage my HVAC system?

Blocking vents or adjusting dampers might seem like a way to save energy, but it can actually harm your HVAC system. When airflow is restricted, it disrupts the pressure balance in the ductwork, which can put extra strain on your heating and cooling equipment. Over time, this added stress can lead to mechanical problems or even system failure. For this reason, it’s usually a good idea to keep vents open, even in unused rooms, to avoid unnecessary damage and reduce the chances of costly repairs.

How often should airflow balancing be done after repairs or renovations?

HVAC airflow balancing is crucial after starting up a new system, completing repairs, or making renovations. Although there’s no strict timeline for rebalancing, it’s important to perform it whenever changes are made. This ensures proper airflow distribution and keeps the system running efficiently, helping it deliver the comfort you expect.

Drinking Water Systems: RO, UV & Carbon

Drinking water systems

When it comes to clean, safe drinking water, understanding your options is key. Tap water often contains contaminants like lead, PFAS, and bacteria, which modern filtration systems can address effectively. Here’s a quick breakdown of the main systems:

  • Reverse Osmosis (RO): Removes 95–99% of dissolved solids, heavy metals, and chemicals. Costs range from $200 to $15,000+, depending on the system size.
  • UV Purification: Eliminates 99.99% of bacteria and viruses using UV light. Ideal for well water and costs $300–$1,000+.
  • Carbon Filtration: Improves taste and removes chlorine, VOCs, and odors. Affordable, with systems costing $50–$200.

Maintenance is crucial for all systems, including regular filter replacements and sanitization. Testing your water before choosing a system ensures you target the right contaminants. Whether you need better-tasting water or protection from harmful pollutants, there’s a system to fit your needs and budget.

Best Water Filter for Every Budget (2026 Guide)

Types of Drinking Water Systems

Drinking Water Filtration Systems Comparison: RO vs UV vs Carbon

Drinking Water Filtration Systems Comparison: RO vs UV vs Carbon

Different drinking water systems tackle contaminants using specific technologies. Reverse osmosis filters at the molecular level, UV light eliminates microorganisms, and carbon filtration removes impurities through adsorption. Understanding these methods can help you choose the right system for your water needs. Let’s break down how each works, along with their benefits and costs.

Reverse Osmosis Systems

Reverse osmosis (RO) systems use a semipermeable membrane with pores as small as 0.0001 microns to filter water. This process relies on high pressure to push water molecules through the membrane, leaving behind contaminants like lead, arsenic, PFAS, and nitrates. The result? 95-99% of total dissolved solids (TDS) are removed.

“Reverse osmosis is the gold standard of home water filtration. It’s the only widely available technology that removes 95-99% of dissolved contaminants… including PFAS, lead, arsenic, and nitrates.” – Crystal Quest Water Filters

While effective, RO systems discharge 1–4 gallons of wastewater for every gallon of purified water. Costs vary widely: under-sink systems run from $200 to $950, while whole-house units can cost $4,500 to $15,000+. These systems are ideal for addressing high TDS levels, heavy metals, or chemical pollutants. However, if your water is hard (over 7 grains), installing a water softener first is crucial to prevent membrane damage.

UV Purification Systems

UV purification relies on ultraviolet light at 254 nanometers to neutralize bacteria, viruses, and protozoa by damaging their DNA. This process achieves a 99.99% or greater reduction in harmful pathogens like E. coli, Giardia, and Cryptosporidium.

“UV purification is not filtration – it’s disinfection. It uses UV-C light at 254nm to destroy DNA in bacteria, viruses, and protozoa, rendering them harmless.” – HisoAir

UV systems don’t produce wastewater and require no chemicals, but they don’t remove physical particles or dissolved solids. Clear water is essential for UV to work effectively since cloudy water can block the light. These systems cost $300 to $1,000+, with annual lamp replacements ranging from $20 to $100. They’re especially useful for well water or sources prone to biological contamination.

Carbon Filtration Systems

Carbon filtration uses activated carbon to trap contaminants through adsorption. This method is highly effective at removing chlorine, volatile organic compounds (VOCs), and odors that affect water taste and smell. Granular activated carbon can eliminate up to 99.9% of VOCs and up to 99% of chlorine from municipal water.

“We use carbon to remove PFAS, but if you want to be absolutely sure about your drinking water, a reverse osmosis system underneath the sink is the best guarantee.” – Aidan, Lead Technical Expert, Mid Atlantic Water

Carbon filters don’t remove dissolved minerals, heavy metals, or salts. Most systems don’t require electricity, making them simple and cost-effective. Under-sink carbon systems range from $50 to $200, with annual filter replacement costs between $30 and $100. If your primary concern is chlorine taste or chemical odors, carbon filtration is a great choice. It’s also commonly used as a pre-filter in multi-stage systems to protect RO membranes from chlorine damage.

How to Choose a Drinking Water System

The first step in picking the right water system is understanding what’s in your water. If you rely on municipal water, check your Consumer Confidence Report (CCR) online. If you use a private well, you’ll need to test your water through a certified lab, which typically starts at around $159. Always test your water before buying a filtration system.

Once you know what contaminants are present, match them to the appropriate technology. For example, carbon filters are great for reducing chlorine taste and odor, reverse osmosis systems handle dissolved solids and heavy metals, and UV purification is best for neutralizing bacteria and viruses. If your water contains elevated levels of lead or PFAS, consider upgrading to a reverse osmosis system or one certified under NSF 53 standards.

“Reverse osmosis is not the right answer for everyone. If your water test shows only minor chlorine taste issues… a quality pitcher or faucet-mount filter will handle the job at a fraction of the cost.”

  • David King, Founder, OffGrid Filters

Household size is another key factor. A family of four typically uses 2–4 gallons of water daily for drinking and cooking. Your system, whether it’s under-sink or whole-house, should meet your flow rate needs. For whole-house systems, aim for 10–15 gallons per minute to prevent pressure drops when multiple fixtures are used simultaneously. Also, think about installation requirements. Reverse osmosis systems need under-sink space, a dedicated faucet, and a drain connection, while carbon and UV systems are more compact and easier to set up.

Lifetime costs are worth considering too. Point-of-use systems like under-sink filters are cheaper upfront but have higher per-gallon costs over time. Whole-house systems, on the other hand, require a larger initial investment but are more economical in the long run. For instance, whole-house carbon systems cost about $0.0013 per gallon, while countertop reverse osmosis systems range between $0.11 and $0.19 per gallon. Always check for NSF/ANSI certifications: Standard 42 for chlorine and taste, Standard 53 for health-related contaminants like lead, and Standard 58 for reverse osmosis systems.

Now that you know the basics, let’s take a closer look at how different technologies stack up in terms of efficiency, installation, and maintenance.

System Comparison: Reverse Osmosis, UV Purification, and Carbon Filtration

Here’s a quick breakdown of how reverse osmosis, UV purification, and carbon filtration compare:

System Type Contaminant Removal Efficiency Installation Requirements Maintenance Frequency Suitable Applications
Reverse Osmosis High: Removes 95–99% of dissolved solids, lead, PFAS, nitrates Moderate: Needs a drain connection and often a storage tank Moderate: Pre-filters every 6–12 months; membrane every 2–5 years Residential drinking water, laboratories, high-TDS areas
UV Purification Biological only: Kills 99.99% of bacteria and viruses Simple: Inline installation; requires an electrical outlet Low: Annual UV lamp replacement Well water with biological contamination
Carbon Filtration Chemical/taste: Removes chlorine, VOCs, odors Simple: Available as countertop, under-sink, or whole-house options High: Cartridge changes every 6–12 months Municipal water, taste/odor improvement

Maintenance and Troubleshooting

Common Problems and How to Fix Them

Water filtration systems tend to run into a few predictable problems. For reverse osmosis (RO) systems, slow water flow is a frequent issue, often caused by clogged pre-filters or low pressure in the storage tank. If the tank is empty, use a bicycle tire gauge to check the air pressure and adjust it to 5–8 psi. If water keeps draining continuously, the likely culprits are either a faulty automatic shut-off (ASO) valve or a malfunctioning check valve. Bad taste or odors? That’s usually due to an exhausted carbon post-filter or biofilm buildup – both of which require replacing the filters and sanitizing the system.

UV purification systems, while simpler, still need attention. If the alarm goes off, the UV lamp likely needs replacing (usually every 12 months). During this process, clean the quartz sleeve with a cloth soaked in vinegar or citric acid to remove scaling. Keep in mind, just because the lamp glows doesn’t mean it’s effectively killing germs – it needs to emit UV light at the specific 254 nm wavelength. Leaks at the chamber? That’s a sign of worn-out O-rings, which should be replaced and lubricated with food-grade silicone, such as Molykote 111.

For carbon filtration systems, reduced water pressure is often caused by sediment clogging the filter cartridge. If you start noticing a chlorine taste in the water, the carbon media is likely used up and needs replacing.

Here’s a quick troubleshooting guide:

System Type Common Issue Likely Cause Troubleshooting Steps
Reverse Osmosis Slow water flow Clogged pre-filters or low tank pressure Replace pre-filters; check and adjust tank pressure to 5–8 psi
Reverse Osmosis Continuous draining Faulty ASO valve or check valve Inspect and replace the ASO or check valve
Reverse Osmosis Bad taste/odor Exhausted carbon filter or biofilm buildup Replace filters and sanitize the system
UV Purification Alarm sounding Lamp failure or low UV intensity Replace the lamp; clean the quartz sleeve
UV Purification Leaking at chamber Worn O-rings Replace and lubricate O-rings with food-grade silicone
Carbon Filtration Reduced pressure Sediment clogging Replace the cartridge; check for kinked tubing
Carbon Filtration Chlorine taste Media exhaustion Replace the carbon filter

Addressing these common issues is easier when combined with regular maintenance.

Regular Maintenance Tips

Routine care is the best way to avoid problems and extend the life of your system. One of the most important aspects is sticking to a filter replacement schedule. For RO systems, sediment and carbon pre-filters should be replaced every 6–12 months, while the RO membrane can last anywhere from 2 to 5 years, depending on water quality. UV lamps need replacing every 12 months, and carbon filters typically last between 6–12 months. If you’re using well water, you may need to replace pre-filters more frequently – about every 3–6 months – due to higher levels of sediment or iron.

Sanitization is another critical step. To prevent bacterial growth and keep your water tasting fresh, sanitize your RO system and storage tank annually or whenever you replace the membrane. Use a diluted chlorine solution or an RO-safe cleaner for this process. After sanitizing or replacing filters, flush the system by filling and draining the storage tank at least three times before using the water. For new carbon filters, run water through them for several minutes to clear out any loose carbon dust.

Don’t overlook O-ring maintenance. Every time you open a housing, check the O-rings for wear and replace them every 2–3 years. Apply a thin layer of food-grade silicone lubricant to prevent leaks – avoid petroleum jelly, as it can degrade rubber seals.

To keep everything running smoothly, invest in a basic toolkit. This should include:

  • A filter wrench for opening housings
  • A bicycle tire gauge and pump for tank pressure adjustments
  • A TDS (Total Dissolved Solids) meter to monitor water quality (costs around $10–$15)
  • A soft cloth for cleaning UV sleeves

Lastly, regular performance monitoring is essential. Use a TDS meter to ensure your RO system is working efficiently – if effectiveness drops below 80%, it’s time to replace the membrane. For whole-house filters, a pressure drop of more than 5–7 psi indicates the filter needs replacing. Also, keep in mind that RO production decreases by about 1–2% for every degree Fahrenheit below 77°F.

Hydrodynamics Water Conditioning Services

Hydrodynamics

Since 1994, Hydrodynamics has been a go-to provider for water conditioning services in Northeastern Pennsylvania.

Located in Hazleton, PA, the company focuses on delivering personalized water treatment solutions with a strong emphasis on customer care.

Hydrodynamics starts by offering a free water test for homeowners in NEPA. This test helps identify common issues like mineral buildup, chlorine taste, or even lead contamination. Once the problem is pinpointed, they design a tailored water treatment system. Their team includes technicians certified in A.S.S.E. Backflow Testing and EPA 609 standards, ensuring high-quality service.

The company specializes in reverse osmosis systems, which can remove up to 99% of contaminants. They also provide carbon filtration and water softening options to address a variety of water quality concerns.

“Our certified technicians have years of experience in water treatment and HVAC services… Your satisfaction is our priority, and we offer ongoing support to ensure your system operates flawlessly.” – Hydrodynamics Inc.

Hydrodynamics doesn’t just install systems – they also offer ongoing maintenance to keep everything running smoothly. They recommend annual professional check-ups to ensure your system stays in top condition. By following these maintenance practices, Hydrodynamics helps homeowners achieve long-term performance from their water systems.

Their commitment to customer satisfaction is echoed in testimonials like this one from Emma K. of Drums, PA:

“They were prompt and knowledgeable and efficient. Very pleased with their work.” – Emma K., Drums, PA

The company also boasts a 74% recommendation rate based on customer reviews, reflecting their dedication to quality service.

Whether you’re struggling with hard water, sediment, or just want cleaner drinking water, Hydrodynamics understands the specific needs of Northeastern Pennsylvania residents. Their localized expertise ensures they address the unique challenges of the region while delivering the benefits of advanced water treatment systems.

Conclusion

The first step to selecting the right drinking water system is testing your water to identify specific contaminants – whether it’s lead, PFAS, or bacteria. Once you know what you’re dealing with, you can choose the appropriate technology. For example, reverse osmosis (RO) systems are effective for removing dissolved solids and heavy metals, activated carbon filters handle chlorine and improve taste, and UV purification tackles microbial threats. Under-sink RO units typically range from $200 to $950, with annual maintenance costs of $80–$150. This knowledge forms the foundation for choosing and maintaining your system.

Regular upkeep is crucial to protect your investment. Replace sediment and carbon pre-filters every 6 to 12 months to extend the life of your RO membrane. UV lamps should be replaced annually – even if the light appears functional – because their germicidal effectiveness decreases over time. Using a TDS (Total Dissolved Solids) meter to monitor your RO system’s performance is also a smart move; a noticeable drop in rejection rate signals it may be time to replace the membrane.

Basic troubleshooting can often resolve performance issues. Slow water flow is a common problem and usually points to clogged pre-filters or low feed pressure (below 40 PSI), which might require a booster pump. If your water develops an unusual taste or odor, it could mean your activated carbon filters are no longer removing chlorine effectively. When simple fixes don’t work, calling in a professional ensures your system operates at its best.

For more complex water issues – like hard water, sediment, or emerging contaminants – expert advice can make a big difference. Hydrodynamics offers free water testing and customized solutions, including RO systems, activated carbon filters, and water softeners, designed to tackle your specific concerns. Their certified technicians handle everything from installation to routine maintenance, ensuring your system consistently delivers safe, high-quality water. Following these steps not only guarantees cleaner water but also ensures your system remains reliable for years to come.

Ready to take the next step? Contact Hydrodynamics to schedule your free water test and get expert guidance on choosing and maintaining the perfect system for your home.

FAQs

Do I need RO, UV, or carbon for my water?

The right water purification system depends on your water quality and what you’re aiming to achieve. Reverse Osmosis (RO) systems are excellent for eliminating dissolved contaminants such as heavy metals and salts. UV purification focuses on neutralizing bacteria and viruses, making it ideal for biological threats. Carbon filters, on the other hand, enhance taste and odor by removing chlorine and organic compounds. For broader coverage, combining different systems can be a smart choice. Start by testing your water and consulting an expert to find the best solution for your specific needs.

Should I test my water before buying a system?

Testing your water before buying a treatment system is a smart move. It helps pinpoint specific contaminants like bacteria, chemicals, or heavy metals in your supply. This ensures you select a system that matches your needs, making the treatment more effective and dependable.

How often do filters or UV lamps need replacing?

Filters should typically be replaced every 6 to 12 months, while UV lamps usually need replacement every 12 months to keep everything running efficiently. Staying on top of regular maintenance is key to ensuring good water quality and keeping the system performing at its best.

HVAC Energy Loss Solutions & Fixes

Fixing HVAC Energy Loss: Common Solutions

When your HVAC system isn’t running efficiently, it can lead to higher energy bills, reduced comfort, and system wear. The good news? Most energy loss stems from a few common, fixable issues:

  • Dirty air filters: Block airflow, increase energy use, and strain components.
  • Leaky ductwork: Wastes 20–30% of conditioned air, raising costs.
  • Dirty coils: Reduce heat transfer, forcing the system to work harder.
  • Low refrigerant levels: Cause inefficiency and compressor strain.
  • Thermostat issues: Lead to incorrect readings and wasted energy.

Simple fixes like replacing filters, sealing ducts, and cleaning coils can boost efficiency by 15–30%, saving hundreds annually. For persistent problems, professional services ensure long-term performance and savings. Regular maintenance is key to avoiding breakdowns and keeping your HVAC system running smoothly.

Where am I losing energy from my heating and cooling system? (Duct leakage)

Dirty Air Filters and Restricted Airflow

A dirty air filter might seem like a minor issue, but it can have a big impact on your HVAC system’s performance and energy use. When filters get clogged with dust, your system has to work harder to push air through your home. This extra effort not only drives up energy bills – heating and cooling typically make up almost half of the average household’s $1,900 yearly energy costs – but also puts strain on key components like fans and heat exchangers. Over time, this can lead to costly repairs or even shorten the lifespan of your system. In fact, the leading causes of heating and cooling system failure are dirt and neglect.

“A dirty air filter will cause your heating and cooling system to work harder to distribute air throughout your home. This can increase energy costs and damage your equipment, leading to early failure.” – ENERGY STAR

Signs of Clogged Filters

How can you tell if your air filter needs attention? Look out for these warning signs:

  • Higher energy bills without any significant changes in weather or usage.
  • Weak or uneven airflow coming from your vents.
  • Difficulty maintaining the temperature set on your thermostat.
  • More dust building up around registers and grilles than usual.

These clues often point to a filter that’s overdue for cleaning or replacement.

How to Maintain Air Filters

Keeping your air filters in good shape is simpler than you might think. Here’s what to do:

  • Check your filters monthly, especially during peak heating or cooling seasons, and replace them every three months – or sooner if they’re visibly dirty.
  • When replacing a filter, make sure the arrow on the edge points toward the furnace or blower unit. This ensures proper airflow.
  • For safety, always turn off your system at the thermostat or circuit breaker before working on it.
  • If you notice gaps around the filter holder, seal them with duct tape to stop unfiltered air from slipping through.

A little regular maintenance can go a long way in keeping your HVAC system running efficiently and saving you money in the long run.

Leaky or Blocked Ductwork

After dealing with air filters, it’s time to look at your ductwork – another key factor in HVAC efficiency. Damaged or poorly sealed ducts can waste 20–30% of conditioned air, letting energy escape into unconditioned areas like attics, crawlspaces, or wall cavities. Shockingly, about 75% of buildings suffer from duct leakage, making it a frequent culprit behind energy loss.

Leaky ducts can cut your system’s efficiency by as much as 20%. For example, if your HVAC costs you $2,500 annually, fixing duct leaks could save you approximately $500 per year. Beyond the monetary impact, leaks force your HVAC system to work harder, which can wear out components faster and shorten its lifespan.

How to Identify Ductwork Problems

Catching duct issues early can help you avoid bigger headaches later. Uneven temperatures – those frustrating hot and cold spots around your home – are often a sign of air escaping through leaks or blockages. Weak airflow from vents or hissing and whistling sounds when the system runs are also telltale signs of escaping air.

Another clue? Excessive dust. If return ducts are leaking in areas like attics or crawlspaces, they can pull in dust, insulation particles, and allergens, spreading them throughout your home. You might also notice musty odors or chemical smells if leaks are drawing air from damp spaces or garages storing items like paint or pesticides. And if your utility bills suddenly spike without a clear reason, your ductwork might be the problem.

For a DIY check, try the smoke test. While your system is running, hold a lit incense stick or smoke pencil near duct joints. If the smoke wavers or gets drawn into a seam, you’ve likely found a leak. You can also visually inspect ducts in accessible areas like attics or crawlspaces for holes, disconnected sections, or crushed flexible ducts. Look for discoloration or loose drywall around air registers – these can signal air escaping behind walls.

Sealing and Insulating Ducts

Once you’ve identified duct problems, sealing and insulating them is essential for restoring efficiency. Start with sealing – insulation won’t help if the ducts are still leaking. Mastic sealant is highly recommended for this job. It’s a paint-on solution that provides a strong, flexible, and permanent seal, making it perfect for joints, curves, and connections.

“Mastic is the undisputed champion. It provides a superior, long-lasting seal that ensures you’re not just patching the problem, but solving it”.

For flat surfaces, foil HVAC tape with acrylic adhesive works well. But avoid using standard cloth-backed “duct tape” – despite its name, it doesn’t hold up under temperature changes and pressure. Before applying any sealant, clean the duct surface with a mild solution to ensure proper adhesion.

After sealing, add insulation to ducts in unconditioned spaces like attics or garages. Fiberglass duct wrap is a popular and budget-friendly option for retrofitting, but be sure to wear safety gear like gloves and a mask when handling it. According to the International Energy Conservation Code, ducts in unconditioned attics need at least R-8 insulation, while those in other unconditioned areas require R-6. DIY materials for this project typically cost between $55 and $170, while hiring professionals for duct sealing and insulation can range from $1,000 to $2,700, depending on the size of your system and how accessible the ducts are.

Fixing duct leaks pairs perfectly with other maintenance tasks, such as replacing air filters, to boost your HVAC system’s performance and energy efficiency.

Dirty Coils and Heat Transfer Problems

Your HVAC system’s coils – the indoor evaporator and outdoor condenser – play a key role in heat transfer. When these coils are covered in dust, pet hair, or grime, your system’s efficiency takes a hit. Even a thin 0.02-inch layer of dust can reduce heat transfer by 15% and airflow by 11%, which may lead to energy consumption spiking by over 30%.

Dirt acts like an insulating layer on the aluminum fins, blocking proper refrigerant heat exchange and limiting airflow. This can force the blower motor to work harder, and as heat transfer becomes less effective, your system has to run longer and more frequently to meet the thermostat setting. This extra strain impacts the compressor significantly. In fact, for every 10% drop in airflow caused by dirt, your system’s efficiency can decline by 6% to 8%. Over time, this wear and tear could shave 3 to 5 years off your HVAC system’s lifespan. Knowing these risks highlights the importance of regular maintenance to keep your system running smoothly.

Signs of Dirty Coils

Dirty coils, like clogged filters or leaky ducts, can severely limit your HVAC system’s energy efficiency. There are several warning signs to watch for. If the air from your vents feels weak or warmer than usual, it might be time to check the coils. Ice forming on the refrigerant lines or the evaporator coil is another indicator. This happens when a dirty coil fails to absorb enough heat, causing refrigerant temperatures to drop too low and condensation to freeze.

You might also notice musty or “dirty sock” odors coming from your ductwork. This smell often points to mold or biofilm growth on the coils, which can lead to microbial counts up to 300 times higher than those found in clean systems. Additionally, rising energy bills can signal trouble. A 10% efficiency loss could add $100 to $150 annually to your energy costs, while a 25% loss might increase expenses by $250 to $400. If your home feels humid even with the AC running, dirty coils are likely behind the problem.

Cleaning and Maintaining Coils

Keeping your coils clean is critical for maintaining efficiency and avoiding expensive repairs. Aim to clean them once a year. However, if you have pets, smokers in the house, or live in a humid coastal area, you may need to clean them every 4 to 6 months. For light maintenance, you can use a no-rinse foaming coil cleaner and a soft brush vacuum attachment. Just remember to turn off the system before starting. For a deeper clean, schedule professional servicing every two years to recover up to 95% of lost heat transfer capacity.

“If your coil can’t breathe, your AC can’t perform – and your wallet will feel it.” – Samantha Reyes, Smart Comfort Specialist

Professional coil cleaning typically costs between $150 and $250 for surface cleaning, or $300 to $450 for a deep chemical clean. While this may seem like an investment, it’s far less expensive than replacing a damaged coil, which can cost $800 to $1,500, or a failed compressor, which ranges from $1,200 to $2,000. Additionally, flushing the condensate drain with vinegar and warm water can help prevent clogs. Combining regular coil cleaning with filter replacement ensures your HVAC system operates efficiently and keeps repair costs at bay.

Low Refrigerant Levels and Compressor Strain

When refrigerant levels drop due to a leak, your HVAC system has to work overtime to maintain cooling, which can increase energy consumption by as much as 30%. This strain doesn’t just affect efficiency – it puts extra pressure on the compressor, the most expensive part of the system. Low refrigerant also disrupts the balance of indoor humidity, leaving your home feeling damp and uncomfortable. Ideally, humidity levels should stay between 30% and 50%.

Refrigerant leaks don’t resolve themselves. Because the refrigerant remains pressurized, it will continue to escape whether the system is running or not, eventually depleting entirely. Common causes include corrosion in the evaporator coil, loose connections, or worn seals. Like clogged filters or leaky ducts, refrigerant leaks interfere with system performance and drive up energy costs. Catching these issues early can help you avoid expensive compressor repairs.

Detecting Refrigerant Issues

Refrigerant problems often show up in noticeable ways. If your vents are blowing warm or room-temperature air, it could be a sign of low refrigerant. Unusual sounds like hissing or whistling may indicate gas leaking under pressure, while bubbling noises suggest liquid refrigerant escaping. Ice forming on the evaporator coils is another red flag – low refrigerant causes moisture in the air to freeze on the coils. Short cycling, where the system frequently turns on and off without reaching the desired temperature, is another symptom. Additionally, an unexplained increase in your energy bill might point to a refrigerant issue.

It’s also important to consider health risks. Leaking refrigerant can lead to symptoms like headaches, dizziness, nausea, and respiratory irritation. In severe cases, exposure might cause seizures or even loss of consciousness.

Recharging Refrigerant and Repairing Leaks

If you suspect a refrigerant leak, turn off your thermostat and circuit breaker right away. This helps prevent further damage to the compressor and reduces the risk of exposure to harmful chemicals. Avoid trying to refill the refrigerant yourself – this is a job for licensed HVAC professionals. They can identify the source of the problem, whether it’s a crack in the lines, corrosion in the evaporator coil, or a worn seal, and then repair or replace the faulty components. Afterward, they’ll recharge the system according to the manufacturer’s guidelines.

Routine maintenance can help prevent refrigerant leaks, just as it does for filter and coil issues. Repairing a refrigerant leak typically costs between $250 and $1,600, while replacing an entire AC unit due to extensive damage can cost anywhere from $3,900 to $8,000. After repairs, keep an eye on your system for recurring issues like higher energy bills or strange noises. Scheduling annual professional maintenance is a smart way to monitor refrigerant levels and spot early signs of wear on critical components like coils.

Thermostat and Control Issues

Once you’ve tackled filters, ductwork, and coils, paying attention to your thermostat setup is the next step to keep your HVAC system running efficiently.

The thermostat is essentially the command center for your HVAC system. If it’s not calibrated or set up correctly, it can lead to wasted energy and higher utility bills. For example, a thermostat reading 72°F when the actual temperature is 75°F may shut the system off too early. This premature shutdown forces the system to restart sooner than necessary, wasting energy and potentially making your home uncomfortable. This issue, known as short cycling, not only increases energy use but also puts extra strain on your system’s components.

Where you place your thermostat matters just as much as how it’s set up. Installing it near heat sources like lamps, ovens, or direct sunlight can result in inaccurate temperature readings. Similarly, placing it near drafty windows or vents can cause false readings, leading to unnecessary shutdowns or longer operating times. Older programmable thermostats can also lose accuracy over time as their sensors drift out of calibration.

Common Thermostat Problems

One of the most noticeable signs of an issue is incorrect temperature readings. To test this, place a reliable thermometer next to your thermostat and wait about 15 minutes. If the readings differ by more than 2°F, your thermostat likely needs recalibration. Dust buildup on internal sensors can also affect accuracy. To fix this, carefully remove the thermostat cover and use compressed air or a soft brush to clean away dust and debris.

Unresponsive controls are another frequent problem. If your thermostat isn’t responding, check the batteries and replace them if necessary – doing this annually is a good habit. Inspect the wiring for any loose connections or signs of corrosion. Also, make sure the thermostat is set to the correct mode. For example, having it on “heat” during summer or “cool” during winter can cause it to malfunction.

How to Optimize Thermostat Settings

For the best performance, install your thermostat on an interior wall, ideally 52–60 inches above the floor. Avoid placing it near windows, doors, or heat sources to ensure it measures the average temperature of your living space instead of localized hot or cold spots.

Programming your thermostat to match your daily schedule is another way to improve efficiency. Set lower or higher temperatures (depending on the season) during times when no one is home, and use the recovery feature to have your home at the desired temperature by the time you return. Avoid constantly overriding the programmed settings, as this can make the system run longer at high-energy levels than necessary.

Remember, most residential air conditioners are designed to maintain a 20°F difference between indoor and outdoor temperatures. Cranking the thermostat lower during a heatwave won’t cool your home faster; it will just push the system to work at full capacity for extended periods. Upgrading to a modern digital or smart thermostat can help reduce HVAC runtime by up to 15%, offering both convenience and energy savings.

Preventative Maintenance for Energy Efficiency

HVAC Maintenance Schedule and Energy Efficiency Impact Guide

HVAC Maintenance Schedule and Energy Efficiency Impact Guide

Once you’ve tackled thermostats, filters, ductwork, and coils, the next step is sticking to consistent maintenance. Why? Because heating and cooling make up nearly 50% of a typical home’s energy use, which means they play a huge role in your annual energy costs. Skipping regular upkeep can quickly cause those costs to climb.

A good maintenance routine combines simple monthly tasks with professional check-ups twice a year. For example, checking air filters every 30 days and replacing them when dirty can prevent up to a 15% efficiency drop caused by restricted airflow. Scheduling a professional tune-up in the spring for cooling systems and in the fall for heating systems ensures your equipment is ready when you need it most. Plus, contractors are often more available during these off-peak times, making it easier to book an appointment. A well-planned schedule can help you avoid unnecessary energy losses.

Maintenance Schedule Overview

Not all tasks need to be done with the same frequency, but each one plays a direct role in keeping your system efficient. Here’s a quick breakdown of recommended tasks and why they matter:

Maintenance Task Frequency Energy Efficiency Impact Potential Cost of Neglect
Air Filter Replacement Monthly (Check) / 1–3 Months (Change) Prevents 15% loss Higher costs & equipment wear
Coil Cleaning (Evaporator/Condenser) Annually Improves heat transfer Compressor strain; system failure
Duct Sealing & Insulation Periodic / As Needed Boosts efficiency by 20% Air leaks; uneven temperatures
Professional Tune-up Bi-annually (Spring/Fall) Keeps system at peak performance Breakdowns; reduced lifespan
Thermostat Calibration/Upgrade Monthly (Check) / Once (Upgrade) Saves ~$100/year with ENERGY STAR models Frequent cycling; wasted energy
Lubricating Moving Parts Annually (Professional) Reduces friction Motor wear; higher electrical draw
Condensate Drain Cleaning Annually Prevents humidity issues Water damage; mold growth

Benefits of Regular Maintenance

Regular maintenance goes beyond quick fixes like cleaning coils or sealing ducts – it strengthens your system’s overall performance. It saves energy, extends the lifespan of your equipment, reduces emergency repair needs, and keeps your home comfortable year-round. For instance, even a thin layer of dust (just 0.042 inches) on an evaporator coil can reduce heat transfer efficiency by up to 21%. That’s a big drop for skipping a simple annual cleaning.

Sealing ductwork can recover 20% to 30% of the air typically lost through leaks. Upgrading to an ENERGY STAR-certified smart thermostat can save you about $100 per year, and replacing outdated equipment might cut your annual bills by nearly $140. Keeping detailed maintenance records is also smart – it helps you spot recurring problems early and ensures your manufacturer warranties remain valid.

Professional Solutions from Hydrodynamics

Hydrodynamics

Some energy efficiency issues call for professional know-how. Since 1994, Hydrodynamics has been a trusted provider in Northeastern Pennsylvania, offering services like duct sealing, coil cleaning, refrigerant management, and energy-efficient installations. Their factory-trained technicians stay up-to-date with the latest HVAC advancements, ensuring systems operate at peak efficiency. This expertise complements DIY efforts, helping maintain long-term energy savings.

These professional services go beyond basic fixes, addressing energy loss with a thorough approach. For instance, Hydrodynamics’ EPA 609 Certified Technicians handle refrigerant management and conduct high-pressure leak tests to ensure both safety and optimal performance. According to the U.S. Department of Energy, properly sealed ducts can significantly reduce energy waste and may even qualify for Federal Tax Credits of up to $1,200.

Hydrodynamics also installs energy-efficient systems, including heat pumps, geothermal units, ductless mini-splits, and high-velocity air handlers. They provide tailored maintenance plans aimed at cutting energy waste and extending equipment lifespan – without pushing unnecessary upgrades. Emma K. from Drums, PA shared her experience:

“They were prompt and knowledgeable and efficient. Very pleased with their work.”

Hydrodynamics echoes this commitment to customer focus:

“Customer satisfaction is always our number one goal.” – Hydrodynamics Inc.

Whether you’re maintaining an older HVAC system or investing in new equipment, Hydrodynamics offers solutions for residential, commercial, and industrial clients. With over 30 years of local experience, they bring a deep understanding of energy-efficient problem-solving to every project.

Conclusion

Tackling HVAC energy loss means addressing the root causes that undermine your system’s efficiency. By combining straightforward DIY measures with professional solutions, you can help your system regain its optimal performance. Ignoring these issues can lead to higher energy bills and unnecessary strain on components, which accelerates wear and tear.

The financial consequences are no small matter. Energy and air losses not only increase costs but can also reduce your HVAC system’s typical lifespan of 10–15 years. Simple tasks like replacing filters monthly and setting your thermostat correctly can make a noticeable difference. This mix of regular upkeep and professional care ensures your system remains efficient and your expenses stay manageable.

That said, some issues – such as refrigerant leaks, duct sealing, or coil cleaning – require the expertise of trained professionals. Partnering with experienced service providers, like Hydrodynamics, can deliver the repairs and upgrades needed for long-term efficiency and savings.

Whether you’re trying to extend the life of an aging system or prevent future breakdowns, the key lies in balancing proactive DIY efforts with regular professional maintenance. This approach not only safeguards your investment but also keeps your home comfortable and your energy costs in check year-round.

FAQs

What HVAC fix saves the most energy first?

Sealing and insulating your ductwork is a smart way to cut down on energy waste. By minimizing air leaks, it boosts the efficiency of your HVAC system and ensures that conditioned air gets where it’s supposed to go. This straightforward upgrade can make a noticeable difference in your system’s performance and help trim your energy bills.

How do I know if my ducts are leaking?

You can spot duct leaks by looking for visible cracks, holes, or disconnected sections in your ductwork. Other clues include uneven heating or cooling, higher-than-usual energy bills, or rooms that are hard to keep at a comfortable temperature. Pay attention to inconsistent airflow throughout your home – this can also signal potential leaks. Regular inspections can help catch these problems early.

When should I call Hydrodynamics for HVAC help?

If your HVAC system isn’t running as it should, routine troubleshooting isn’t solving the problem, or you’re looking for expert maintenance or ways to improve energy efficiency, call Hydrodynamics for help. They can assist with tasks like sealing ducts, cleaning coils, or upgrading your system to enhance performance. Tackling energy loss issues early or scheduling regular maintenance can also help you avoid expensive repairs and keep your system running smoothly.

Drainage Problems and Solutions Guide

Common Drainage Problems and Solutions

When water lingers on your property after rain, it can lead to serious issues like foundation damage, erosion, and mosquito infestations. Key causes include clogged gutters, poor yard grading, compacted soil, and underground water buildup. Addressing these problems quickly is essential to protect your home and landscape. Here’s a quick breakdown of common issues and fixes:

  • Clogged Gutters & Downspouts: Debris buildup and improper slope can cause overflow. Regular cleaning, downspout extensions, and gutter guards can help.
  • Poor Yard Grading: Water pooling near your foundation signals grading issues. Fix with proper slope adjustments or professional regrading.
  • Compacted Soil: Heavy traffic or machinery compresses soil, reducing water absorption. Core aeration and adding compost improve drainage.
  • Underground Water Buildup: Hydrostatic pressure can damage foundations. Solutions include French drains, sump pumps, and interior drainage systems.

Key Tip: Regular maintenance like gutter cleaning and soil aeration can save you thousands in repairs. For severe drainage issues, professional help is often the best choice. Keep reading for detailed solutions to safeguard your property.

Common Drainage Problems: Causes, Solutions, and Costs Comparison

Common Drainage Problems: Causes, Solutions, and Costs Comparison

Backyard Drainage Solutions | Ask This Old House

Ask This Old House

Clogged or Poorly Installed Gutters and Downspouts

Gutters and downspouts play a crucial role in protecting your home from water damage, especially during heavy rainfall. When they fail, water can overflow and collect around your foundation, leading to serious problems. As C.E. Larusso, Contributing Writer at Angi, aptly states:

“A bad gutter can drag your home’s foundation into the gutter pretty quickly!”

Let’s break down the common causes of these issues and how to address them.

What Causes Gutter and Downspout Problems

One of the main issues is debris buildup. Leaves, twigs, dirt, and even nests from birds and squirrels can clog gutters, preventing water from flowing properly through the downspouts. Another frequent problem is an improper pitch, which causes water to pool instead of draining toward the downspout. Additionally, undersized gutters or downspouts can’t handle the volume of water during heavy storms, leading to overflows.

Structural wear and tear also contribute. Rust, corrosion, and loose seams can allow water to leak through cracks instead of being directed away from your home. During winter, standing water in gutters can freeze, creating ice dams that cause further overflow when the ice melts. All of these issues can lead to pooling water around your foundation, increasing the risk of soil erosion, basement flooding, mold, and even structural damage.

How to Fix Gutter and Downspout Issues

The best way to prevent these problems is through regular maintenance. Clean your gutters at least twice a year – once after the fall leaves drop and again in early spring. If your home is surrounded by trees, you might need to check them more frequently, especially during the fall. Hiring a professional to clean your gutters typically costs around $162, which is far less than the $9,250 it could cost to install a French drain if water damage becomes severe.

Another effective solution is to extend your downspouts so water is discharged 4 to 6 feet away from your foundation. For added protection, some experts recommend extending them 5 to 10 feet. You can use flexible plastic tubing or rigid materials like PVC or aluminum, which cost less than $20. Installing gutter guards or downspout screens can also help by keeping out large debris while allowing water to flow freely. Professional installation for these systems typically ranges from $650 to $2,000.

Lastly, make sure your gutters are properly sloped toward the downspouts. If you notice pooling water, re-slope the affected sections to ensure efficient drainage. These simple steps can go a long way in protecting your home from water damage.

Incorrect Yard Grading and Low Spots

Poor yard grading can cause water to flow toward your foundation, leading to pooling, basement leaks, and even structural damage like buckled floors. Oklahoma State University emphasizes:

“Soils should slope outward from a house. In some cases, settling or other landscape activities might reduce the slope, causing water to pond adjacent to the house.”

How to Spot Yard Grading Problems

One of the simplest ways to detect grading issues is to observe where water collects after a heavy rain. If water pools near your foundation or in low spots in your yard, it’s a clear sign of trouble. These areas not only harm your lawn by killing grass – most turfgrasses can’t survive more than three days of flooding – but also create persistent mud.

Another clue is the amount of foundation visible above ground. Ideally, there should be 6 to 8 inches of exposed foundation between the ground and your siding. This gap helps protect against rot and keeps water from breaching your home. To measure your yard’s slope accurately, use stakes, nylon rope, and a line level to calculate the vertical drop (rise) over a horizontal distance (run).

How to Fix Yard Grading Problems

For optimal drainage, aim for a slope of about 1 inch per foot extending away from your home for the first 5 to 10 feet. For small DIY fixes, bagged topsoil is an affordable option, costing under $2 per 40-lb bag. However, avoid using loose topsoil or mulch alone, as they’re too permeable and prone to washing away. Instead, fill low spots with compacted loam or clay-heavy soil for better stability.

When filling these areas, work with dry soil and use a plate compactor or tamper to pack it down firmly. This prevents future settling and ensures a long-lasting solution. If raising the ground level might obstruct basement windows, consider installing window wells to act as retaining walls. Don’t forget to call 811 before you dig to locate underground utilities and ensure compliance with IRC regulations.

For larger or more complicated grading issues, hiring a professional may be the best option. Professional aeration for large lawns typically costs around $270, while installing a French drain ranges from $10 to $100 per linear foot. These upgrades not only resolve grading problems but also improve your overall drainage system.

Compacted Soil and Poor Water Absorption

Soil health plays a huge role in your property’s drainage system, often as much as gutters and grading. When soil becomes overly compacted, its air pockets disappear, making it harder for water to seep in. According to the University of Minnesota Extension:

“A compacted soil has a reduced rate of both water infiltration and drainage.”

This means that instead of soaking into the ground, rainwater pools on the surface, creating muddy patches and runoff. Healthy soil relies on large pores to absorb water, but compression caused by heavy equipment, foot traffic, or even rainfall slows this process significantly. If your soil drains less than 1 inch per hour, it’s classified as poorly drained. Most plants, however, prefer drainage rates between 1 and 3 inches per hour.

What Causes Soil Compaction

Soil is most vulnerable to compaction when it’s wet. Moisture acts like a lubricant, letting soil particles pack tightly together under pressure. In fact, up to 70% to 90% of compaction happens during the first pass of heavy machinery. Loads exceeding 10 tons can compact soil up to two feet deep, making it nearly impossible to fix with basic tools.

Other culprits include foot traffic, parked cars, repeated tilling, and even raindrops. Raindrops can form a crust as thick as ½ inch on the soil surface, blocking water from entering and preventing seeds from sprouting.

How to Improve Water Absorption in Soil

Start by testing your soil’s drainage with a simple percolation test. Dig a 12-inch-deep hole, fill it with water, let it drain, and refill it. Measure how far the water level drops in one hour. If it’s less than 1 inch, you’ve got a drainage issue.

Core aeration is one way to loosen compacted soil without disrupting its structure. A mechanical aerator removes small plugs of soil, creating channels for air and water to reach roots. For lawns, aim for holes spaced about two inches apart. Adding a 2- to 4-inch layer of compost to the top 6 to 12 inches of soil can also help. Compost improves soil aggregation, which creates larger pores for better drainage. The University of Minnesota Extension emphasizes:

“Improving soil structure is the best defense against soil compaction.”

Before tilling, try the squeeze test: grab a handful of topsoil and form it into a ball. If it crumbles, it’s ready to till. If it stays intact, the soil is too wet, and working it will only make compaction worse . For long-term results, limit foot and vehicle traffic to designated paths to keep the rest of your yard uncompacted.

These steps can go a long way in boosting your soil’s ability to absorb water and prevent drainage issues. They work well alongside other drainage solutions to protect your property.

Poor Surface Water Management

When rainfall surpasses what the soil can absorb, the excess water needs to be redirected. Without a proper plan to manage this runoff, water tends to pool on hard surfaces, leading to flooding and soil erosion. In areas like Tampa Bay, where annual rainfall exceeds 50 inches, often delivered in intense storms, standard drainage systems can easily be overwhelmed.

Signs of Surface Water Management Problems

Beyond common issues like clogged gutters or improper grading, inadequate surface water management can lead to more serious drainage problems. For instance, if puddles linger long after a rainstorm, this could indicate a drainage issue that needs attention. Similarly, if your lawn feels consistently soggy or spongy – even during dry spells – it’s a sign that water is accumulating either on the surface or just below it.

Other warning signs include erosion channels cutting through your yard or soil washing away near downspouts and slopes. Water pooling on patios, driveways, or walkways not only creates access issues but can also cause cracks and surface wear over time. Foundation problems may present as water stains on walls, basement moisture, or water backing up near downspouts. Oversaturated soil can also harm your landscaping, leading to dying grass, yellowing plants, or even root rot in trees and shrubs. Additionally, stagnant puddles can become breeding grounds for mosquitoes, signaling poor drainage.

Natural Methods for Managing Surface Water

Natural solutions can be an effective way to address surface water problems. One option is swales, which are shallow, sloped ditches lined with vegetation. These direct runoff away from structures to safer areas like dry wells or gardens. Professional installation costs range from $5 to $15 per linear foot, but a DIY approach using basic materials can cost as little as $1 to $3 per linear foot.

Another solution is rain gardens, which are planted in low-lying areas and use deep-rooted native plants to absorb stormwater and direct it into the ground. Creating a rain garden yourself, including the cost of native plants, typically runs about $5 per square foot. Dry creek beds are another option. These use rocks of various sizes to create a channel for stormwater, doubling as a drainage solution and a decorative element. They usually cost between $3 and $4 per square foot.

For improved drainage, replacing impervious surfaces like concrete or asphalt with permeable materials such as pea gravel or crushed stone can help divert water away from foundations. If you’re planning any digging for drainage projects, don’t forget to call 811 to have underground utility lines marked before starting.

Underground Water Buildup

Water below the surface can pose serious risks to your home’s structural stability, even when surface issues seem manageable. When heavy rains saturate the soil, the added water weight creates hydrostatic pressure. This pressure forces moisture through tiny pores in concrete, as well as through cracks and joints in your foundation. The problem is even worse in areas with clay-heavy soil, which tends to hold onto water. During extended rainfall, this can raise the water table above your basement floor, leading to significant issues.

One major contributor to this problem is the “clay bowl effect.” The looser, backfilled soil around your foundation acts like a sponge, trapping water and pressing it against your home. This hidden pressure can compromise your basement’s integrity, making it crucial to address the issue with targeted solutions.

How to Identify Underground Drainage Problems

Spotting underground water issues early can save you from expensive repairs. One common entry point for water is the cove joint, where the basement floor meets the foundation wall. These sections are poured at different times and rarely seal perfectly, leaving a vulnerable gap. If you notice water pooling along this seam during or after rain, it could indicate subsurface water pressure.

Another clue is efflorescence, a white, chalky residue left behind when groundwater seeps in and evaporates. This mineral trail often points to active seepage. Additional warning signs include damp spots on lower walls, musty odors, peeling paint near the floor, and persistently wet soil around your home.

To confirm whether the moisture is from groundwater and not a plumbing issue, try the main water shutoff test. Turn off your home’s water supply for several hours. If water still seeps into the basement, the source is likely underground. Another method involves taping a 2-foot square of plastic sheeting to your basement floor. If moisture collects on the underside after 24 to 48 hours, water is migrating up through the slab.

How to Manage Subsurface Water

Several solutions can help manage underground water effectively:

  • French drains: These trenches, filled with gravel and a perforated pipe, collect and divert groundwater. Professional installation costs range from $30 to $100 per linear foot, while a DIY version might cost $10 to $25 per linear foot.
  • Interior drainage systems: Also called drain tiles, these systems involve cutting a channel along your basement’s perimeter to direct water to a sump pit. Professional installation typically costs between $3,000 and $10,000.
  • Sump pumps: Essential for removing water from sump pits, these pumps cost $200 to $500 for DIY installation or $800 to $3,000 when professionally installed with a battery backup.

“The correct approach is to relieve or redirect the pressure using a drainage system that gives water a controlled path to a sump pump rather than trying to stop it with surface treatments alone.” – The Basement Guide Staff

  • Dry wells: These underground basins filled with stone collect runoff and allow it to seep deeper into the soil. DIY materials cost between $50 and $250, while professional installation can go up to $5,000.

For visible foundation cracks, polyurethane or epoxy injection kits can temporarily seal gaps. DIY kits cost $50 to $100, while professional repairs range from $250 to $500 per crack. However, sealing cracks without addressing hydrostatic pressure is often a short-term fix.

When to Call a Professional for Drainage Problems

Some drainage issues can be tackled with a bit of DIY effort, but others require professional intervention to avoid expensive repairs and protect your home’s foundation. Understanding when to bring in an expert is key to preventing long-term damage.

DIY vs. Professional Solutions

It’s important to distinguish between tasks you can handle on your own and those that need professional attention. Simple fixes, like cleaning gutters or adding downspout extensions, can address minor surface water problems. However, complex issues often demand specialized tools and expertise.

Method Type Effectiveness Maintenance Needs
Downspout Extensions DIY Moderate; redirects water a short distance. High; prone to clogs and detachment.
Gutter Cleaning DIY Moderate; prevents overflow. High; seasonal cleaning required.
French Drains Professional High; handles subsurface water effectively. Low; requires professional installation.
Catch Basins Professional High; ideal for low-lying areas like driveways. Moderate; needs sediment removal.
Grinder Pumps Professional Very High; moves water uphill or long distances. Low; best with professional upkeep.
Yard Regrading Professional High; fixes poor water flow at its source. Very Low; permanent if done properly.

These examples show when basic repairs might work and when more advanced solutions are necessary.

You should call a professional if water is entering your basement or pooling near your foundation – these are serious signs of drainage failure. Persistent standing water, recurring drain backups (often caused by tree roots), severe erosion near downspouts, ice accumulation on walkways in winter, or large areas of dead vegetation in oversaturated soil are all red flags that DIY methods can’t fix.

“Ignoring the issue can lead to incredibly expensive and lasting damage to your home’s foundation and structure.” – Alex Riza, Plumbing Expert

A quick test: during heavy rain, if your gutters overflow or water flows toward your house, it’s time to act fast and call a professional. For soil drainage, dig a small hole and fill it with water. Healthy soil should drain in about 4 hours; anything longer – especially 12 to 24 hours – signals a problem.

Hydrodynamics‘ Drainage Services

Hydrodynamics

When DIY solutions fall short, professional services can address the root of the problem. Hydrodynamics specializes in identifying and solving persistent drainage issues that threaten your home’s foundation. Their plumbing assessments can uncover hidden problems like tree root intrusion, collapsed pipes, or improper grading – issues that might go unnoticed during routine inspections. With advanced camera inspections, they pinpoint problems without unnecessary digging.

For properties dealing with elevation challenges or heavy runoff from nearby areas, Hydrodynamics offers grinder pump installations to move water uphill or to distant drainage mains. Costs for residential grinder pumps range from $1,000 to $4,500, while high-capacity systems for larger properties can cost $10,000 to $25,000.

They also provide seasonal maintenance plans to keep systems like sump pumps, grinder pumps, and catch basins clear of debris and ready to handle heavy rainfall. Maintenance and repairs typically cost between $500 and $2,000, while system upgrades range from $3,500 to $7,000. Custom drainage solutions can cost anywhere from $4,000 to $8,500.

Hydrodynamics offers additional services like mechanical root cutting to clear blocked pipes, backwater prevention valve installations to stop sewer backups, and construction of berms and swales to redirect runoff from higher elevations. Since 1994, this family-owned business has been serving residential, commercial, and industrial clients, bringing decades of experience to every project.

Conclusion: Preventing Drainage Problems Year-Round

Keeping your drainage system in good shape requires a mix of regular maintenance and professional expertise. Ignoring drainage issues can lead to expensive foundation damage. A simple yet effective step is cleaning your gutters and downspouts twice a year – ideally before spring and fall rains – to keep water flowing away from your home. This helps protect your foundation and reduces the risk of basement flooding.

It’s also important to inspect your drainage system regularly. Check French drain outlets, catch basins, and pipes for debris that could block water flow. Aerating your lawn can improve water absorption by breaking up compacted soil, especially in areas with heavy foot traffic. Another key tip: ensure your yard is properly graded so water flows away from your house, and maintain at least 4 inches of clearance between the soil and your siding.

“Good yard drainage starts with gutters.” – Lee Wallender, The Spruce

While routine maintenance is crucial, some problems require professional attention. Persistent standing water, basement leaks, or recurring backups are signs that it’s time to call in the experts. Since 1994, Hydrodynamics has been solving complex drainage challenges with services like mechanical root cutting, grinder pump installations, and custom drainage system repairs. Their seasonal maintenance plans can prepare your system for heavy rainfall, helping you avoid costly emergencies down the road.

FAQs

How do I tell if water near my house is from grading or gutters?

During rain, water’s behavior can reveal underlying issues. If water tends to pool around your foundation or in low-lying areas after a heavy downpour, it’s likely due to grading problems – where the land slopes toward your house instead of away from it.

On the other hand, gutter issues can lead to water overflowing or collecting near the roofline or around downspouts. If your gutters are clean and water still pools, the problem is probably with the grading. However, clogged gutters can cause overflow no matter how well your property is graded.

What’s the fastest way to figure out if my basement moisture is groundwater?

Inspect for signs of hydrostatic pressure, such as water bubbling up through cracks in the floor or pooling at the base of walls. Look for external problems too, like improper grading around the property or visible cracks in the foundation. If you notice moisture lingering after rain or cleaning – and especially if it appears to be coming from below the surface – it’s probably groundwater. To get a clear picture of the issue, consider bringing in a professional to assess the soil and groundwater conditions around your home.

Which drainage fix should I do first to protect my foundation?

To safeguard your foundation, the first thing to tackle is any drainage problems that might lead to water pooling around it. Bring in a professional to evaluate and fix the foundation’s drainage system. These types of repairs are usually not suitable for DIY projects, so relying on an expert can help you avoid water seepage and potential damage, particularly during heavy rainstorms.

HVAC Noise Causes & Simple Fixes

HVAC Noise: Common Causes and Fixes

Your HVAC system should run quietly. Strange noises often signal issues that need attention to avoid expensive repairs or replacements. Here’s a quick breakdown of common HVAC noises, their causes, and what to do:

  • Rattling: Loose screws or panels. Tighten them, but if it persists, call a professional.
  • Banging: Loose or damaged components like the compressor or blower motor. Needs expert help.
  • Buzzing: Electrical issues such as loose wiring or failing capacitors. Shut down and contact a technician if there’s a burning smell.
  • Squealing/Grinding: Worn belts or bearing failures. Turn off the system and seek professional service.
  • Popping: Ducts expanding/contracting due to temperature changes. Insulate ducts or check airflow.
  • Gurgling/Bubbling: Clogged condensate lines or refrigerant issues. May require professional maintenance.

Addressing these noises early can save you from costly repairs. Simple DIY steps like tightening panels or replacing air filters can help, but some issues demand professional diagnostics. If repairs exceed $5,000 (based on system age × repair cost), replacing the unit might be smarter. Regular maintenance is key to keeping your HVAC system quiet, efficient, and safe.

Common HVAC Noises: Causes and Solutions Guide

Common HVAC Noises: Causes and Solutions Guide

Common Cause for Noisy HVAC | Ask This Old House

Ask This Old House

Common HVAC Noises and Their Causes

Your HVAC system has a way of communicating through the sounds it makes. While some noises are harmless, others can signal problems that may require immediate attention. Identifying the type of noise can help you determine whether it’s a simple fix or time to call in a professional.

Rattling or Vibrating Noises

Rattling sounds usually point to loose hardware, like screws, panels, or motor components. Start by checking your outdoor condenser and indoor air handler for any loose screws or panels, and tighten them if necessary. If the rattling continues, it could mean internal issues with the blower motor or compressor, which would need professional attention. As Michael Starratt from United HVAC Motors explains, “A properly functioning HVAC system should run quietly, providing heating and cooling without disruption”. Addressing these issues early can save you from costly repairs, as remanufactured blower motors can cost between $329.99 and $699.99. If the noise becomes more forceful and turns into banging, it may indicate more serious problems.

Banging or Clunking Sounds

Banging noises often suggest loose components, but the added intensity could mean internal damage. Tighten any accessible screws or panels, but if the banging persists or seems to come from deeper within the unit, you might be dealing with a failing compressor or damaged blower motor parts. Pay special attention during startup or shutdown – if the compressor struggles to start and you hear clanking, the capacitor might need to be replaced.

Buzzing or Humming Noises

A steady, low hum is normal during operation, but a sudden or loud buzzing often signals electrical problems. This could include loose wiring, faulty contactors, broken relays, or failing capacitors that can’t deliver the necessary charge to start the unit. Buzzing may also point to a failing motor or transformer. While you can check for loose panels or refrigerant lines vibrating against the housing, leave any electrical diagnostics to the experts. Electrical repairs typically range from $150 to $450, while motor replacements can cost between $250 and $650.

Important note: If buzzing is accompanied by a burning smell, shut down your system immediately, as this could indicate a potential electrical fire hazard.

Squealing or Grinding Noises

Squealing and grinding noises suggest mechanical stress. Squealing often comes from worn or loose belts losing tension. In newer systems, it might also indicate bearing issues in the motor. Grinding sounds, on the other hand, are more severe and usually mean metal-on-metal contact caused by failed bearings or an unbalanced blower wheel. For example, a 1/3 HP blower motor with bearing failure can progress from minor squeals to a completely seized rotor in as little as 72 hours. If you hear grinding, shut off your system immediately and call for professional service to avoid extensive damage and higher repair costs.

Less Common HVAC Noises and How to Fix Them

Sometimes, your HVAC system might produce unusual sounds that go beyond the typical hum or rattle. These less frequent noises can be warning signs of inefficiencies or potential issues that need attention before they turn into costly repairs.

Popping or Booming Sounds

If you hear popping or booming noises, your ductwork might be expanding and contracting due to sudden temperature changes. Jason Peavey, Co-founder of PV Heating, Cooling & Plumbing, explains:

As soon as the hot air from the furnace hits the cold ducts, the metal starts to expand quickly. When this happens, an air duct popping noise may result from the rapid expansion of the cold metal.

High static pressure can make this problem worse. Rene Langer, Senior Comfort Specialist at PICKHVAC, points out:

The number one cause of noisy ducts is static pressure that is too high.

This issue is particularly common with rectangular ducts or those made from thinner metal. To address it, you can:

  • Insulate the ducts to reduce noise and temperature fluctuations.
  • Replace or clean dirty air filters to improve airflow.
  • Tighten any loose screws or panels in the ductwork.
  • Install spring-loaded backdraft dampers (typically $20–$30) to minimize clanging sounds.

If these fixes don’t solve the problem, your ductwork might be undersized for your system. In that case, a professional evaluation, including a Manual J load calculation, can help identify the best solution.

Gurgling or Bubbling Noises

Gurgling or bubbling sounds often point to water or air blockages. A common culprit is a clogged condensate drain line, which prevents proper drainage. You can often fix this by inspecting the drain line and flushing it out or using a wet/dry vacuum to clear minor clogs.

If the noise comes from the refrigerant lines, it might indicate trapped air in the system. This requires professional attention, as a trained technician will need to bleed the air from the lines or check refrigerant levels. These tasks involve specialized tools and certifications, so it’s not something you should attempt on your own.

To prevent these problems, schedule regular professional maintenance – ideally in the fall for furnaces and in the spring for air conditioners. This proactive approach can help catch minor issues before they turn into major headaches.

When to Contact Hydrodynamics for Professional Help

Hydrodynamics

Some HVAC noises go beyond routine maintenance and signal the need for immediate professional intervention. Sounds like metallic grinding, banging accompanied by combustion odors, or electrical buzzing with visible sparks are red flags that require you to shut down the system immediately.

When these situations arise, professional diagnostics are essential. Hydrodynamics follows a detailed process to identify the source of unusual noises. Their technicians examine critical components like the blower motor, compressor, and fan blades for wear and tear. They also use tools such as multimeters to test electrical parts like capacitors and analyze pressure imbalances caused by refrigerant leaks or airflow blockages . Noises are further classified based on their origin – whether it’s a rotating imbalance, mechanical looseness, aerodynamic turbulence, or refrigerant flow issues.

Refrigerant-related problems, in particular, must be handled by professionals certified under EPA Section 608 . Persistent screeching or squealing often points to motor or bearing failures, which are not DIY-friendly fixes .

Hydrodynamics organizes repairs into three urgency levels. Tier 1 issues, such as severe grinding or sparking, demand an immediate shutdown to prevent serious damage. Tier 2 problems, like belt squealing or duct resonance, should be addressed within 30 days to avoid further deterioration. Tier 3 concerns, such as minor rattling from registers, can typically wait until your next routine maintenance visit. Understanding these tiers helps you prioritize repairs and decide whether a professional service call is necessary after performing basic safety checks.

Before reaching out to a technician, take a moment to check your air filter and tighten any loose access panels. These simple actions can often eliminate whistling or rattling noises . However, if the issue persists, it’s time to weigh the cost of repairs against replacement. Use the $5,000 rule: multiply the unit’s age by the estimated repair cost. If the result exceeds $5,000, replacing the system is usually the smarter choice. For reference, installing a new HVAC system in a 1,500-square-foot home typically costs between $5,000 and $12,000, depending on efficiency levels and ductwork requirements.

Conclusion: Maintaining a Quieter HVAC System

A noisy HVAC system often points to mechanical wear or potential breakdowns. For example, a squealing bearing can go from bad to worse in as little as 72 hours if left unchecked.

To minimize noise issues, make sure to replace air filters every 1–3 months, keep at least 80% of your vents open, and inspect for loose panels or screws regularly.

Hydrodynamics follows ASHRAE 180 standards, conducting routine vibration checks and setting acoustic baselines to catch problems early. However, if noise persists despite basic fixes, it’s often a sign of a more serious issue that needs immediate attention.

Certain sounds – like metallic grinding, liquid slugging, or rattling paired with combustion odors – can signal serious hazards. These situations call for shutting the system down and bringing in a professional for diagnostics. Hydrodynamics addresses urgent problems promptly while keeping an eye on smaller concerns during scheduled maintenance.

A quieter HVAC system doesn’t just enhance comfort – it also boosts efficiency and helps protect your investment over the long term.

FAQs

Which HVAC noises mean I should shut the system off right away?

If your HVAC system starts making loud screeching, banging, rattling, or high-pitched whistling noises, you should turn it off immediately. These sounds can signal problems such as a failing compressor, loose parts, or airflow blockages. Ignoring these noises could lead to more damage or even safety hazards. To avoid further complications, shut the system down and call a professional technician to inspect and fix the issue.

How can I tell if a noise is coming from the ducts or the unit itself?

To figure out where that HVAC noise is coming from, take a moment to listen closely while the system is running.

  • Duct noises – like rattling or banging – are often caused by loose duct sections, vent dampers, or shifts in air pressure.
  • Unit noises – such as humming or buzzing – usually point to problems with parts like the blower motor, fan, or compressor.

Focus on whether the sound is coming from the ductwork or the main unit to narrow down the issue.

When does it make more sense to replace my HVAC instead of repairing it?

If your HVAC system is over 12–15 years old and repairs are costing you $1,300 or more, it’s often smarter to go for a replacement. Another handy guideline? Multiply the repair cost by the system’s age. If that number is more than $5,000, replacing the system is likely the more budget-friendly option in the long run.

Multi-Zone HVAC Balancing Guide

Ultimate Guide to Multi-Zone HVAC Balancing

Balancing your multi-zone HVAC system ensures efficient performance, protects equipment, and eliminates temperature inconsistencies.

Key takeaways:

  • Multi-zone systems allow independent temperature control across areas using multiple thermostats.
  • Proper balancing prevents issues like frozen coils, overheated heat exchangers, and high energy bills.
  • Tools like balancing hoods, anemometers, and manometers are essential for accurate airflow measurement.
  • Following the 35% Rule: The smallest zone must handle at least 35% of total airflow to avoid static pressure problems.
  • Balancing reduces energy use by up to 35%, extends equipment life, and improves indoor comfort.

If your system struggles with uneven airflow, high utility costs, or frequent cycling, professional balancing services can help. Start by checking for blockages, adjusting dampers, and ensuring proper system design. For long-term reliability, consider expert evaluation and maintenance.

Flow Hood: How to Properly Balance an HVAC System

Tools and Equipment for Balancing

Balancing HVAC systems effectively depends on accurate measurement tools to ensure proper airflow and protect equipment from damage. Today, a wide range of instruments is available, from budget-friendly smartphone-compatible meters to advanced professional systems. Below are the key tools you’ll need for precise airflow measurement in multi-zone HVAC systems.

Balancing Hood

A capture hood, also known as a flow hood, is one of the most straightforward tools for measuring airflow at diffusers and grilles. Simply place the hood over the terminal, and it will display the airflow in cubic feet per minute (CFM).

For diffusers with uneven velocity patterns, applying manufacturer-specific K-factors ensures accurate readings. Entry-level models of capture hoods start at about $494, while professional-grade units can cost up to $3,510.

Anemometers and Manometers

Anemometers are used to measure air velocity at specific points. Rotating vane anemometers require multiple readings to calculate total CFM, whereas thermal anemometers provide high resolution for low-velocity variable air volume (VAV) applications, though they can be sensitive to environmental conditions.

Pressure measurement is equally important. Pitot tube manometers are commonly used to determine total and static pressure within ductwork. By subtracting static pressure from total pressure, you can calculate velocity pressure and determine air velocity using the formula V = 4005 × √VP. For larger rectangular ducts, at least 16 traverse points are needed to ensure accuracy. While this method is ideal for trunk ducts, it’s not suitable for low-velocity scenarios.

Additional Measurement Tools

Digital airflow meters combine several functions – measuring velocity, volume, temperature, pressure, and humidity – in one device. Accessories like the velocity matrix allow for area-averaged, multi-point measurements, making them indispensable for ensuring even airflow distribution across zones.

To confirm fan performance, use tachometers to measure fan RPM and compare it to the manufacturer’s specifications before making damper adjustments. Keep in mind that duct leakage in commercial buildings can reduce delivered airflow by 10%–25%.

How to Balance a Multi-Zone HVAC System

3-Step Multi-Zone HVAC Balancing Process with Key Measurements

3-Step Multi-Zone HVAC Balancing Process with Key Measurements

Preparation and Initial Checks

Start by gathering key documents like duct calculations, layout drawings, equipment specifications, and control details. If your system is older and lacks documentation, sketch the duct layout, note nameplate data, and create a chart to track design airflow against actual measurements.

Before diving in, ensure all volume and splitter dampers are open, the blower is running at the correct speed, filters are clean, and all accessories are properly installed. For multi-zone systems, set all thermostats to create an “All Zones Calling” condition – typically 55°F for cooling or high heat for heating mode. This setup allows you to measure maximum airflow at each register. Take baseline static pressure readings to confirm your system is below the 0.8″ WC danger threshold, as exceeding this can significantly reduce airflow. For context, every 0.1″ WC increase above 0.7″ cuts airflow (CFM) by about 10%.

“Air balancing is a critical step in HVAC commissioning that often gets overlooked until problems arise.” – Jason Rende, HVAC Designer and Air Balancing Specialist

Keep in mind a crucial rule: with single-stage equipment, the smallest zone must handle at least 35% of the total system CFM to avoid excessive static pressure that could damage the equipment. Also, check that the bypass duct is installed at least 8 feet away from the supply and return plenums, and make sure its balancing damper is accessible for adjustments.

Proportional Balancing Method

Once the system is running at design speed with all dampers open, measure airflow at each outlet using a balancing hood or anemometer. Identify the index circuit, which is the zone receiving the lowest percentage of its design airflow. This zone serves as the benchmark for balancing the rest of the system.

Next, adjust the dampers in other zones to match the index circuit’s airflow proportion. Focus first on outlets delivering significantly more than their design airflow, as reducing their output naturally redirects air to underperforming zones. The aim is to bring all outlets within 10% of their design airflow values. By following this proportional balancing method, you minimize overall system pressure while ensuring all zones are adequately served. This approach can also reduce energy consumption, as seen in typical applications where brake horsepower drops from 36 to 25.

“The task of proportional balancing is the first step to achieving an energy efficient pumping system.” – Chad Edmondson, JMP Equipment Company

After completing proportional adjustments, proceed to verification and fine-tuning.

Verification and Final Adjustments

With the proportional balance established, iterative adjustments will help fine-tune the system. Air balancing is not a one-and-done process – every adjustment affects the entire system, so multiple rounds of measurement and tweaking are often necessary. Once proportional balance is achieved, verify total system airflow with a duct traverse or static pressure reading to ensure both airflow and pressure stay within design limits.

Check that each outlet remains within 10% of its design airflow, and secure all damper settings. Ensure the damper or valve in the most critical zone stays fully open to minimize system resistance. Finally, record all measurements for the commissioning report. Properly balanced airflow not only optimizes performance but also reduces energy losses. In fact, balancing and sealing ducts can lower heating and cooling losses from an average of 25%–40% to just 4%–5%.

Common HVAC Balancing Problems and Solutions

Blockages and Obstructions

A large number of airflow complaints in multi-zone HVAC systems can be traced back to physical blockages. For example, dirty air filters alone account for 20% of airflow issues, while closed vents contribute to 30% of uneven temperatures. A simple test for a clogged filter? Hold it up to a light source – if no light passes through, it’s time for a replacement. Also, walk through your home and ensure all vent dampers are open, with their levers aligned to the airflow direction.

Blockages aren’t always obvious. In attics and crawl spaces, you might find crimped flex-ducts, disconnected sections of ductwork, or ducts with excessive bends – all of which can choke airflow before it even reaches your rooms. Use a flashlight to inspect the ductwork and seal any cracks or gaps to avoid air loss. While the system is running, check for leaks at visible duct joints. Sealing these with duct mastic is a relatively low-cost fix, ranging from $5 to $30 for DIY materials, though professional repairs for extensive damage can cost $300–$800.

Another common culprit? Closed interior doors, which cause 15% of circulation issues. When doors to bedrooms or closets stay shut, conditioned air gets trapped and can’t return to the furnace, creating pressure imbalances. To fix this, keep doors open during peak heating or cooling seasons. Alternatively, you can install transfer grilles ($50–$150) or make door undercuts to ensure steady air circulation.

Once physical obstructions are resolved, fine-tune airflow by adjusting damper settings.

Incorrect Damper Settings

Improper adjustments to dampers often lead to hot and cold spots throughout a home. The key is to identify zones with excessive airflow and restrict them to balance the system. Start by pinpointing which areas receive too much air – these zones typically exceed their design specifications. Adjust their dampers first to redirect airflow to underperforming zones without over-restricting the system.

“Adjust branch dampers until all outlets are within 10% of design airflow values.” – Jason Rende, Air Balancing Specialist

In single-stage zoned systems, the bypass damper is essential for protecting your equipment. When only the smallest zone is calling for air, the bypass damper must relieve excess pressure to keep static pressure below the danger threshold of 0.8″ WC. If the bypass duct is undersized or its damper is misaligned, you risk frozen coils during cooling or overheated heat exchangers in heating mode. Once you’ve determined the correct damper positions, lock them in place to prevent future shifts.

However, even with perfect damper settings, underlying design flaws can still lead to balancing issues.

Design and Installation Problems

Some HVAC balancing problems are rooted in system design flaws that dampers alone can’t fix. For instance, having a thermostat on just one floor of a multi-story home causes about 35% of balancing issues, as it fails to account for temperature variations on other levels. Moving the thermostat to a central location can make a big difference, with professional relocation costing $100–$300.

Another common issue is excessively long duct runs, which lose pressure before air reaches distant rooms. An inline duct booster fan ($150–$300) can temporarily improve airflow in these cases, but it’s not a permanent fix. For more severe issues, like undersized main trunks or excessively long ductwork, a complete redesign may be necessary. This type of professional ductwork overhaul typically costs between $2,000 and $5,000.

Additionally, ensuring the smallest zone handles at least 35% of the total system CFM is critical in single-stage systems. Falling short of this threshold can lead to excessive static pressure and long-term equipment damage. Variable-speed systems offer a more efficient solution – they adjust capacity to match zone demands, often eliminating the need for bypass ducts altogether.

These solutions complement earlier proportional balancing techniques and help ensure a more reliable and efficient HVAC system.

Hydrodynamics Multi-Zone HVAC Balancing Services

Hydrodynamics

Full-Service HVAC Solutions

Since 1994, Hydrodynamics has been a trusted name in Northeastern Pennsylvania, bringing more than three decades of expertise to multi-zone HVAC balancing. Their team of factory-trained technicians holds advanced certifications, such as EPA 609, A.S.S.E Backflow Testing, and Trac Pipe & Gas Tite. This ensures they’re equipped to handle everything from adjusting residential dampers to commissioning large-scale industrial systems.

“We have all your HVAC service needs covered throughout the year, ranging from repairs and replacements to maintenance and installations.”
– Hydrodynamics Inc.

Their services span a wide range of equipment, including central air conditioning, ductless mini-split systems, heat pumps, and specialized HVAC setups for residential, commercial, and industrial spaces. Customers consistently commend Hydrodynamics for their dependable service. This reputation for reliability is matched by their dedication to energy-efficient system solutions.

Energy-Efficient Systems

Hydrodynamics prioritizes eco-friendly practices to maximize resource efficiency. Their services go beyond basic temperature control, addressing combustion pollutants, conducting high-pressure leak tests, and installing variable-speed equipment that adapts to zone-specific demands. This often eliminates the need for bypass ducts.

By performing Manual J calculations for each zone rather than relying on a single whole-house estimate, they can apply diversity factors that cut peak loads by 7%. Their installations also include power dampers with Belimo actuators, which consume 25% less energy than traditional spring-return models. These thoughtful upgrades allow Hydrodynamics to deliver solutions tailored to each client’s unique energy and comfort requirements.

Custom Service Plans

Hydrodynamics designs service plans to meet the specific needs of residential, commercial, and industrial clients across Northeastern Pennsylvania. Industrial clients, in particular, benefit from the expertise of technicians trained to handle complex systems that are beyond the scope of general contractors.

“Our factory trained technicians are available to service all of your industrial needs.”
– Hydrodynamics Inc.

Their year-round maintenance ensures that multi-zone systems stay balanced through seasonal changes. Additionally, integrated services like water conditioning and grinder pump maintenance help optimize overall building performance by aligning HVAC systems with other critical infrastructure needs.

Conclusion

Key Takeaways

Balancing a multi-zone HVAC system is crucial for protecting your equipment and cutting down on energy costs. A key principle to remember is the 35% Rule: the smallest zone should manage at least 35% of the total system CFM. This helps avoid dangerous static pressure issues that can lead to frozen evaporator coils or overheated heat exchangers. For context, every 0.1″ WC increase above 0.7″ reduces airflow by 10%.

Using zone-specific Manual J calculations allows you to factor in diversity, which can reduce peak loads by about 7%. Additionally, variable-speed systems are excellent at adjusting capacity to meet demand, often making bypass ducts unnecessary. While professional commissioning may add approximately 25% to installation labor costs, it ensures your system is properly balanced for long-term performance and equipment protection. As Ben Reed, Principal at Teal Maker Consulting, puts it:

“Zoning isn’t just about adding dampers – it’s about creating a complete system that respects equipment limitations while delivering promised comfort.”

By applying these principles and techniques, you can achieve immediate and effective improvements in your HVAC system’s performance.

Next Steps

If you’re dealing with uneven temperatures, high energy costs, or frequent cycling of your HVAC system, it might be time for professional balancing. Hydrodynamics, with nearly 30 years of expertise, specializes in this area. Their comprehensive services include static pressure monitoring, bypass duct sizing calculations, and detailed Testing, Adjusting, and Balancing (TAB) reports to ensure proper airflow at every register. Contact Hydrodynamics today to schedule an evaluation and optimize your system for better performance, longer equipment life, and compliance with manufacturer specifications.

FAQs

Can I balance my zones without professional tools?

Balancing zones in an HVAC system without the right tools is a risky move. It involves precise tasks like adding dampers or figuring out bypass duct needs – things that demand specialized equipment and expertise. Trying to handle this on your own could result in pressure problems or even damage to your system. To ensure everything runs smoothly and efficiently, it’s best to rely on professional tools and know-how.

How do I know if my system’s static pressure is too high?

To see if your system’s static pressure is too high, use a manometer to measure it. Then, compare the reading to the system’s rated pressure, which is usually between 0.4 to 0.5 inches of water column (in. WC) for most residential systems. If the reading exceeds this range, it could point to problems like dirty filters, blocked ducts, or coil issues. These issues can cause weak airflow, noisy vents, and increased energy consumption.

Do I need a bypass duct with a zoned system?

Whether or not a bypass duct is necessary comes down to the design of your HVAC system. In older or more traditional setups, bypass ducts play a role in controlling static pressure and maintaining proper airflow. However, with advancements in technology, many modern zoning systems now rely on sophisticated dampers and controls, making bypass ducts less common. To figure out what’s right for your system, it’s best to consult an HVAC professional who understands your specific setup.