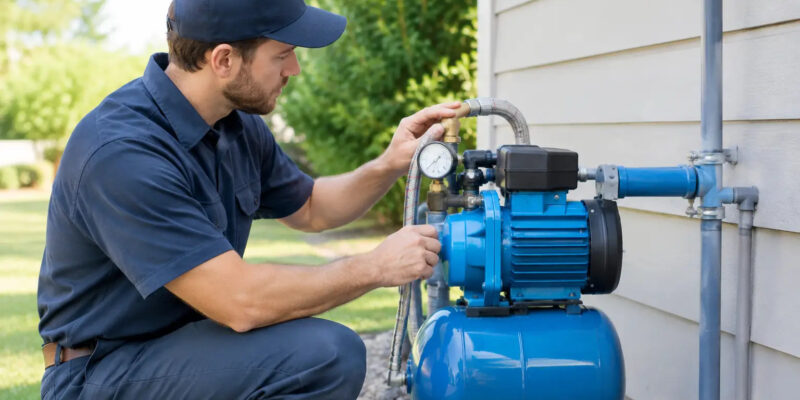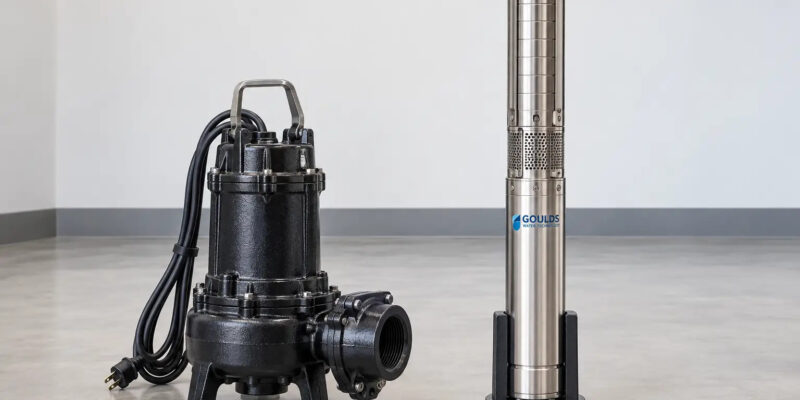
Pump Failure Case Studies: Preventing Downtime

A pump rarely fails without giving some warning. Pressure that fluctuates, a breaker that trips, an alarm that will not clear, or a basin that drains more slowly than usual can all point to a problem that deserves prompt attention. These pump failure case studies show why the visible symptom is not always the root cause – and why a correct diagnosis matters as much as replacing a failed part.

For homeowners, a pump problem can mean no water, sewage backup risk, or damage to plumbing fixtures. For a commercial property or industrial facility, it can interrupt production, create sanitation concerns, or leave critical equipment without the water or circulation it needs. The common lesson is simple: treat a pump issue as a system issue, not just a motor issue.

Pump Failure Case Studies From Common Service Situations

The following scenarios reflect common pump failures seen in homes, businesses, and facilities across Northeastern Pennsylvania. Each system has different operating conditions, but the diagnostic approach remains the same: confirm the symptom, inspect the electrical and mechanical components, identify what caused the failure, and correct any condition that could damage the replacement.

Case Study 1: A Well Pump That Ran Constantly

A homeowner noticed that the well pump seemed to run whenever water was used. The house still had water, but pressure dropped noticeably during showers, and the electric bill had increased. Waiting for a complete loss of water would have been understandable, but it would also have allowed the pump to keep operating under stress.

The first assumption in situations like this is often that the submersible well pump is worn out. That may be true, especially with an older pump, but a pump that runs continuously can also be responding to a pressure-tank problem, a failed pressure switch, a plumbing leak, a clogged filter, or a loss of pressure on the well side of the system.

In this case, the pressure tank had lost its proper air charge and the switch was cycling too frequently. Short cycling forces the pump motor to start and stop far more often than it was designed to. Those frequent starts create heat and electrical stress, reducing motor life even if the pump itself is still capable of producing water.

The repair required more than a quick switch replacement. The tank, switch settings, electrical connections, and system pressure all needed to be evaluated together. Once the failed components were addressed and the system was adjusted properly, pressure stabilized and the pump stopped cycling excessively.

The lesson: a well pump that seems to be failing may be reacting to a pressure-control issue. Replacing the pump without correcting the cause can shorten the life of the new equipment.

Case Study 2: A Grinder Pump Alarm Caused by More Than a Clog

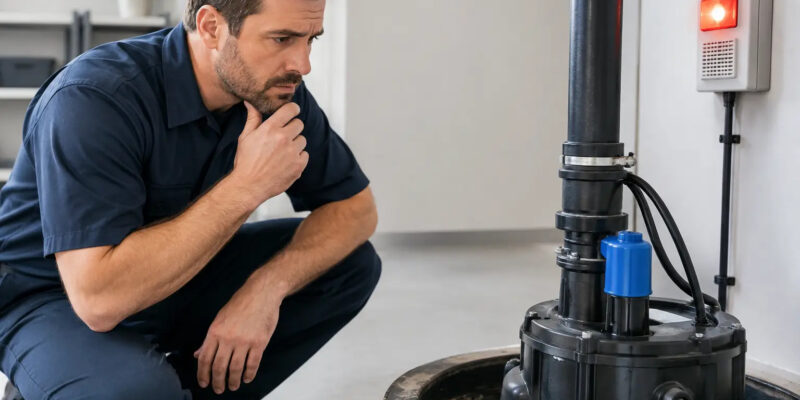
A grinder pump serves a demanding job. It collects wastewater and moves it to a sewer connection when gravity drainage is not possible. When its alarm sounds, the property owner may be tempted to reset it and hope the problem clears. That can be risky. If wastewater continues entering the basin while the pump cannot discharge it, the system can overflow.

At a residential property, a grinder pump alarm had been reset several times over a few days. The pump would run briefly, then shut down again. The basin contained material that should not have been flushed, which contributed to the immediate obstruction. But removing the obstruction alone did not explain why the pump repeatedly overheated.

Further inspection found a worn float switch and an aging check valve. The float was not consistently signaling the pump at the right level, while the check valve was allowing some discharge water to fall back into the basin after each cycle. The pump was handling more repeat work than necessary and operating under poor conditions.

The solution included clearing the obstruction, replacing the failed controls, and addressing the discharge issue. Just as important, the owner received practical guidance on what should never enter a grinder pump system. Wipes, feminine hygiene products, paper towels, grease, and other non-flushable materials can cause problems even when packaging suggests otherwise.

The lesson: a grinder pump alarm is not simply an inconvenience. It is an early warning that should be checked before the basin reaches capacity. A reset can restore operation temporarily, but it does not identify why the alarm occurred.

Case Study 3: A Commercial Circulation Pump With Intermittent Failure

A commercial building experienced uneven heating in several areas. Some zones warmed normally, while others remained cold despite a functioning boiler. The circulation pump was operating intermittently, leading staff to suspect an electrical failure or a failing motor.

Electrical testing was part of the diagnosis, but it did not tell the full story. The pump was receiving power. The larger issue was poor water quality in the closed-loop system, combined with debris accumulation near the pump and air trapped in portions of the piping. The pump was working harder to move water through a restricted system, and its performance dropped as operating conditions changed.

This type of failure illustrates a key trade-off in commercial mechanical service. Replacing the pump may restore circulation quickly, but it may not be the most durable solution if debris, air, incorrect flow settings, or system imbalance remain in place. In some cases, immediate replacement is necessary to restore heating or cooling. In others, cleaning, flushing, air elimination, and controls review can prevent the same failure from returning.

The corrective work focused on the pump and the loop it served. After the system was cleaned, air issues were addressed, and circulation was confirmed at the affected zones, the building returned to more consistent heating performance.

The lesson: circulation pumps depend on the health of the system around them. Water quality, air management, valve position, piping restrictions, and equipment controls all affect pump performance.

What These Pump Failures Have in Common

Although a well pump, grinder pump, and commercial circulation pump perform different jobs, their failures often follow similar patterns. Electrical issues, worn controls, blocked flow, improper cycling, and neglected maintenance can all turn a manageable repair into an urgent replacement.

Pump sizing also matters. An oversized pump may cycle too quickly or create unnecessary pressure stress. An undersized pump may run too long, overheat, or fail to keep up with demand. The right equipment depends on the property, water needs, piping arrangement, vertical lift, discharge conditions, and expected operating hours. There is no single pump choice that suits every home or facility.

Age matters, but it should not be the only factor in deciding whether to repair or replace. A newer pump with a failed switch or capacitor may be an excellent repair candidate. An older pump with motor damage, repeated service history, deteriorated piping, or insufficient capacity may justify replacement. A qualified technician should explain the condition of the existing equipment and the practical options before work begins.

Early Warning Signs Worth Acting On

Pump failures can develop gradually or happen without much notice. Property owners and facility teams should arrange service when they notice repeated breaker trips, unusual humming or grinding sounds, reduced water pressure, frequent pump cycling, an alarm condition, visible leaks, changing water quality, or water where it does not belong.

For facilities with critical equipment, preventive maintenance is usually less disruptive than emergency service. Routine inspection can identify worn seals, damaged controls, loose electrical connections, improper pressure settings, blocked strainers, and early corrosion before those issues cause an operational shutdown. The ideal maintenance schedule depends on the pump type, water conditions, workload, and consequences of downtime.

Hydrodynamics Inc. approaches pump service with the full mechanical system in view. Whether the concern involves a residential well pump, grinder pump, water-treatment equipment, or a commercial and industrial pump application, the goal is to restore dependable operation while addressing the condition that caused the problem.

When a pump begins to sound different, cycle more often, or struggle to keep up, acting early gives you more repair options. It also gives a technician time to diagnose the system carefully instead of making decisions under the pressure of a complete failure.
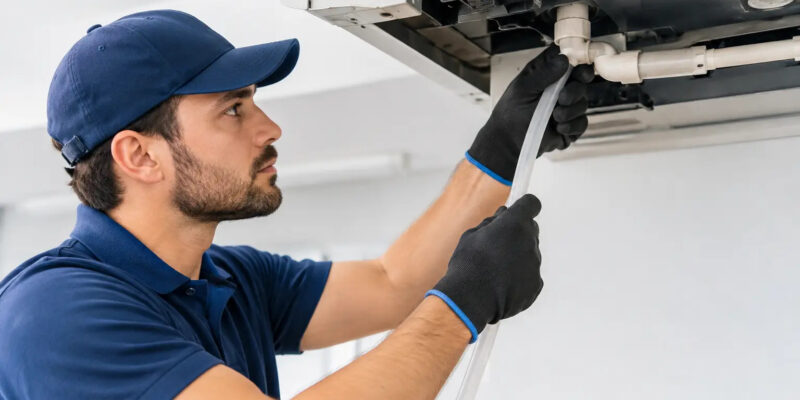
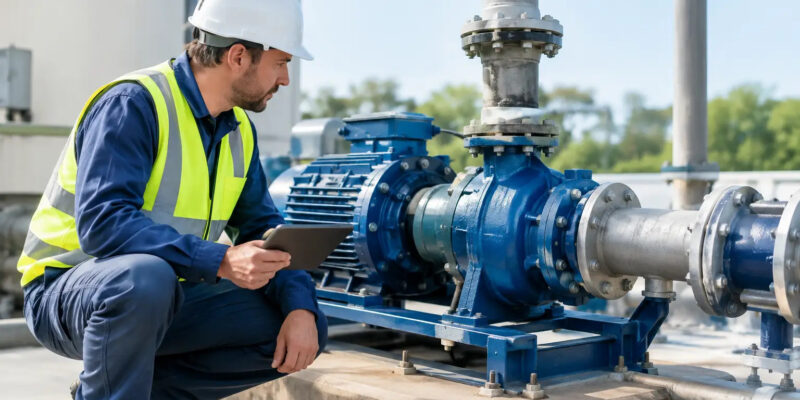
How to Clean Condensate Drain Lines Safely

A puddle near an indoor air handler is rarely just a housekeeping problem. During cooling season, your air conditioner can remove gallons of moisture from indoor air each day. That water has to leave through a small condensate drain line. Knowing how to clean condensate drain lines can help prevent water damage, musty odors, and an unexpected cooling shutdown when temperatures are high.

For most homeowners, cleaning an accessible residential drain line is a reasonable maintenance task. The work needs to be done carefully, however. A clog may be only one symptom of a deeper issue, such as an improperly pitched drain, a failed condensate pump, a cracked drain pan, or biological buildup that keeps returning. Commercial and industrial systems can have more complex drain arrangements that should be handled by qualified HVAC personnel.

What a Condensate Drain Does

Your air conditioner does more than cool the air. As warm indoor air passes over the cold evaporator coil, moisture condenses on the coil and drips into a pan below it. From there, the water travels through a PVC, vinyl, or metal condensate line to a floor drain, plumbing connection, exterior termination, or condensate pump.

Because the line is consistently damp, it can collect algae-like growth, biofilm, dust, insulation debris, and sediment. Over time, that material restricts the flow of water. In Northeastern Pennsylvania, many systems sit idle through winter and then run hard during warm, humid stretches, making preseason maintenance especially useful.

A properly operating drain is a small component with a major job. If it blocks, water can overflow into the equipment cabinet, ceiling, wall, or utility-room floor. Many newer systems include a float switch that turns off cooling when water rises too high. That protection helps prevent damage, but it can leave a home or business without air conditioning until the cause is corrected.

Signs Your Condensate Drain May Be Clogged

The most obvious sign is water around the indoor unit, but a clog does not always announce itself with a puddle. Watch for a musty smell near the air handler, visible standing water in the drain pan, water staining on nearby drywall, or an air conditioner that shuts down while the thermostat is still calling for cooling.

A gurgling drain, slow drip at the outdoor termination, or water backing up into a cleanout opening can also point to restricted flow. If your system uses a condensate pump, an unusually loud pump, a pump that runs continuously, or a full pump reservoir may signal that the discharge tubing or pump itself needs attention.

Do not keep resetting a tripped float switch or repeatedly restarting the system without addressing the water problem. The switch is doing its job. Bypassing it can turn a manageable drain issue into damaged equipment or interior water damage.

What You Need Before Cleaning the Drain

For a typical accessible PVC drain line, gather a wet/dry vacuum, a small cup, distilled white vinegar, clean water, rags, and a flashlight. A flexible bottle brush may help with an accessible drain opening, but avoid forcing anything deep into the line. Rigid wire, coat hangers, or high-pressure air can crack fittings, puncture tubing, or push a clog farther into a difficult location.

Before starting, turn off power to the air conditioner at the thermostat and the appropriate service switch or breaker. This is particularly important if the drain pan, float switch, wiring, or condensate pump is near the area you will be working on. If you are unsure which disconnect controls the equipment, stop and contact an HVAC professional.

Locate the drain line at the indoor unit. Many systems have a capped vertical cleanout tee near the evaporator coil or air handler. The line may leave the equipment, run to a nearby plumbing drain, or pass through an exterior wall. If the drain is concealed in a finished ceiling or wall, do not open building materials just to perform routine cleaning.

How to Clean Condensate Drain Lines Step by Step

Start at the indoor unit and inspect the drain pan and visible piping. If the pan is full, remove water carefully with a wet/dry vacuum or absorbent towels before opening the cleanout. Look for disconnected fittings, cracks, sagging tubing, or obvious buildup around the opening. Cleaning will not correct a damaged or incorrectly installed drain assembly.

Next, find the drain line termination. At a home, it may be outside near the foundation, at a utility sink, or near a floor drain. If the pipe is safely accessible, place the wet/dry vacuum hose over the end and create as tight a seal as possible with a rag. Run the vacuum for one to two minutes. This often removes slime, water, and loose debris from the line.

Return to the indoor cleanout. Remove the cap slowly, because backed-up water may spill out. Pour about one cup of distilled white vinegar into the opening, then allow it to sit for 20 to 30 minutes. Vinegar helps break down organic buildup without the harsh fumes or material concerns associated with bleach.

Bleach is often suggested as a drain cleaner, but it is not the best default choice. It can create strong fumes, damage some components, react with other cleaning products, and cause problems if the line drains into certain plumbing or treatment systems. Vinegar is a gentler option for routine maintenance. If your equipment manufacturer provides specific cleaning guidance, follow that guidance instead.

After the vinegar has had time to work, flush the line with clean water. Pour water slowly into the cleanout while someone watches the discharge point, if possible. You want to see a steady flow. If the water immediately backs up, stop pouring. The clog may be beyond the section you can safely clear, or the drainage path may have a mechanical problem.

Replace the cleanout cap securely when finished. Then restore power and run the cooling system long enough to confirm that condensate is draining normally. Check around the indoor unit again after 20 to 30 minutes of operation. A dry pan and a normal discharge at the outlet are encouraging signs, but continue to monitor the area over the next day.

When a Wet/Dry Vacuum Is Not Enough

A wet/dry vacuum works well for many soft clogs, but it is not a cure for every drainage failure. Call for professional service when the drain line remains blocked after basic cleaning, the line is inaccessible, or water has leaked into ceilings, walls, electrical components, or finished flooring.

Professional diagnosis is also warranted when clogs keep returning. Recurring blockage can result from poor drain pitch, a missing or improperly installed trap, a line that is too small, a dirty evaporator coil shedding debris, or a drain outlet that is plugged downstream. In a commercial building, rooftop units, multiple air handlers, long drain runs, and shared drainage systems can require more involved troubleshooting.

A condensate pump deserves special attention. If the pump reservoir is full but the unit will not discharge, the pump may be failed, the tubing may be kinked, or the check valve may be stuck. Pump repairs involve electricity and water in close proximity, so a service call is generally the safer choice.

Preventing the Next Condensate Drain Clog

Routine attention is easier and less expensive than responding to an overflow. For most residential cooling systems, inspect and clean the accessible drain line at the start of cooling season and again during extended periods of heavy use. Homes with high indoor humidity, pets, dusty mechanical rooms, or frequent system operation may benefit from more frequent checks.

Keep the area around the indoor unit clean and dry. Replace HVAC filters on schedule, because a loaded filter can contribute to coil contamination and airflow problems. Do not cover or block an outdoor drain termination. If the discharge point is near landscaping, keep mulch, soil, leaves, and snow from obstructing it.

Preventative HVAC maintenance provides another layer of protection. A technician can inspect the evaporator coil, pan, trap, float switch, pump, drain slope, and discharge route while also checking the cooling system's broader operation. For property managers and facility operators, documenting drain maintenance is particularly valuable because it reduces the chance that a small water issue becomes a tenant disruption or equipment outage.

Hydrodynamics Inc. helps homeowners and businesses throughout Northeastern Pennsylvania address condensate drainage concerns as part of dependable HVAC repair and preventative maintenance. A drain line may be small, but keeping it clear protects the equipment and the space around it when you need cooling most.

Pump Systems: What Keeps Water Moving Reliably

A pump failure rarely waits for a convenient time. A home on a well can lose water pressure without warning, a grinder pump can stop wastewater from leaving the building, and a drainage pump can allow water to collect where it does not belong. Pump systems are essential equipment, not background plumbing components. Choosing the right system and caring for it properly protects water access, sanitation, property, and daily operations.

For homeowners, business owners, and facility managers in Northeastern Pennsylvania, the right answer depends on what the pump must move, how far it must move it, and how critical uninterrupted operation is. A properly selected pump can provide years of dependable service. An undersized, poorly installed, or neglected unit often shows its limits when demand is highest.

What Pump Systems Do for a Property

Pump systems move water or wastewater when gravity alone cannot do the job. Some deliver clean water from a private well to fixtures and equipment. Others remove sewage from a lower-level bathroom, carry wastewater through a pressure line, manage stormwater, or increase water pressure in a larger building.

The pump itself is only one part of the system. Reliable operation also depends on electrical controls, piping, check valves, tanks, alarms, floats, pressure switches, and the condition of the water or waste stream being handled. A problem in any one of these components can look like a pump failure, which is why diagnosis should go beyond simply replacing the motor.

A well pump, for example, works with a pressure tank and pressure switch to maintain usable water pressure. A grinder pump relies on controls, a basin, and a discharge line to move wastewater safely. In both cases, proper installation is what turns individual components into a dependable system.

Common Types of Pump Systems

Well Pumps and Water-Pressure Equipment

Private wells commonly use a submersible pump installed below the water level in the well. The pump sends water to the home or building, where a pressure tank stores a small reserve and reduces how often the pump must start. A shallow-well jet pump may be appropriate in certain applications, but deeper wells typically require a submersible design.

Low pressure does not always mean the well pump has failed. A waterlogged pressure tank, worn pressure switch, clogged filter, leaking line, or water-treatment issue can produce similar symptoms. A technician should test system pressure, electrical performance, pump cycling, and water delivery before recommending a repair or replacement.

Well yield also matters. A pump that can produce more water than the well can sustainably supply may run the well down during heavy demand. Correct sizing accounts for household or facility use, well depth, static water level, drawdown, pipe friction, and the pressure required at the building.

Grinder Pumps and Sewage Pumps

Grinder pumps serve properties where wastewater must travel uphill or through a pressurized sewer line. Inside the basin, the pump grinds waste solids and moves the resulting slurry through a relatively small discharge pipe. These systems are common where a gravity sewer connection is not practical.

Not every pump intended for wastewater has grinding capability. A sewage ejector pump may handle wastewater and certain solids in applications with a larger discharge pipe, while a grinder pump is designed for pressurized systems that require finer solids processing. Installing the wrong equipment can create repeated clogs, overload the motor, or fail to meet system requirements.

Grinder pumps also depend on what enters the system. Wipes, paper towels, feminine hygiene products, grease, and other non-flushable materials can cause blockages or damage even when a pump is operating as designed. Clear use guidelines and prompt attention to alarms help prevent a minor issue from becoming a wastewater backup.

Sump, Drainage, and Booster Pumps

Sump pumps remove groundwater that collects around a foundation or in a sump basin. They are especially valuable in low-lying areas, finished basements, and properties with seasonal water concerns. A working check valve, properly routed discharge line, and reliable power supply matter as much as the pump itself.

Drainage pumps may be used for equipment rooms, condensate management, pits, or other areas where water must be removed. Booster pumps, meanwhile, increase pressure or maintain flow for fixtures and equipment in buildings where incoming water pressure is insufficient. Each application calls for different controls, materials, capacity, and backup considerations.

Signs a Pump Needs Service

A pump may continue operating even when performance has declined. Addressing warning signs early can often prevent a complete loss of water, a flooded space, or an interruption to business operations.

Watch for frequent pump cycling, reduced water pressure, air sputtering from faucets, unusual vibration, clicking controls, rising electric use, or a pump that runs continuously. For wastewater systems, an alarm, sewage odor, slow drains, or a wet area around the basin calls for immediate attention. A sump pump that does not activate during testing, or one that runs but does not discharge water, should be checked before the next heavy rain.

Some symptoms point to problems outside the pump. A clogged sediment filter can restrict well-water flow. A failed check valve can allow water to fall back into the line. A damaged float can prevent a basin pump from starting at the proper level. Professional troubleshooting identifies the actual cause, which helps avoid spending money on a replacement that does not solve the problem.

Proper Pump System Sizing Is Not Optional

Pump capacity is often described by horsepower, but horsepower alone does not determine whether a pump is right for the job. Flow rate, measured in gallons per minute, must be matched to the total dynamic head the pump must overcome. Total dynamic head includes vertical lift, pressure requirements, and friction loss through pipe, fittings, valves, and filters.

This is why two properties can need very different equipment even when both have wells or wastewater basins. A pump that is too small may struggle to meet demand and wear prematurely. One that is too large can short-cycle, create pressure problems, and place unnecessary stress on controls and piping.

Installation details affect service life as well. Electrical protection must be appropriate for the equipment, discharge piping must be correctly sized and supported, and check valves must be installed in the right location and orientation. For critical commercial or industrial applications, alarm systems, duplex pump arrangements, and backup power may be worthwhile investments. The right level of redundancy depends on the consequences of downtime.

Maintaining Pump Systems Before Failure

Preventative maintenance is usually less disruptive than emergency repair. For residential well systems, periodic pressure checks, tank inspections, filter service, and water-quality testing can reveal problems before water delivery is affected. Water-treatment equipment should also be considered, since sediment, hardness, iron, or other conditions can affect plumbing components and system performance.

Grinder and sewage pump maintenance should include inspection of controls, floats, basin condition, valves, and alarm function. Property managers should keep access to the basin clear and make sure occupants know what should not enter the system. Where equipment serves a business or industrial process, maintenance planning should account for operating hours, critical production periods, and available backup capacity.

Sump pumps deserve a regular test before wet-weather seasons. Confirm that the float moves freely, the pump starts, and water leaves through the discharge line. A battery backup can provide valuable protection during an outage, but it also needs periodic testing and battery replacement.

Hydrodynamics Inc. approaches pump work as part of the larger mechanical and plumbing system. That matters when a water-pressure concern involves a well pump, pressure tank, filtration equipment, plumbing leak, or electrical control rather than a single failed part. Coordinated service helps property owners make practical repair and replacement decisions based on the full system.

When Repair Makes Sense and When Replacement Is Better

A failed pressure switch, float, capacitor, check valve, or control component may be a straightforward repair if the pump itself is in good condition. Repair can also make sense when the equipment is appropriately sized, parts are available, and performance has otherwise been reliable.

Replacement becomes more reasonable when failures are recurring, the pump cannot meet current demand, repair costs are approaching the value of new equipment, or the system was incorrectly selected from the start. Older pumps can also become less efficient or more difficult to service as components wear and parts become limited.

Before approving a replacement, ask what caused the failure and whether the new equipment will address that cause. A new pump will not fix a restricted pipe, inadequate well yield, damaged wiring, or a basin that is too small for the application.

Reliable water and wastewater service begins with equipment that fits the property and continues with routine attention long before an alarm sounds or a faucet runs dry. If a pump is showing changes in pressure, cycling, noise, or drainage performance, scheduling an evaluation early gives you more options and fewer surprises.

Geothermal Versus Propane Heating for PA Homes

A heating system that works well in a mild climate can become an expensive frustration during a Northeastern Pennsylvania winter. When comparing geothermal versus propane heating, the right answer depends on more than fuel price. Your property, existing equipment, utility access, budget, and plans for the building all affect the decision.

Both systems can provide dependable comfort when they are properly sized, installed, and maintained. The difference is how they create that heat, where the upfront investment falls, and what ongoing responsibilities come with ownership.

Geothermal Versus Propane Heating: The Core Difference

A propane furnace or boiler burns stored propane gas to make heat. A furnace distributes warm air through ductwork, while a boiler moves heated water through baseboards, radiators, or radiant-floor tubing. Propane systems can also support domestic hot water, cooking, fireplaces, generators, and other appliances.

Geothermal heating does not burn fuel at the home. A geothermal heat pump transfers heat from the ground through an underground loop system. Below the frost line, ground temperatures remain relatively stable through the year. The heat pump uses that steady temperature to provide heating in winter and air conditioning in summer.

That operating difference matters. Propane equipment generally costs less to install, especially when usable ductwork or hydronic piping is already in place. Geothermal typically requires a larger initial investment because it includes underground loop installation, drilling or trenching, and specialized heat-pump equipment. In exchange, geothermal can deliver very low operating costs and year-round heating and cooling from one system.

Upfront Cost and Long-Term Operating Cost

For many property owners, the first question is simple: which system costs less? The practical answer is that propane usually costs less at the beginning, while geothermal may cost less over a long ownership period.

A propane replacement can be relatively straightforward when a home already has a propane tank, gas piping, chimney or venting arrangement, and compatible distribution system. Equipment selection still matters. Furnace efficiency, boiler design, zoning, water-heating needs, and available space should all be reviewed before a replacement is selected.

Geothermal costs vary widely because every site is different. A horizontal loop may be possible where there is sufficient open land. Vertical boreholes are often a better fit on smaller lots, but drilling can raise project costs. Soil conditions, bedrock, landscaping, access for equipment, and loop-field design all affect the installation scope.

Operating costs are also local and variable. Propane prices move with market conditions, delivery arrangements, and seasonal demand. A geothermal heat pump uses electricity, but it moves heat rather than generating it through combustion. Under suitable conditions, it can provide several units of heat for every unit of electricity consumed. That efficiency can make geothermal especially attractive for owners planning to remain in a property for many years.

A fair comparison should use actual utility history, not broad national averages. Review your recent propane usage, electric rates, building size, insulation level, and thermostat habits. A system that looks economical on paper can disappoint if the home has major air leaks, undersized ductwork, or poorly insulated attic areas.

Comfort, Cooling, and Everyday Performance

Propane heat has a reputation for strong, quick warmth. A properly sized propane furnace can raise indoor temperature rapidly, which appeals to homeowners who prefer noticeable heat from supply registers. Propane boilers can also provide the even, quiet comfort associated with radiant or hydronic heating.

Geothermal heat pumps generally run longer at lower output. That is not a weakness. Longer, steadier cycles can reduce temperature swings and help maintain more consistent comfort from room to room. Proper duct design and airflow are essential, particularly when a geothermal unit is replacing an older furnace that produced hotter supply air.

Geothermal also brings a major advantage for properties that need central air conditioning. The same equipment handles summer cooling, and many systems can assist with hot-water production during the cooling season. For a home using separate heating and cooling equipment that is nearing replacement age, the value of combining those functions deserves consideration.

Propane may remain the better fit for a building with an existing boiler and no need for central cooling. It can also make sense where limited electrical capacity, site constraints, or a shorter expected ownership period make geothermal difficult to justify.

Installation Factors That Can Change the Decision

No heating decision should be made before a load calculation and site review. The heating equipment must match the building's actual heat loss, not simply the capacity of the system being replaced. Older equipment is often oversized, and replacing it with the same size can lead to short cycling, uneven temperatures, and unnecessary fuel use.

For propane, the review should include tank location, piping condition, venting, combustion air, appliance connections, and whether a furnace, boiler, or combination system best serves the property. Indoor and outdoor tanks each have placement and service considerations. Reliable winter access for deliveries is another practical concern in rural areas.

For geothermal, the underground loop is as important as the indoor unit. A qualified contractor needs to assess available land, drilling access, underground utilities, well locations, septic systems, drainage, and future plans for additions, pools, garages, or landscaping. The loop field is a long-term part of the property, so design should not be treated as an afterthought.

Commercial and industrial properties require an even broader review. Operating schedules, ventilation requirements, process loads, equipment redundancy, and maintenance access can influence whether geothermal, propane, or a hybrid approach is appropriate. A facility that cannot tolerate downtime may prioritize backup capacity and serviceability as highly as fuel efficiency.

Maintenance and Reliability Expectations

Both options need preventative maintenance. Propane furnaces and boilers should receive regular inspection of burners, heat exchangers, venting, safety controls, filters, ignition components, and combustion performance. Boilers also need attention to circulators, expansion tanks, relief valves, water quality, and distribution components.

Geothermal systems do not require fuel deliveries or combustion venting, but they are not maintenance-free. Air filters, condensate drains, electrical components, refrigerant performance, circulating pumps, and ductwork still need professional attention. The underground loop is designed for long service life, while indoor mechanical components will eventually require repair or replacement like any heat-pump system.

Reliability is strongly tied to installation quality. Correct sizing, sound electrical work, proper airflow or water flow, and accessible service components matter more than a nameplate efficiency rating alone. Routine service also helps catch small issues before they interrupt heat during a cold spell.

When Propane Is Often the Practical Choice

Propane may be the stronger option when the property already has compatible equipment and the project calls for a direct, cost-conscious replacement. It is also useful for homes and businesses that rely on propane for multiple appliances or want a fuel source that can support standby generation.

It can be a sensible choice for properties with limited space for a loop field, difficult drilling access, or plans to sell in the near future. A high-efficiency propane furnace or boiler, paired with sound insulation and air sealing, can provide dependable results without the larger capital commitment of geothermal.

When Geothermal Can Be Worth the Investment

Geothermal is often most compelling for new construction, major renovations, and long-term owners replacing both heating and cooling systems. It can also be a strong fit for homes with adequate land or favorable drilling conditions, especially where propane consumption has been high.

The system's stable operation, cooling capability, and reduced exposure to propane price swings can be valuable over time. Properties with well-designed ductwork, radiant distribution, or a plan for comprehensive efficiency upgrades may see the best results.

A dependable heating decision starts with a property-specific evaluation, not a one-size-fits-all recommendation. For homeowners and facility managers in the Hazleton area, an experienced mechanical contractor can compare your building load, existing infrastructure, site conditions, and long-term goals before recommending the system that will serve the property well through the next heating seasons.

Why Does a Grinder Pump Alarm Go Off at Home?

A grinder pump alarm is not an appliance alert to ignore until morning. It usually means wastewater in the pump basin has risen above its normal operating level. If you are asking, “why does a grinder pump alarm go off?” the short answer is that the pump is not moving sewage out of the basin as it should – or the alarm system is detecting a condition that needs attention.

For homes and facilities served by a grinder pump, fast action can prevent an unpleasant and expensive backup. The alarm does not always mean the pump has failed beyond repair, but it does mean the system needs to be used carefully until the cause is identified.

What a Grinder Pump Alarm Is Telling You

A grinder pump collects wastewater from toilets, sinks, showers, washing machines, and other plumbing fixtures in a sealed basin. When the wastewater reaches a preset level, a float switch starts the pump. The pump grinds solids into a slurry and sends the wastewater through a pressurized discharge line to the public sewer or septic connection.

The alarm float is set higher than the normal pump-on level. When the wastewater rises to that point, it activates an audible alarm, a light, or both. In other words, the alarm is warning that the basin is getting too full.

Many systems have enough basin capacity to provide a limited window for response. That window depends on the basin size, how much water the building uses, and whether the pump is still operating at all. Continuing normal water use can fill the basin quickly.

Why Does a Grinder Pump Alarm Go Off?

Several conditions can trigger a grinder pump alarm. Some are simple electrical problems. Others require pump repair, line cleaning, or replacement of worn components.

A Power Outage or Tripped Breaker

A grinder pump cannot operate without electricity. After a storm, utility interruption, or electrical issue, wastewater continues entering the basin but cannot be pumped out. The high-water alarm sounds once the water reaches the alarm float.

Check whether the home or building has power and inspect the pump circuit breaker. If the breaker has tripped, reset it once. If it trips again, leave it off and arrange for service. Repeated tripping can point to a short circuit, a failing motor, moisture in electrical components, or a seized pump.

A portable generator may help during an extended outage, but only if it is properly sized and safely connected. Never use improvised wiring or run a generator in a garage, basement, or other enclosed area.

Too Much Water Entering the Basin

Heavy water use can temporarily overwhelm a pump system, particularly if several fixtures are used at once. Back-to-back showers, laundry loads, dishwasher cycles, and toilet flushing can add up quickly. A large gathering at a home or a busy period in a commercial property can expose a pump that is undersized, aging, or already operating below capacity.

Groundwater infiltration can also be a factor in some systems. During heavy rain or snowmelt, water entering through damaged connections or improperly routed drainage can add unnecessary volume to the basin. Sump pumps, roof drains, and foundation drains should not discharge into a grinder pump basin unless the system was specifically designed for that purpose.

A Clog in the Pump or Discharge Line

Grinder pumps are designed for wastewater and toilet paper, not for every item that can fit down a drain. Wipes labeled “flushable,” paper towels, feminine hygiene products, dental floss, diapers, grease, and cat litter can jam the grinding mechanism or create a blockage in the discharge line.

Grease deserves special attention in homes, restaurants, and break rooms. It may leave a kitchen drain as a liquid, but it cools and hardens inside pipes and pump components. Over time, grease buildup restricts flow and forces the system to work harder.

A blocked discharge line may allow the pump to run without lowering the basin level. You might hear the motor running longer than usual, notice the alarm returning shortly after it is silenced, or see no reduction in water level. This is a service issue, not a condition to solve by repeatedly resetting the panel.

A Failed Float Switch or Control Panel Issue

Float switches tell the system when to start the pump and when to activate the alarm. A float can become tangled, coated with debris, stuck in one position, or worn out after years of use. If the pump-on float fails, the basin can fill until the higher alarm float activates.

Control panels, relays, fuses, and alarm circuits can also fail. In some cases, the pump may be working normally but the alarm continues due to a defective float or alarm component. That still calls for repair. A silent or unreliable alarm removes an essential early warning system.

Pump Motor or Mechanical Failure

Grinder pumps operate in demanding conditions. Motors, impellers, seals, capacitors, and grinding components eventually wear. A pump can also overheat, seize, or lose the ability to develop enough pressure to push wastewater through the discharge line.

A humming sound without pumping, unusual grinding noise, frequent cycling, or a pump that runs continuously are all signs that should be evaluated by a qualified pump technician. The right repair depends on the pump model, its condition, the basin setup, and the source of the failure. Sometimes replacing a failed component makes sense; on an older unit with repeated problems, replacement may be the more dependable choice.

What to Do When the Alarm Sounds

Start by reducing water use immediately. Avoid flushing toilets, taking showers, running washing machines, operating dishwashers, or draining sinks unless absolutely necessary. Every gallon sent down a drain enters the basin.

Next, check for an obvious power issue. Look for a household outage, a tripped breaker, or a disconnected plug if the unit uses a plug connection. Do not open the electrical control panel, remove the basin cover, or reach into the tank. Grinder pump basins contain wastewater, harmful gases, and moving equipment.

If the alarm has a silence or reset button, it may be used to stop the audible signal temporarily. Silencing the alarm does not correct the underlying high-water condition. Keep water use restricted and monitor whether the alarm returns.

If the alarm follows a brief outage and the pump begins operating after power returns, allow time for the basin level to drop. Continue limiting water use until the alarm is off and the system has returned to normal. If the alarm remains on, the pump does not run, the breaker trips, or wastewater backs up into fixtures, request professional service promptly.

When a Grinder Pump Alarm Is an Emergency

Treat the situation as urgent when sewage is backing up into a tub, shower, floor drain, or toilet; when the basin is visibly overflowing; or when the pump will not run and the property cannot safely limit water use. Commercial properties, multi-unit buildings, and facilities with restrooms in active use can reach that point especially quickly.

If wastewater has entered living or work areas, keep people and pets away from the affected space. Sewage cleanup requires proper sanitation and may involve more than pump repair. Addressing the pump is the first step, but contaminated materials and surfaces also need to be handled safely.

Preventing Future Grinder Pump Alarms

Most grinder pump alarms are easier to prevent than to manage during a backup. Use the system only for human waste and toilet paper. Keep wipes, grease, food scraps, hygiene products, and other non-pumpable materials out of toilets and drains.

A preventative inspection can identify worn floats, electrical concerns, check-valve problems, restricted discharge piping, and pump wear before an alarm becomes a disruption. For properties with high wastewater demand, a technician can also evaluate whether the basin, pump capacity, and controls are appropriate for the building’s actual use.

For homeowners and property managers across Northeastern Pennsylvania, Hydrodynamics Inc. can diagnose grinder pump alarms, repair pump-system components, and help plan practical maintenance for dependable wastewater service. When the alarm sounds, reduce water use first, then get the cause addressed before a manageable warning becomes a sewage problem.

Water Disinfection for Wells and Buildings

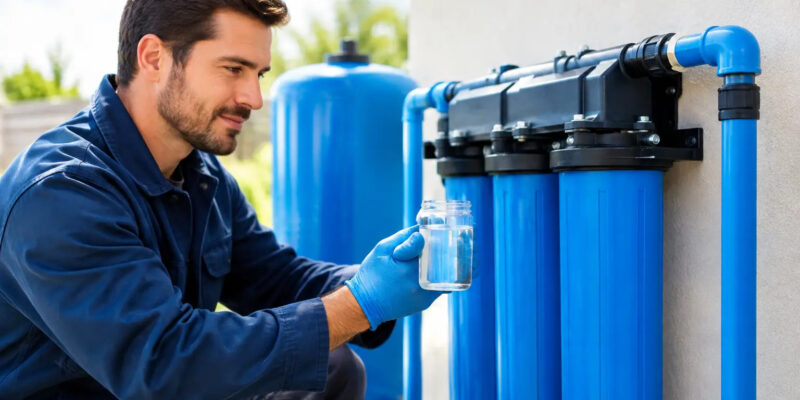
A clear-looking glass of water can still carry microorganisms that should not be there. For homes served by private wells and facilities with their own water sources, water disinfection is the treatment step that addresses bacteria, viruses, and other microbiological concerns that a softener, filter, or pump repair alone will not solve.

The right approach starts with testing, not assumptions. A water test identifies whether contamination is present and reveals the water conditions that can affect treatment performance. From there, property owners can choose a disinfection method that fits the source, the plumbing system, the water chemistry, and the level of ongoing protection needed.

When Water Disinfection Is Needed

Private wells are not regulated and routinely monitored in the same way as public water supplies. That does not mean well water is automatically unsafe, but it does mean the owner is responsible for testing and maintenance. Bacteria can enter a well after flooding, a damaged well cap, a plumbing repair, a pump replacement, or changes to the surrounding property.

Testing is also wise when water has an unusual odor, discoloration, a sudden change in taste, or when household members experience recurring gastrointestinal illness. Those symptoms do not prove that the water is the cause, but they warrant a closer look.

For commercial and industrial properties, the concern can extend beyond a single drinking-water faucet. Buildings may have storage tanks, long plumbing runs, low-use areas, equipment connections, ice machines, employee break rooms, or seasonal occupancy patterns. Stagnant water and poorly maintained components can create conditions that deserve professional evaluation.

Routine testing is especially valuable for properties in Northeastern Pennsylvania that depend on wells. A test after a major storm, flood event, or work on the well system can catch a problem before it becomes a larger disruption.

What Water Disinfection Actually Does

Disinfection controls microorganisms. It is not a catch-all treatment for every water-quality issue.

A properly selected disinfection system may address coliform bacteria, E. coli, and other microbial risks, depending on the treatment method and the source-water conditions. It does not remove hardness minerals, sediment, iron, manganese, dissolved chemicals, or fuel-related contaminants. In some cases, those issues must be addressed first so the disinfection equipment can do its job effectively.

For example, hard water can coat internal components, while iron, manganese, cloudiness, and sediment can interfere with ultraviolet light. A property with several water problems may need a coordinated treatment train: sediment filtration first, then iron or hardness treatment where needed, followed by disinfection. This is why a water analysis and an on-site review matter more than choosing equipment based on a single symptom.

UV Disinfection: Continuous Protection Without Chemicals

Ultraviolet, or UV, disinfection uses a specialized lamp to expose water to germicidal light as it passes through a treatment chamber. The light damages the ability of microorganisms to reproduce. UV is a practical option for many well-water applications because it provides continuous treatment at the point where water enters the building and does not add chlorine taste or odor.

UV has clear operating requirements. The water must be sufficiently clear for the light to reach microorganisms, which often means installing filtration ahead of the UV unit. The equipment must also be sized for the building’s peak flow demand. A unit selected only for average water use may not provide the intended treatment during periods of heavy demand.

Maintenance is straightforward but necessary. Lamps require scheduled replacement even when they still appear to be glowing, because their germicidal output declines over time. The quartz sleeve surrounding the lamp also needs cleaning or replacement if mineral buildup blocks the light. Power interruptions, alarms, flow rates, and prefilter changes should all be part of the maintenance plan.

UV does not leave a disinfecting residual in the plumbing. That is often an advantage for taste and daily use, but it means the rest of the system must be maintained properly. If bacteria are already established in the well or plumbing, the source may need to be disinfected before a UV system is installed.

Chlorination: Useful for Well and System Cleanup

Chlorination introduces chlorine at a controlled level to disinfect water. A one-time process commonly called shock chlorination can be used after a positive bacteria test, well work, or contamination event to disinfect the well and associated plumbing. It can be effective, but it is not a permanent answer if the source of contamination remains.

A cracked well casing, missing cap, poor surface drainage, unprotected wiring entry, or nearby source of contamination can allow bacteria to return. Repeated shock chlorination without correcting the underlying issue can create a cycle of temporary results and recurring test failures.

Continuous chlorination may be appropriate for some high-demand or challenging water systems. It provides a disinfecting residual and can work well when designed and monitored correctly. However, it requires chemical storage, feed equipment, contact time, regular testing, and often additional treatment to manage chlorine taste, odor, or byproducts. It is a more involved solution than UV, but it can be the better fit when conditions call for residual protection.

Start With Testing, Then Treat the Cause

A bacteria result is a decision point, not just a pass-or-fail report. The response depends on what was found, the type of water source, recent events at the property, and whether the result is isolated or recurring.

A qualified water-treatment professional will look beyond the test result. They may inspect the well cap and casing, review drainage around the well, check the pressure tank and plumbing connections, confirm that the treatment equipment is correctly located, and assess whether sediment or mineral levels are limiting performance. For a commercial building, the review may also include water demand, pipe layout, storage, and areas where water sits unused.

The goal is to avoid treating a symptom while leaving the cause untouched. If a well cap is loose or surface water is pooling near the casing, that repair belongs in the solution. If cloudy water is reducing UV effectiveness, filtration must be addressed. If an aging pump system is disturbing sediment or failing to maintain dependable pressure, the water system needs attention as a whole.

Choosing Between UV and Chlorine Treatment

There is no universal winner between UV and chlorination. UV is often a strong choice for homeowners who want continuous microbiological treatment without adding chemicals, provided the water is properly pretreated and the unit is maintained. It is also appealing for buildings where taste and odor matter and the water supply is stable.

Chlorination is often better suited to well and plumbing disinfection after contamination, or to systems that need a residual disinfectant throughout the distribution piping. It may also be part of a larger treatment strategy for difficult source water. The trade-off is more active management, including chemical handling and ongoing monitoring.

In some cases, both methods have a role. A system may be shock chlorinated to disinfect the well and plumbing, then protected with properly installed UV treatment for daily use. The sequence and equipment selection should be based on current testing, not on a one-size-fits-all package.

Maintenance Protects the Investment

Water-treatment equipment is most dependable when it is treated like any other essential mechanical system. Filters need replacement, UV lamps need annual service, sleeves need inspection, and water quality should be retested on a schedule that matches the property and its history. Commercial and industrial facilities may need a more formal maintenance plan because downtime, employee safety, and process reliability are all on the line.

Hydrodynamics Inc. helps homeowners and property managers evaluate well-water concerns, install UV water-treatment equipment, and keep related plumbing and pump systems working together. A coordinated approach is especially useful when poor water quality, pressure problems, filtration needs, and aging mechanical equipment overlap.

If a water test raises questions, act before the next plumbing repair, storm, or busy season puts more demand on the system. A clear diagnosis and a maintainable treatment plan can provide far more confidence than relying on water that only looks clean.

Waste Oil Heaters: A Practical Facility Guide

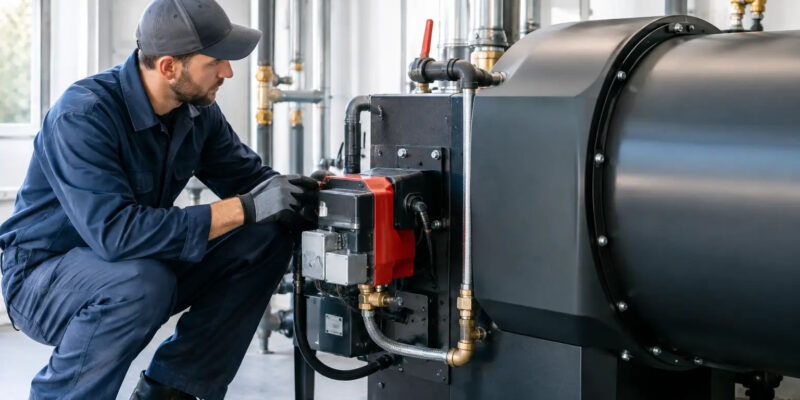
A busy service bay, fleet garage, or industrial shop can generate used oil year-round while still facing high heating costs every Pennsylvania winter. Waste oil heaters address both realities by using properly managed eligible used oil as a fuel source for space heat. For the right facility, they can reduce disposal volume, offset purchased heating fuel, and provide dependable warmth where large overhead doors, concrete floors, and frequent air exchanges make heating a constant operating expense.

That does not make a waste-oil system a fit for every building. These heaters require appropriate fuel handling, dedicated space, proper installation, and ongoing maintenance. The strongest results come from looking at the heater as part of a complete mechanical system rather than as a stand-alone piece of equipment.

Where Waste Oil Heaters Make Sense

Waste oil heating is most practical for businesses that consistently produce qualifying used oil and have a building with a meaningful heating load. Automotive repair shops, truck and equipment fleets, agricultural operations, municipal garages, maintenance departments, and certain manufacturing facilities are common examples.

The value depends on volume and consistency. A small shop that generates limited used oil may not have enough available fuel to support its heating needs throughout the season. A larger facility with several service bays and a steady flow of oil changes may have a more reliable supply. Before choosing equipment, it is worth tracking how much used oil the operation collects over a typical year, how it is stored, and how much heat the building requires during the coldest part of the season.

A waste oil heater is also better suited to a work area than to every occupied space. Shops and garages often benefit from unit heaters that deliver warm air directly where people work. Office areas, customer waiting rooms, and tightly controlled spaces may be better served by separate HVAC equipment designed for those comfort and ventilation needs.

Start With the Building, Not the Fuel Supply

A common mistake is sizing a heater around the amount of oil available rather than the building’s heat loss. Fuel supply matters, but it should not determine whether the unit is too small to keep up or oversized for normal operation.

A proper evaluation considers square footage, ceiling height, insulation levels, wall and roof construction, window and door area, and how often overhead doors open. A repair garage with 16-foot ceilings and multiple bay doors can lose heat much faster than an insulated warehouse of the same floor area. Local winter design temperatures also matter in Hazleton and across Northeastern Pennsylvania, where prolonged cold weather can expose shortcomings in an undersized system.

Air distribution deserves equal attention. A heater may have adequate capacity on paper but still leave employees cold if warm air never reaches workstations. Placement, discharge direction, mounting height, fan performance, and obstructions such as lifts, racking, or partitions all affect comfort. In larger or irregularly shaped buildings, multiple units or a carefully planned ducted approach may be more effective than one large heater at a single end of the shop.

Think About Backup Heat

Even a well-maintained waste-oil system can need service, and used-oil supply may vary. Facilities that cannot tolerate downtime should plan for backup heat or retain an existing heating source where practical. The right approach depends on the building’s use, the consequences of a cold-weather shutdown, and whether the system supports occupied areas, inventory, equipment, or freeze protection.

Fuel Quality Is an Operating Issue

Waste oil heaters are designed to burn approved used oils, but not everything called “waste oil” belongs in the tank. The acceptable fuel types and blending limits are determined by the heater manufacturer and applicable regulations. Used crankcase oil, hydraulic oil, transmission fluid, and certain other petroleum-based fluids may be acceptable when handled correctly. Solvents, gasoline, antifreeze, brake cleaner, chlorinated materials, and other contaminants do not belong in the fuel supply.

Contaminated fuel creates safety, emissions, and maintenance concerns. It can also damage pumps, nozzles, and combustion components. Clear shop procedures are essential: label collection containers, train employees on what can and cannot be added, and keep the fuel-storage area controlled. If outside sources contribute used oil, the facility needs even stronger acceptance practices because the contents may be unknown.

Water is another frequent source of trouble. Water can enter storage tanks through condensation, poor container handling, or contaminated incoming oil. It can interrupt combustion, accelerate component wear, and create unstable burner operation. Properly designed tanks, filtration, water separation where needed, and regular inspection help protect the system.

Installation Is More Than Hanging a Unit Heater

Waste oil equipment needs a professional installation that addresses combustion air, venting, fuel storage, electrical service, clearances, controls, and local code requirements. The heater, tank, supply lines, filters, and safety devices must work together. A unit can appear to run properly at startup yet become unreliable if its fuel-delivery system is poorly designed or its venting is incorrect.

The burner and flue system must be matched to the equipment specifications. Improper vent sizing, unsupported piping, inadequate termination location, or neglected draft requirements can lead to poor combustion and nuisance shutdowns. Installation also needs to account for building layout and service access. Filters, pumps, cleanout areas, and controls should be reachable without making routine maintenance difficult or unsafe.

Permitting and compliance should be addressed before installation, not after equipment arrives. Requirements can vary by municipality, building type, fuel storage arrangement, and intended use. A qualified mechanical contractor can coordinate system design around the facility, the selected heater, and the applicable requirements instead of forcing a one-size-fits-all layout.

Maintenance Determines Whether the Savings Last

Waste oil burners work in a demanding environment. Their fuel is less uniform than new heating oil, which makes regular inspection and cleaning especially important. Preventive maintenance is not optional if a facility expects reliable heat through the season.

At a minimum, service should address filters, strainers, burner components, nozzle condition, ignition parts, air settings, combustion chamber condition, fan operation, safety controls, and venting. The fuel tank and lines should be checked for sludge, water, leaks, and restrictions. A technician may also verify combustion performance and adjust the system according to manufacturer specifications.

The service interval depends on fuel quality, operating hours, equipment design, and the working environment. A shop with consistently clean fuel and moderate runtime may need less frequent attention than a high-hour fleet facility collecting oil from several sources. Waiting for smoke, odor, hard starts, or shutdowns is not a maintenance plan. Those symptoms usually mean the system has already lost efficiency or is approaching a failure.

Watch for Changes in Operation

Facility staff can help catch problems early by paying attention to changes in sound, startup behavior, heat output, or fuel consumption. Repeated lockouts, uneven flame behavior, visible smoke, new odors, or oil around fittings deserve prompt attention. Keeping a simple service record also makes it easier to spot recurring issues and plan maintenance before peak heating season.

Compare the Full Cost, Not Just the Heater Price

The financial case for waste oil heating is tied to more than the initial equipment cost. Potential benefits include reduced spending on conventional heating fuel and lower dependence on off-site used-oil disposal. But the complete calculation should also include tank and piping installation, electrical work, venting, maintenance, filters, compliance needs, and the labor required to manage the oil supply.

For some facilities, the biggest advantage is control. Used oil is already generated on site, so converting an eligible waste stream into useful heat can make operating costs more predictable. For others, the required maintenance and fuel-handling responsibility outweigh the benefit. The answer depends on the facility’s oil volume, heat demand, operating schedule, and ability to maintain disciplined fuel practices.

Hydrodynamics Inc. helps commercial and industrial customers evaluate specialized heating systems in the context of the entire building. That includes considering equipment placement, existing heat sources, ventilation, controls, and the service support needed after installation.

A well-planned waste-oil heating system should make the shop more comfortable without adding uncertainty to the workday. When equipment is correctly sized, fuel is managed carefully, and maintenance is scheduled before winter, the heater can become a practical part of a facility’s long-term operating plan.

Geothermal Installers Hazleton Pennsylvania

A geothermal system is not a standard heating-and-cooling replacement. It is a property-level mechanical project that depends on the ground beneath your building, the way the building uses energy, and the quality of the installation. For homeowners and facility managers comparing geothermal installers Hazleton Pennsylvania, the right question is not simply which unit to buy. It is whether the contractor can properly assess the site, design the loop field, integrate the indoor equipment, and support the system for years after startup.

Geothermal heat pumps can provide dependable heating, cooling, and, in many applications, domestic hot-water support. They do so by moving heat between a building and the relatively stable temperature below the earth’s surface. That principle is straightforward. Designing a system that performs well through a Northeastern Pennsylvania winter takes careful planning.

What a Geothermal Installation Actually Includes

A geothermal heat pump uses an underground loop system containing a water-based solution. In heating season, it draws heat from the ground and transfers it indoors. In cooling season, it moves heat from the building back into the ground. The indoor heat pump distributes conditioned air through ductwork or, in some designs, connects with hydronic equipment.

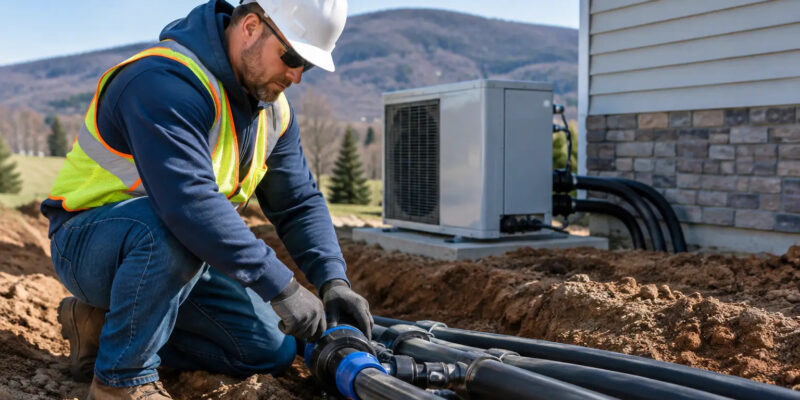
The equipment inside the building is only one part of the job. A complete installation may involve loop drilling or trenching, underground piping, headers, circulation pumps, electrical work, ductwork changes, controls, condensate management, and integration with existing heating or water-heating equipment. If any one of those pieces is undersized, poorly coordinated, or difficult to service, the owner may not receive the comfort or operating results expected from geothermal.

This is why a geothermal estimate should be based on more than the square footage of a home or building. Two properties with the same footprint can have very different heating loads because of insulation levels, window performance, occupancy, ceiling height, ventilation needs, process loads, and the condition of the existing distribution system.

Site Conditions Shape the Right System

Before recommending equipment, experienced geothermal installers in Hazleton, Pennsylvania should evaluate the site. Available land, access for drilling or excavation equipment, rock conditions, groundwater considerations, utility locations, and the location of wells or septic systems can all affect the loop design and project cost.

Horizontal loops are installed in trenches and can be a practical choice where a property has sufficient open land and favorable excavation conditions. Vertical loops use drilled boreholes and require less surface area, making them useful for tighter sites or locations where trenching would be disruptive. Some projects may use pond loops or other specialized configurations when site conditions support them.

No loop type is automatically best. A large rural lot does not always mean horizontal trenching is the lowest-cost or strongest long-term option, particularly if access, rock, landscaping, or soil conditions complicate excavation. Likewise, a vertical system can be an excellent fit for a constrained commercial site, but drilling logistics must be planned around building access and underground infrastructure.

A thorough evaluation also protects other essential systems. Properties throughout the region may rely on private wells, water treatment equipment, septic systems, sump systems, or pumps. Those components need to be identified before work begins so the geothermal installation is coordinated with the full mechanical and water-service needs of the property.

Load Calculations Matter More Than Equipment Size

Oversizing is a common concern with any HVAC installation. A larger heat pump is not automatically a safer choice. It can lead to shorter run cycles, reduced dehumidification in cooling season, unnecessary equipment cost, and operating issues that are difficult to diagnose later.

Proper system sizing starts with a building load calculation. For a residence, that means looking at the envelope of the home, including insulation, windows, air leakage, orientation, and room-by-room comfort needs. For a commercial or industrial facility, the analysis may also need to account for occupancy patterns, ventilation requirements, refrigeration, process equipment, loading doors, rooftop equipment, and changing operating schedules.

The underground loop must also be sized for the heating and cooling loads it will carry. The loop field is not an accessory. It is the heat source and heat sink for the system. A well-designed loop helps preserve stable performance through the seasons and supports the service life of the heat pump.

Existing Ductwork and Backup Heat Need a Clear Plan

Many geothermal projects are replacements for oil, propane, gas, or older heat-pump systems. The existing ductwork may be usable, but it should be inspected rather than assumed adequate. Leaky ducts, poor return-air paths, restrictive filters, or improperly sized supply runs can limit comfort no matter how efficient the new heat pump is.

Some homes and buildings benefit from retaining a backup or supplemental heat source. That decision depends on the system design, local utility costs, the building’s load, and the owner’s priorities. In other cases, a properly designed geothermal heat pump can carry the expected load without relying heavily on supplemental heat.

The discussion should be specific. Ask how the system will perform during the coldest weather, what equipment will provide supplemental heat if needed, and how the controls will decide when to use it. A clear answer is more valuable than a broad promise about efficiency.

Questions to Ask Geothermal Installers in Hazleton, Pennsylvania

A geothermal proposal deserves more review than a standard equipment swap. Property owners should expect the contractor to explain the design in plain language and identify the work included in the price.

Ask how the heating and cooling loads will be calculated, what loop configuration is recommended, and why it fits the property. Confirm who will handle drilling or excavation coordination, permits where required, electrical requirements, piping connections, ductwork modifications, and restoration of affected areas.

It is also reasonable to ask how the system will be commissioned after installation. Startup should include verification of flow, refrigerant operation, temperature performance, controls, condensate drainage, and airflow. The contractor should explain routine maintenance requirements, filter changes, recommended service intervals, and whom to contact if the system needs attention.

For commercial and industrial properties, the conversation should go further. Decision-makers should understand how installation work will affect operations, whether work can be phased, what downtime is expected, and how the geothermal equipment will coordinate with ventilation, refrigeration, rooftop units, boilers, pumps, or other critical systems.

Operating Cost Is Only One Part of the Decision

Geothermal systems are often chosen for their potential energy savings and long equipment life. Those benefits can be meaningful, especially for properties with high heating demand or owners planning to remain in a building for many years. However, the upfront investment is typically higher than a conventional HVAC replacement because of drilling, trenching, loop piping, and site work.

The value calculation depends on the property. Fuel costs, electricity rates, available incentives, financing, building efficiency, and expected ownership period all matter. Incentive programs and tax rules can change, so owners should confirm current eligibility before making a final financial decision.

A geothermal system also does not eliminate the need for maintenance. Indoor air filters still need attention, condensate drains need to remain clear, electrical and control components should be inspected, and circulation equipment needs periodic professional service. Preventative maintenance helps identify small issues before they affect comfort, energy use, or business operations.

Choose a Contractor Prepared to Support the Whole System

Geothermal performance is tied to more than the heat pump itself. It depends on the loop field, air distribution or hydronic delivery, electrical controls, water management, and the condition of related mechanical equipment. That is especially relevant when an older building has several systems working together.

Hydrodynamics Inc. brings geothermal work into a broader mechanical-service approach that includes HVAC, plumbing, pumps, water conditioning, and ongoing maintenance. For property owners, that means the contractor evaluating a geothermal project can also recognize related concerns with ductwork, drainage, well-pump equipment, water quality, or existing heating equipment instead of treating each issue as unrelated.

The best next step is a site-specific conversation before selecting equipment or comparing proposals only by price. A careful evaluation can show whether geothermal is the right fit for your property and, if it is, what it will take to build a system that provides dependable comfort through every season.

How to Size a Well Pump for Steady Water Pressure

A well pump that is too small shows up quickly: weak showers when the washing machine runs, low pressure at an outdoor hose, or a pump that seems to run constantly. A pump that is too large can be just as troublesome, causing rapid cycling, unnecessary energy use, and premature equipment wear. Learning how to size well pump equipment starts with treating the well, plumbing, pressure system, and water demand as one connected system.

For a home or facility in Northeastern Pennsylvania, proper sizing also has to account for real operating conditions. A deep well, a sloped property, a multi-bathroom home, livestock use, irrigation, or a commercial process can all change the right pump selection. Horsepower alone does not tell the whole story.

Start With the Well’s Available Water Supply

The first limit is the well itself. Its yield is the rate at which groundwater can reliably flow into the well, commonly expressed in gallons per minute, or GPM. A pump cannot sustainably deliver more water than the well produces over time.

A yield test measures how much water the well can provide and how the water level responds during pumping. The test should identify the static water level, which is the water level when the pump is off, and the pumping level, often called drawdown. The difference matters because a submersible pump must lift water from the pumping level, not simply from the top of the well casing.

A low-yield well does not automatically require a weak pump. Many homes with low-producing wells use storage in the well and a properly sized pressure tank to meet short periods of high demand. The goal is to select a pump rate that protects the water source while still providing enough water for normal use.

Calculate the Flow Rate You Actually Need

The next question is how much water the property needs at one time. For a typical residence, pump sizing is based on expected peak demand rather than average daily water use. A family may use hundreds of gallons over a day, but the pump needs to serve the fixtures and appliances likely to operate at the same time.

A practical starting point for many homes is to allow roughly 8 to 12 GPM for ordinary household use. Larger homes with several bathrooms, a large soaking tub, irrigation, water treatment equipment, or frequent simultaneous use may need more. A small home with one bathroom may need less.

Commercial and industrial applications require a closer review. A restroom group, commercial kitchen, boiler feed, cooling equipment, washdown station, water-treatment system, or process equipment can create a demand profile that does not resemble a household. In those cases, peak demand, required operating hours, and any need for reserve capacity should be documented before a pump is selected.

Do not size solely by the number of bathrooms. Fixture flow rates, occupancy, appliance use, and outdoor water needs all influence demand. A home with three bathrooms used by two people may need less capacity than a two-bathroom property with irrigation and a water-softening system that regenerates overnight.

Determine Total Dynamic Head

Once the required flow is known, the pump must be selected to produce that flow against the total resistance in the system. This is called total dynamic head, or TDH. It combines several measurements:

  • Vertical lift from the pumping water level to the pressure tank or point of discharge
  • Required pressure at the tank, fixtures, or equipment
  • Friction loss through pipe, fittings, valves, filters, and treatment equipment
  • Elevation changes between the well and the building

Pressure is often converted to feet of head for pump calculations. One PSI equals approximately 2.31 feet of head. For example, a pressure switch that operates at 40/60 PSI means the pump must overcome about 139 feet of head to reach 60 PSI before friction losses and vertical lift are added.

Consider a pump set where the pumping water level is 180 feet below the pressure tank. If the system must reach 60 PSI, that adds about 139 feet of head. If pipe friction, a check valve, a filter, and other components add another 25 feet, the pump must deliver the required GPM at approximately 344 feet of total dynamic head.

That calculation illustrates why selecting a pump by horsepower can lead to mistakes. Two 1-horsepower pumps may deliver very different flow rates at 344 feet of head. The pump performance curve, not the motor label, determines whether the equipment will meet the application.

Use the Pump Curve, Not a Guess

Every well pump has a performance curve showing how many gallons per minute it can produce at different head levels. Flow declines as head increases. The correct selection is a pump whose curve meets the target GPM at the calculated TDH, while remaining appropriate for the well’s yield and the system’s pressure range.

There is a balance to maintain. Selecting the largest available pump can produce excessive flow, pressure swings, and frequent cycling. Selecting a marginal pump may result in disappointing pressure and poor performance when several fixtures are open. A pump should operate within its intended range, not at the extreme edge of its curve.

Motor size follows the hydraulic requirement. A larger motor may be necessary for a deep setting or a high-pressure system, but it is not automatically better. Electrical capacity, wire size, voltage drop, control-box requirements, and starting characteristics should also be checked. Long runs from the electrical panel to a deep well can require larger wire to protect the motor and maintain dependable operation.

Match the Pressure Tank and Controls

The pressure tank is not just an accessory. It stores a usable volume of water, called drawdown, between the pressure switch cut-in and cut-out settings. That stored water allows the pump to run in reasonable cycles instead of starting every time someone fills a glass of water.

A conventional design generally aims for a pump run time of at least one to two minutes per cycle. The tank must have enough drawdown at the chosen pressure setting to support that run time. For example, a 10 GPM pump needs approximately 10 to 20 gallons of usable drawdown for a one- to two-minute run cycle. Because a tank’s advertised size is larger than its actual drawdown capacity, the correct tank may be much larger than that number suggests.

Constant-pressure systems use a variable-speed controller and can provide more consistent pressure with a different tank arrangement. They can be an excellent fit for homes with changing demand or properties where steady water pressure is a priority. However, they add electronic controls and should be evaluated against the condition of the existing well, electrical system, plumbing, and budget.

Pressure switches, check valves, pitless adapters, well caps, and safety controls should also be reviewed. Replacing only a failed pump without addressing a waterlogged tank, burned contacts, restricted filter, or damaged wiring can leave the underlying problem in place.

Account for Water Treatment and Plumbing Restrictions

Water treatment equipment can affect pump sizing more than many property owners expect. Sediment filters, iron filters, softeners, ultraviolet systems, neutralizers, and reverse-osmosis equipment each have flow requirements and pressure losses. A filter that is undersized, clogged, or installed without enough bypass capacity can make a properly sized pump appear inadequate.

Pipe diameter matters as well. Water moving through a narrow pipe at a high flow rate creates substantial friction loss. Long service lines, aging galvanized piping, multiple elbows, and undersized plumbing can all reduce available pressure at the far end of the building. In some situations, correcting a pipe or treatment restriction produces better results than installing a more powerful pump.

When a Professional Site Review Is Worth It

Basic pump calculations are useful, but a site review is the right next step when a well is deep, its yield is uncertain, the property has recurring pressure problems, or the system supports more than ordinary household use. Accurate sizing requires measurements that may not be visible from inside the home: pump setting depth, drop-pipe condition, actual water level, existing electrical wiring, pressure-tank drawdown, and the condition of the check valves and controls.

Hydrodynamics Inc. can evaluate the complete well-water system rather than treating the pump as an isolated part. That approach helps identify whether the best solution is a new pump, pressure tank adjustment, plumbing repair, water-treatment update, or a combination of improvements.

A well pump should provide dependable water without overworking the well or cycling itself to an early failure. Before choosing replacement equipment, gather the well records, note when pressure problems occur, and have the system tested under real demand. Those details lead to a pump selection that supports the property for years, not just until the next service call.

Best Industrial Heating Upgrade Options for Facilities

A heating system can still run every morning and still be costing a facility far more than it should. Uneven temperatures at workstations, long warm-up times, frequent service calls, rising fuel use, and equipment that cannot hold process temperatures are all signs that an upgrade deserves a closer look. The best industrial heating upgrade options are not identical from one facility to the next. The right choice depends on the building layout, fuel availability, ventilation requirements, production schedule, and the work being done inside.

For industrial facilities in Northeastern Pennsylvania, the decision also has to account for cold winters, large overhead doors, older building construction, and the need to keep operations moving when weather is at its worst. A practical evaluation starts with the heating load and the way heat is actually used, not simply with the age of the existing equipment.

Start With the Heating Problem, Not the Equipment

An aging heater is an obvious reason to consider replacement, but it is not the only one. A facility may have adequate total heating capacity while still struggling with cold zones, combustion-air issues, poor air distribution, or heat loss near loading areas. Replacing a unit with the same type and size can repeat the original problem.

Before selecting equipment, document when and where temperatures fall short. Note whether the problem occurs during door activity, at certain shifts, in areas with high ceilings, or only during extreme weather. Review fuel consumption, maintenance history, thermostat settings, ventilation equipment, and any planned changes in production or floor layout. This information helps distinguish between a capacity problem and a control, distribution, or building-envelope problem.

A qualified contractor should also verify gas piping, electrical capacity, venting paths, clearances, combustion air, and applicable code requirements. These details affect which upgrades are practical and what the complete installed cost will be.

Best Industrial Heating Upgrade Options to Consider

High-efficiency unit heaters for general space heating

Modern gas-fired unit heaters remain a sensible choice for many warehouses, shops, maintenance buildings, and work areas. They are familiar, relatively compact, and can deliver heat quickly when properly sized and located. Replacing older, inefficient units can reduce fuel waste while improving ignition reliability, venting safety, and temperature control.

This option works well when the facility needs broad, dependable space heating and has an existing gas supply. The trade-off is that forced-air heat can stratify in tall spaces, with warm air collecting near the roof while people and equipment remain cold below. Destratification fans, better unit placement, and zoning often make as much difference as the new heaters themselves.

Infrared radiant heating for tall or drafty spaces

Radiant tube heaters warm people, floors, equipment, and surfaces directly rather than relying only on warming the air. That makes them especially useful in high-bay buildings, loading docks, vehicle service areas, and facilities where doors open frequently. Workers can feel comfortable at a lower air temperature because the occupied zone receives direct radiant heat.

Radiant heating is not automatically the best fit for every operation. Placement matters, particularly where there are cranes, storage racks, combustible materials, sensitive processes, or changing work areas. The system must also be designed around required clearances and ventilation. When properly applied, however, radiant equipment can address persistent cold-floor complaints that overhead forced-air systems do not solve well.

Condensing boilers and hydronic distribution

Facilities with hydronic heating may benefit from replacing older boilers with high-efficiency condensing equipment. These boilers can provide heat to unit heaters, finned-tube radiation, air handlers, process loads, or multiple building zones from a central plant. They are a strong option when a site needs controlled, even heat across offices, production areas, and support spaces.

Condensing boilers perform best when the system can return cooler water to the boiler. That may require reviewing existing coils, radiators, piping, pumps, controls, and water temperatures. A boiler replacement without hydronic-system adjustments can leave efficiency on the table. On the other hand, a thoughtfully designed upgrade can improve redundancy, zoning, serviceability, and long-term operating control.

Heat pumps for appropriate loads and zones

Commercial heat pumps can be a practical part of an industrial heating plan, particularly for offices, break rooms, control rooms, smaller additions, or facilities with moderate heating loads. They can provide both heating and cooling, which may simplify equipment needs in spaces that require year-round conditioning.

Their suitability depends on winter design conditions, building load, electrical infrastructure, backup heat needs, and the nature of the space. In a high-infiltration loading area or a process space requiring high discharge temperatures, a heat pump alone may not be the right answer. In mixed-use facilities, though, it can reduce reliance on fossil fuel for areas that do not need industrial-grade heating output.

Waste-oil heating systems for qualifying operations

Vehicle fleets, equipment shops, and industrial operations that generate used oil may have an opportunity to use that resource for space heating. Waste-oil furnaces and boilers are designed to burn properly prepared waste oil, helping certain businesses offset purchased heating fuel while managing a byproduct of their operation.

This is a specialized application, not a universal recommendation. The facility must generate enough suitable oil, have room for compliant storage and equipment, and commit to the maintenance and fuel-handling requirements. For the right operation, a waste-oil system can be a practical long-term investment. For a business with inconsistent oil volume or limited maintenance capacity, conventional gas or propane equipment may be more dependable.

Make-up air, ventilation, and heat recovery improvements

Some facilities lose more heat through exhaust and infiltration than through the heating equipment itself. Welding areas, paint operations, commercial kitchens, manufacturing processes, and buildings with frequent door traffic may require large volumes of replacement air. If that air enters cold and untreated, heaters must work harder just to maintain basic indoor temperatures.

A tempered make-up air unit can replace exhausted air with conditioned outdoor air. In suitable applications, heat recovery equipment can capture energy from exhaust air and transfer it to incoming ventilation air. These upgrades must be engineered carefully because ventilation is often tied to worker safety, contaminant control, and process requirements. Reducing ventilation below what the operation requires is never an energy-saving strategy.

Controls and Zoning Often Deliver the Fastest Improvement

New heating equipment cannot perform at its best if every zone follows one thermostat or runs on a fixed schedule that no longer matches the facility. Programmable controls, separate zones, occupied-setback schedules, remote monitoring, and demand-based operation can reduce waste without sacrificing comfort or production needs.

For example, a warehouse may need full heat only in shipping lanes and active work areas during first shift, while storage areas can operate at a lower setback. A maintenance shop may need early warm-up before crews arrive but little heating overnight. Controls should reflect actual use, not old habits.

Integrating heating controls with ventilation, unit heaters, boilers, pumps, and rooftop equipment also helps prevent systems from working against each other. Hydrodynamics Inc. approaches these projects as complete mechanical systems, because the heating equipment, airflow, controls, plumbing, and electrical requirements all affect the final result.

How to Choose an Upgrade That Holds Up

The lowest equipment price is rarely the lowest ownership cost. Facility decision-makers should compare expected fuel use, maintenance requirements, anticipated equipment life, available redundancy, installation disruption, and the ability to support future expansion. A system that is highly efficient on paper may not be the best choice if it cannot meet the building's recovery time, process temperature, or ventilation demands.

Ask for a clear scope that explains equipment sizing, proposed locations, venting or piping changes, controls, electrical work, startup, and ongoing maintenance needs. It is also worth discussing what happens if one unit fails. In facilities where downtime is expensive, staged capacity or backup equipment may be more valuable than a single large system.

An industrial heating upgrade should make daily operations easier, not create a new set of service concerns. The most useful next step is a site assessment that connects the building's conditions, work patterns, and heating goals to equipment that can deliver dependable performance through the next heating season and beyond.