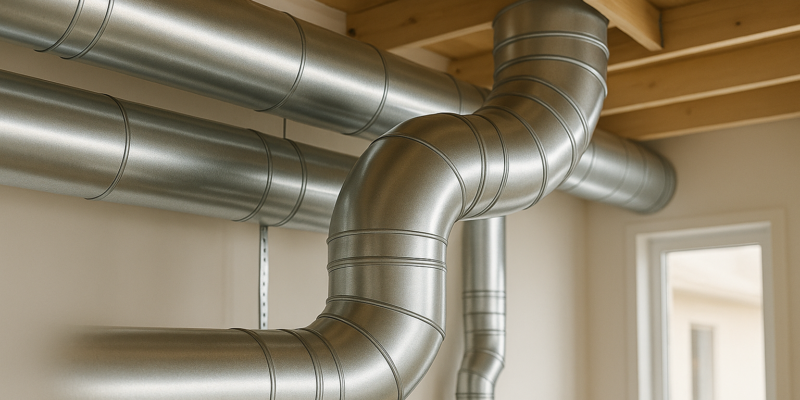
Common Duct Design Mistakes and Fixes

Common Duct Design Mistakes and Fixes

Duct design mistakes can lead to uneven temperatures, weak airflow, noisy systems, and higher energy bills. Common issues include poorly sized ducts, bad layouts, inadequate insulation, leaky connections, and unbalanced ventilation. These problems often strain HVAC systems, reduce comfort, and waste energy.

Key Solutions:

  • Proper Sizing: Use precise calculations (e.g., ACCA Manual D) to ensure ducts deliver the correct airflow.
  • Improved Layouts: Minimize long runs, sharp bends, and poorly placed vents.
  • Better Insulation: Use R-6 to R-8 insulation in unconditioned spaces to prevent heat loss/gain.
  • Seal Leaks: Apply mastic or foil tape to prevent air loss and improve efficiency.
  • Balance Airflow: Add dampers and return vents to eliminate pressure imbalances.

Professional assessments can identify hidden issues and optimize your duct system for better comfort and lower energy costs. Fixing these problems not only improves performance but also extends your HVAC system’s lifespan.

(Podcast) Common Duct Design Mistakes w/ Jack Rise

Common Duct Design Mistakes

Duct design errors can make a building feel uncomfortable, no matter how often you adjust the thermostat. These problems often arise when contractors bypass detailed calculations and rely on guesswork or outdated methods. The result? A system that might look fine but struggles to perform from the start. Knowing these common pitfalls is the first step toward fixing airflow issues.

Incorrect Duct Sizing

One of the most frequent culprits behind HVAC complaints is undersized ducts. Even when the furnace or air conditioner is correctly sized, undersized ducts can create high static pressure, leading to weak airflow, uneven temperatures, noisy vents, and faster wear on equipment. Homeowners often blame their HVAC unit for being “too weak”, but the real problem lies in the ductwork failing to deliver air efficiently.

On the flip side, oversized main trunks paired with undersized branches can reduce air velocity, causing uneven airflow and temperature inconsistencies.

These sizing mistakes often happen when contractors base duct dimensions on equipment tonnage instead of performing precise room-by-room calculations, such as those outlined in ACCA Manual D. Without these calculations, critical factors like building layout, duct length, and friction losses from fittings are overlooked, leading to performance issues.

Poor Layout and Placement

The way ducts are routed can make or break system performance. Long duct runs and sharp bends increase friction, limiting airflow to distant rooms. For example, placing a sharp elbow right above the air handler fan disrupts airflow and amplifies noise, even if the rest of the system is properly sized. Best practices recommend keeping a straight section off the fan before adding any turns.

Register placement is another common issue. Supply vents that blow into walls or furniture fail to distribute air properly, while return grilles located only in central hallways can’t evenly pull air from all rooms. In colder climates, placing supply registers near ceilings can be problematic; warm air rises, leaving the lower part of the room cooler and less comfortable for occupants.

Inadequate Insulation

Ducts running through unconditioned spaces, like attics or crawlspaces, can lose or gain heat quickly if they lack proper insulation. This leads to inefficient HVAC operation and higher energy costs. Common mistakes include bare ducts, insulation with a low R-value for the local climate, or gaps and tears in the vapor barrier.

Many building codes now require better duct insulation in unconditioned areas, as it’s a straightforward way to cut energy costs. Still, when insulation is overlooked or poorly installed, it compromises the system’s ability to deliver consistent temperatures.

Leaky Ductwork

Air leaks in duct systems can waste 20–30% of conditioned air, driving up energy bills and reducing comfort levels. These leaks often occur at joints, take-offs, boots, and anywhere ducts connect to walls, ceilings, or equipment.

When air escapes into unoccupied spaces like attics or wall cavities, it leaves rooms under-conditioned while forcing the HVAC system to work harder. Leaks on the return side can also pull in unfiltered air from crawlspaces, garages, or attics, spreading dust, odors, and allergens throughout the building. This not only affects comfort but can also worsen respiratory issues and lower indoor air quality. Concentrated leaks near the air handler or trunk lines can raise static pressure, reducing airflow at vents and lowering the system’s efficiency compared to its rated SEER or AFUE values.

Unbalanced Ventilation

A lack of return vents or poorly placed ones can throw off the system’s balance, causing drafts, uneven temperatures, and even door slamming. Many homes rely on a single central return in a hallway, which creates problems when bedroom doors are closed. This setup starves those rooms of return airflow, causing pressure imbalances. Positive pressure forces air out through cracks and windows, while negative pressure pulls in unconditioned air, making it harder to maintain consistent indoor temperatures.

Without balancing dampers in the duct branches, contractors can’t fine-tune airflow to each room. Closing supply vents to redirect air isn’t a solution – it increases static pressure and can damage equipment. Proper balancing involves measuring airflow, adjusting dampers, and ensuring each room gets the right amount of air based on its heating and cooling needs.

Mistake Category Typical Cause or Symptom Impact on Comfort and Energy
Incorrect duct sizing Ducts too small for required airflow (CFM) Weak airflow, noisy vents, longer HVAC cycles, higher bills
Poor layout and placement Long runs, sharp bends, bad vent locations Uneven temperatures, energy waste, poor airflow in some rooms
Inadequate insulation Bare or low-R insulation in unconditioned spaces Heat loss/gain, discomfort, higher energy costs
Leaky ductwork Unsealed joints, disconnected sections Air loss, poor comfort, higher bills, reduced air quality
Unbalanced ventilation Few returns, no dampers, closed doors Pressure issues, drafts, uneven temperatures, inefficiency

Understanding these common errors lays the groundwork for solutions that improve airflow, boost efficiency, and ensure HVAC systems meet professional standards.

Solutions to Fix Duct Design Mistakes

Addressing duct design mistakes doesn’t always require replacing the entire system. Instead, focusing on specific improvements – like resizing ducts, sealing leaks, upgrading insulation, and balancing airflow – can resolve many issues, restoring efficiency and comfort.

Correct Duct Sizing

Undersized ducts can cause uneven airflow and strain your HVAC system. To fix this, start with precise calculations using industry standards such as ACCA Manual J, S, and D. These calculations help determine the heating and cooling loads for each room, ensuring the ductwork delivers the correct airflow, measured in cubic feet per minute (CFM). Factors like room size, insulation, window area, climate, and duct friction losses all play a role.

Avoid relying on generic rules tied to equipment tonnage. For example, a small bedroom might only need 75–150 CFM, served by a 6–8 inch round duct, while a larger living room might require 200–400 CFM, needing an 8–10 inch duct or larger. Open-plan spaces could demand even more airflow, requiring larger ducts or multiple supply branches.

When retrofitting, focus on problem areas first – like rooms that are consistently too hot or cold. Measuring the total external static pressure at the air handler can reveal if undersized ducts are overworking the blower motor, which can shorten its lifespan and increase energy consumption.

Better Duct Layouts

Poor duct layouts often create airflow issues. Efficient designs minimize friction and pressure drops by keeping duct runs short and straight. Long runs and sharp bends add resistance, reducing airflow to distant rooms and making the fan work harder.

A trunk-and-branch layout is a practical solution, with short, direct runs to each room. Supply registers should be placed near exterior walls or windows, while return vents should be located on interior walls or ceilings to promote even air distribution.

Avoid sharp bends by using long-radius elbows or flexible transitions, and include a straight section before any turns. Renovating to eliminate overly long runs or multiple sharp bends can significantly improve both comfort and system performance.

Better Insulation

Ducts running through unconditioned spaces – like attics, garages, or crawlspaces – can lose or gain heat quickly without proper insulation. This forces the HVAC system to work harder, leading to higher energy bills. Building codes in many U.S. regions now require at least R-6 insulation for ducts in unconditioned areas, with R-8 recommended in extreme climates.

Fiberglass duct wrap or pre-insulated flex ducts are common solutions. Ensure that insulation fully covers all duct surfaces without gaps or compression, as this reduces effectiveness. Seams should be tightly sealed with tape or mastic to prevent air leaks, and exposed metal parts, like joints and boots, should be wrapped to reduce thermal bridging and condensation risks.

Studies show that sealing and insulating ducts in existing homes can cut heating and cooling energy use by 10–20%, depending on the climate, duct location, and initial leakage levels.

Sealing Duct Leaks

Leaky ducts waste energy and reduce system performance. Common leak points include joints, seams, take-offs, and connections. You can locate leaks visually or use tools like a smoke pencil or incense stick to detect escaping air. For a more precise approach, professional duct leakage testing, such as using a duct blaster, can identify problem areas.

For sealing, apply water-based mastic with a brush or gloved hand for durable results. UL-listed foil tape is also effective, especially on seams and joints, but avoid standard cloth “duct tape”, as it fails over time in hot environments.

Professional duct sealing, which may include advanced aerosol sealing, typically costs a few hundred to $1,500 for a single-family home, depending on the system’s size and complexity. While the upfront cost may seem high, the investment pays off through lower utility bills and improved comfort within a few years.

Balancing Airflow

Unbalanced airflow can create hot and cold spots throughout your home. To fix this, install balancing dampers on branch ducts for precise adjustments. Partially close dampers to over-conditioned areas and open them fully in under-conditioned spaces. Adjusting registers can also help, but avoid closing them completely, as this increases static pressure and risks damaging the system.

Many homes rely on a single central return vent, which can cause problems when bedroom doors are closed. Adding return vents or transfer grilles in these rooms prevents pressure imbalances and improves overall airflow. Ideally, every major room should have a return path, either through a dedicated grille or undercut doors. Homes with insufficient returns often experience temperature differences of several degrees between rooms and floors.

For larger systems, professional testing ensures accurate CFM distribution. Technicians use specialized instruments to measure airflow and pressure in each branch, adjusting fan speed, dampers, and duct sizing to achieve even distribution without overworking the fan. This method is far more effective than trial and error.

Professional services, like those offered by Hydrodynamics, can conduct detailed assessments that include load calculations, duct modeling, and leakage testing. With their expertise, they can redesign layouts, resize ducts, upgrade insulation, seal leaks, and balance systems to improve comfort, reduce noise, and lower energy costs.

The Role of Professional Services in Duct Design

When it comes to duct design, professional services play a critical role in ensuring everything – from sizing to layout – is done right. While minor issues might be manageable with DIY solutions, professional HVAC services bring the expertise, tools, and industry know-how needed to optimize duct systems for peak performance. Inefficient ductwork not only wastes energy but also costs more in the long run, making professional intervention a smart investment.

Benefits of Professional Assessment

Professional assessments go far beyond a simple visual inspection. Certified technicians use specialized tools to uncover hidden problems, measuring airflow, static pressure, and duct leakage with a level of accuracy that’s impossible to achieve through observation alone. For instance, duct leakage testing involves calibrated instruments to pinpoint how much conditioned air is escaping through leaks.

These evaluations often reveal issues you might not notice right away, like leaks hidden behind walls, undersized return ducts, or poorly balanced branch runs. Left unchecked, these problems can lead to higher energy bills, uneven comfort, and even premature equipment breakdowns. By addressing these inefficiencies early, professionals help you avoid costly repairs down the road.

Another major advantage is compliance with industry standards. Professionals ensure your duct system is tailored to your building’s heating and cooling needs while meeting local building codes for insulation and design. This attention to detail prevents common mistakes, such as improper duct sizing, inadequate sealing, or poorly planned layouts.

Take Hydrodynamics Inc., founded in 1994, as an example. Their EPA 609 Certified Technicians perform detailed duct assessments for residential, commercial, and industrial properties. Their expertise ensures systems not only comply with current standards but also deliver long-term efficiency. As Emma K. from Drums, PA, shared:

“They were prompt, knowledgeable, and efficient. Very pleased with their work.”

Custom Solutions for Residential, Commercial, and Industrial Needs

Duct design isn’t a one-size-fits-all process. Residential properties often need targeted upgrades, like adding return vents to balance airflow or improving insulation to cut energy loss, ensuring consistent comfort in every room. Commercial buildings, on the other hand, require more complex solutions, such as multi-zone systems or variable air volume setups, to handle fluctuating occupancy levels and stricter energy regulations. Meanwhile, industrial facilities, such as warehouses or manufacturing plants, demand high-capacity ductwork capable of managing large airflow volumes while meeting safety standards.

Hydrodynamics tailors its HVAC services to meet the unique demands of each sector, ensuring every project gets a solution that fits its specific needs.

Energy Efficiency and Cost Savings

Investing in professional duct services translates into tangible savings through better energy efficiency and reduced wear on HVAC equipment. Sealing leaks and upgrading insulation not only lower energy consumption but also cut operating costs and extend the lifespan of your system.

Well-maintained ductwork prevents your HVAC system from overworking, which can otherwise lead to higher energy bills and faster equipment wear. Tackling duct issues early minimizes operating costs and reduces the risk of premature equipment replacements. Regular inspections catch small problems before they escalate into expensive failures.

Hydrodynamics prioritizes preventative maintenance as a cornerstone of their services. In November 2025, the company published an article titled “How to Ensure Ductwork Meets Retrofit Standards”, noting that inefficient ductwork can waste up to 30% of HVAC energy. Another article from December 2025, “Duct Leakage Testing for Retrofit Projects”, emphasized the importance of professional testing in identifying leaks and improving overall efficiency.

For retrofit projects, professional assessments help modernize older duct systems, aligning them with today’s efficiency standards. This not only cuts energy use but also enhances overall comfort, making it a worthwhile upgrade for any property.

Conclusion

Mistakes in duct design can lead to a trifecta of problems: discomfort, higher energy bills, and reduced HVAC efficiency. Issues like incorrect sizing that choke airflow or leaky ductwork that wastes energy can quickly snowball into bigger headaches. The good news? These problems are often fixable with the right strategies.

The first step to solving these issues is identifying them. Problems such as poor sizing, ineffective layouts, inadequate insulation, and improper ventilation all chip away at your system’s performance. Each misstep contributes to inefficiencies that impact your comfort and wallet.

Once the issues are clear, the fixes are fairly straightforward. For example, using Manual D calculations ensures your ducts are sized correctly, delivering the right amount of airflow throughout your space. Reducing sharp bends, keeping duct runs short, and insulating ducts in unconditioned spaces with R-6 to R-8 insulation can slash energy use by as much as 20%. Sealing leaks with mastic or metal tape and balancing airflow using dampers can eliminate those annoying hot and cold spots while cutting down on energy waste.

For a more precise approach, professional assessments are invaluable. Certified technicians can locate leaks, measure airflow, and ensure your system meets industry standards. This attention to detail not only prevents costly errors but also ensures long-term savings. Companies like Hydrodynamics Inc., staffed with EPA 609 Certified Technicians, offer comprehensive duct evaluations and tailor-made solutions for residential, commercial, and industrial needs. Their expertise ensures your system operates at peak efficiency.

Fixing duct design flaws doesn’t just improve comfort – it boosts efficiency and enhances indoor air quality. Whether you’re upgrading an older system or planning a new one, investing in proper duct design pays off in the form of lower energy bills, longer equipment life, and consistent comfort. A well-thought-out duct system ensures you enjoy immediate benefits while safeguarding future savings and performance.

FAQs

How can I tell if my ductwork is the wrong size, and what can I do to fix it?

Improperly sized ductwork can cause a host of problems, including weak airflow, inconsistent room temperatures, louder-than-normal HVAC operation, and even higher energy costs. You might notice rooms that are always too hot or too cold, vents with barely any airflow, or an unusually noisy system – these are all red flags that your ductwork might not be the right size for your home.

If these issues sound familiar, it’s a good idea to call in a professional HVAC technician. They can assess your system by performing a load calculation and checking for any design flaws in your ductwork. Depending on what they find, solutions might involve resizing the ducts, sealing leaks, or installing dampers to better control airflow. Fixing these issues can make your home more comfortable, cut down on noise, and help lower your energy bills.

Why should I hire professionals for duct design and maintenance instead of attempting DIY solutions?

Hiring professionals for duct design and maintenance is a smart move if you want your system to deliver consistent airflow, lower energy costs, and dependable performance over time. These experts come equipped with the right tools and expertise to size and install ducts correctly, which helps avoid problems like uneven temperatures, noisy systems, and wasted energy.

Attempting DIY solutions might seem tempting, but they often fall short when it comes to the precision ductwork requires. This can lead to expensive repairs or increased utility bills down the road. Opting for professional services not only saves you time and effort but also ensures your HVAC system runs efficiently and reliably.

How can using dampers and adding return vents improve my HVAC system’s airflow and efficiency?

Balancing airflow with dampers and adding extra return vents can make a noticeable difference in how well your HVAC system works. Dampers give you control over how much air flows into different areas, ensuring every room gets the right level of heating or cooling. This can help get rid of uncomfortable hot or cold spots while also easing the workload on your system.

Installing additional return vents enhances air circulation by allowing conditioned air to return to the HVAC unit more effectively. This not only prevents energy waste but also helps keep temperatures consistent throughout your home, potentially lowering your energy bills. Together, these changes fine-tune your system’s performance, making your home more comfortable and energy-efficient.
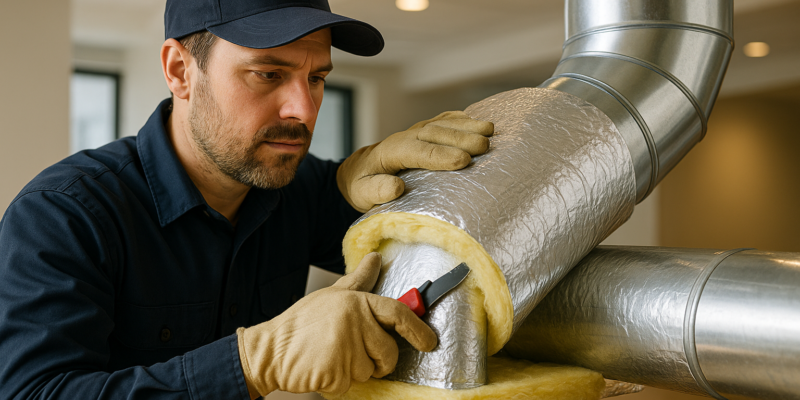

How to Ensure Duct Insulation Meets Code

How to Ensure Duct Insulation Meets Code

  • Why it matters: Poor insulation can lead to higher energy bills, uneven temperatures, mold growth, and equipment damage.
  • Key regulations: U.S. standards like the IECC, ASHRAE 90.1, and IMC specify insulation requirements based on climate zones and duct location.
  • Inspection tips: Check insulation thickness, seal joints, and look for air leaks or condensation to ensure compliance.
  • Materials to use: Options include fiberglass wraps, rigid foam boards, and spray foam, each suited for specific applications.
  • Documentation: Keep records of R-value calculations, product certifications, and installation photos to pass inspections smoothly.

Bottom line: Proper planning, material selection, and installation are essential to meet code requirements and maintain an efficient HVAC system. Professional help can simplify the process and ensure compliance.

Module 5 Insulation Installation Requirements

HVAC Codes and Standards You Need to Know

Understanding the codes that regulate duct insulation is crucial for ensuring compliance with energy efficiency and safety standards. In the United States, several key regulations set legally enforceable requirements that local building departments uphold during inspections.

The International Energy Conservation Code (IECC) provides the primary framework for energy conservation, including insulation standards for heating and cooling systems. Most states adopt the IECC, sometimes tailoring it with local amendments to suit regional needs.

In addition, ASHRAE Standard 90.1 complements the IECC by offering more detailed energy efficiency guidelines. Since local building departments have the final say on which codes apply, it’s always a good idea to consult them before starting any insulation work to confirm the applicable version of the code and any local modifications. Let’s dive into the specific codes and standards shaping these requirements.

IMC, IECC, and ASHRAE 90.1 Requirements

ASHRAE

The International Mechanical Code (IMC) outlines the mechanical requirements for HVAC systems, including basic duct insulation provisions. However, the energy efficiency aspects are primarily governed by the IECC and ASHRAE 90.1.

The IECC specifies minimum R-values for insulation based on climate zones, ensuring energy efficiency for both the building envelope and ductwork. Meanwhile, ASHRAE 90.1 provides more detailed guidelines, addressing factors like duct location, temperature differences, and system efficiency. It also emphasizes proper installation techniques to avoid thermal bridging and ensure continuous insulation coverage.

How Climate Zones Affect Insulation Requirements

The United States is divided into eight distinct climate zones, accounting for moist, dry, and marine conditions. These zones play a critical role in determining insulation requirements, as thermal resistance needs vary based on local temperature extremes and seasonal weather.

For instance, in colder climates, higher R-values are essential to minimize heat loss from ducts carrying warm air. Conversely, in warmer climates, proper insulation prevents heat gain into ducts carrying cool air. The IECC establishes these minimum standards to optimize energy efficiency.

Here’s a quick look at climate zone–based insulation requirements:

Climate Zone Uninsulated Attic R-Value 3-4 inches Existing Attic Insulation R-Value Uninsulated Floor R-Value
1 R30–R49 R19–R38 R13
2 R49–R60 R38–R49 R13
3 R49–R60 R38–R49 R19
4 except Marine R60 R49 R19

To determine your project’s climate zone, refer to the IECC maps. Keep in mind that climate zone boundaries may vary by locality, so it’s essential to confirm specific requirements with your local building department. Once you’ve identified the correct zone, you can calculate and apply the appropriate R-value standards for your project.

How to Calculate Required Insulation R-Values

Start by identifying where your ducts are located and understanding the R-value requirements outlined by your local building codes. The R-value, which measures thermal resistance, plays a critical role in ensuring your system is both code-compliant and energy-efficient.

Pinpoint the areas where ductwork is installed to address the specific thermal demands of each location.

R-Value Requirements by Location and Application

The location of your ductwork determines the necessary R-value. According to the 2018 International Energy Conservation Code (IECC), supply and return ducts measuring 3 inches or larger generally require R-8 insulation in most climate zones. For ducts smaller than 3 inches, requirements may differ, so it’s essential to check local codes for precise guidelines.

In unconditioned spaces – like basements, crawl spaces, and garages – higher insulation levels are typically required. For example, the 2015 commercial IECC and ASHRAE 90.1 2016 specify an R-12 insulation requirement for commercial ducts located in unconditioned or exterior spaces within climate zones 5 through 8. Exterior installations, such as rooftop ducts or those in attics above insulated ceilings, face harsher conditions. ASHRAE 90.1 2016 defines these exterior spaces and emphasizes the need for higher R-values due to direct exposure to outdoor temperature extremes.

In conditioned spaces, where temperatures are more stable, lower R-values may suffice. However, proper insulation is still crucial to minimize energy loss. Additionally, the size of the ductwork affects insulation needs – larger ducts can transfer more heat due to their increased surface area, often requiring higher R-values.

After determining the required R-values, confirm their accuracy using official code references.

How to Verify R-Value Requirements in Code References

Once you’ve calculated the necessary R-values, verify them by consulting official code documents. The International Code Council (ICC) website, accessible at codes.iccsafe.org, provides access to I-Codes like the IECC. Their Digital Codes Premium Enterprise platform offers tools such as AI Navigator, Quick Consult New, a Q&A Database, and Compliance Calculators. Even basic read-only access to historical code versions is available.

To confirm R-value requirements for duct location and size, review section R403.3.1 in the 2018 IECC. Keep in mind that state and local regulations often modify these standards. For instance, California’s Title 24 outlines specific duct insulation requirements. Always cross-check national codes with local amendments, and verify the applicable version with your local building department.

For the latest ASHRAE standards, which detail thermal resistance requirements for commercial applications, visit the ASHRAE website directly. If you encounter complex scenarios, consider consulting an HVAC professional to ensure compliance and efficiency.

How to Inspect Existing Ductwork for Code Compliance

To ensure your ductwork meets code requirements, start by evaluating its insulation. Use the calculated R-values as your benchmark during the inspection to determine if the insulation is up to standard.

Before diving in, turn on your HVAC system. This step puts the ducts under operating pressure, making it easier to detect air leaks and evaluate the overall performance of your system.

Step-by-Step Insulation Quality Assessment

Begin by visually inspecting all accessible ductwork. Pay close attention to bends, registers, and junctions – these are common areas where gaps and air leaks can occur.

  • Check insulation thickness:
    Measure the insulation depth around the ducts and compare it to the R-value requirements you calculated earlier. In cases of blown-in or sprayed insulation, look for markers in attic spaces that indicate the original thickness, the settled thickness, and the effective R-value.
  • Test for air leaks:
    With the system running, feel along the seams, joints, and connections. If you notice air escaping, it’s a sign of compromised seals, which can reduce the effectiveness of insulation.
  • Conduct a smoke test:
    Use a smoke pencil or an incense stick near duct connections to identify subtle leaks that might be hard to detect by touch.
  • Inspect and document seams:
    Check all joints and seams to ensure they are securely sealed. Record any issues, including their location, type, and severity, to plan for repairs. Older installations, in particular, may have deteriorated or missing sealant that allows air to escape.

If you suspect significant issues, consider hiring an HVAC professional, such as Hydrodynamics Inc., to perform advanced diagnostics. They can use specialized tools like a duct blaster to pressurize the system and measure total air leakage precisely.

Warning Signs of Non-Compliant Insulation

After your inspection, keep an eye out for these red flags that may indicate insulation problems:

  • Higher energy bills:
    A sudden, unexplained spike in utility costs could mean your HVAC system is overworking due to poorly insulated or leaky ducts.
  • Uneven room temperatures:
    Hot or cold spots in different areas of your home may suggest that conditioned air is escaping before it reaches its intended destination.
  • Condensation on ductwork:
    If you notice condensation on ducts in unconditioned spaces like attics or crawl spaces, it’s a clear sign of insufficient insulation. This can lead to water damage, mold growth, and other structural issues.

    “Duct insulation and sealing are critical yet often overlooked aspects of maintaining an efficient and safe HVAC system.”
    – Season Control

  • Poor airflow:
    Weak airflow from vents might point to blockages, broken seals, or damaged ductwork that compromise insulation.
  • Mold or mildew odors:
    A musty smell or visible mold on duct surfaces indicates that condensation problems have worsened and need immediate attention.
  • Physical damage:
    Look for loose, detached, or compressed insulation, as well as kinked, tangled, or dented ductwork. These issues can reduce thermal resistance and signal that the insulation is no longer effective.
  • Excessive dust buildup:
    If you notice dust accumulating around vents and registers – even with clean air filters – it could be a sign of duct leaks that not only affect insulation but also indoor air quality.

To keep your system running efficiently and ensure it remains code-compliant, schedule professional inspections every 3 to 5 years – or sooner if you spot any of these warning signs.

sbb-itb-99db659

Choosing and Installing Code-Compliant Insulation

Picking the right insulation and installing it correctly is crucial to meet building codes and pass inspections. A poor choice of materials or sloppy installation can result in failed inspections and long-term energy inefficiencies.

Best Insulation Materials for Code Compliance

When it comes to code-compliant insulation, several options stand out:

  • Fiberglass duct wrap: A popular option for both residential and commercial use, this material comes in various insulation ratings to suit different climates. Many versions also include a built-in vapor barrier, which helps prevent condensation in unconditioned spaces like attics and crawl spaces.
  • Rigid foam board insulation: This material offers strong thermal performance and durability. Types like polyisocyanurate and extruded polystyrene are particularly effective, providing excellent insulation per inch of thickness. They work well with rectangular ductwork, which can be cut precisely for a snug fit.
  • Spray foam insulation: Known for creating an airtight seal, closed-cell spray foam also acts as a vapor barrier. However, it requires professional application and specialized equipment, which typically makes it a pricier option.
  • Duct board systems: These systems combine ductwork and insulation into one product. Made from pre-fabricated fiberglass panels with a protective facing, they simplify installation and deliver consistent thermal performance.
  • Reflective insulation: For budget-friendly projects in hot climates, reflective insulation can help combat radiant heat. However, it’s less effective in colder regions where heat loss through conduction is a bigger concern.

Once you’ve chosen the right material, proper installation is key to ensuring it performs as intended.

Proper Installation Techniques

Installing insulation correctly is just as important as selecting the right material. Here’s how to do it:

  1. Prepare the duct surface: Start by cleaning the ductwork thoroughly. Remove dust, debris, and any damaged insulation to create a clean surface for the new material.
  2. Seal joints and seams: Use HVAC-rated duct tape or mastic sealant to seal all joints and seams. Avoid standard household tape, which can fail over time due to temperature changes and humidity. Apply the sealant generously to ensure complete coverage.
  3. Install fiberglass duct wrap: Wrap the insulation snugly around the duct without compressing it, as compression reduces its effectiveness. Overlap seams adequately and seal them securely with the appropriate tape. Be sure to follow local guidelines for placing vapor barriers.
  4. Fit rigid foam boards: Cut the foam boards slightly larger than needed, then trim them for a precise fit. Use adhesives specifically designed for foam products, as some adhesives can damage the material. Seal all edges carefully to block air infiltration.
  5. Protect and support insulation: In areas like attics or crawl spaces, add a protective cover (such as wire mesh or thin plywood) to prevent accidental damage during maintenance. For heavier insulation, install supports at regular intervals to prevent sagging and maintain consistent coverage.
  6. Handle complex areas with care: Insulate tricky spots like elbows, tees, and transitions with carefully cut pieces to ensure continuous coverage and avoid gaps.

Finally, address any issues immediately. It’s far easier to fix problems before scheduling an inspection.

For peace of mind, consider hiring professionals like Hydrodynamics Inc. Their expertise in local code requirements and proper installation techniques can help you avoid common mistakes that lead to inspection failures or costly rework.

How to Document and Verify Code Compliance

Once you’ve installed insulation, it’s crucial to document everything thoroughly to confirm compliance with building codes. Proper documentation not only ensures your work meets standards but also helps secure approval to finalize your duct insulation project. These steps align with earlier installation guidelines, creating a seamless process from start to finish.

Documentation Needed for Code Compliance

After completing the installation, gather all necessary documents to verify your work complies with code requirements. Having everything prepared before the inspection will make the process smoother.

  • Product certifications: Collect manufacturer specification sheets that list R-values, fire ratings, and ASTM test results for all insulation materials used. Save original packaging labels, as inspectors may cross-check these with approved materials lists.
  • Installation records: Take clear, detailed photos throughout the process – before, during, and after installation. Focus on critical areas like duct joints, vapor barrier placement, and insulation thickness. If you deviated from standard procedures, document these changes and explain how they still meet code requirements. Include dated photos showing the condition of the ductwork before retrofitting began.
  • Calculation worksheets: Show how you determined the required R-values for your specific climate zone and application. Include copies of the relevant code sections and your calculations proving the insulation meets or exceeds minimum requirements. Some jurisdictions may require a licensed professional to sign these calculations.
  • Material receipts and invoices: Keep proof of purchase for all materials. Inspectors often verify that materials were sourced from legitimate suppliers and match the specifications in your application. Organize receipts by installation area or duct zone for easier review.
  • Contractor licenses and certifications: If you hired professionals for any part of the project, have their credentials ready. This includes HVAC contractor licenses, insulation installer certifications, and any specialized training relevant to the materials or techniques used.

For expert guidance on documentation and inspections, consider consulting Hydrodynamics Inc. Their experience can help streamline the process and ensure compliance.

How to Schedule and Pass Local Inspections

When you’re ready for an inspection, contact your local building department at least 48 hours in advance. Aim for a mid-morning appointment, as inspectors are often more focused and less rushed at this time of day.

  • Prepare the inspection area: Make sure all work is visible and accessible. Remove any temporary coverings or protective materials that could block the inspector’s view of the insulation. Have tools like a flashlight and measuring tape on hand for their convenience.
  • Walk through the installation: Guide the inspector through the project, highlighting key compliance features such as proper vapor barrier placement, adequate R-values, and sealed joints. Be ready to explain your methods and reference relevant code sections.
  • Address issues on the spot: If the inspector identifies problems, resolve them immediately if possible. For instance, if insulation appears compressed in some areas, you might need to provide thickness measurements from various locations to confirm the effective R-value still meets requirements.
  • Request detailed written feedback: If corrections are needed, ask the inspector to clearly outline the issues and reference specific code sections. This ensures you understand exactly what needs to be fixed before scheduling a follow-up inspection.

Hydrodynamics Inc. can also assist with inspections. Their knowledge of local requirements and familiarity with common compliance issues can increase your chances of passing on the first try, saving you time and money on your project.

Conclusion: Get Professional Help for Code Compliance

Ensuring your duct insulation meets code requirements is no small task. It involves more than just understanding the rules – it demands precise calculations, careful installation, and an eye for detail. Falling short can lead to inspection failures, higher energy bills, or even safety issues. Something as seemingly minor as a miscalculated R-value or a small installation mistake can set your project back, causing delays and expensive rework.

With variables like climate zone considerations, proper vapor barrier placement, and differences in local codes, navigating these requirements can quickly become overwhelming. That’s where professional expertise becomes invaluable.

Hydrodynamics Inc., a family-owned business serving clients since 1994, specializes in HVAC solutions for residential, commercial, and industrial needs. Their services span heating, air conditioning, ductless systems, and heat pumps, all with a focus on energy efficiency and strict code compliance.

Whether you’re retrofitting an existing system or starting a new installation, working with seasoned professionals ensures thorough assessments, faster inspections, and systems that perform at their best.

FAQs

What happens if duct insulation doesn’t meet code requirements?

Failing to meet duct insulation code requirements can have serious consequences. For starters, it can lead to increased energy bills, reduced HVAC performance, and uncomfortable indoor conditions. Poor insulation often allows air leaks, contributes to humidity problems, and may even encourage mold growth – all of which can negatively impact air quality and pose health concerns.

On top of that, non-compliance can bring fines, cause project delays, and create potential safety risks. By ensuring your duct insulation is up to code, you not only improve comfort and efficiency but also steer clear of expensive penalties and avoidable setbacks.

What R-value should I use for duct insulation in my climate zone?

The recommended R-value for duct insulation varies based on your climate zone and the ducts’ location. For ducts in unconditioned spaces, an R-value of R-6 to R-8 is typically suggested. However, in colder regions, higher values – such as R-13 or more – might be needed, particularly if the ducts are buried in ceiling insulation. In extremely cold climates, insulation standards for attics and walls can serve as a reference. For example, attics often require R-49 to R-60, while walls may need R-13 to R-21.

Be sure to check your local building codes and climate zone recommendations to ensure your duct insulation meets both energy efficiency and regulatory standards.

What are the best ways to ensure duct insulation meets building code requirements?

To ensure your duct insulation complies with building codes, start by choosing insulation with the right R-value for your area. For instance, R-6 is commonly required in unconditioned spaces, while climates with more extreme conditions might call for R-8 or even R-12 in exterior or vented attics.

Installation matters just as much as the insulation itself. Ducts should be fastened securely and sealed to prevent air leaks. Using vapor barriers where needed can guard against moisture issues. In spaces like attics, make sure the insulation is either buried or enclosed properly to maintain its effectiveness. Also, remember to follow airflow guidelines, ensuring proper spacing and pressure balance for better performance and compliance.

By following these steps, you not only meet code requirements but also boost energy efficiency and help your HVAC system last longer.