Heat Pump vs. Dual-Mode Systems: Seasonal Testing

Heat Pump vs. Dual-Mode Systems: Seasonal Testing

When choosing between heat pumps and dual-mode systems, the main difference lies in how they handle heating in various climates. Heat pumps use electricity to transfer heat, making them efficient in milder regions. Dual-mode systems combine a heat pump with a gas furnace, automatically switching between the two based on outdoor temperatures, which makes them better suited for colder climates.

Key Takeaways:

  • Heat Pumps: Best for mild climates; efficient for both heating and cooling but may struggle in extreme cold.
  • Dual-Mode Systems: Ideal for colder regions; combine electric and gas heating for consistent performance in low temperatures.
  • Seasonal Testing: Ensures systems perform well in all weather conditions, evaluating heating, cooling, and energy efficiency.

Quick Comparison:

Feature Heat Pumps Dual-Mode Systems
Climate Suitability Mild climates Cold climates
Heating Method Electric (refrigerant cycle) Electric + Gas Furnace
Efficiency in Cold Temps Decreases below balance point Maintains efficiency with gas
Maintenance Needs Moderate Higher (due to dual components)
Ideal Use Case Year-round mild temperatures Harsh winters and variable temps

Understanding your local climate, energy costs, and heating needs will help you make the right choice. Both systems require regular maintenance and testing to ensure optimal performance.

Seasonal Testing Procedures and Standards

Heat Pump Testing Standards

In the United States, heat pump testing is guided by well-established industry standards to ensure accurate evaluation of seasonal performance. Key protocols include ANSI/ASHRAE 116, AHRI Standard 210/240, and DOE Appendix M. To provide a more comprehensive assessment, updated metrics – SCORE for cooling and SHORE for heating – now incorporate factors like off-mode power consumption and performance in colder climates.

Testing procedures involve both steady-state and cyclic evaluations within specific temperature and humidity ranges. For example, cooling tests are conducted at 95°F and 75°F, while heating tests are performed at 47°F and 43°F. These controlled conditions aim to replicate real-world operating scenarios.

For variable-speed systems, a load-based testing method is preferred. This approach allows the system to operate under its built-in controls, dynamically adjusting to varying load demands, which provides a closer approximation to actual usage. Multiple steady-state tests are conducted to measure performance at different speed levels.

The ENERGY STAR program adds another layer of quality assurance by requiring that all faults identified during seasonal testing – such as issues with blowers, cooling, heating, or auxiliary heating – are documented and resolved before certification is granted. This ensures that only systems in perfect working order achieve certification.

Dual-Mode System Testing Standards

Dual-mode systems, which combine electric heat pump functionality with fuel-based heating, undergo all the standard heat pump tests along with additional evaluations for their fuel-based components and switching mechanisms. These tests ensure that both heating methods perform efficiently and that the system transitions seamlessly between modes.

The electric heat pump component is tested using the same standards applied to standalone heat pumps, while the fuel-based heating element, often a gas furnace, is evaluated under its own criteria. This dual evaluation ensures that each system operates effectively within its designed range.

A critical part of the testing involves verifying the reliability of the switching mechanism. Tests confirm that the system can smoothly alternate between electric and fuel-based heating based on factors like outdoor temperature and load requirements. The control logic is also tested to ensure the system selects the most efficient mode under different conditions. For split systems, certification focuses on the integrated performance of the outdoor heat pump, indoor air handler, gas furnace, and control system, rather than evaluating individual components separately.

Hydrodynamics Inc. provides specialized HVAC services to ensure dual-mode systems meet compliance standards, deliver accurate performance, and maintain energy efficiency.

Performance Metrics for Seasonal Testing

Main Performance Metrics

When it comes to measuring seasonal efficiency in U.S. HVAC systems, three key metrics stand out: SEER2, HSPF2, and COP.

SEER2 (Seasonal Energy Efficiency Ratio 2) focuses on cooling efficiency. It calculates the total cooling output in BTUs during a typical cooling season and divides it by the total electric energy input in watt-hours during the same period. Introduced in 2023 as an update to the older SEER standard, SEER2 provides a more accurate reflection of real-world conditions, including system cycling losses. A higher SEER2 rating means the system provides more cooling while using less electricity – great for energy savings.

HSPF2 (Heating Seasonal Performance Factor 2) measures heating efficiency in a similar way. It looks at the total heating output in BTUs over a heating season and divides it by the electricity consumed in watt-hours. While SEER2 is all about cooling, HSPF2 is crucial for heat pumps and dual-mode systems, especially in colder climates where heating demands are higher.

COP (Coefficient of Performance) takes a slightly different approach. It evaluates the ratio of useful heating or cooling output to the energy consumed under specific conditions. This metric is particularly useful for variable-speed and cold-climate systems, as it highlights how well the system performs across a range of temperatures and loads – not just seasonal averages.

Variable-speed heat pumps tend to shine in seasonal testing compared to single-speed units. By adjusting their output to match the building’s needs, these systems achieve higher part-load efficiency and smoother operation. This adaptability often translates to higher SEER2 and HSPF2 ratings, especially in areas with moderate temperature fluctuations. They also handle humidity control better and reduce cycling losses, making them a solid choice for energy-conscious homeowners.

But there’s another factor that plays a critical role in seasonal performance: defrost cycle efficiency.

Defrost Cycle Efficiency

Defrost cycles are a key consideration when evaluating heat pump performance, especially in cold, humid conditions. Ice buildup on the outdoor coil can lower efficiency and even damage the system if not addressed. To prevent this, heat pumps periodically enter defrost mode.

Defrost cycle efficiency measures the energy used during defrost events compared to the heat delivered to the building. Inefficient or frequent defrost cycles can significantly lower overall seasonal efficiency, especially since frost formation is common during much of the heating season.

Heat pumps generally rely on two defrost methods, each with unique efficiency implications:

  • Active defrost reverses the refrigeration cycle to melt the frost. This method temporarily stops heating and consumes additional energy.
  • Passive defrost turns off the compressor, allowing ambient air to melt the frost naturally. While less energy-intensive, it also pauses heating temporarily.

Both methods impact heating output and efficiency. How much they affect performance depends on outdoor conditions and the system’s design.

Seasonal testing accounts for defrost energy consumption by incorporating it into HSPF2 and COP calculations. This ensures that the efficiency ratings reflect real-world performance, especially for systems tested in colder climates where defrost cycles are more frequent. For heat pumps in these conditions, defrost efficiency becomes a major factor in overall performance.

Dual-mode systems, which can switch to a fuel-based heating component during defrost cycles, are less affected by defrost inefficiencies. This feature allows them to maintain consistent heating while the heat pump defrosts, offering better comfort and efficiency in cold weather.

When evaluating systems for colder climates, it’s essential to consider defrost cycle efficiency and the system’s ability to maintain capacity at low temperatures. HVAC professionals can help you interpret these metrics and recommend systems that align with your climate and heating needs.

Heat Pumps vs. Dual-Mode Systems Comparison

Testing Complexity and Frequency

When it comes to testing, heat pumps and dual-mode systems have distinct requirements in terms of both complexity and frequency. Heat pumps, especially variable-speed models, undergo more detailed testing protocols. These models adjust their compressor speed dynamically to match varying conditioning loads, which allows for testing that better reflects real-world performance.

Dual-mode systems, on the other hand, require additional testing for their auxiliary heating functions. Beyond the standard heat pump tests, these systems must ensure proper coordination between the heat pump and the resistance heat stages. This means verifying that the auxiliary heat engages correctly when needed. Testing frequency also differs: heat pumps generally require annual testing or verification upon installation, while dual-mode systems often need more frequent checks to confirm proper switching between heating modes and auxiliary heat activation.

The introduction of the AHRI Standard 210/240-2024 has further increased testing complexity by replacing the older SEER2 and HSPF2 metrics with SCORE (Seasonal Cooling and Off-mode Rated Efficiency) and SHORE (Seasonal Heating and Off-mode Rated Efficiency). These new metrics now factor in off-mode power consumption, offering a more comprehensive look at energy efficiency for both system types. By including all energy consumed by a unit, these updated ratings provide a clearer picture of overall efficiency.

Performance in Different Climates

Climate plays a significant role in how these systems perform. Heat pumps tend to lose efficiency as outdoor temperatures drop. At lower temperatures, they produce less heat, which becomes a challenge at the “balance point” – the outdoor temperature where the heat pump’s output matches the home’s heating needs.

Dual-mode systems address this issue by incorporating auxiliary resistance heating. When outdoor temperatures fall below the balance point, and the heat pump can no longer meet demand on its own, the auxiliary heat kicks in to provide the necessary supplemental heating. This makes dual-mode systems more reliable in colder climates, where consistent performance is essential.

Testing standards have also evolved to reflect these climate-specific differences. For example, SHORE ratings now offer a cold climate option that evaluates performance at extremely low temperatures (5°F and below). Additionally, the DOE has implemented load-based testing methods that assess how well heat pumps perform under low-temperature conditions. These methods allow systems to automatically adjust their control settings based on real-time loads rather than relying on static manufacturer presets.

For homeowners in regions with mild winters, where temperatures rarely dip below the balance point, a heat pump alone can often provide sufficient and cost-effective heating. However, in colder areas like New England, dual-mode systems are better suited to maintain comfort and reliability. By supplementing heat pump performance with auxiliary heat, they eliminate the need for the heat pump to operate inefficiently in extreme cold.

Maintenance and Testing Requirements

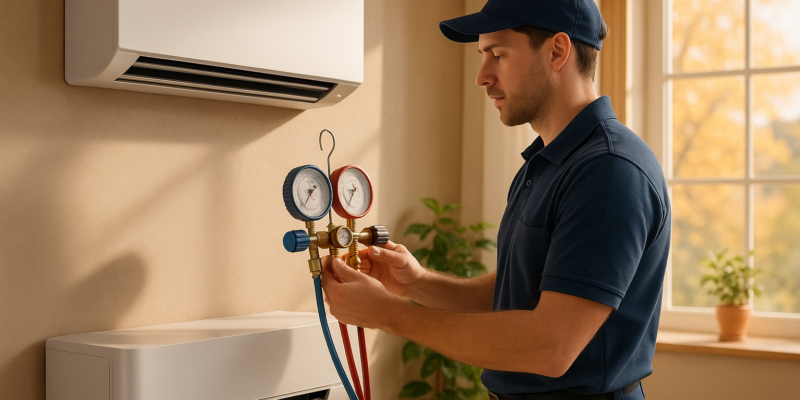
The maintenance and testing needs of these systems reflect their operational differences. Heat pump maintenance focuses on verifying refrigerant levels and ensuring proper control operation in both heating and cooling modes. Technicians can conduct quick checks by monitoring system temperatures and operation without needing gauges.

Dual-mode systems, however, involve additional steps. These include testing the reversing valve to ensure smooth transitions between heating and cooling, verifying that auxiliary resistance heat activates at the right temperatures, and confirming that the thermostat correctly manages the switch between heat pump and auxiliary heating stages.

ENERGY STAR certification requirements highlight these distinctions. While both heat pumps and dual-mode systems require checks for fan blower performance and cooling efficiency, dual-mode systems must also undergo tests for heat pump-only heating and auxiliary heating functionality. For split-system setups, ENERGY STAR certification is based on the performance of the specific indoor and outdoor unit combination tested under regional guidelines.

Dual-mode systems with optional resistance heat operate in three stages: reduced, full, and full plus resistance heat. Each stage requires separate testing during maintenance. While this multi-stage operation enhances comfort control, it also adds complexity to both testing and upkeep, ensuring the system runs efficiently in all modes.

For homeowners, these testing and maintenance differences carry practical implications. Heat pumps, particularly variable-speed models, rely heavily on proper installation and commissioning to achieve their rated efficiency. Poor installation can significantly affect performance, making professional setup and regular maintenance essential. These practices help homeowners choose the right system for consistent performance throughout the seasons.

Energy Efficiency and System Optimization

How to Use Seasonal Testing Results

Seasonal testing data is a powerful tool for identifying where your system may be losing efficiency. Metrics like SEER (Seasonal Energy Efficiency Ratio), HSPF (Heating Seasonal Performance Factor), and COP (Coefficient of Performance) highlight when and why your system struggles. For instance, if your data shows frequent activation of backup heat when temperatures dip below 40°F, it might be time to adjust your system controls.

Another key insight comes from part-load performance data, which shows how your system operates during low-demand periods. Since HVAC systems rarely work at full capacity, frequent cycling during mild weather can waste energy, as each startup consumes more power than steady operation.

Energy auditors use this data to estimate potential savings from upgrades. If your system relies too heavily on backup heating, switching to a variable-speed compressor or fine-tuning system controls could significantly cut costs. Seasonal data also helps confirm whether your system’s balance point – the outdoor temperature at which your heat pump can meet heating needs without backup – matches your local climate.

Defrost cycle data is another area to watch. When outdoor coils frost over, the system temporarily reverses to melt the ice, which can reduce heating output. If defrost cycles are inefficient, it might be time to clean the coils or adjust the controls.

These insights often lead to the next step: bringing in professional HVAC services to make precise adjustments.

Professional HVAC Services

Interpreting seasonal testing data isn’t something most of us can do on our own – it requires technical expertise. Companies like Hydrodynamics bring specialized tools and training to ensure your system not only performs better but also stays compliant with regulations. Their trained technicians can analyze the results to pinpoint opportunities for improvement, whether it’s tweaking system controls, upgrading components, or optimizing operations. This is especially critical for variable-speed systems, which depend on load-based testing for accurate performance assessments.

Another important consideration is maintaining eligibility for rebates and tax credits. Many incentive programs now require validated seasonal performance data. By working with qualified professionals, you can ensure that your system adjustments meet these requirements and protect your access to valuable incentives.

Modern HVAC systems – featuring variable-speed compressors, smart controls, and integrated backup heating – are sophisticated and require careful handling. Without proper expertise, even minor adjustments can hurt efficiency or, worse, lead to equipment damage.

Professionals can also use seasonal data to refine your maintenance schedule, ensuring your system stays efficient and reliable.

Maintenance Schedule Guidelines

Seasonal testing results can take your maintenance plan beyond generic recommendations, tailoring it to your system’s specific needs. For example, if defrost cycles show reduced efficiency, you may need to clean coils or inspect the defrost system more frequently, especially before and after peak heating seasons.

While the standard advice is to schedule professional maintenance twice a year – typically in spring and fall – seasonal data might reveal the need for additional service. If a dual-mode system frequently activates backup heat, certain components may require quarterly inspections instead of the usual annual checks.

Maintenance Action Heat Pump Frequency Dual-Mode System Frequency Adjustments Based on Testing Results
Filter replacement Monthly Monthly Increase frequency if airflow is restricted
Coil cleaning Biannually Biannually Consider quarterly if defrost efficiency drops
Refrigerant check Annually Annually Perform more often if capacity issues arise
Control calibration Annually Biannually After any noticeable efficiency decline

Extreme weather can also take a toll on your system. Post-event inspections are crucial for maintaining efficiency and preventing long-term damage.

When seasonal testing is combined with professional maintenance, it creates a cycle of continuous improvement. This approach not only reduces long-term costs but also extends your system’s lifespan while ensuring peak performance year-round. Early detection of performance issues can help avoid expensive repairs and keep your energy bills in check.

Smart maintenance schedules focus on the specific challenges your system faces during different temperature ranges. By addressing these stresses at the right time, you can make sure your maintenance dollars are spent where they’ll have the greatest impact on performance and longevity.

Choosing the Right System for Your Needs

Main Points Summary

When deciding between heat pumps and dual-mode systems, it’s essential to understand how each performs under varying seasonal conditions. Heat pumps are particularly effective in milder climates, thanks to the introduction of new SCORE and SHORE ratings. These ratings account for off-mode energy consumption, offering a more complete picture of efficiency. Heat pumps perform best when they can operate without relying heavily on backup heating throughout the year.

On the other hand, dual-mode systems shine in colder climates, where temperatures often drop below the balance point – the outdoor temperature at which a heat pump can no longer meet heating demands on its own. Testing these systems is more complex, as it must confirm both the heat pump’s operation and the integration of auxiliary heating to ensure reliable performance during extreme cold.

Load-based testing provides a clearer picture of real-world efficiency compared to peak ratings. For instance, variable-speed heat pumps demonstrate higher efficiency in mild climates by running longer at lower speeds. Meanwhile, dual-mode systems prove their value in colder regions where auxiliary heating is frequently needed.

Maintenance requirements also vary. Heat pumps need seasonal checks, including defrost system inspections. Dual-mode systems, however, demand more attention due to their additional components and the controls that manage the switch between heating modes. While this makes them more maintenance-intensive, it also enhances their reliability during harsh weather. These factors are key to determining which system aligns best with your needs.

How to Make the Right Choice

Start by reviewing your local climate data and identifying your home’s balance point. For milder climates, a standard or variable-speed heat pump is often the most efficient and cost-effective option, providing reliable heating and cooling year-round. In colder regions, where winter temperatures frequently fall below 25°F, a dual-mode system equipped with auxiliary electric or gas heat ensures consistent comfort and may even reduce operating costs during the coldest months.

Weigh the upfront costs against long-term savings. While two-stage and variable-speed heat pumps have higher initial price tags, they offer lower operating costs and improved comfort over time. Dual-mode systems, though more expensive to install due to their additional components, can be more economical in regions with harsh winters where a heat pump alone might struggle to keep up. Considering these factors alongside system reliability in your local conditions will help guide your decision.

A professional load calculation (Manual J) is crucial for determining the right system size and type for your home. This calculation, combined with seasonal testing data specific to your climate zone, provides a solid foundation for making an informed choice.

Maintenance is another important consideration. Heat pumps require regular tasks like filter changes and occasional professional inspections. Dual-mode systems, with their added components, need more frequent upkeep but often deliver better reliability in extreme weather.

Partnering with experts like Hydrodynamics Inc. can make the process smoother. Their ability to interpret seasonal testing results and ensure compliance with local codes and efficiency standards helps ensure your system delivers optimal performance and savings over its lifespan. By combining expert advice with seasonal test data, you can confidently select a system tailored to your specific needs.

Ultimately, your decision should balance initial costs, energy efficiency, maintenance requirements, and climate demands. Seasonal testing data offers clear, reliable performance metrics, taking the guesswork out of choosing the right system for your home and budget.

Heat pumps seasonal performance factor (SPF) – What installers need to know

FAQs

What should I consider when choosing between a heat pump and a dual-mode system for my home?

When choosing between a heat pump and a dual-mode system, you’ll want to think about your home’s heating and cooling needs, your local climate, and your energy efficiency goals. Heat pumps work well for both heating and cooling in moderate climates because they transfer heat instead of generating it. But if you live in a colder area, their efficiency can drop, which is where a dual-mode system might come in handy. These systems pair a heat pump with a backup heating source, like a furnace, to keep your home comfortable even during freezing temperatures.

It’s also worth weighing the installation costs, potential energy savings, and maintenance requirements. While dual-mode systems might cost more upfront, they tend to provide more dependable heating when the weather gets extreme. Talking to a professional HVAC provider, such as Hydrodynamics Inc., can give you a clearer idea of which option suits your home and budget best.

How do seasonal testing results affect the efficiency and performance of heat pumps and dual-mode systems?

Seasonal testing plays a key role in understanding how heat pumps and dual-mode systems handle different weather conditions. By examining their performance throughout the year, this process highlights energy efficiency, potential savings, and any necessary tweaks to keep them running at their best.

For heat pumps, these tests focus on how well they manage heating and cooling during temperature swings, ensuring reliable performance in both summer and winter. Similarly, dual-mode systems, designed to switch between heating and cooling, are assessed for smooth transitions and efficiency in regions with mixed climates. Regular testing not only keeps your home comfortable but also helps catch inefficiencies early, saving money over time.

What specific maintenance tasks are required for dual-mode systems that differ from standalone heat pumps?

Dual-mode systems, designed to handle both heating and cooling, come with their own set of maintenance needs to keep them running efficiently. Beyond the typical care required for heat pumps, these systems often demand extra attention to their switching mechanisms and controls – the parts responsible for toggling between heating and cooling. Regular checkups are key to ensuring these components work seamlessly.

Seasonal tweaks are another important part of maintaining dual-mode systems. This might include recalibrating thermostats or checking refrigerant levels to make sure the system transitions smoothly between functions. Scheduling routine maintenance with professionals, like Hydrodynamics Inc., can help catch and fix potential problems early, keeping your system in top shape all year long.
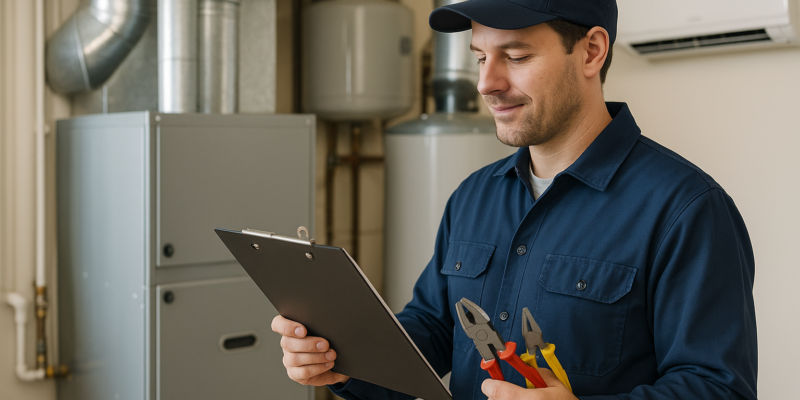
How to Prevent HVAC Callbacks: 5 Service Strategies

How to Prevent HVAC Callbacks: 5 Service Strategies

In the HVAC industry, callbacks can be a frustrating and costly issue for both service providers and their customers. They can disrupt schedules, strain customer relationships, and cut into profits. However, with the right strategies, HVAC professionals can significantly reduce callbacks and improve overall service quality. Based on insights from an experienced service expert, this article explores five actionable strategies that can transform how HVAC teams operate, ensuring fewer callbacks and more satisfied customers.

The Importance of Callback Prevention

Callbacks occur when a service issue isn’t fully resolved on the first visit, requiring a technician to return to the same job. Not only do callbacks hurt a company’s bottom line, but they can also damage customer trust. Preventing callbacks isn’t just about saving time and money – it’s about delivering consistent, high-quality service that sets your business apart. By following these five principles, you can improve your service efficiency, maintain customer satisfaction, and uphold your reputation for reliability.

1. Ask the Right Questions from Start to Finish

One of the most effective ways to prevent callbacks is by asking detailed and thoughtful questions throughout the service process. This begins the moment a technician is dispatched to a call. Review call notes and customer history to uncover relevant details about past issues or repairs. This preparatory step ensures you arrive at the job with the right tools, parts, and expectations.

When engaging with the customer, ask about their observations and any previous concerns. Whether it’s a homeowner, property manager, or business operator, clear communication helps uncover vital clues about the problem. Questions such as, “When did the issue start?” or “Have you noticed any unusual noises or changes in performance?” can reveal underlying causes you might otherwise overlook. By building a complete picture of the situation, you can address the root cause, not just the symptoms.

2. Address Drain Concerns Every Time

Clogged or poorly maintained drains are one of the most common reasons for HVAC callbacks. To tackle this consistently, adopt a proactive approach: either clean or quote the drain on every service visit, no exceptions.

For example:

  • If you’re performing a major repair, such as replacing an evaporator coil, cleaning the drain should be included as part of the process – even if it seems unnecessary.
  • For minor service calls, like capacitor replacements, offer to clean or quote the drain as a preventative measure.

These small steps take only a few minutes but can save your team from rolling a truck back to the same property due to a preventable drainage issue. This practice also helps maintain system efficiency and improves customer satisfaction, as it demonstrates thorough attention to detail.

3. Remove All Panels for a Thorough Inspection

In HVAC service, thoroughness is key. A disciplined habit of removing all system panels allows technicians to inspect components beyond the immediate issue. While it might be tempting to focus solely on the identified problem (e.g., a faulty capacitor), this approach can lead to missed opportunities to prevent future failures.

Removing panels reveals potential issues such as:

  • Dirty filters
  • Clogged evaporator coils
  • Signs of wear or damage in unseen components

For instance, replacing a compressor without checking the filter or evaporator coil could result in recurring issues. A dirty or clogged filter might have been the root cause of the compressor’s failure in the first place. This comprehensive inspection process ensures you address underlying problems, making callbacks far less likely.

4. Record All Measurements and Readings

Documenting system readings and measurements during service calls is a crucial practice. By taking and recording data such as capacitor readings, refrigerant levels, or voltage, technicians can provide evidence of their work and identify potential issues.

This documentation serves two purposes:

  1. Callback Prevention: Thorough readings help ensure that every aspect of the system is functioning within the manufacturer’s specifications before leaving the site.
  2. Customer Communication: If a customer calls back with concerns, having documented data allows you to demonstrate that the system was inspected and tested thoroughly. This can defuse misunderstandings and build trust.

For example, a recorded capacitor reading can confirm that the part was functional during the previous visit, helping customers understand that some issues can arise unexpectedly despite regular maintenance.

5. Perform a Final Walkthrough and “Touch Everything”

The final walkthrough, often referred to as the “touch everything” rule, is perhaps the most critical step in preventing callbacks. This simple yet highly effective practice involves physically inspecting the equipment one last time after completing all repairs and maintenance tasks.

During this walkthrough:

  • Place your hands on components such as the blower or condenser to ensure they are operational.
  • Check for any loose caps, tools left behind, or signs of overlooked issues.
  • Verify that the drain is working properly and that no components were inadvertently left out of place.

This extra step takes only a few minutes but can save hours of frustration later. While it may seem unnecessary most of the time, it’s during those rare moments – when you catch a loose connection or forgotten detail – that this habit proves invaluable.

Key Takeaways

  • Ask Questions: Begin every service call by reviewing customer history and asking detailed questions to build a comprehensive understanding of the problem.
  • Clean or Quote Every Drain: Proactively address potential drainage issues, even when they’re not the primary reason for the call.
  • Remove All Panels: Conduct a complete inspection of the system to uncover hidden issues, ensuring no critical detail is overlooked.
  • Record Readings: Document measurements and system data to facilitate future troubleshooting and demonstrate the quality of your work.
  • Final Walkthrough: Make a habit of physically inspecting the system after completing the job. This practice can catch small errors that might lead to callbacks.

Conclusion

Reducing HVAC callbacks is about more than just efficiency – it’s about creating a seamless customer experience and ensuring every job is done right the first time. By adopting these five service strategies, HVAC professionals can build trust, earn repeat business, and stand out in a competitive market. Small, consistent changes in how you approach each service call can lead to significant long-term benefits for both your business and your customers.

Ultimately, the key to preventing callbacks is a commitment to thoroughness, communication, and proactive problem-solving. These principles not only reduce frustration for your team but also reinforce your reputation as a trusted expert in the HVAC industry. Implement these strategies today, and watch your service calls transform for the better.

Source: “5 Service Strategies to Prevent HVAC Callbacks” – HVAC School, YouTube, Aug 6, 2025 – https://www.youtube.com/watch?v=Zc28AlF-68I

Use: Embedded for reference. Brief quotes used for commentary/review.

Solar vs. Heat Pump Water Heaters: Which Saves More Energy?

Solar vs. Heat Pump Water Heaters: Which Saves More Energy?

When deciding between solar and heat pump water heaters, here’s what you need to know upfront:

  • Solar water heaters use sunlight to heat water, reducing electricity needs. They’re great for sunny areas like California or Florida, but they require roof space and good sunlight exposure. Costs are higher upfront, but savings can pay off in 3–7 years.
  • Heat pump water heaters use electricity to pull heat from the air and are 2–3 times more efficient than standard electric models. They work in various climates, are compact, and cost less to install initially.

Quick Comparison:

Feature Solar Water Heaters Heat Pump Water Heaters
Upfront Cost Higher Lower
Energy Source Sunlight Ambient air
Best Climate Sunny regions Moderate to warm climates
Space Needs Roof space for collectors Indoor space with ventilation

Both options cut energy costs, but your choice depends on your home’s layout, climate, and budget. For maximum savings, consider combining both systems if feasible.

How Solar Water Heaters Work and Save Energy

How They Work and Energy Savings

Solar water heaters use sunlight to heat water for home use, offering an efficient way to reduce energy consumption. These systems rely on solar collectors, which can be either flat-plate or evacuated tube types, to capture sunlight. A heat-transfer fluid circulates through the collectors, absorbing the sun’s energy. This warmed fluid then flows to a heat exchanger in the storage tank, where it transfers heat to the water without mixing with it. A small pump keeps the fluid circulating, using only a minimal amount of electricity.

By tapping into the sun’s energy, solar water heaters can significantly cut down on the need for conventional energy sources to heat water. Proper installation and an understanding of how the system works are key to maximizing its efficiency.

Installation Requirements and Limits

For the best performance, solar water heaters should be installed on a sturdy roof with a southern-facing orientation (or within 45° of south) to capture the most sunlight. The installation site should receive direct sunlight, especially during peak midday hours.

Adjusting the tilt of the collectors to match your location’s latitude can further enhance efficiency. However, in areas with frequent overcast skies or during seasons with limited sunlight, a backup heating element might be necessary to ensure a steady supply of hot water.

In colder climates where temperatures can drop below freezing, systems need freeze protection measures, such as antifreeze solutions or automatic drainback mechanisms, to prevent damage to the pipes. Additionally, shading from trees, nearby buildings, or other obstacles can reduce performance, so a detailed site evaluation is essential before installation.

To keep the system running smoothly, regular maintenance is crucial. This includes periodic inspections, cleaning, and ensuring compliance with local building codes and permits. These steps help maintain the system’s efficiency over time.

How Heat Pump Water Heaters Work and Save Energy

How They Work and Energy Savings

After exploring solar water heaters, let’s dive into how heat pump water heaters work and why they stand out for energy efficiency.

Unlike traditional electric water heaters that generate heat directly through electric resistance, heat pump water heaters take a different approach. They pull heat from the surrounding air and transfer it to the water. This is achieved using a refrigerant cycle that includes four key components: an evaporator, compressor, condenser, and expansion valve. Here’s how it works:

  • The evaporator absorbs heat from the air, causing the refrigerant to evaporate.
  • The compressor then pressurizes the refrigerant, significantly raising its temperature.
  • The hot refrigerant gas moves through the condenser coil, where it releases heat to warm the water.
  • Finally, the expansion valve cools the refrigerant, resetting the cycle.

This process allows heat pump water heaters to achieve a Coefficient of Performance (COP) between 2.0 and 3.5. To put it simply, for every unit of electricity they use, they produce 2 to 3.5 units of heat. This level of efficiency translates to energy savings of about 60% to 70% compared to standard electric water heaters. For instance, if a household spends $600 a year on water heating with a conventional unit, switching to a heat pump system could cut that cost by more than half.

These systems can even extract heat from air temperatures as low as the 40s °F, although their efficiency does drop in colder conditions.

Climate and Installation Needs

To get the most out of a heat pump water heater, proper placement is key. These systems work best in moderate to warm climates where indoor temperatures remain relatively steady. Areas like the Southeast, Southwest, and parts of California are ideal for maintaining high efficiency year-round. However, they’re still a good option in colder regions when installed in conditioned spaces such as basements, utility rooms, or heated garages.

Most installations are indoors, and it’s important to place the unit in a spot with enough ambient air and adequate clearance for effective heat exchange. Unlike solar water heaters, which depend on specific roof orientations, heat pump water heaters offer more flexibility in placement – as long as ventilation needs are met.

One unique feature of these systems is their cooling effect. By pulling heat from the air, they can dehumidify and slightly cool the surrounding space. This can be a bonus during warmer months but might slightly increase heating demands in colder seasons. Even so, the energy savings from water heating typically outweigh this minor trade-off.

From an electrical perspective, most residential units run on standard 240-volt circuits and can often be installed with minimal changes to existing setups. In colder indoor environments, the system’s backup electric elements may kick in more frequently to ensure a consistent hot water supply, which can lower efficiency. These details highlight how heat pump water heaters differ from solar water heaters and set the stage for a direct comparison.

Heat Pump vs Solar Water Heater

Solar vs. Heat Pump Water Heaters: Direct Comparison

Now that we’ve covered the basics of each system, let’s dive into a head-to-head comparison, focusing on installation needs and cost factors.

Comparison Table

Here’s a quick side-by-side look at how these two systems stack up:

Feature Solar Water Heaters Heat Pump Water Heaters
Initial Installation Cost Higher upfront investment Lower upfront investment
Installation Space Requires clear, unobstructed space for solar collectors Compact design, suitable for tighter spaces

Key Differences Between the Systems

Solar water heaters come with steeper installation costs and need plenty of open space to set up the collectors. On the other hand, heat pump water heaters are easier on the wallet initially and fit well in homes with limited room to spare. Another important consideration is sunlight – solar systems rely on consistent, direct sunlight, whereas heat pump systems are more adaptable to different environments.

These differences can help steer your decision based on how much space you have and what you’re willing to spend upfront. Up next, we’ll dive into the critical factors to weigh when choosing the best system for your home.

How to Choose the Right Water Heater for Your Home

Choosing the right water heater means finding a system that fits your specific needs. Several important factors come into play when deciding which technology will work best for your home. Let’s break down what you should keep in mind.

What to Consider Before Buying

When weighing your options, it’s crucial to think about how your climate, home layout, and energy goals align with the available technologies.

Climate plays a big role. Solar water heaters are an excellent choice for sunny states like Arizona, Florida, Nevada, and California. These systems can supply consistent hot water throughout the year while reducing energy use significantly. On the other hand, heat pump water heaters are more versatile and perform well in a variety of climates, including cooler or moderate regions. They can cut electricity use by 50% to 70% compared to traditional models. However, keep in mind that extreme cold or high humidity can impact their efficiency, especially if installed in unheated areas.

Your property’s layout matters too. Solar water heaters require enough unobstructed space for collectors and a structure positioned to capture the most sunlight. In contrast, heat pump water heaters are more compact and can fit into smaller spaces, though they still need proper ventilation to work effectively.

For personalized advice, the team at Hydrodynamics can evaluate your home’s climate, layout, and hot water needs to recommend the best system for maximum energy savings.

Combining Systems for Greater Efficiency

In some situations, using both solar and heat pump systems together can boost efficiency even further. A hybrid setup takes advantage of each system’s strengths: solar heating provides primary hot water during sunny days, while the heat pump steps in during cloudy or less sunny periods. This approach works especially well in moderate climates, ensuring reliable performance year-round.

That said, hybrid systems require careful planning. They demand more space for solar collectors, the heat pump unit, and additional plumbing and controls. The upfront costs are higher, but the long-term energy savings can be worth it.

Hydrodynamics specializes in designing and installing both solar and heat pump systems, including hybrid configurations. Their experts can help determine if a combined setup is right for your home and ensure everything runs smoothly for optimal efficiency and savings.

Conclusion: Getting the Most Energy Savings from Your Water Heater

Solar and heat pump water heaters can significantly cut energy costs compared to traditional models, but the best choice depends on your specific needs and location. For example, solar water heaters work exceptionally well in sunny states like Arizona, Florida, and California, where abundant sunlight can help slash energy bills. On the other hand, heat pump water heaters perform reliably across a range of climates and can dramatically reduce electricity consumption compared to standard electric systems. Your local weather conditions and property layout will play a big role in determining which option is right for you.

To maximize savings, it’s essential to select a system that aligns with your household’s hot water usage, local utility rates, and available rebates. Installation requirements also factor into the overall cost and effectiveness of your chosen system.

For those looking to push efficiency even further, combining solar and heat pump technologies can be an excellent option. A hybrid system that integrates both can deliver even greater energy savings, though it requires careful planning and comes with higher upfront costs.

Since 1994, Hydrodynamics has been helping homeowners find energy-efficient water heating solutions. Their team specializes in evaluating your needs and providing expert installation, repairs, and maintenance to ensure your system is perfectly sized and configured for your home.

And remember: proper installation and routine maintenance are key to getting the most out of your water heater, both in terms of performance and energy savings.

FAQs

Is my home a good fit for a solar water heater?

To figure out if your home is a good match for a solar water heater, start by checking for an unshaded area that faces south or toward the equator. This could be a section of your roof or even an open yard – any spot that gets plenty of sunlight throughout the day. You’ll also need enough space for the system, which typically requires about 40 square feet for every 25 gallons of capacity. Make sure the location is sturdy enough to handle the weight of the equipment.

Other factors to consider include the orientation of your roof, potential shading from nearby trees or buildings, and the local climate. To get a clear picture of your home’s suitability, it’s a good idea to consult a professional who can evaluate these aspects and guide you through the installation process.

What kind of maintenance do solar and heat pump water heaters require over time?

Solar water heaters need regular upkeep to stay efficient and last longer. Key tasks include cleaning the solar collectors once a year to clear away dirt and debris. If your system uses antifreeze, it should be replaced every 3 to 5 years. Other important checks include inspecting pumps and thermostats, flushing the tank to remove sediment, and looking for leaks – these should be done every 1 to 3 years. With consistent maintenance, these systems can serve you for 20 to 30 years.

Heat pump water heaters, on the other hand, require less frequent attention. You’ll need to clean or replace the air filters every few months and inspect the evaporator coils annually to make sure they’re clean. It’s also a good idea to check the condensate drain regularly to prevent clogs. Keeping up with these tasks ensures both types of systems run efficiently and last as long as possible.

Can combining solar and heat pump water heaters help save more energy, and what should homeowners consider before installing a hybrid system?

Combining solar panels with heat pump water heaters is a smart way to cut energy costs. Solar panels generate renewable energy that powers the heat pump, reducing dependence on grid electricity and lowering your utility bills. This setup is a great option for homeowners aiming to boost energy efficiency while using greener solutions.

To make this work effectively, a few factors need attention. You’ll need enough space to install both the solar panels and the heat pump system. It’s also important to check that your plans align with local building codes and regulations. Proper integration of the two systems is key to getting the best performance. Hiring a professional installer is highly recommended to ensure everything runs smoothly and delivers the savings you’re aiming for.

Third-Party Certification for Retrofitted HVAC Systems

Third-Party Certification for Retrofitted HVAC Systems

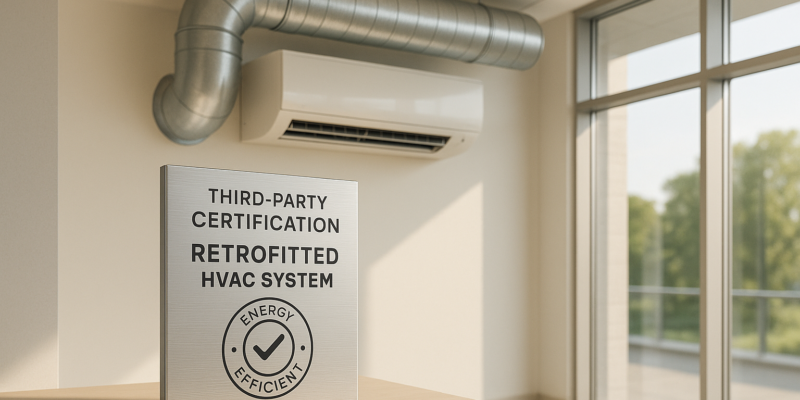
Upgrading your HVAC system? Third-party certification ensures your retrofitted system meets energy efficiency, safety, and performance standards. It’s a trusted way to verify compliance with regulations while unlocking financial perks like utility rebates and tax incentives. Plus, certified systems often boost property value and simplify building inspections.

Key Benefits of Certification:

  • Energy savings: Certified systems reduce utility costs.
  • Regulatory compliance: Meets local codes and avoids project delays.
  • Financial incentives: Access to rebates, tax credits, and better financing.
  • Property value: Certification increases appeal to buyers and tenants.
  • Documented performance: Independent verification builds confidence.

Certification Process:

  1. Assessment: Energy audits identify system upgrades.
  2. Installation: Contractors follow best practices for retrofitting.
  3. Commissioning: Independent agents test system performance.
  4. Verification: Accredited bodies review data and approve certification.

Programs like ENERGY STAR, LEED, and AHRI set industry benchmarks, while standards like ASHRAE 90.1 ensure efficiency and compliance. Certification involves costs ($1,500–$50,000) but delivers lasting benefits, making it a smart move for building owners.

Achieving Success With Retrofit Heat Pumps (Webinar)

Major Certification Programs and Industry Standards

When retrofitting an HVAC system, certification programs and industry standards serve as essential benchmarks. They provide clear guidelines for assessing performance, efficiency, and safety, ensuring your upgrades align with industry expectations. Here’s how these frameworks connect to different phases of retrofitting.

AHRI, ENERGY STAR, and LEED Programs

AHRI

The Air-Conditioning, Heating, and Refrigeration Institute (AHRI) certifies HVAC equipment performance ratings, ensuring that both new installations and retrofitted components meet established efficiency benchmarks. Meanwhile, ENERGY STAR certification emphasizes energy efficiency and reduced environmental impact. Achieving this certification can make your project eligible for utility rebates or tax incentives, which is a big plus for commercial retrofits. On the other hand, Leadership in Energy and Environmental Design (LEED) evaluates overall building sustainability. HVAC retrofits often play a major role in improving energy savings and enhancing indoor air quality, both of which contribute to LEED certification.

ASHRAE Standards and Local Building Codes

ASHRAE

ASHRAE standards are the backbone of many HVAC certification programs and local building codes. For instance, ASHRAE 90.1 sets the minimum energy efficiency requirements for commercial HVAC systems, addressing areas like equipment efficiency ratios, duct insulation, and control sequences. Similarly, ASHRAE 62.1 focuses on ventilation and indoor air quality, ensuring healthier environments for building occupants.

Local building codes, often based on ASHRAE guidelines, vary by state and municipality. Retrofitting older buildings typically triggers compliance updates, requiring upgrades to meet current codes. This might involve resizing equipment, redesigning ductwork, or improving insulation and sealing to reduce heat loss and air leakage.

Permits and inspections are critical to enforcement. HVAC or mechanical permits are usually required for equipment upgrades, while electrical permits cover control system updates. After installation, city or state officials conduct inspections to ensure compliance. Non-compliance can lead to fines, legal actions, or even the temporary or permanent closure of the facility.

Minimum Energy Performance Standards (MEPS)

The U.S. Department of Energy (DOE) enforces Minimum Energy Performance Standards (MEPS) to establish baseline efficiency levels for HVAC systems. These standards outline minimum efficiency ratios for equipment like air conditioners and heat pumps. MEPS are periodically updated to reflect new technology and environmental priorities, meaning older systems might no longer meet current requirements.

For retrofitted systems, MEPS compliance guarantees that the upgraded equipment meets federal efficiency standards. Many utility rebate and financing programs also require equipment to exceed these minimum benchmarks.

As regulations evolve, MEPS may demand higher standards, such as better MERV ratings, improved ventilation, and more frequent air quality testing. Keeping up with these changes ensures your system remains compliant and efficient.

How to Get Certification for Retrofitted HVAC Systems

Getting a retrofitted HVAC system certified involves a structured, multi-step process that typically takes around 3-6 months. Here’s a breakdown of what to expect at each stage.

System Assessment and Planning Phase

The first step is an energy audit conducted by certified professionals. This audit establishes a baseline for energy performance and identifies specific upgrades needed to meet certification standards.

During this phase, energy auditors review the existing HVAC equipment, ductwork, controls, and the building’s overall structure. For commercial buildings, they may perform blower door tests to check for air leaks and use thermal imaging to locate insulation gaps. These evaluations help pinpoint inefficiencies and potential improvements.

It’s also essential to choose the right certification program based on your building type and goals. Programs like ENERGY STAR and LEED have different requirements, so selecting the one that aligns with your objectives is key. Throughout this phase, detailed documentation is crucial – it sets the foundation for your certification application and establishes pre-retrofit performance benchmarks.

Professional engineers or certified energy managers usually lead this phase. They ensure the retrofit plans comply with standards like ASHRAE 90.1 for energy efficiency and ASHRAE 62.1 for indoor air quality. They’ll also coordinate with local building officials to address permits and inspection schedules.

With a solid plan and proper documentation in place, the project moves forward to installation and commissioning.

Installation and System Commissioning

Once the retrofit plan is approved and permits are secured, the actual installation begins. Certified HVAC contractors handle the work, adhering to manufacturer guidelines and industry best practices.

The most critical part of this phase is system commissioning. Independent commissioning agents (not affiliated with the installation team) ensure the system operates as designed. This involves testing equipment performance, calibrating controls, verifying airflow rates, and checking refrigerant levels.

For ENERGY STAR certification, the commissioning process must prove that the system meets the EPA’s minimum efficiency requirements. This includes measuring energy consumption under various conditions and comparing the results to predicted models.

Commissioning agents also perform detailed tests to ensure emergency systems work, backup systems are functional, and the building automation system integrates seamlessly with the new equipment. Operator training is another key aspect, ensuring the system is used correctly for optimal performance. Certification programs typically require performance data collected over weeks or months to confirm the system consistently meets standards in real-world conditions.

Once the system passes commissioning, the next step involves independent verification.

Third-Party Verification and Final Approval

The final phase ensures your upgraded system meets all necessary standards and secures certification. Independent accredited certification bodies review all documentation and conduct on-site inspections to provide an unbiased evaluation.

This step often requires 12 months of post-installation data to confirm the system performs consistently across seasons. Certification bodies analyze energy consumption patterns, maintenance records, and any updates made during the period. They may also conduct surprise inspections to ensure the system continues to function as designed.

For LEED certification, a LEED Accredited Professional submits detailed documentation via the program’s online platform. This includes commissioning reports, energy modeling results, equipment details, and proof of ongoing performance monitoring. The U.S. Green Building Council then reviews the submission, a process that can take 2-4 months.

ENERGY STAR certification, on the other hand, requires annual recertification. Buildings must maintain a top 25% energy performance ranking to keep their certification. This involves implementing continuous monitoring systems and maintaining detailed energy records to demonstrate ongoing compliance.

Local building officials typically conduct final inspections before certification bodies complete their review. These inspections ensure code compliance and confirm all permits are properly closed. Any issues identified must be resolved before certification is granted.

Certification costs vary depending on the program and building size. For ENERGY STAR, fees range between $1,500-$5,000 annually, while LEED certification can cost anywhere from $10,000-$50,000, depending on the complexity and size of the building.

Once certification is achieved, building owners receive official documentation and are often listed in public databases. Certification programs also provide marketing materials and logos to help promote the building’s improved energy performance to tenants, customers, and stakeholders.

To maintain certification, regular reporting and periodic re-commissioning are required. Building operators must keep thorough records and be prepared for random audits to confirm continued compliance with program standards.

Pros and Cons of Third-Party Certification

Third-party certification for retrofitted HVAC systems offers a mix of upsides and challenges. This balance allows building owners to carefully consider the benefits alongside the associated costs. Let’s break it down.

Main Benefits of Certification

  • Lower energy costs: Certified retrofitted systems often perform more efficiently, cutting down on utility bills over time.
  • Increased property appeal: Certification can make properties more attractive to buyers and tenants, boosting marketability and overall asset value.
  • Financial perks: Certification can open doors to rebates, tax credits, and other financial incentives.
  • Easier compliance: Staying up-to-date with permits and regulations becomes simpler with certification.
  • Marketing edge: A certified building can enhance its reputation, especially among environmentally conscious tenants and stakeholders.

Common Challenges and Obstacles

  • High upfront costs: The initial fees for certification and retrofitting can be steep.
  • Complex paperwork: The process often involves detailed documentation, including energy assessments and performance records.
  • Delays in timelines: Certification can stretch project schedules due to inspections, testing, and necessary adjustments.
  • Ongoing requirements: Maintaining certification demands periodic recertification and continuous monitoring of system performance.
  • Performance risks: If the retrofitted system fails to meet standards during verification, additional modifications or testing may be needed.
  • Limited contractor availability: In some regions, finding contractors experienced in certification protocols can be a challenge, potentially leading to delays and higher costs.

Pros vs. Cons Comparison Table

Here’s a quick look at the trade-offs:

Benefits Challenges
Reduced energy costs High initial investment
Better property marketability Extensive paperwork and documentation
Access to financial incentives Longer project timelines
Easier regulatory compliance Ongoing monitoring and recertification
Stronger branding opportunities Risk of additional system modifications

Best Practices for Certification Success

When it comes to certifying retrofitted HVAC systems, keeping detailed and accurate documentation is essential. Proper records can help you avoid unnecessary delays during the certification review process.

Record Keeping and Documentation

Start with pre-retrofit assessments. These should include comprehensive site surveys and equipment audits that document the existing inventory, the condition of equipment, and any identified issues. This baseline data is crucial for confirming that the retrofit meets compliance standards.

Keep these records well-organized. Why? Because it not only makes third-party verification smoother but also simplifies future audits and system evaluations. Streamlined documentation can significantly speed up the independent verification process and ensure quicker final approval.

Working with Certified Professionals

Staying Current with Standards Updates

Conclusion

Third-party certification provides assurance that your retrofitted HVAC system meets strict performance and energy efficiency standards while also qualifying for valuable federal incentives like the 179D Energy Deduction.

Programs such as AHRI and ENERGY STAR offer independent validation of system performance, showcasing a dedication to both quality and energy efficiency. This turns compliance into more than just a regulatory requirement – it becomes a strategic benefit. Incorporating third-party certification into your retrofit approach helps you maintain efficiency and stay aligned with regulatory standards in the long run.

FAQs

What financial incentives are available for retrofitted HVAC systems with third-party certification?

Certified retrofitted HVAC systems come with the added perk of potential financial incentives, such as federal tax credits, utility rebates, and state-level programs. For instance, you could qualify for up to $2,000 in federal tax credits for installing energy-efficient heat pumps. Similarly, air conditioners and gas furnaces may earn you $600 in credits. These federal benefits are available until 2025, encouraging homeowners to make energy-efficient upgrades.

On top of that, many utility companies provide rebates for certified systems that meet energy-saving standards. To find out what’s available, contact your state or local utility provider for specific program details. By upgrading to certified retrofitted systems, you not only reduce your energy bills but also tap into these cost-saving opportunities.

How do certifications like ENERGY STAR and LEED increase a building’s value and appeal?

Certifications like ENERGY STAR and LEED can greatly enhance the appeal and value of buildings. Properties with an ENERGY STAR certification often benefit from lower operating costs, attract tenants more easily, and can even secure higher rental rates, all of which contribute to increased property value. On the other hand, LEED-certified buildings are well-regarded for their eco-friendly design and operational savings, making them especially attractive to both buyers and tenants.

These certifications don’t just boost a property’s day-to-day performance – they also make a difference in the long run. Buildings with these credentials tend to have higher resale values, better occupancy rates, and a stronger competitive edge in the market. For U.S. property owners, pursuing third-party certifications is a smart way to achieve both financial gains and environmental responsibility, while showcasing their properties as forward-thinking, energy-efficient investments.

What is the process for obtaining third-party certification for retrofitted HVAC systems, and how long does it usually take?

The certification process for retrofitted HVAC systems through third-party organizations generally involves a few essential steps. It often starts with an optional pre-assessment to identify any potential issues upfront. After that, an application is submitted, followed by a detailed audit. This audit examines all documentation and verifies that the system meets the necessary standards. Depending on the complexity of the system and the specific certification criteria, the entire process can take anywhere from a few weeks to several months.

Earning certification confirms that the retrofitted system aligns with industry standards, boosting its performance, safety, and energy efficiency. This not only helps in meeting regulatory requirements but also strengthens customer trust in the system’s reliability and quality.

Best Practices for Reducing Particulates During Renovations

Best Practices for Reducing Particulates During Renovations

Renovations can release harmful particulates like dust and fine matter (PM2.5), impacting health and HVAC systems. These particles can cause respiratory issues and reduce HVAC efficiency, circulating dust throughout buildings. To minimize risks, follow these key practices:

  • Contain Dust: Use barriers like modular wall systems or heavy plastic sheeting to isolate work zones.
  • Control Airflow: Create negative pressure with HEPA-filtered exhaust fans to keep particles contained.
  • Protect HVAC Systems: Shut down or seal vents in work areas to prevent dust infiltration.
  • Daily Cleaning: Use HEPA vacuums, damp cloths, and proper waste disposal to maintain cleanliness.
  • Worker Safety: Provide N95 masks, protective clothing, and handwashing stations to reduce exposure.
  • Monitor Air Quality: Regularly inspect barriers and measure particle levels to ensure containment methods are effective.

Best Practices To Control Remodeling Dust

Where Particulates Come From in Renovation Projects

Understanding which renovation activities and materials produce airborne particulates is key to managing dust and maintaining a safer environment during construction.

Main Sources of Particulates

Demolition work is a major contributor to airborne dust. Activities like breaking down walls, removing old flooring, and tearing out fixtures release particulates from materials such as drywall, plaster, concrete, and wood. In older buildings, this dust may also contain hazardous substances like asbestos fibers or lead-based paint particles.

Cutting and drilling operations generate concentrated bursts of fine dust. Whether it’s power saws slicing through wood, concrete, or metal, or drills creating holes in masonry, these tasks release clouds of tiny particles that can quickly spread throughout a space.

Sanding activities produce some of the smallest and most persistent particulates. Sanding drywall seams, refinishing wood floors, or prepping surfaces for paint turns materials into microscopic fragments that linger in the air. These fine particles can infiltrate HVAC systems and even reach deep into the respiratory system.

Material handling and transport also keeps dust circulating. Moving bags of cement, clearing debris, or simply walking through dusty areas stirs up settled particles, spreading them to areas not directly involved in the renovation.

Adhesives, sealants, and finishing products can add to particulate levels as well. Products like spray-applied textures or insulation release airborne particles during application. Even mixing joint compound can produce dust, while curing adhesives and sealants emit volatile compounds that condense into fine particulates.

All these sources not only reduce indoor air quality but also place additional strain on HVAC systems, as explained below.

How Particulates Affect HVAC Systems and Air Quality

Renovation dust doesn’t just settle on surfaces – it can wreak havoc on HVAC systems and indoor air quality. These fine particles clog filters, reducing airflow and forcing systems to work harder. Particulates that slip past filters may settle on evaporator coils, cutting down heat transfer efficiency, or accumulate on blower wheels, leading to motor strain and imbalances. In severe cases, fine particles can even infiltrate the compressor, resulting in expensive repairs.

Once particulates settle in ductwork, they become a recurring issue. Every time the HVAC system circulates air, these particles can be redistributed into spaces like bedrooms, offices, and common areas – even if those spaces are separated by barriers.

The size of the particles determines their impact. Larger particles (over 10 microns) settle quickly and mainly cause equipment fouling. Mid-sized particles (2.5 to 10 microns) can penetrate deeper into HVAC components and the respiratory system. The smallest particles (under 2.5 microns) are the most concerning. These can bypass standard filters, stay airborne for long periods, and pose ongoing health risks.

Temperature and humidity swings during renovations can make things worse. They can impair HVAC performance and encourage condensation, which may lead to mold growth and further air quality issues.

Given how critical HVAC systems are to maintaining clean air, it’s important to seek professional advice. Companies like Hydrodynamics Inc. specialize in HVAC maintenance and energy-efficient solutions, ensuring systems stay protected and operate efficiently during and after renovation projects. Their expertise can make a significant difference in safeguarding both the equipment and the health of building occupants.

Site Preparation and Containment Methods

Keeping dust under control starts with proper site preparation. This means separating work zones from areas in use by employing physical barriers, managing airflow, and smart scheduling. These steps are essential for safeguarding workers and protecting HVAC systems.

Building Physical Barriers Around Work Areas

To keep dust contained, install sturdy modular wall systems like STARC. These are especially useful in environments where cleanliness is critical, such as hospitals, offices, or airports. For smaller or less demanding projects, heavy-duty plastic sheeting (6 mil or thicker) can be taped over openings, ensuring all HVAC registers are securely sealed.

One major advantage of modular systems is their speed of installation. Contractors can set up as much as 100 feet of STARC wall in under an hour. This not only reduces reliance on subcontractors but also saves space, as the panels are reusable across multiple projects.

For projects generating significant dust, full isolation containment is key. This method seals off the work area completely, with workers accessing it through airlocks or designated pathways to limit dust migration. Modular dust containment systems with specialized panels and accessories create airtight enclosures, offering better functionality than basic plastic sheeting.

Controlling Airflow to Limit Dust Spread

Once barriers are in place, managing airflow is the next step. Negative air machines or exhaust fans can create negative pressure, pulling air into the work zone and preventing particles from escaping. To ensure proper filtration, route the extracted air through HEPA filters.

For effective air control, aim for 4–6 air changes per hour. For example, in a 1,000 cubic foot space, this means moving 4,000–6,000 cubic feet of air per hour.

In adjacent clean areas, positive pressure can be used to block dust infiltration. By slightly pressurizing these spaces, air flows outward, keeping particles at bay. However, it’s crucial to avoid creating pressure differences that disrupt HVAC systems or the building structure.

Monitor pressure differences with tools like manometers or digital pressure gauges. Aim for a difference of 0.02 to 0.05 inches of water column between the work zone and nearby areas for effective containment.

Scheduling Renovations to Limit Exposure

Thoughtful scheduling can significantly reduce exposure to dust during renovations. Plan high-dust tasks during off-peak hours or when HVAC systems are off. This allows dust to settle and gives additional time for cleaning. Organize tasks so that the dustiest work happens first, followed by a thorough cleanup before finishing touches begin.

Consider the building’s usage patterns. For example, schools, offices, and healthcare facilities have predictable peak times. Collaborating with facility managers can help identify the best times to schedule disruptive work, minimizing inconvenience and exposure.

Protecting HVAC Systems During Renovations

Beyond managing dust containment, safeguarding HVAC systems is critical to prevent contamination inside the system. During renovations, HVAC systems can easily become a target for dust and debris, which can clog ductwork, damage equipment, and spread particles throughout the building. Protecting these systems is key to preserving indoor air quality.

Shutting Down or Sealing HVAC Systems

The best way to shield HVAC systems during renovation is to turn them off entirely during high-dust activities. By doing so, you stop dust from circulating through the system and spreading to other parts of the building. However, this isn’t always an option, especially in occupied spaces or during extreme weather.

When a complete shutdown isn’t practical, consider turning off the HVAC zones that serve the renovation area. This allows you to maintain climate control in other parts of the building while keeping the work zone isolated. If shutting down even part of the system isn’t feasible, sealing the vents becomes essential.

To protect the system, cover supply and return vents in the work area with heavy plastic sheeting secured using painter’s tape to ensure no gaps. Additionally, seal all vents and access points in the construction zone with plastic and tape to block dust from entering the system. For added protection, hang plastic sheets over doorways to create a barrier between the renovation zone and occupied areas.

It’s worth noting that covering vents while the HVAC system is running can strain the unit, potentially reducing its lifespan. Taking these precautions minimizes the risk of dust infiltration and helps maintain system integrity during renovations.

Daily Cleaning and Dust Control Practices

Daily cleaning and dust control measures are crucial to maintaining a safe and efficient renovation environment. These practices build on earlier steps like containment and HVAC protection, ensuring that dust and debris don’t spiral out of control. The goal is simple: tackle dust before it becomes a problem, keeping the workspace manageable and safeguarding both workers and building occupants.

Methods to Reduce Dust Creation

The best way to control dust is to stop it at the source. Wet cutting and sanding techniques are highly effective in reducing airborne particles. For example, when working with drywall, concrete, or tile, tools equipped with water delivery systems – or even a light spray of water before cutting – can help keep particles grounded. Instead of floating through the air, the dust becomes heavier and falls to the floor.

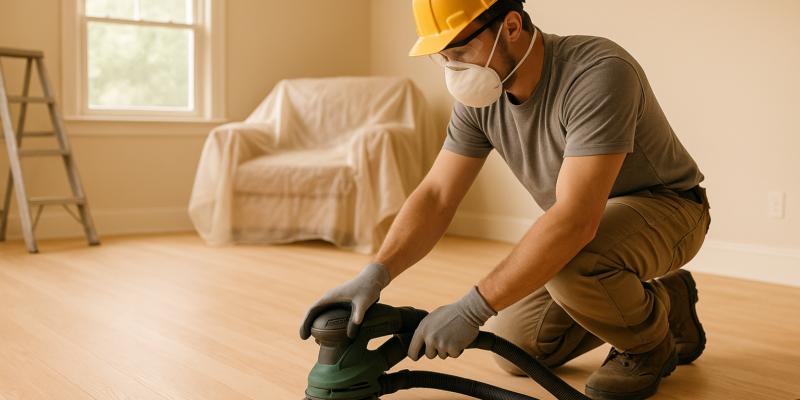
Using oscillating multi-tools instead of circular saws can also minimize dust production. Similarly, orbital sanders with dust collection attachments capture particles as they’re created, making them a smarter choice for sanding tasks. For demolition, a careful, methodical approach – controlled dismantling – is far better than aggressive tearing down, which often creates unnecessary dust clouds.

Another effective strategy is material staging. Store dusty materials like drywall and insulation in sealed areas, away from active work zones. When possible, pre-cut materials in a designated, ventilated area rather than cutting them throughout the job site. This approach keeps dust generation confined to one easily managed location.

Once you’ve taken steps to limit dust creation, consistent daily cleaning is key to maintaining control.

Daily Cleaning and Waste Removal

To effectively manage renovation dust, HEPA vacuum systems are a must. Use these vacuums at the end of each workday and after completing particularly dusty tasks to keep the area clean.

For surfaces, ditch the broom – damp microfiber cloths and mops are far more effective at capturing fine dust. Sweeping tends to stir up particles, while damp cleaning methods trap them. A two-step approach works best for floors: vacuum first to remove larger debris, then follow up with a damp mop to catch any lingering dust.

Promptly removing waste is another critical step. Don’t let debris like drywall scraps or insulation pile up for days. Bag these materials immediately using heavy-duty plastic bags, seal them tightly, and transport them to disposal areas to prevent particles from escaping.

At the end of each workday, implement these end-of-day protocols:

  • Seal any opened material packages.
  • Cover tools and equipment with plastic sheeting.
  • Ensure all waste containers have tight-fitting lids.

These steps prevent overnight dust migration and set the stage for a cleaner start the next day.

Worker Safety Equipment

Protecting workers is just as important as controlling dust. Respiratory protection is essential; N95 masks work for light dust exposure, but for heavier tasks, P100 respirators offer better filtration. Workers should use fresh masks daily and replace them as needed, especially if breathing becomes difficult.

Protective clothing acts as a barrier between workers and dust. Disposable coveralls with elastic cuffs and ankles prevent dust from settling on regular clothing. At the end of a shift, workers should remove and properly dispose of their protective gear in the containment area to avoid spreading dust to clean areas.

To further prevent the spread of particles, use boot covers and sticky mats. Place adhesive walk-off mats at every exit point from the work zone, and ensure workers step on them with both feet before leaving. Replace mats once they lose their stickiness, which typically happens after 30-60 uses, depending on the dust level.

Finally, set up hand and face washing stations near containment exits. Even with gloves and masks, fine dust can settle on exposed skin and hair. Simple stations with soap and water allow workers to clean up before leaving the work area, significantly reducing the risk of dust spreading throughout the building.

Checking That Control Methods Are Working

Keeping dust containment, HVAC protection, and cleaning practices effective requires regular inspections and air quality checks.

Daily Barrier Inspections

Physical barriers act as the first line of defense, but they only work if they remain intact. Each morning, inspect all plastic sheeting, tape seals, and zipper doors for any tears, loose edges, or areas where tape may have lost adhesion overnight. Factors like temperature changes and building movement can cause even properly installed barriers to shift or separate.

Pay close attention to high-traffic areas, such as doorways and material transport paths, as these are most likely to develop gaps. If you notice dust accumulating outside the designated work zone, it’s a clear sign the barriers may be compromised.

To confirm negative air pressure, ensure exhaust fans are running at appropriate speeds, filters are clear, and test by holding a lightweight tissue near the barrier edges – it should be drawn inward. After these visual checks, use particle counters to gather objective data on air quality.

Measuring Air Quality

While visual inspections are helpful, they don’t provide the full picture. Handheld particle counters can measure dust levels inside and outside work zones, typically detecting particles between 0.3 and 10 microns. Pay special attention to particles in the 0.5 to 2.5 micron range, as these can stay airborne for hours and pose risks to respiratory health and HVAC systems.

Start by establishing baseline dust levels in clean areas before work begins, then monitor these levels daily. Dust levels outside the work zone should stay close to the baseline throughout the project. If particle counts rise significantly, it may indicate that containment measures need improvement.

Real-time monitoring during active work can also identify which tasks, such as cutting or demolition, produce the most dust. If you’re managing an HVAC system, check air quality near return air grilles and in mechanical rooms – construction dust can quickly clog filters and reduce efficiency.

Keep a record of these measurements to identify trends and adjust containment strategies as needed.

Keeping Records

Consistent documentation turns routine monitoring into actionable project insights. Maintain a daily log that includes barrier conditions, air quality readings (with specific particle counts, times, and locations), and any repairs made. Weather notes and photos of barrier installations or damage can provide additional accountability.

For example, your log might include entries like:

  • Main hallway outside work zone: 1,200 particles/cubic foot at 9:00 AM
  • Main hallway outside work zone: 2,800 particles/cubic foot at 3:00 PM

Photographic evidence of barriers, damage, or dust accumulation can be critical for addressing occupant concerns or resolving cleanup responsibilities.

Additionally, track your filter replacement schedule and note the condition of filters during each change. If filters clog faster than expected, it could indicate that your containment methods aren’t capturing dust effectively. This information allows you to adjust strategies and better plan for future projects.

Weekly summaries of daily logs can reveal patterns that might not be obvious day-to-day, such as recurring spikes in particle levels or weak spots in containment. These trends can also signal when professional HVAC maintenance is necessary. Expert support, like that from Hydrodynamics, can help ensure your HVAC system remains efficient and air quality stays protected during renovations.

Key Points for Reducing Particulates During Renovations

When it comes to renovations, keeping particulates under control is all about using a mix of effective strategies. Here’s a closer look at some essential methods to manage dust and protect both air quality and equipment.

Physical containment is a must. Using sealed plastic sheeting and setting up negative air pressure systems creates a barrier to keep dust from spreading. But here’s the catch: these barriers only work if air is actively being pulled out of the work area. Without that pressure difference, even tiny gaps can let dust escape.

Protecting HVAC systems is another critical step. Isolating the renovation zones from the HVAC system prevents dust from circulating throughout the building. Shut down or block off air handling units in the renovation area, and install MERV 13 or higher filters to trap particles as small as 0.3 microns. This not only keeps dust contained but also safeguards expensive HVAC equipment.

Daily wet cleaning and HEPA vacuuming are key to keeping settled dust under control. By regularly cleaning surfaces and removing waste, you prevent dust buildup that could overwhelm containment systems, especially during busier phases of the project.

Continuous monitoring ensures everything is working as it should. Regular visual inspections of barriers and using particle counters to measure airborne dust levels help confirm the effectiveness of your containment efforts. Pay close attention to particles in the 0.5 to 2.5 micron range – they’re the most likely to stay airborne and pose risks to both respiratory health and HVAC systems.

FAQs

What health risks do particulates from renovations pose, and how can they be reduced?

Particulates released during renovation projects can seriously impact health, leading to respiratory problems like asthma, bronchitis, and COPD. Prolonged exposure can even result in more severe conditions such as silicosis or lung cancer. These risks are particularly concerning for workers and nearby residents.

To minimize exposure, it’s essential to take precautions. Start by suppressing dust with water when cutting or sanding materials. Next, contain the work area using barriers or plastic sheeting to keep particles from spreading. Finally, improve ventilation by using exhaust fans or creating negative air pressure to push contaminants outside. These measures can dramatically reduce airborne particles, providing better protection for everyone involved in the renovation process.

What are negative pressure systems, and how can they help control dust during renovations?

Negative pressure systems are a practical way to keep dust and debris contained during renovations. By creating lower air pressure in the work area compared to the surrounding spaces, they prevent airborne particles from drifting into other parts of the building.

Setting up a negative pressure system involves a few key steps. Start by using exhaust fans or negative air machines equipped with hoses that vent directly outdoors. To seal the work area, cover gaps, doors, and vents with plastic sheeting to block any escape routes for dust. Position the negative air machine as close as possible to the source of dust for maximum efficiency. To maintain proper containment, use pressure gauges to monitor airflow, aiming for a rate of 150–200 CFM. Following these guidelines can help keep your renovation space cleaner and safer.

How can I protect my HVAC system from dust during a renovation?

To protect your HVAC system from dust during renovations, begin by covering all vents, duct openings, and air handlers with plastic sheeting or vent covers designed for this purpose. This stops dust from infiltrating the system and spreading around your home. If possible, turn off the HVAC system during demolition or construction to reduce the risk of dust circulation.

Once the renovation wraps up, give the system a deep clean and replace the air filters to eliminate any leftover dust. Incorporating HEPA filters, setting up physical barriers, and keeping the workspace tidy throughout the project are additional steps that can safeguard your HVAC system and help maintain better indoor air quality.

How to Ensure Duct Insulation Meets Code

How to Ensure Duct Insulation Meets Code

  • Why it matters: Poor insulation can lead to higher energy bills, uneven temperatures, mold growth, and equipment damage.
  • Key regulations: U.S. standards like the IECC, ASHRAE 90.1, and IMC specify insulation requirements based on climate zones and duct location.
  • Inspection tips: Check insulation thickness, seal joints, and look for air leaks or condensation to ensure compliance.
  • Materials to use: Options include fiberglass wraps, rigid foam boards, and spray foam, each suited for specific applications.
  • Documentation: Keep records of R-value calculations, product certifications, and installation photos to pass inspections smoothly.

Bottom line: Proper planning, material selection, and installation are essential to meet code requirements and maintain an efficient HVAC system. Professional help can simplify the process and ensure compliance.

Module 5 Insulation Installation Requirements

HVAC Codes and Standards You Need to Know

Understanding the codes that regulate duct insulation is crucial for ensuring compliance with energy efficiency and safety standards. In the United States, several key regulations set legally enforceable requirements that local building departments uphold during inspections.

The International Energy Conservation Code (IECC) provides the primary framework for energy conservation, including insulation standards for heating and cooling systems. Most states adopt the IECC, sometimes tailoring it with local amendments to suit regional needs.

In addition, ASHRAE Standard 90.1 complements the IECC by offering more detailed energy efficiency guidelines. Since local building departments have the final say on which codes apply, it’s always a good idea to consult them before starting any insulation work to confirm the applicable version of the code and any local modifications. Let’s dive into the specific codes and standards shaping these requirements.

IMC, IECC, and ASHRAE 90.1 Requirements

ASHRAE

The International Mechanical Code (IMC) outlines the mechanical requirements for HVAC systems, including basic duct insulation provisions. However, the energy efficiency aspects are primarily governed by the IECC and ASHRAE 90.1.

The IECC specifies minimum R-values for insulation based on climate zones, ensuring energy efficiency for both the building envelope and ductwork. Meanwhile, ASHRAE 90.1 provides more detailed guidelines, addressing factors like duct location, temperature differences, and system efficiency. It also emphasizes proper installation techniques to avoid thermal bridging and ensure continuous insulation coverage.

How Climate Zones Affect Insulation Requirements

The United States is divided into eight distinct climate zones, accounting for moist, dry, and marine conditions. These zones play a critical role in determining insulation requirements, as thermal resistance needs vary based on local temperature extremes and seasonal weather.

For instance, in colder climates, higher R-values are essential to minimize heat loss from ducts carrying warm air. Conversely, in warmer climates, proper insulation prevents heat gain into ducts carrying cool air. The IECC establishes these minimum standards to optimize energy efficiency.

Here’s a quick look at climate zone–based insulation requirements:

Climate Zone Uninsulated Attic R-Value 3-4 inches Existing Attic Insulation R-Value Uninsulated Floor R-Value
1 R30–R49 R19–R38 R13
2 R49–R60 R38–R49 R13
3 R49–R60 R38–R49 R19
4 except Marine R60 R49 R19

To determine your project’s climate zone, refer to the IECC maps. Keep in mind that climate zone boundaries may vary by locality, so it’s essential to confirm specific requirements with your local building department. Once you’ve identified the correct zone, you can calculate and apply the appropriate R-value standards for your project.

How to Calculate Required Insulation R-Values

Start by identifying where your ducts are located and understanding the R-value requirements outlined by your local building codes. The R-value, which measures thermal resistance, plays a critical role in ensuring your system is both code-compliant and energy-efficient.

Pinpoint the areas where ductwork is installed to address the specific thermal demands of each location.

R-Value Requirements by Location and Application

The location of your ductwork determines the necessary R-value. According to the 2018 International Energy Conservation Code (IECC), supply and return ducts measuring 3 inches or larger generally require R-8 insulation in most climate zones. For ducts smaller than 3 inches, requirements may differ, so it’s essential to check local codes for precise guidelines.

In unconditioned spaces – like basements, crawl spaces, and garages – higher insulation levels are typically required. For example, the 2015 commercial IECC and ASHRAE 90.1 2016 specify an R-12 insulation requirement for commercial ducts located in unconditioned or exterior spaces within climate zones 5 through 8. Exterior installations, such as rooftop ducts or those in attics above insulated ceilings, face harsher conditions. ASHRAE 90.1 2016 defines these exterior spaces and emphasizes the need for higher R-values due to direct exposure to outdoor temperature extremes.

In conditioned spaces, where temperatures are more stable, lower R-values may suffice. However, proper insulation is still crucial to minimize energy loss. Additionally, the size of the ductwork affects insulation needs – larger ducts can transfer more heat due to their increased surface area, often requiring higher R-values.

After determining the required R-values, confirm their accuracy using official code references.

How to Verify R-Value Requirements in Code References

Once you’ve calculated the necessary R-values, verify them by consulting official code documents. The International Code Council (ICC) website, accessible at codes.iccsafe.org, provides access to I-Codes like the IECC. Their Digital Codes Premium Enterprise platform offers tools such as AI Navigator, Quick Consult New, a Q&A Database, and Compliance Calculators. Even basic read-only access to historical code versions is available.

To confirm R-value requirements for duct location and size, review section R403.3.1 in the 2018 IECC. Keep in mind that state and local regulations often modify these standards. For instance, California’s Title 24 outlines specific duct insulation requirements. Always cross-check national codes with local amendments, and verify the applicable version with your local building department.

For the latest ASHRAE standards, which detail thermal resistance requirements for commercial applications, visit the ASHRAE website directly. If you encounter complex scenarios, consider consulting an HVAC professional to ensure compliance and efficiency.

How to Inspect Existing Ductwork for Code Compliance

To ensure your ductwork meets code requirements, start by evaluating its insulation. Use the calculated R-values as your benchmark during the inspection to determine if the insulation is up to standard.

Before diving in, turn on your HVAC system. This step puts the ducts under operating pressure, making it easier to detect air leaks and evaluate the overall performance of your system.

Step-by-Step Insulation Quality Assessment

Begin by visually inspecting all accessible ductwork. Pay close attention to bends, registers, and junctions – these are common areas where gaps and air leaks can occur.

  • Check insulation thickness:
    Measure the insulation depth around the ducts and compare it to the R-value requirements you calculated earlier. In cases of blown-in or sprayed insulation, look for markers in attic spaces that indicate the original thickness, the settled thickness, and the effective R-value.
  • Test for air leaks:
    With the system running, feel along the seams, joints, and connections. If you notice air escaping, it’s a sign of compromised seals, which can reduce the effectiveness of insulation.
  • Conduct a smoke test:
    Use a smoke pencil or an incense stick near duct connections to identify subtle leaks that might be hard to detect by touch.
  • Inspect and document seams:
    Check all joints and seams to ensure they are securely sealed. Record any issues, including their location, type, and severity, to plan for repairs. Older installations, in particular, may have deteriorated or missing sealant that allows air to escape.

If you suspect significant issues, consider hiring an HVAC professional, such as Hydrodynamics Inc., to perform advanced diagnostics. They can use specialized tools like a duct blaster to pressurize the system and measure total air leakage precisely.

Warning Signs of Non-Compliant Insulation

After your inspection, keep an eye out for these red flags that may indicate insulation problems:

  • Higher energy bills:
    A sudden, unexplained spike in utility costs could mean your HVAC system is overworking due to poorly insulated or leaky ducts.
  • Uneven room temperatures:
    Hot or cold spots in different areas of your home may suggest that conditioned air is escaping before it reaches its intended destination.
  • Condensation on ductwork:
    If you notice condensation on ducts in unconditioned spaces like attics or crawl spaces, it’s a clear sign of insufficient insulation. This can lead to water damage, mold growth, and other structural issues.

    “Duct insulation and sealing are critical yet often overlooked aspects of maintaining an efficient and safe HVAC system.”
    – Season Control

  • Poor airflow:
    Weak airflow from vents might point to blockages, broken seals, or damaged ductwork that compromise insulation.
  • Mold or mildew odors:
    A musty smell or visible mold on duct surfaces indicates that condensation problems have worsened and need immediate attention.
  • Physical damage:
    Look for loose, detached, or compressed insulation, as well as kinked, tangled, or dented ductwork. These issues can reduce thermal resistance and signal that the insulation is no longer effective.
  • Excessive dust buildup:
    If you notice dust accumulating around vents and registers – even with clean air filters – it could be a sign of duct leaks that not only affect insulation but also indoor air quality.

To keep your system running efficiently and ensure it remains code-compliant, schedule professional inspections every 3 to 5 years – or sooner if you spot any of these warning signs.

sbb-itb-99db659

Choosing and Installing Code-Compliant Insulation

Picking the right insulation and installing it correctly is crucial to meet building codes and pass inspections. A poor choice of materials or sloppy installation can result in failed inspections and long-term energy inefficiencies.

Best Insulation Materials for Code Compliance

When it comes to code-compliant insulation, several options stand out:

  • Fiberglass duct wrap: A popular option for both residential and commercial use, this material comes in various insulation ratings to suit different climates. Many versions also include a built-in vapor barrier, which helps prevent condensation in unconditioned spaces like attics and crawl spaces.
  • Rigid foam board insulation: This material offers strong thermal performance and durability. Types like polyisocyanurate and extruded polystyrene are particularly effective, providing excellent insulation per inch of thickness. They work well with rectangular ductwork, which can be cut precisely for a snug fit.
  • Spray foam insulation: Known for creating an airtight seal, closed-cell spray foam also acts as a vapor barrier. However, it requires professional application and specialized equipment, which typically makes it a pricier option.
  • Duct board systems: These systems combine ductwork and insulation into one product. Made from pre-fabricated fiberglass panels with a protective facing, they simplify installation and deliver consistent thermal performance.
  • Reflective insulation: For budget-friendly projects in hot climates, reflective insulation can help combat radiant heat. However, it’s less effective in colder regions where heat loss through conduction is a bigger concern.

Once you’ve chosen the right material, proper installation is key to ensuring it performs as intended.

Proper Installation Techniques

Installing insulation correctly is just as important as selecting the right material. Here’s how to do it:

  1. Prepare the duct surface: Start by cleaning the ductwork thoroughly. Remove dust, debris, and any damaged insulation to create a clean surface for the new material.
  2. Seal joints and seams: Use HVAC-rated duct tape or mastic sealant to seal all joints and seams. Avoid standard household tape, which can fail over time due to temperature changes and humidity. Apply the sealant generously to ensure complete coverage.
  3. Install fiberglass duct wrap: Wrap the insulation snugly around the duct without compressing it, as compression reduces its effectiveness. Overlap seams adequately and seal them securely with the appropriate tape. Be sure to follow local guidelines for placing vapor barriers.
  4. Fit rigid foam boards: Cut the foam boards slightly larger than needed, then trim them for a precise fit. Use adhesives specifically designed for foam products, as some adhesives can damage the material. Seal all edges carefully to block air infiltration.
  5. Protect and support insulation: In areas like attics or crawl spaces, add a protective cover (such as wire mesh or thin plywood) to prevent accidental damage during maintenance. For heavier insulation, install supports at regular intervals to prevent sagging and maintain consistent coverage.
  6. Handle complex areas with care: Insulate tricky spots like elbows, tees, and transitions with carefully cut pieces to ensure continuous coverage and avoid gaps.

Finally, address any issues immediately. It’s far easier to fix problems before scheduling an inspection.

For peace of mind, consider hiring professionals like Hydrodynamics Inc. Their expertise in local code requirements and proper installation techniques can help you avoid common mistakes that lead to inspection failures or costly rework.

How to Document and Verify Code Compliance

Once you’ve installed insulation, it’s crucial to document everything thoroughly to confirm compliance with building codes. Proper documentation not only ensures your work meets standards but also helps secure approval to finalize your duct insulation project. These steps align with earlier installation guidelines, creating a seamless process from start to finish.

Documentation Needed for Code Compliance

After completing the installation, gather all necessary documents to verify your work complies with code requirements. Having everything prepared before the inspection will make the process smoother.

  • Product certifications: Collect manufacturer specification sheets that list R-values, fire ratings, and ASTM test results for all insulation materials used. Save original packaging labels, as inspectors may cross-check these with approved materials lists.
  • Installation records: Take clear, detailed photos throughout the process – before, during, and after installation. Focus on critical areas like duct joints, vapor barrier placement, and insulation thickness. If you deviated from standard procedures, document these changes and explain how they still meet code requirements. Include dated photos showing the condition of the ductwork before retrofitting began.
  • Calculation worksheets: Show how you determined the required R-values for your specific climate zone and application. Include copies of the relevant code sections and your calculations proving the insulation meets or exceeds minimum requirements. Some jurisdictions may require a licensed professional to sign these calculations.
  • Material receipts and invoices: Keep proof of purchase for all materials. Inspectors often verify that materials were sourced from legitimate suppliers and match the specifications in your application. Organize receipts by installation area or duct zone for easier review.
  • Contractor licenses and certifications: If you hired professionals for any part of the project, have their credentials ready. This includes HVAC contractor licenses, insulation installer certifications, and any specialized training relevant to the materials or techniques used.

For expert guidance on documentation and inspections, consider consulting Hydrodynamics Inc. Their experience can help streamline the process and ensure compliance.

How to Schedule and Pass Local Inspections

When you’re ready for an inspection, contact your local building department at least 48 hours in advance. Aim for a mid-morning appointment, as inspectors are often more focused and less rushed at this time of day.

  • Prepare the inspection area: Make sure all work is visible and accessible. Remove any temporary coverings or protective materials that could block the inspector’s view of the insulation. Have tools like a flashlight and measuring tape on hand for their convenience.
  • Walk through the installation: Guide the inspector through the project, highlighting key compliance features such as proper vapor barrier placement, adequate R-values, and sealed joints. Be ready to explain your methods and reference relevant code sections.
  • Address issues on the spot: If the inspector identifies problems, resolve them immediately if possible. For instance, if insulation appears compressed in some areas, you might need to provide thickness measurements from various locations to confirm the effective R-value still meets requirements.
  • Request detailed written feedback: If corrections are needed, ask the inspector to clearly outline the issues and reference specific code sections. This ensures you understand exactly what needs to be fixed before scheduling a follow-up inspection.

Hydrodynamics Inc. can also assist with inspections. Their knowledge of local requirements and familiarity with common compliance issues can increase your chances of passing on the first try, saving you time and money on your project.

Conclusion: Get Professional Help for Code Compliance

Ensuring your duct insulation meets code requirements is no small task. It involves more than just understanding the rules – it demands precise calculations, careful installation, and an eye for detail. Falling short can lead to inspection failures, higher energy bills, or even safety issues. Something as seemingly minor as a miscalculated R-value or a small installation mistake can set your project back, causing delays and expensive rework.

With variables like climate zone considerations, proper vapor barrier placement, and differences in local codes, navigating these requirements can quickly become overwhelming. That’s where professional expertise becomes invaluable.

Hydrodynamics Inc., a family-owned business serving clients since 1994, specializes in HVAC solutions for residential, commercial, and industrial needs. Their services span heating, air conditioning, ductless systems, and heat pumps, all with a focus on energy efficiency and strict code compliance.

Whether you’re retrofitting an existing system or starting a new installation, working with seasoned professionals ensures thorough assessments, faster inspections, and systems that perform at their best.

FAQs

What happens if duct insulation doesn’t meet code requirements?

Failing to meet duct insulation code requirements can have serious consequences. For starters, it can lead to increased energy bills, reduced HVAC performance, and uncomfortable indoor conditions. Poor insulation often allows air leaks, contributes to humidity problems, and may even encourage mold growth – all of which can negatively impact air quality and pose health concerns.

On top of that, non-compliance can bring fines, cause project delays, and create potential safety risks. By ensuring your duct insulation is up to code, you not only improve comfort and efficiency but also steer clear of expensive penalties and avoidable setbacks.

What R-value should I use for duct insulation in my climate zone?

The recommended R-value for duct insulation varies based on your climate zone and the ducts’ location. For ducts in unconditioned spaces, an R-value of R-6 to R-8 is typically suggested. However, in colder regions, higher values – such as R-13 or more – might be needed, particularly if the ducts are buried in ceiling insulation. In extremely cold climates, insulation standards for attics and walls can serve as a reference. For example, attics often require R-49 to R-60, while walls may need R-13 to R-21.

Be sure to check your local building codes and climate zone recommendations to ensure your duct insulation meets both energy efficiency and regulatory standards.

What are the best ways to ensure duct insulation meets building code requirements?

To ensure your duct insulation complies with building codes, start by choosing insulation with the right R-value for your area. For instance, R-6 is commonly required in unconditioned spaces, while climates with more extreme conditions might call for R-8 or even R-12 in exterior or vented attics.

Installation matters just as much as the insulation itself. Ducts should be fastened securely and sealed to prevent air leaks. Using vapor barriers where needed can guard against moisture issues. In spaces like attics, make sure the insulation is either buried or enclosed properly to maintain its effectiveness. Also, remember to follow airflow guidelines, ensuring proper spacing and pressure balance for better performance and compliance.

By following these steps, you not only meet code requirements but also boost energy efficiency and help your HVAC system last longer.

How to Test HVAC Efficiency Each Season

How to Test HVAC Efficiency Each Season

Seasonal HVAC testing keeps your system performing efficiently and reduces energy costs. By checking for issues like airflow problems, dirty components, or incorrect refrigerant levels, you can prevent expensive repairs and extend the life of your system. Here’s a quick breakdown of what you need to know:

  • Why test each season? Seasonal changes put different strains on your HVAC system. Regular testing helps identify problems early, such as dirty coils or low refrigerant, which can reduce efficiency by 10–30%.
  • Key efficiency metrics: Learn about SEER (cooling efficiency), HSPF (heating efficiency), and AFUE (fuel efficiency) to understand your system’s performance.
  • Tools to use: Essential tools include digital thermometers, anemometers, and refrigerant gauges to measure temperature, airflow, and pressure accurately.
  • Safety first: Always follow safety protocols when working with electrical components or refrigerants.
  • Seasonal maintenance tips: Clean filters, inspect ductwork, and clear debris around outdoor units to maintain efficiency year-round.

Testing your HVAC system ensures lower energy bills, better performance, and a longer lifespan. If your results show major issues, call a professional for deeper diagnostics and repairs.

HVAC Systems Testing for Energy Efficiency – Day 1

Tools and Equipment for HVAC Efficiency Testing

Having the right tools can mean the difference between precise diagnostics and mere guesswork. High-quality, professional tools are essential for year-round HVAC testing and maintenance. The key lies in understanding what each tool measures and how to use it safely when working with electrical components and refrigerants. These tools form the backbone of accurate seasonal assessments, ensuring your HVAC system performs reliably.

Testing Tools You’ll Need

To get started, you’ll need a range of specialized tools designed to measure various aspects of your HVAC system’s performance:

  • Digital thermometers: Opt for models with dual probes to simultaneously measure supply and return air temperatures. This allows you to calculate temperature differentials across the system, which is critical for assessing efficiency.
  • Anemometers: These devices measure airflow velocity, which is a key indicator of system performance. A hot-wire anemometer, in particular, can provide precise readings of air speeds, helping you identify issues like blocked filters, closed dampers, or undersized ducts that force the system to work harder.
  • Manometers: Use these to detect abnormal pressure drops across filters, coils, and ductwork. Such drops often point to underperforming components, like clogged filters or dirty evaporator coils.
  • Refrigerant manifold gauges: These gauges measure high and low pressure to verify the correct refrigerant charge. An improper charge can lead to reduced cooling capacity or excessive strain on the compressor.
  • Digital multimeters: These versatile tools measure electrical parameters such as voltage, current, and resistance. For example, if a blower motor is drawing unusually high amperage, it could signal worn bearings or debris buildup.
  • Data loggers: These are invaluable for tracking temperature and humidity over extended periods. They can reveal performance trends, such as a heat pump struggling at specific outdoor temperatures or an air conditioner cycling too frequently during peak usage.

Safety Equipment and Procedures

Once you’ve gathered the right tools, following strict safety protocols is non-negotiable. Working with HVAC systems involves potential electrical and refrigerant hazards, so taking proper precautions is essential.

  • Electrical Safety: Always turn off power at the breaker before opening any electrical panels or handling wiring. Use a non-contact voltage tester to confirm circuits are de-energized before starting work.
  • Refrigerant Handling: Refrigerants are stored under high pressure and can be hazardous. Wear safety glasses and gloves when connecting manifold gauges, and consider using a respirator with organic vapor cartridges to prevent exposure. Refrigerants can cause frostbite on contact and displace oxygen in confined spaces, so handle them with care.
  • General Safety Gear: Equip yourself with cut-resistant gloves, knee pads, and a headlamp for added protection and comfort, especially when working in tight spaces like attics or crawl spaces.

Before beginning any efficiency testing, clear debris around the equipment, ensure proper ventilation, and keep a Class C fire extinguisher nearby. Never work alone when dealing with high-voltage systems or confined spaces.

Tool Calibration

Accurate diagnostics depend on properly calibrated tools. Most digital instruments should be calibrated annually, though basic checks can be done more frequently. For example:

  • Calibrate thermometers using an ice bath (32°F) and boiling water (212°F).
  • Compare pressure gauges against a known standard or send them to a calibration lab for high-precision adjustments.

How to Test HVAC Efficiency by Season

Different seasons call for specific HVAC tests to ensure the system is running efficiently. For spring and summer, focusing on temperature differential testing is a reliable way to gauge air conditioning performance.

Testing Air Conditioning Efficiency in Spring and Summer

Start by running the air conditioner for 15–30 minutes. This allows the system to stabilize and ensures proper airflow and cycling are in place.

One essential method is Temperature Differential Testing. Use a digital thermometer to record the temperatures at the supply and return vents once the system stabilizes.

Then, calculate the difference by subtracting the supply vent temperature from the return vent temperature. A well-functioning unit should show a temperature difference of at least 15°F.

Understanding Your Test Results

After completing your seasonal tests, the next step is making sense of the performance numbers. These results provide a snapshot of your system’s current efficiency and overall health.

What Performance Numbers Tell You

Your test results should align with U.S. efficiency standards. For cooling systems, an ideal temperature difference between return and supply air is 15°F to 20°F. If the difference is less than 15°F, it could point to issues such as low refrigerant levels, dirty coils, or restricted airflow.

For heating systems, gas furnaces should produce supply air temperatures between 130°F and 170°F, depending on outdoor conditions and system design. Heat pumps, on the other hand, typically deliver supply air between 85°F and 105°F. While heat pump output may feel cooler compared to a furnace, it still effectively heats your home.

Airflow measurements are another critical factor. They should fall within manufacturer specifications, typically 350–450 CFM per ton. If airflow is below this range, the problem could be clogged filters, blocked ducts, or a malfunctioning blower motor.

To assess energy efficiency, compare your system’s actual energy usage to its rated performance. For electric systems, track your monthly kilowatt-hour (kWh) usage, and for gas units, monitor therms. Compare these numbers to previous years and manufacturer estimates to identify any inefficiencies.

When to Call a Professional

If your test results consistently fall outside the ideal ranges, it’s time to involve a professional. Here are some specific scenarios where expert help is necessary:

  • Cooling tests with temperature differentials below 15°F: This could indicate refrigerant leaks, compressor issues, or severe airflow problems.
  • Unusual energy usage: A sudden 20% or more increase in your energy bills, without changes in weather or usage patterns, suggests underlying efficiency problems.
  • System cycling issues: Short cycling – when the system frequently turns on and off in cycles shorter than 10 minutes – may be caused by electrical issues, refrigerant problems, or an oversized system.
  • Furnace supply air outside 120°F–180°F: This could signal issues with combustion, the heat exchanger, or gas pressure. Similarly, heat pump output outside the normal range requires attention.
  • Airflow below 300 CFM per ton: Low airflow or uneven temperatures across rooms might indicate ductwork problems, blower motor failures, or design flaws.
  • Carbon monoxide detection: If any heating system test reveals carbon monoxide, shut the system down immediately and seek professional service.

Even if individual readings seem acceptable, a gradual decline in performance over multiple seasons is a red flag. For example, an annual efficiency drop of 10% to 15% may indicate aging components that need evaluation or replacement planning.

If multiple concerning readings appear at once, it’s a sign of interconnected issues that go beyond basic troubleshooting. In such cases, a qualified HVAC professional can provide a comprehensive diagnosis and recommend the best course of action.

sbb-itb-99db659

Seasonal Maintenance for Better HVAC Efficiency

Keeping up with regular maintenance is key to ensuring your HVAC system runs efficiently. Once you’ve completed your seasonal efficiency tests, ongoing care helps your system maintain peak performance, use energy wisely, and provide consistent comfort throughout the year. This seasonal maintenance checklist works alongside your efficiency tests to keep everything in top shape.

Seasonal Maintenance Checklist

Spring Maintenance
Spring is the perfect time to get your cooling system ready for the warmer months ahead. Start by replacing air filters according to the manufacturer’s recommendations. Next, give some attention to the outdoor condenser unit – clear away leaves, dirt, and other debris, then gently rinse the coils with a garden hose. Be careful not to bend or damage the fins.

Switch your thermostat from heating to cooling mode. If you have a programmable thermostat, adjust its schedule to match the longer daylight hours and rising temperatures. Set cooling levels appropriately for when you’re home and away to maximize energy efficiency.

Summer Maintenance
During the summer, it’s all about ensuring your air conditioner can handle the heat. Check refrigerant lines for ice buildup, which could point to airflow problems or low refrigerant levels. Make sure the area around your outdoor unit is free from overgrown vegetation to allow proper airflow.

Take time to inspect ductwork in areas like basements, crawl spaces, or attics. Look for loose connections, damaged insulation, or air leaks. Sealing these leaks can improve system efficiency and help lower energy bills.

Fall Preparation
As fall rolls in, it’s time to shift focus to your heating system. Run a full heating cycle on your furnace or heat pump before the cold sets in, and pay attention to any unusual noises that might indicate worn components. Clean or replace filters to eliminate built-up dust and pollen, and ensure the area around your furnace is clear of clutter or flammable items. Maintaining a safe clearance around your heating equipment is essential for proper operation.

Winter Maintenance
In winter, when your system is working overtime, keep a close eye on its performance. Make sure vents and registers aren’t blocked by furniture or other items, as this can disrupt airflow and cause uneven heating. If you have a heat pump, check the outdoor unit regularly to remove any snow or ice buildup – but avoid using sharp tools that could damage the equipment.

Throughout all seasons, it’s important to lubricate moving parts like blower motors and fan bearings as specified by the manufacturer. While many modern systems have sealed bearings that don’t need lubrication, older units may require periodic oiling to keep them running smoothly.

How Regular Maintenance Improves Efficiency

By following these seasonal maintenance steps, you can ensure your HVAC system runs efficiently over the long term. Routine tasks like cleaning or replacing air filters help maintain airflow, while cleaning the coils supports effective heat transfer for both heating and cooling. Proper lubrication of moving parts reduces friction, helping the system operate more smoothly and efficiently.

Preventive maintenance also catches small issues – like a loose belt or a dirty flame sensor – before they escalate into bigger, more expensive problems. Addressing these minor concerns early can prevent breakdowns during extreme weather and help you avoid costly emergency repairs. Plus, regular upkeep often ensures compliance with manufacturer warranty requirements.

In short, a well-maintained HVAC system is not only more efficient but also more reliable, offering better comfort and energy savings throughout the year. By sticking to these seasonal tasks, you can keep your system running smoothly and in line with efficiency standards.

Hydrodynamics: Your Partner for HVAC Efficiency Testing

Seasonal check-ups and maintenance are great for keeping your HVAC system in shape, but some problems need more than just routine care. When efficiency issues go beyond what basic tests can uncover, it’s time to bring in the experts. This is where professional HVAC services step in, offering specialized tools and tailored solutions to tackle those tricky problems.

Professional HVAC Efficiency Services

Hydrodynamics Inc., a trusted name since 1994, has been delivering comprehensive HVAC services to residential, commercial, and industrial clients. Their efficiency testing relies on calibrated instruments to uncover problems that standard homeowner tests might overlook.

Their services include a thorough analysis of your system’s performance. From detecting refrigerant leaks to identifying ductwork inefficiencies or worn-out components, they dig deeper than surface-level inspections. They also ensure that temperature differentials and airflow pressures fall within the required ranges, leaving no stone unturned.

But they don’t stop at testing. If your system isn’t meeting performance standards, Hydrodynamics offers upgrades designed to improve efficiency and cut down on utility bills. Whether it’s modern heat pumps, ductless systems, or geothermal heating and cooling solutions, they bring advanced options to the table. For commercial clients, their expertise even extends to industrial heating equipment, offering tailored solutions for more complex systems.

To complement seasonal testing, Hydrodynamics provides preventative maintenance programs. These programs catch potential issues during routine service calls, helping to prevent problems before they impact your system’s performance. When combined with your own seasonal checks, their services ensure your HVAC system runs smoothly all year long.

Why Choose Hydrodynamics

As a family-owned and operated business since 1994, Hydrodynamics brings decades of hands-on experience to every job. Their local roots mean they’re familiar with the unique challenges posed by the area’s climate, ensuring your HVAC system is prepared to handle whatever the seasons bring.

What sets Hydrodynamics apart is their wide-ranging expertise. Unlike companies that focus on just one aspect of HVAC work, they handle everything – from basic repairs and installations to advanced industrial heating systems and waste oil systems. This all-encompassing approach allows them to evaluate your system’s efficiency from multiple angles and deliver solutions tailored to your specific needs.

Their dedication to energy-efficient solutions aligns seamlessly with the purpose of seasonal efficiency testing. Whether you’re looking for a quick tune-up to boost performance or a full upgrade to modern, high-efficiency equipment, their technicians are ready with options that help reduce energy usage and lower your bills.

For commercial and industrial clients, Hydrodynamics offers specialized services for large-scale systems like rooftop heating and AC units. These systems often have unique efficiency requirements that go beyond the scope of standard residential testing, making professional expertise essential.

When seasonal tests uncover issues or you need a deeper analysis, Hydrodynamics combines technical know-how with reliable service to keep your HVAC system operating at its best all year round.

Conclusion: Maintaining HVAC Efficiency Year-Round

Testing your HVAC system throughout the year is one of the easiest ways to protect your investment and keep energy costs in check. By prioritizing seasonal efficiency checks, you’re setting your system up for reliable performance and a longer lifespan.

Key Points to Remember

  • Regular testing reduces costs and extends system life. Routine maintenance not only lowers energy bills but can also significantly extend the lifespan of your HVAC system, which typically lasts 10–20 years. Tools like digital thermometers, manometers, and multimeters can help you catch minor issues early, preventing costly damage to major components like compressors and heat exchangers.
  • Clean filters, coils, and ducts improve indoor air quality. Keeping these components clean reduces the spread of dust, allergens, and other particles in your home, creating a healthier environment for everyone.
  • Safety is a priority. Seasonal checks can uncover hazards like refrigerant leaks, faulty wiring, or cracked heat exchangers that might lead to serious risks, such as carbon monoxide exposure.
  • Professional expertise matters. Services from companies like Hydrodynamics can identify hidden problems using advanced tools and knowledge, ensuring your HVAC system runs efficiently through every season.

By keeping these points in mind, you’ll be better equipped to maintain your HVAC system and enjoy consistent performance year-round.

Your Next Steps

To keep your system running efficiently, take these practical steps as you move forward with a proactive maintenance routine:

  • Focus on the upcoming season. Whether it’s prepping for the heat of summer or the chill of winter, start by checking air filters, inspecting visible components, and measuring temperature differentials to spot any early signs of wear or malfunction.
  • Establish a seasonal testing schedule. Plan comprehensive checks in spring and fall, and focus on season-specific components – like cooling systems in summer and heating systems in winter – when those systems are in use.
  • Know when it’s time to call a pro. If your testing reveals unusual temperature differentials (outside the typical 15–20°F range), abnormal pressure readings, or any safety concerns, contact an HVAC professional immediately. Regular professional maintenance is often required to keep your system’s warranty valid, ensuring both performance and financial protection.
  • Consider preventative maintenance programs. Combining your seasonal checks with professional inspections can help catch problems early, keeping your system efficient and reliable over time.

With these steps, you’ll be on your way to maintaining a comfortable, energy-efficient home while extending the life of your HVAC system.

FAQs

What are the warning signs that my HVAC system might need professional help after a seasonal checkup?

After completing a seasonal HVAC efficiency test, certain signs might suggest your system needs professional attention. Keep an ear out for strange noises like banging or rattling, and take note of unpleasant odors or uneven temperatures throughout your home. If your energy bills suddenly climb without an obvious explanation, it could point to an issue with efficiency.

Other warning signs include weakened airflow, the system cycling on and off more frequently than normal, or struggling to maintain your preferred temperature. Tackling these problems quickly with professional help can prevent further damage and keep your HVAC system running smoothly all year long.

How often should I calibrate my HVAC testing tools for accurate results?

To get precise readings, HVAC testing tools need to be calibrated at least once a year. For tools involved in more critical measurements, it’s better to calibrate them every six months.

Routine calibration is key to keeping your equipment dependable and ensuring your HVAC system runs smoothly. Be sure to check and follow the manufacturer’s recommendations for calibration schedules specific to your tools.

What key metrics should I monitor to evaluate my HVAC system’s efficiency each season?

To get a clear picture of how well your HVAC system performs year-round, keep an eye on a few essential performance metrics:

  • Seasonal Energy Efficiency Ratio (SEER): This measures how efficiently your system cools your home during the summer months.
  • Heating Seasonal Performance Factor (HSPF): This evaluates your system’s heating efficiency during colder weather.
  • Energy Efficiency Ratio (EER): A quick way to gauge overall energy performance.
  • Coefficient of Performance (COP): This shows how effectively your system converts energy into heating or cooling.

By tracking these metrics, you can ensure your HVAC system is running smoothly, cut down on energy costs, and spot areas that might need improvement. Regular monitoring can also help your equipment last longer and keep your indoor environment comfortable no matter the season.

How to Get Your Air Conditioner Working Like New

How to Get Your Air Conditioner Working Like New

When the summer heat peaks in Northeastern Pennsylvania, air conditioners often run at full capacity, sometimes from dawn until bedtime. As a homeowner, business operator, or industrial manager, the last thing you want is for your AC system to malfunction during these sweltering months. Fortunately, there are simple maintenance tasks you can perform yourself to ensure your air conditioner operates at peak efficiency and avoids costly breakdowns.

This guide breaks down the essential steps you can take to get your air conditioner working like new – without the need to call an HVAC professional. These steps are straightforward, require no special skills, and can save you hundreds of dollars in service fees.

Understanding the Problem: Why Maintenance Matters

Your air conditioning system works hard to keep your space cool, but this comes at a cost: wear and tear. Common issues like algae build-up in condensation lines, dirty fins, or poorly selected air filters can hamper your system’s performance and even lead to catastrophic water damage if left unchecked.

The good news? Regular maintenance can make a world of difference. By taking a proactive approach, you can extend your AC’s lifespan, lower energy bills, and improve comfort levels in your home or workplace.

Step 1: Inspect and Clean the Condensation Line

The condensation line is one of the most overlooked components of a central AC system but is critical to its functionality. It’s responsible for draining the water your system produces, especially during humid summer months. Over time, algae, mold, and bacteria can accumulate in the line, leading to clogs, water backup, and shutdowns.

How to Check and Clean the Line:

  1. Turn Off the Power: Start by shutting off your AC unit at the breaker panel to ensure safety. Check for any secondary on/off switches near your AC unit, as these also need to be turned off.
  2. Locate the Condensation Line: Identify the PVC pipe running from your AC unit to the outside of your home.
  3. Seal the Outlet: Use a cork that fits snugly into the pipe’s exterior end to block the outlet.
  4. Add Cleaning Solution: Carefully pour a safe, biodegradable cleaning agent, like distilled white vinegar, into the pipe. Vinegar is effective at breaking down algae and bacteria while being eco-friendly.
  5. Wait and Rinse: Allow the solution to sit for 30–60 minutes, depending on the level of buildup. Afterward, flush the line multiple times with hot water to clear debris.
  6. Clear the Trap: Use a flexible cleaning tool or "snake" to remove stubborn blockages, particularly around bends or traps in the pipe.

By maintaining a clean condensation line, you prevent water backup that could trigger float switches, shut down your AC, or, worse, cause extensive water damage.

Step 2: Clean Your AC Fins

The aluminum fins on your outdoor AC unit play a vital role in heat exchange. Over time, they can collect dirt, dust, and debris, reducing airflow and efficiency. Cleaning these fins can make a noticeable difference in the temperature of the air coming out of your vents.

Cleaning Process:

  1. Use Castile Soap: Apply a gentle, biodegradable Castile soap solution to the fins. Avoid harsh chemicals or bleach that could corrode the material.
  2. Careful Rinsing: Use a garden hose with light pressure to rinse off the soap. Never use a pressure washer, as the high force can bend the delicate fins.
  3. Straighten Bent Fins: If you notice any bent fins, use a fin comb to straighten them. Bent fins can block airflow and strain your system.

This step not only improves your AC’s efficiency but also reduces its runtime, saving you money on electricity.

Step 3: Choose the Right Air Filter

A high-quality, properly selected air filter is essential for maintaining good airflow while protecting your AC system from dirt and particles. However, it’s a common misconception that a higher Minimum Efficiency Reporting Value (MERV) always equals better performance. Overly restrictive filters can hinder airflow, causing the fan motor to work harder and reducing overall efficiency.

Tips for Selecting a Filter:

  • Opt for a Low MERV Filter: A MERV rating of 1–4 is sufficient for catching larger particulates without straining the system.
  • Replace Regularly: Check your filter every 1–3 months during peak cooling seasons and replace it as needed.
  • Consider Whole-House Air Filtration: For improved indoor air quality, invest in a separate air filtration system rather than relying solely on your AC.

By using the right filter and maintaining it regularly, you enhance airflow and help your system maintain a steady, comfortable temperature.

The Hidden Costs of Neglecting Maintenance

Neglecting basic maintenance doesn’t just lead to reduced cooling – it can result in costly consequences. For example, a clogged condensation line can cause water damage to floors, walls, and ceilings, especially if your AC system is located in an attic or second-floor utility room. Additionally, dirty fins or restrictive filters make your system work harder, leading to higher energy bills and potential equipment failure.

Proactive maintenance saves you the hassle of emergency repairs and ensures your AC system runs efficiently for years to come.

Key Takeaways

  • Turn Off Power First: Always switch off your AC unit at the breaker and any secondary controls before performing maintenance.
  • Clean Your Condensation Line: Use white vinegar to kill algae and bacteria, and flush the line with hot water. Check for clogs in the trap and clean thoroughly.
  • Maintain Aluminum Fins: Wash outdoor fins with Castile soap and gently rinse to improve airflow and cooling efficiency.
  • Use Low MERV Filters: Avoid overly restrictive filters; instead, choose ones that balance airflow and particle capture.
  • Inspect Regularly: Perform these simple maintenance tasks every 3 months or at least annually to prevent major issues.
  • Prevent Water Damage: By keeping the condensation line clear, you avoid costly repairs caused by leaks and overflows.
  • Extend Lifespan and Save Money: Proper maintenance reduces strain on your AC system, saving on energy costs and repair bills.

Conclusion

Taking care of your air conditioning system doesn’t have to be complicated or expensive. By following these easy-to-implement steps – cleaning the condensation line, washing the fins, and using the right air filter – you’ll ensure your system operates efficiently and lasts longer.

For homeowners, business operators, and industrial managers in NEPA, these proactive measures are particularly vital, given the region’s humid summers. A well-maintained AC system not only keeps your indoor spaces comfortable but also reduces energy consumption and maintenance costs.

Incorporate these steps into your routine, and enjoy cool, stress-free summers without the need for costly emergency repairs. Your air conditioner – and your wallet – will thank you.

Source: "How To Get Your House Air Conditioner To WORK LIKE NEW | Save Thousands!!!" – Zen Garden Oasis, YouTube, Aug 16, 2025 – https://www.youtube.com/watch?v=L0oVq7K4774

Use: Embedded for reference. Brief quotes used for commentary/review.

How to Troubleshoot Solar Water Heater Issues

How to Troubleshoot Solar Water Heater Issues

Solar water heaters are cost-effective and eco-friendly but can encounter problems like lukewarm water, leaks, or odd noises. Fixing these issues often involves simple steps like adjusting the thermostat, cleaning panels, or checking for leaks. Here’s what you should know:

  • Common Problems: Inconsistent water temperature, visible leaks, strange noises, reduced water pressure.
  • Causes: Dirty collector panels, air pockets in lines, low system pressure, poor insulation, or faulty components.
  • Fixes: Clean panels, bleed air from lines, inspect for leaks, adjust thermostat settings, and test the circulation pump.
  • Safety Tips: Turn off power and gas, let the system cool, wear protective gear, and inspect the work area for hazards.
  • Maintenance: Regular cleaning, flushing, pressure checks, and annual professional inspections can prevent future problems.

For complex issues like electrical repairs or major leaks, call a professional to ensure safety and proper repairs.

Solar water heating system, not heating, element, thermostat, anode replacement. Thermosiphon Geyser

Common Solar Water Heater Problems

Solar water heaters can run into issues from time to time, and catching the warning signs early can save you from expensive repairs down the road.

Warning Signs of System Problems

One of the most common red flags is inconsistent water temperatures. Maybe your water takes longer to heat up in the morning, stays lukewarm even when the sun is shining bright, or suddenly turns cold mid-shower. If you notice temperature swings of more than 10°F from your usual settings, it’s worth investigating.

Visible leaks are another clear indicator. Look for drips or moisture around pipes, connections, or the storage tank. Even small leaks can waste water and lead to further damage. Pay close attention to the collector panels, pump housing, and pipe joints for signs of moisture or mineral residue, which could point to slow leaks.

Odd noises coming from the system should also raise a red flag. Gurgling sounds often mean air is trapped in the lines, while grinding or squealing noises from the circulation pump could signal worn bearings or debris. If you hear banging or hammering when water flows, it might be a pressure issue that needs immediate attention.

Your system’s digital controller can also provide valuable clues. Error messages like sensor failures, pump issues, or temperature warnings shouldn’t be ignored. Persistent error codes usually require a professional to diagnose the problem.

Lastly, if you’re experiencing reduced water pressure throughout your home, it could be related to your solar water heater. Sediment buildup in the heat exchanger or blocked circulation lines is often to blame. If the pressure drop occurs after installing or servicing the system, it’s likely connected.

Recognizing these warning signs is important because they often point to common underlying problems.

What Causes Performance Problems

Dirty or damaged solar collector panels are a frequent culprit when heating issues arise. Dust, debris, or mineral buildup on the panels can block sunlight and reduce heat absorption by as much as 25%. Cracked glass or damaged absorber plates further disrupt heat transfer.

Air pockets in the circulation lines can also cause trouble. These pockets block water flow and create hot spots that may damage components. Air often gets trapped after maintenance, power outages, or when system fluid levels are low, preventing the circulation pump from doing its job efficiently.

Incorrect system pressure is another common issue. Low pressure can reduce circulation and allow air to enter the system, while high pressure puts stress on seals and connections, leading to leaks. Most residential systems operate best in the 15-30 PSI range.

Poor insulation around pipes and the storage tank can lead to heat loss before the water even reaches your faucets. Over time, insulation breaks down due to UV exposure, moisture, or temperature changes, which can cut system efficiency by 15-20%.

Faulty temperature sensors can cause the system to malfunction. For example, they might send inaccurate readings to the controller, causing the backup heater to run unnecessarily or preventing the circulation pump from activating when it should. These issues often develop gradually, making them harder to spot early on.

Scale and sediment buildup is especially problematic in areas with hard water. Mineral deposits can clog heat exchangers and restrict water flow, acting like insulation that blocks efficient heat transfer. Systems in regions with water hardness above 10 grains per gallon are particularly prone to this issue.

Finally, pump and controller failures can disrupt the system’s automatic functions. Circulation pumps generally last 8-12 years, but they can wear out sooner if debris or air pockets cause strain. Electronic controllers, on the other hand, are vulnerable to power surges, moisture, and aging components.

Safety Steps Before Starting

Working on a solar water heater requires careful preparation to avoid injuries. These systems can reach extremely high temperatures and involve electrical and plumbing components that demand proper handling.

Turn Off Power and Gas

Start by shutting off the system’s circuit breaker and any nearby disconnect switches.

If your system includes a backup gas water heater or gas booster, turn off the gas supply valve. This valve is typically located on the gas line leading to the unit. Rotate it until it’s perpendicular to the pipe to stop the gas flow. Once the valve is closed, allow a few minutes for any remaining gas to dissipate before starting your work.

To ensure all power sources are off, check the system’s digital display or controller. Some systems may have multiple electrical connections, so double-checking is essential.

Once the power and gas are fully turned off, you can move on to cooling the system and preparing for the task ahead.

Let System Cool and Wear Protection

Solar collectors can reach extreme temperatures during operation. According to NextEnergy, “Solar collectors can reach temperatures exceeding 180°F on sunny days”. Additionally, the water in the storage tank can become dangerously hot, with discharge temperatures potentially exceeding 125°F.

Before starting any repairs, let the system cool completely to avoid burns.

Wear the right protective gear, including heat-resistant gloves, safety glasses, and long-sleeved clothing. If the system uses heat transfer fluids like propylene glycol, handle them carefully, as they can be hazardous.

Check Your Work Area

Inspect the work area thoroughly for potential hazards. Look for standing water, which could indicate leaks or create slip risks, especially near electrical components.

Ensure the area is well-lit. Many solar water heater components are located in basements, utility rooms, or rooftops where natural light may be limited. Using a flashlight or work light can help you work more safely.

Pay attention to any unusual smells, such as burning, gas, or chemicals. If you notice anything concerning, stop immediately and call a qualified technician.

Clear away debris and obstacles to prevent trips and maintain easy access to the electrical panel. Keep a phone within reach in case of emergencies.

For rooftop work, check the weather conditions. Avoid working during windy, wet, or icy conditions. If you’re not comfortable with heights, it’s best to leave rooftop tasks to a professional. Always use proper ladder safety techniques if you decide to proceed.

How to Fix Common Issues

Once safety measures are in place, you can tackle common problems step by step. Start with the simplest fixes before moving on to more complex solutions.

Check Thermostat Settings

Temperature issues are often the easiest to address. Solar water heaters may use various control systems, like thermostatic mixing valves (TMVs), dedicated thermostats for backup heaters, or manual controls. Before adjusting the thermostat, consult your owner’s manual and gather any necessary tools.

Most systems are designed to maintain water temperatures between 120°F and 140°F (49°C to 60°C). If your system includes an electric backup heater, make sure the power is switched off at the circuit breaker before you begin. Locate the thermostat, usually near the bottom of the tank, and remove its cover. Adjust the settings as follows:

  • For primary thermostats, use the dial or digital display to set the temperature within the recommended range.
  • For TMVs, adjust the knob located near the outlet pipe.
  • For backup heaters, set the thermostat to approximately 50–60°C for safety.

Once adjustments are complete, replace the cover and restore power.

Clean and Inspect Solar Panels

Keeping your solar panels clean and intact is essential for efficient performance. Start by inspecting the panels for any visible damage, such as cracks, chips, or broken glass. Even small imperfections can affect efficiency, so address them as soon as possible.

Check for new sources of shade that could block sunlight, like overgrown trees, new buildings, or accumulated debris. Clean the panels during cooler times of the day using mild soap, water, and a soft brush or cloth. Avoid abrasive tools, as they can scratch the surface.

Be on the lookout for damage caused by severe weather, such as hail, strong winds, or falling debris, which can harm both the glass and the components underneath.

Look for Leaks and Worn Parts

Leaks and damaged components can reduce performance and cause further issues if not addressed. Common problems include loose or damaged pipe connections, cracked storage tanks, faulty valves, worn solar collector tubes, sediment buildup, corrosion, and effects of thermal expansion or contraction .

Signs of trouble include water stains, pressure drops, pooling water, or hissing sounds.

Inspect pipes, fittings, and components for moisture or corrosion. If you find minor issues – like a loose fitting or a worn seal – tighten or replace the parts. For major problems, such as a cracked tank or significant leaks, seek professional help immediately to prevent further damage.

Test Circulation Pump Function

If your system uses a circulation pump to transfer heated fluid from the solar collectors to the storage tank, ensure the pump is working properly. A functioning pump should emit a quiet humming sound. If it’s silent or making loud grinding or rattling noises, it might be failing.

Feel the pipes near the pump to check for warmth or slight vibrations, which indicate water flow. Inconsistent heating or gurgling sounds could mean air is trapped in the system. If this happens, refer to your owner’s manual for instructions on bleeding air from the collector loop’s highest points. Also, check the pump’s electrical connections to ensure they’re secure and free of corrosion.

Once the pump is working correctly, you can reset the system.

Reset the System

After completing repairs, reset your system. Restore power and gas, then check the pressure gauge, which should read between 12–30 PSI when cold. Monitor the system as it stabilizes and ensure hot water flows consistently at all faucets.

If problems persist despite your efforts, it’s time to reach out to professionals like Hydrodynamics Inc. for expert service and maintenance.

sbb-itb-99db659

Maintenance Tips

Keeping your solar water heater in good shape not only ensures efficient operation but also helps you avoid costly repairs. With regular care, your system can serve you reliably for years, making maintenance a smart way to boost your home’s energy efficiency. Incorporate these tips into your routine to extend the life of your system.

Regular Cleaning and Inspections

Clean your solar collectors a few times a year to remove dust, pollen, and bird droppings that can reduce their efficiency. Aim to clean during the cooler parts of the day to avoid temperature-related stress on the panels.

Use a garden hose with a gentle spray nozzle to rinse off debris. For tougher spots, a soft brush or squeegee with mild detergent works well. Stay away from abrasive cleaners, steel wool, or high-pressure washers, as these can damage the protective glass coating. If your panels are hard to access, a telescoping brush designed for solar panels can make the job easier.

While cleaning, take a moment to inspect the system. Look for shading caused by overgrown trees, debris like leaves or snow, and signs of wear on mounting hardware. Check pipes and fittings for discoloration, leaks, or mineral deposits, which could signal potential issues.

Keep an eye on your energy usage and utility bills – sudden changes might indicate a drop in system performance. Recording your maintenance activities can also help you identify patterns and address problems early.

Flushing and Pressure Checks

Routine system flushing, as recommended by the manufacturer, helps prevent mineral buildup that can compromise performance. Additionally, test the pressure relief valve regularly. If it doesn’t release water or if it drips constantly, it may need replacement.

For closed-loop systems, periodic draining and refilling are essential to maintain the heat transfer fluid, which can degrade over time. This task requires specialized equipment, so it’s best left to a professional.

Professional Inspections

While many maintenance tasks can be handled at home, scheduling an annual inspection with a qualified technician is a wise move. Professionals can test electrical components, fine-tune system controls, and conduct a thorough performance assessment, catching potential issues before they escalate.

Keep detailed records of all maintenance, including dates, tasks performed, and parts replaced. These records are not only helpful for technicians but can also be crucial for warranty claims.

For expert care and troubleshooting, you can rely on Hydrodynamics Inc. Their team can optimize your system’s performance and address any component issues promptly. Tackling small problems early can save you from bigger headaches down the road.

Quick Reference Guide

When problems pop up, this guide can help you quickly identify and address common issues. It builds on earlier troubleshooting steps to provide a handy reference for frequent problems and their fixes.

Take a look at the chart below to diagnose issues and find practical solutions.

Problem and Solution Chart

Problem Likely Cause Solution When to Call a Pro
No hot water at all Thermostat set too low, tripped circuit breaker, or pump failure Check the thermostat (set it between 120–140°F), reset the breaker, and listen for pump activity If major repairs are required
Water not hot enough Dirty solar collectors, shading, or low fluid levels Rinse off the panels, trim any obstructing vegetation, and check the fluid reservoir If fluid replacement or system rebalancing is needed
Takes too long to heat Air in system lines, weak pump, or mineral buildup Bleed air from the system, listen for unusual pump sounds, and flush the system if minerals are clogging it If the pump needs replacing or mineral deposits require professional cleaning
Strange noises (gurgling, banging) Air bubbles, loose hardware, or pump cavitation Bleed air, tighten bolts and brackets, and inspect the pump inlet for clogs If pump bearings are worn or pressure adjustments are beyond DIY
Pipe leaks Loose fittings, worn gaskets, or freeze damage Tighten fittings with a wrench and replace worn seals If pipes are cracked, corroded, or leaking at collector connections
System pressure too high Faulty relief valve or overheating Test the relief valve by lifting its lever and ensure proper ventilation around the collectors If the valve needs replacing or system controls need recalibration
Rusty or discolored water Corroded tank, deteriorated anode rod, or contaminated fluid Inspect the anode rod, flush the tank, and test water quality If the tank needs replacing or fluid contamination requires professional help
Pump runs constantly Faulty sensors, stuck relay, or incorrect controller settings Check sensor connections, review controller settings, and test differential adjustments If sensors need replacing or the controller shows internal errors
Ice formation in winter Poor freeze protection, failed circulation, or low antifreeze levels Ensure circulation during freezing conditions and check antifreeze concentration in closed systems If freeze damage has occurred or the antifreeze mixture needs professional testing

Quick Temperature and Pressure Tips

  • Temperature: Ideal water temperature is between 120–140°F.
  • Pressure: Normal system pressure should stay within 12–25 PSI.

For major leaks or more complex problems, reach out to Hydrodynamics Inc. Their certified technicians have been solving residential, commercial, and industrial water system issues since 1994. With decades of expertise, they’re equipped to handle even the toughest repairs.

Emergency Situations

If you smell gas, notice sparking electrical components, or encounter significant water leaks, shut off both the power and water supply immediately. Then, call a professional for assistance.

This guide focuses on the most frequent issues homeowners face with solar water heaters. Some problems might have multiple causes or require several steps to fix, so it’s always best to begin with the simplest solution and move on if the problem persists.

Final Tips

Let’s tie everything together with some practical advice for tackling solar water heater issues. The key? Start simple. Check the thermostat settings, look for leaks, and clean the panels. These straightforward steps often resolve common problems without needing specialized tools or technical know-how.

Know when to step back. While tasks like adjusting temperatures, cleaning panels, or bleeding air from the system are safe for most homeowners, it’s best to leave complex jobs – like electrical repairs, significant plumbing fixes, or pump replacements – to the pros.

Document your troubleshooting and maintenance efforts. Keeping a record not only helps professionals understand what’s already been done but also makes future troubleshooting quicker and smoother.

Routine maintenance is your best defense against problems. Regularly clean the collectors, monitor system pressure, and consider scheduling annual inspections. A little upkeep goes a long way in preventing bigger headaches.

If you hit a wall with DIY solutions, Hydrodynamics Inc. is a trusted resource. This family-owned business has been delivering dependable HVAC and plumbing services since 1994. Their certified technicians are well-versed in all types of water heating systems, serving residential, commercial, and industrial clients alike.

And let’s not forget the golden rule: safety first. If you notice gas odors, sparks, or major leaks, immediately shut off the power and water, then call for emergency assistance. With proper care and professional support when needed, your solar water heater can provide reliable hot water and energy savings for years to come.

FAQs

Why is my solar water heater making strange noises, and how can I fix it?

Unusual sounds coming from your solar water heater – like banging, gurgling, or popping – can often point to trapped air, sediment buildup, or water flow challenges. Here’s how you can tackle these issues:

  • Release trapped air by bleeding the system. This helps restore smooth operation.
  • Flush and clean the tank to clear out sediment deposits, which are common culprits behind popping or banging noises.

If these noises don’t go away, the problem might be more serious, such as overheating or mineral buildup inside the system. Regular maintenance, including draining and flushing, can go a long way in preventing these problems. For more complicated issues, it’s a good idea to reach out to professionals, like Hydrodynamics Inc., to keep your system running smoothly.

How can I tell if the temperature sensors in my solar water heater aren’t working?

To determine whether the temperature sensors in your solar water heater are functioning properly, start by using a multimeter to measure their resistance at room temperature. Then, compare the measurement to the manufacturer’s guidelines. If there’s a noticeable difference between the reading and the specified range, this could point to a problem.

A key red flag: if the resistance remains unchanged when the sensor is exposed to hot water or varying temperatures, it’s likely not working as it should. Additionally, resistance readings that are unusually high or low, instead of staying steady, can also signal a malfunction. If you notice any of these issues, consider replacing the sensor or seeking help from a professional for a thorough inspection.

What regular maintenance should I perform to keep my solar water heater working efficiently?

To ensure your solar water heater stays in good working condition, make it a habit to visually inspect the system every six months. During these checks, watch for any signs of damage, leaks, corrosion, or debris buildup. It’s also important to keep the area around the system clean and free from obstructions.

Clean the solar collectors once a year to clear away dirt, dust, and leaves that can hinder their efficiency. Similarly, flushing the tank annually helps remove sediment buildup, which can otherwise affect performance and reduce the system’s lifespan.

Regular maintenance like this helps your solar water heater run efficiently and keeps it performing well for years.

Top 5 Wiring Standards for Gas Furnaces

Top 5 Wiring Standards for Gas Furnaces

Gas furnace wiring is more than just connecting wires – it’s about ensuring safety, efficiency, and compliance with electrical codes. Following proper standards prevents risks like fires, gas leaks, or carbon monoxide poisoning. The National Electrical Code (NEC) sets the foundation for wiring practices, with additional rules from local jurisdictions. Here are the top five wiring standards you need to know:

  • NEC Compliance: Gas furnaces must use dedicated circuits, proper grounding, and accessible disconnects for safety and maintenance.
  • Correct Wire Sizing: Use the right wire gauge and breaker size (e.g., 12 AWG with a 20-amp breaker) to avoid overheating and ensure efficiency.
  • High-Voltage vs. Low-Voltage Wiring: Keep 120V/240V circuits for main components separate from 24V control circuits to prevent interference and hazards.
  • Circuit Protection and Grounding: Use proper breakers, grounding methods, and surge protection to safeguard the system and your home.
  • Control Wiring for Smart Thermostats: Properly install 18 AWG thermostat wires, include a C-wire for smart devices, and follow standard color codes.

Each of these practices ensures your furnace operates safely and reliably while meeting modern energy and safety standards.

Gas Furnace Wiring Diagram Electricity for HVAC

1. National Electrical Code (NEC) Compliance

The NEC serves as the cornerstone for electrical and control wiring practices, ensuring that gas furnace installations meet strict safety and operational standards. It specifies that gas furnaces must be on dedicated circuits, properly grounded, and equipped with accessible disconnects.

Safety and Code Compliance

According to NEC Article 422.12, gas furnaces – classified as central heating equipment – must be powered by their own individual branch circuit. This ensures a stable and safe power supply. Additionally, all furnace components must be grounded to redirect any stray electrical currents, reducing the risk of electrical hazards.

The NEC also mandates the inclusion of an accessible power disconnect for every gas furnace installation. This feature allows technicians to safely cut off power during maintenance or emergencies, enhancing both safety and ease of service.

Ease of Maintenance and System Upgrades

Adhering to NEC standards simplifies routine maintenance and system upgrades. For example, having a dedicated disconnect allows HVAC technicians to isolate power quickly and safely when working on the unit.

For systems using Corrugated Stainless Steel Tubing (CSST) gas piping, the NEC requires proper bonding. This ensures the piping integrates seamlessly with the home’s electrical grounding system, maintaining overall safety. Additionally, careful consideration of wire sizing and breaker selection is essential to align with these NEC requirements, supporting both safety and efficiency.

2. Correct Wire Sizing and Breaker Selection

When it comes to installing a gas furnace, following NEC guidelines for wire sizing and breaker selection is not just about meeting code – it’s about ensuring safety, efficiency, and long-term serviceability. Choosing the right wire gauge and breaker size is essential for safe and efficient furnace operation.

Safety and Code Compliance

The size of the wire you select has a direct impact on the safety of your gas furnace setup. For standard gas furnaces, 12 AWG wire paired with a 20-amp breaker is typically sufficient. However, high-efficiency furnaces often demand 10 AWG wire with a 30-amp breaker to handle their higher electrical needs.

The principle here is simple: match the wire’s capacity to the furnace’s electrical demand, while accounting for a safety margin. Undersized wires can overheat, leading to insulation failure, electrical fires, or damage to the system.

To ensure safety, apply the 125% rule. For example, if your furnace draws 16 amps, a 20-amp breaker provides the necessary overhead to prevent tripping and protects the circuit from overload.

In certain installations – like basements, crawl spaces, or other damp areas – ground fault protection (GFCI) is critical. Local codes may require GFCI protection in these environments to mitigate risks associated with moisture exposure.

Beyond safety, proper wire sizing also plays a role in the furnace’s overall performance and energy efficiency.

Energy Efficiency and Performance

Wire sizing doesn’t just keep your system safe; it also ensures your furnace operates efficiently. Using wires that are too small can cause voltage drops. This forces the furnace’s components, like the blower motor, to work harder, increasing energy consumption and reducing performance.

Voltage drops can also lead to reduced heating capacity and intermittent ignition issues. Properly sized wires maintain voltage stability, even during the furnace’s startup surge, allowing all components to function as intended. This stability is key to achieving optimal energy efficiency.

The length of the wire run is another important factor. Longer runs increase resistance, which can lead to further voltage drops. For example, if your furnace is 50 feet away from the breaker panel, you might need to upgrade from 12 AWG to 10 AWG wire to maintain proper voltage levels.

Choosing the right wiring now can also save you time and money down the road.

Ease of Maintenance and Upgrades

Thoughtful wire and breaker sizing can make maintenance and future upgrades much easier. For instance, installing slightly larger conductors now can accommodate higher-efficiency furnaces later without the need for a complete rewiring. This can save homeowners hundreds of dollars when upgrading to a more advanced system.

Clear and accessible breaker labeling is another small detail that makes a big difference. Properly labeled breakers help technicians quickly find and isolate the furnace circuit during service calls, reducing both service time and potential safety risks.

Finally, well-protected and properly routed wires are crucial for maintenance accessibility. Running wires through appropriate conduit or cable shields them from accidental damage during routine maintenance in utility areas. This extra layer of protection helps prevent costly repairs and keeps your system running safely and reliably.

3. High-Voltage and Low-Voltage Wiring Requirements

Gas furnaces rely on two distinct circuits: high-voltage (120V/240V) for powering main components and low-voltage (24V) for control systems. These circuits must remain entirely separate and cannot share the same conduit.

High-voltage wiring is responsible for running essential components like the blower motor, igniter, and gas valve. On the other hand, low-voltage wiring handles control circuits, such as thermostats, safety switches, and control boards. Keeping these circuits isolated ensures that low-voltage systems can function without interference from high-voltage operations.

Safety and Code Compliance

Along with proper wire sizing, maintaining separation between high-voltage and low-voltage circuits is essential for both safety and system performance. The National Electrical Code (NEC) mandates that Class 1 circuits (high-voltage) and Class 2 circuits (low-voltage) must be installed in separate raceways. This prevents dangerous cross-connections, reduces the risk of electrocution, and protects sensitive control components from voltage surges.

High-voltage connections require the use of junction boxes rated for the appropriate voltage and current levels. All splices must be made in accessible locations using approved connectors. Additionally, the furnace’s high-voltage disconnect switch should be installed within view of the unit and clearly labeled for emergency use.

Low-voltage wiring, while less hazardous, still demands careful handling. Improper connections can lead to equipment damage or even fire risks. Common thermostat wire, typically 18 AWG with multiple conductors, must be rated for HVAC applications and secured to prevent damage from vibration or movement.

Energy Efficiency and Performance

Keeping high-voltage and low-voltage circuits separate doesn’t just improve safety – it also enhances system efficiency. Proper separation ensures that control circuits receive stable, interference-free power. When high-voltage and low-voltage wires run too close together, electromagnetic interference (EMI) can disrupt thermostat performance, trigger false safety shutdowns, or cause communication errors in smart home systems.

The control transformer, which steps down 120V to 24V, must be appropriately sized for the system’s needs. Most residential gas furnaces use a 40VA transformer, but systems with additional components like multiple zones, humidifiers, or electronic air cleaners may require larger transformers, ranging from 75VA to 100VA.

Low-voltage wire runs should be kept as short as possible to avoid voltage drops. While 24V systems are more forgiving of voltage drops compared to high-voltage circuits, excessively long runs can still create operational issues. For thermostat runs exceeding 100 feet, larger conductors or signal boosters may be necessary.

Color coding plays a key role in both safety and performance. Standard thermostat wiring uses specific colors for easy identification: red for 24V power, white for heat, yellow for cooling, green for the fan, and blue or black for the common wire. Following these conventions reduces wiring errors and makes troubleshooting much simpler.

Ease of Maintenance and Upgrades

Properly separating and organizing high-voltage and low-voltage circuits makes future maintenance and upgrades much easier. Using separate junction boxes for each voltage level allows technicians to work on control circuits without shutting down the main power, saving time and improving safety.

Installing dedicated pathways for low-voltage wiring also simplifies the addition of devices like zone dampers or smart controls. Including extra conductors in the initial thermostat cable installation can provide flexibility for future upgrades without the need for additional rewiring.

Clear labeling is another critical step. High-voltage circuits should be marked with their voltage and current ratings, while low-voltage terminals should follow standard HVAC color codes. This labeling speeds up service and minimizes errors.

Finally, proper wire routing protects both high-voltage and low-voltage circuits from accidental damage during routine maintenance. High-voltage connections should be housed in secure enclosures, while low-voltage wires should be kept away from sharp edges, moving parts, and heat sources. These organizational measures not only streamline service but also enhance the overall reliability of the furnace system.

sbb-itb-99db659

4. Circuit Protection and Grounding Standards

Ensuring proper circuit protection and grounding is a critical step in safely installing gas furnaces. These measures not only guard against electrical hazards but also help maintain the furnace’s reliable operation throughout the heating season. The National Electrical Code (NEC) mandates a dedicated branch circuit for furnaces, which prevents electrical overloads by isolating the furnace’s power needs from other household appliances.

For furnaces with blower fans exceeding 1/8 horsepower, a disconnect switch must be installed in plain sight. A remote lockout device alone does not meet this requirement.

Safety and Code Compliance

Breaker sizing is another important aspect of safe installations. A 15-amp breaker paired with 14-gauge wire or a 20-amp breaker with 12-gauge wire ensures protection against overcurrent. Additionally, any receptacle or lighting circuits connected to the furnace must include Arc-Fault Circuit Interrupter (AFCI) protection. Circuit breakers act as the first line of defense against overcurrent, safeguarding both the equipment and the electrical system.

Grounding all furnace electrical connections is a code requirement. For plastic electrical boxes, the ground wire should connect only to the receptacle. In contrast, metal boxes require the ground wires to be secured to both the receptacle and the box itself using a grounding screw.

Surge protection devices are another essential element. These are required at the service panel for all new furnace installations or replacements. Moreover, outdoor disconnects for feeders supplying one- and two-family homes must be clearly labeled. This allows first responders to quickly cut power during emergencies.

5. Control Wiring and Smart Thermostat Integration

Control wiring connects the thermostat, control board, and various system components, forming the backbone of your furnace’s operation. Typically, 18-gauge, multi-conductor thermostat wire is used, supporting both 24V control circuits and smart thermostat functionalities. To maintain clarity, standard color codes like R, W, G, Y, and C are followed. For smart thermostat setups, additional conductors may be included, ensuring the system meets stringent safety and code requirements.

Safety and Code Compliance

To maintain safe operation and reduce electrical interference, control circuit wiring must be kept separate from line-voltage wiring. The National Electrical Code (NEC) specifies that control circuits, such as Class 2 circuits, must either maintain physical separation from power wiring or use separate raceways.

When making connections, use appropriately sized wire nuts or terminal blocks. For outdoor installations or humid environments, it’s crucial to use weatherproof junction boxes and sealed connectors. These precautions help prevent moisture intrusion, which could lead to system failures.

Smart thermostats require special attention to the C-wire connection. This wire provides continuous 24-volt power to the thermostat’s internal electronics. If your furnace doesn’t have a dedicated common wire, you might need to install a new thermostat cable or use a power extender kit to ensure the thermostat operates reliably.

Energy Efficiency and Performance

Properly installed control wiring not only minimizes electrical interference but also ensures stable system performance, helping to reduce energy waste. Smart thermostats take this a step further by optimizing furnace runtime, which can lower heating costs.

Adding outdoor temperature sensors through extra control wiring can enhance the system’s efficiency. These sensors enable advanced heating curves and anticipatory controls, preventing temperature overshoots and conserving energy during mild weather. Some systems also use multiple zone sensors via low-voltage wiring to balance heating across different areas of the home, creating a more comfortable environment.

Control boards, which depend on well-installed wiring, communicate system status and fault codes. Built-in LED indicators can quickly pinpoint issues like open circuits or incorrect thermostat connections, simplifying troubleshooting and reducing service call times. Thoughtful wiring not only improves energy efficiency but also makes ongoing maintenance much easier.

Ease of Maintenance and Upgrades

Organized control wiring is a game-changer for routine maintenance and future upgrades. Clearly labeling each wire at both the furnace and thermostat ends can save significant time during service calls and help avoid costly miswiring errors.

Installing extra conductors during the initial setup is a smart move. It provides flexibility for future system enhancements or smart home integrations without the hassle of running new wiring later on.

Control boards with diagnostic terminals further simplify maintenance. These test points allow technicians to quickly verify thermostat signals, safety switch operations, and overall system functionality, speeding up routine checks.

Hydrodynamics Inc. adheres to these practices to deliver furnace systems that are reliable, efficient, and easy to maintain.

Comparison Table

Here’s a breakdown of the key specifications for the two wiring types commonly found in gas furnace systems:

Wiring Type Voltage Components Powered Typical Wire Gauge Circuit Protection
High-Voltage 120V Blower motor, ignitor, inducer fan 14 AWG (15-amp) or 12 AWG (20-amp) 15-amp or 20-amp breaker
Low-Voltage 24V Thermostat, relays, control logic 18 AWG to 24 AWG 3A or 5A fuse on control board

High-voltage wiring is designed to handle components that draw significant power, such as the blower motor and ignitor. These circuits require thicker wires – typically 14 or 12 AWG – depending on the current load, and are protected by dedicated breakers rated at 15 or 20 amps.

On the other hand, low-voltage wiring is used for control functions like the thermostat and relays. These circuits use thinner wires, ranging from 18 to 24 AWG, and are protected by small fuses – usually rated at 3A or 5A – located on the furnace’s control board.

When installing a furnace, it’s crucial to recognize the distinct roles of high-voltage and low-voltage wiring. High-voltage circuits power the heavy-duty components, while low-voltage circuits ensure precise control and operation. Together, these wiring systems maintain both the safety and efficiency of the furnace.

Conclusion

Following proper wiring standards is essential for ensuring your gas furnace operates safely and efficiently. Key practices like adhering to NEC guidelines, using the correct wire size, maintaining voltage separation, incorporating circuit protection, and integrating control wiring all work together to protect both your equipment and your home.

These standards go beyond simply meeting code requirements – they actively prevent overheating, reduce the risk of electric shock, and help avoid electrical fires. A properly wired furnace not only operates more reliably but also cuts down on breakdowns and energy costs.

With modern furnace systems featuring smart thermostats and variable-speed components, professional installation isn’t just recommended – it’s necessary. Attempting DIY repairs or installations can void warranties, create safety hazards, and lead to expensive repairs down the line. Licensed HVAC technicians are trained to handle both high-voltage circuits and low-voltage control systems, ensuring every connection meets today’s safety standards.

It’s also worth noting that electrical codes change over time. What was acceptable a few years ago may no longer meet current requirements. Professional technicians stay up-to-date and can upgrade older systems to align with the latest safety regulations.

FAQs

Why is it important to separate high-voltage and low-voltage wiring in a gas furnace?

Keeping high-voltage and low-voltage wiring separate in a gas furnace is essential for safety and proper functionality. High-voltage circuits, typically 120V or 240V, supply power to the furnace, while low-voltage circuits, usually 24V, handle controls like the thermostat and safety mechanisms. If these circuits are combined or improperly arranged, it can lead to electrical interference, short circuits, or even serious hazards like electrical fires or shocks.

Maintaining this separation is also a requirement under electrical codes, which call for dedicated branch circuits for furnaces. Adhering to these standards not only safeguards the system but also ensures it operates efficiently and dependably over the long term.

Why is proper wire sizing important for the efficiency and performance of a gas furnace?

Proper wire sizing plays a key role in keeping your gas furnace running smoothly. It ensures the furnace receives the right amount of voltage and current, preventing issues like voltage drops or overheating. If wires are too small, they can waste energy and even lead to system breakdowns.

Selecting the right wire gauge helps your furnace operate efficiently, lowers energy usage, and boosts its longevity. This simple yet important step not only cuts down on energy costs but also helps you avoid costly repairs in the future.

What are the advantages of using a smart thermostat with a gas furnace, and how do you ensure proper wiring?

Using a smart thermostat with your gas furnace offers a range of benefits, such as better energy management, remote control of your home’s temperature, and automatic adjustments tailored to your daily routine. These capabilities can not only enhance comfort but also help trim down those utility bills.

Before setting up your smart thermostat, make sure it’s designed to work with low-voltage systems, which are commonly found in most U.S. homes. Many models rely on a C-wire (common wire) to maintain a steady power supply. Typically, the wiring involves connecting the R (power), W (heat), and C (common) terminals. Depending on your setup, additional connections like G (fan) might also be needed. A proper installation ensures smooth operation and compatibility with your gas furnace.