How to Fix Bad Water Taste at Home

How to Fix Bad Water Taste at Home

If your tap water tastes off – like chlorine, metal, or even rotten eggs – you’re not alone. Bad water taste can hint at underlying issues like pipe corrosion, bacterial growth, or excessive chemicals. Ignoring it may lead to dehydration or unnecessary spending on bottled water. Here’s how to fix it:

  • Identify the cause: Check for chlorine, metallic, sulfur, or musty flavors to pinpoint the issue.
  • Test your water: Use simple at-home tests or a water test kit to detect contaminants.
  • Quick fixes: Add citrus slices, chill the water, or let chlorine dissipate by leaving water uncovered.
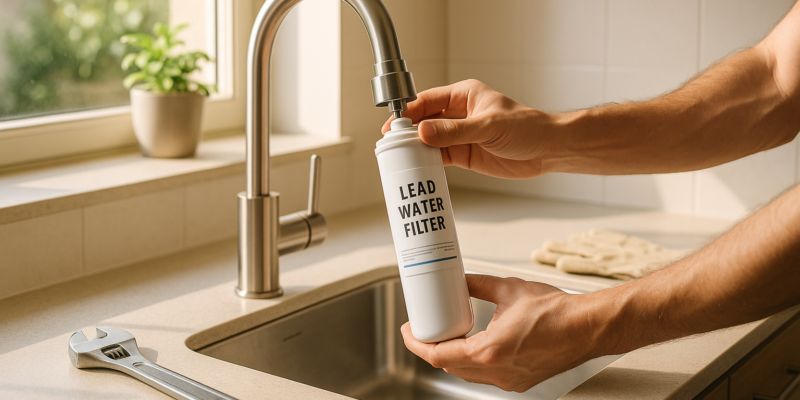
  • Install filters: Use activated carbon for chlorine, reverse osmosis for metals, or whole-house systems for widespread problems.
  • When to call a pro: Persistent issues like corroded pipes or well contamination may need professional help.

Clean, great-tasting water starts with understanding the problem and choosing the right solution. Whether it’s a quick DIY fix or a professional-grade system, you can enjoy better water without breaking the bank.

How to get rid of tastes and smells in your water

Finding the Source of Bad Water Taste

Pinpointing the cause of an unpleasant water taste is the first step toward solving the problem. Different contaminants produce specific flavors and odors, so recognizing these patterns can help you address the issue more effectively. Identifying the root cause ensures you can apply the right fix.

Types of Bad Water Taste

Water can take on a variety of unpleasant tastes, each hinting at a specific problem.

  • Chlorine taste: This is one of the most common complaints, especially for those using city water. It has a sharp, chemical flavor – much like swimming pool water. Municipal water supplies often have a chlorinated taste due to bacteria treatment processes.
  • Metallic flavors: If your water tastes like you’re sucking on a penny, it may indicate copper, iron, or zinc leaching from your plumbing. This is especially common in homes with older copper pipes or galvanized steel systems.
  • Sulfur or rotten egg taste: This unmistakable odor points to hydrogen sulfide gas in your water. It’s more frequently found in well water but can sometimes affect city water supplies.
  • Musty, earthy, or fishy flavors: These tastes often signal organic matter in your water system, such as algae, bacteria, or decomposing plant material. These flavors tend to intensify during warmer months when organic growth is more active.

Once you’ve identified the type of taste, the next step is to figure out whether the problem originates from your water source or your home’s plumbing.

Check Your Water Source

Start by determining if the issue stems from your water supply or your plumbing system. If you’re on city water, reach out to your local water utility to inquire about recent changes in treatment or any known issues in your area. Many utilities provide annual water quality reports that detail the contents of your water supply.

For private well owners, taste problems often trace back to the well or its storage tank. Wells that aren’t properly maintained can develop bacterial growth. The depth and location of your well also play a role – shallow wells are more prone to surface contaminants that can affect taste.

Your plumbing system might also be the culprit. Older pipes, especially those made of galvanized steel, can corrode over time, releasing iron or zinc into your water. Even newer copper pipes can cause metallic flavors if your water is acidic. If the bad taste only occurs in hot water, your water heater may need maintenance or replacement.

Test Your Water at Home

You can perform simple tests at home to identify common water issues. Start by comparing your tap water to bottled distilled water. Pour each into separate clear glasses and examine their color, smell, and taste side by side. Look for unusual tints – yellow, brown, red, orange, blue, or green – and note any odd odors before tasting.

For hard water, try the soap suds test: Fill a container with 12 oz of tap water, add liquid dish soap 10 drops at a time, and shake. If you get lots of suds quickly, your water is soft. If it takes 40 to 50 drops to produce suds, you likely have hard to very hard water. Another method is the hardness evaporation test: Place tap water in a spoon and let it evaporate over 24 to 48 hours. White spots or sticky residue signal hard water minerals.

A magnifying glass inspection can also help. Fill a clean, clear glass with water, hold it up to bright light, and examine it closely. Look for floating particles, persistent cloudiness, or foam that lingers.

If these basic tests reveal potential issues, consider purchasing a home water test kit from a hardware store or online. These kits can measure chlorine levels, pH, total dissolved solids, and common contaminants like copper or iron. For persistent problems, professional water analysis may be necessary.

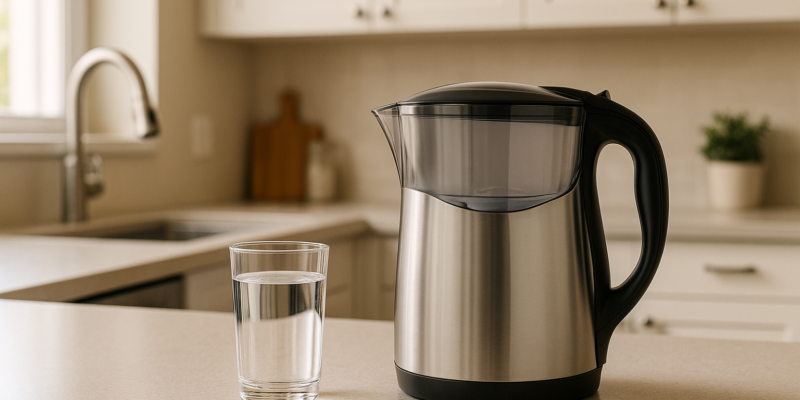
Quick Fixes for Immediate Relief

When you’re stuck with bad-tasting water, you don’t always have to wait for a permanent filtration system to swoop in and save the day. There are plenty of quick and simple tricks you can try at home to make your water more palatable while you work on a long-term solution.

Add Flavors and Adjust the Temperature

One of the easiest ways to deal with unpleasant water is to infuse it with natural flavors. Citrus slices – like lemon, lime, or orange – are a great choice for neutralizing metallic or mineral-heavy tastes. Just drop a few slices into a pitcher of water and let it chill in the fridge for a few hours. Voilà, a refreshing upgrade.

If the water has an earthy or musty flavor, try adding cucumber slices or fresh herbs like mint, basil, or rosemary. These not only mask the off-taste but also add a refreshing twist. For a touch of natural sweetness, toss in some berries (strawberries or raspberries) or chunks of watermelon. They can help balance out harsh chemical flavors.

Temperature tweaks are another quick fix. Simply chilling your water or adding ice cubes can make it taste better by muting unpleasant flavors. Cold temperatures naturally dull our ability to detect certain off-notes, making your water more enjoyable without any extra effort.

If chlorine is the culprit, there are a couple of easy tricks to reduce that sharp, pool-like taste. Letting tap water sit uncovered for a few hours allows the chlorine to dissipate naturally. For faster results, boil the water for 5–15 minutes and then let it cool.

Try Carbonation or a Splash of Juice

Flat or stale water? Carbonation to the rescue! If you have a home soda maker, adding bubbles can instantly make your water more appealing. You can even sprinkle in a pinch of salt if the water tastes flat or seems low in minerals.

Another option is to add a small splash of natural fruit juice. Go for sugar-free varieties to avoid unnecessary sweetness while still giving your water a flavor boost.

These quick fixes won’t solve the root problem, but they’ll provide some much-needed relief while you work on installing a more permanent water treatment system. Whether it’s citrus slices, chilling, or a bit of fizz, these hacks can make a big difference in the short term.

Water Filters and Treatment Systems

If you’re tired of quick fixes that only temporarily mask bad water taste, a proper filtration system could be the long-term solution you need. The secret lies in matching the right treatment system to the specific issues in your water. By addressing the root causes, these systems go beyond temporary relief to deliver consistently better-tasting water.

Match Filters to Your Water Problems

Different water problems call for different filtration technologies. Here’s a breakdown of common issues and the systems that can tackle them:

  • Chlorine taste and odor: Activated carbon filters are the best choice here. These filters trap chlorine molecules as water flows through the carbon media, neutralizing both the taste and smell. They also target certain organic compounds that affect flavor. To keep them effective, plan to replace the filters every 3-6 months, depending on your water usage.
  • Metallic tastes: If your water tastes metallic due to iron, copper, or lead, a reverse osmosis (RO) system is often the answer. RO systems force water through a semi-permeable membrane, removing up to 99% of dissolved metals and other contaminants. They’re especially useful for homes with well water or older plumbing systems that can leach metals into your water.
  • Sulfur odors: That unmistakable “rotten egg” smell from hydrogen sulfide requires a specialized approach. Whole-house oxidation systems convert the gas into filterable particles. For more severe cases, combining oxidation with activated carbon filtration can completely eliminate both the smell and taste of sulfur.
  • Hard water: If your water has a bitter taste or leaves a chalky residue, ion exchange systems can help. These systems replace calcium and magnesium ions with sodium or potassium, softening the water and improving its flavor.

Once you’ve identified the right filter, the next step is determining the best location for installation.

Pick the Right Installation Location

Where you install your filtration system can make a big difference in its effectiveness. Here’s how to choose:

  • Point-of-use systems: These are ideal for addressing taste issues in specific areas, like drinking water from your kitchen faucet. Options like faucet-mounted filters or countertop units are budget-friendly, typically ranging from $30 to $300, and are easy to install.
  • Under-sink systems: If you want a more discreet option with higher filtration capacity, under-sink systems are a great middle ground. They treat all the water from your kitchen sink and provide better flow rates.
  • Whole-house systems: When your water issues affect the entire home – such as sulfur odors noticeable in showers or laundry – a whole-house system is the way to go. These systems treat all incoming water before it reaches any faucet or appliance. While they require a larger upfront investment (around $1,000 to $5,000 installed), they offer comprehensive treatment and even protect your plumbing and appliances from damage.

If you have a larger household, make sure to choose a system that can handle peak water usage. For example, a family of four typically needs a system capable of processing 10-15 gallons per minute to avoid water pressure drops.

Keep Your System Working Properly

To keep your water filtration system delivering clean, great-tasting water, regular maintenance is a must. Neglecting maintenance can lead to expired filters, which may even worsen water quality as trapped contaminants start to break down.

Here’s what you need to stay on top of:

  • Filter replacement: Replace activated carbon filters every 3-6 months, depending on water quality and usage.
  • RO membrane care: Change the membrane every 2-3 years, and replace pre-filters every 6-12 months to protect the system.
  • System sanitization: Clean the system annually with a mild bleach solution to prevent bacterial growth.
  • Water pressure checks: Ensure your system maintains at least 40 psi. If pressure drops, consider installing a booster pump.

For RO systems, replacing pre-filters on schedule is crucial to extending the life of the membrane. Many modern systems make maintenance easier with features like indicator lights or smartphone apps that track filter life and send reminders for replacements. Keeping records and setting calendar alerts can also help you stay organized and ensure your system runs smoothly.

sbb-itb-99db659

When to Call Water Treatment Professionals

After trying DIY fixes and maintaining your filtration system, there comes a point when some water issues demand professional attention. While many taste and odor problems can be addressed at home, certain situations are too complex for DIY solutions. Knowing when to bring in experts can save you time, money, and ensure your water is safe for your family.

When the Problem Goes Beyond DIY Fixes

Some water quality problems are simply beyond the scope of home filtration systems. If you’ve tried multiple filters and still notice persistent bad tastes or odors, it’s time to call in professionals. Expert water testing can identify the root cause and point to solutions that go beyond what household systems can handle.

For example, if your water tastes metallic, sulfurous, or chemically treated despite proper filtration, the issue could stem from corroded pipes, failing well components, or even systemic contamination. These are not problems you can solve with a new filter – they require professional diagnosis and treatment.

Corroded plumbing systems are another red flag. Discolored water, especially reddish-brown or greenish hues, paired with metallic tastes, often indicates deteriorating pipes. Corrosion doesn’t just affect taste; it can also damage your plumbing. A professional can assess whether you need pipe replacements, water chemistry adjustments, or specialized treatments to resolve the issue.

Well water problems are particularly tricky. Issues like bacterial contamination or mineral imbalances often require more than a DIY approach. Professionals can test for harmful bacteria, adjust your well pump system, and install advanced treatment solutions that go far beyond standard filtration.

Sometimes, water pressure problems accompany taste issues, especially in homes with well systems. These could point to issues with your pump or pressure tank rather than the water itself. In such cases, a professional evaluation is essential to get to the root of the problem.

Hydrodynamics Water Treatment Services

When home remedies aren’t enough, professional water treatment services step in to tackle the tough challenges. Hydrodynamics, a family-owned company since 1994, specializes in addressing complex water quality issues for both residential and commercial properties.

Their water conditioning services include installing and maintaining water softeners and UV sterilization systems. These solutions are ideal for addressing hard water, bad tastes, and bacterial contamination – problems that standard filters just can’t fix. This is especially important for homes relying on well water or dealing with challenging municipal water conditions.

Hydrodynamics also offers well pump and grinder pump services. If your water taste issues stem from failing pumps or contaminated well components, their team can diagnose and replace faulty equipment, ensuring your well system consistently delivers clean, great-tasting water.

For water quality problems linked to plumbing, they provide comprehensive plumbing services. Corroded pipes or failing plumbing components can significantly impact water taste and system reliability. Hydrodynamics technicians can inspect your entire plumbing system and recommend repairs or replacements to improve both water quality and performance.

For businesses or homes requiring industrial-grade solutions, they offer advanced heating and cooling systems alongside water treatment options. This integrated approach is particularly beneficial for commercial properties where water quality affects not just drinking water but also operational equipment.

Hydrodynamics also provides maintenance programs to help prevent gradual declines in water quality. Regular upkeep ensures small issues are caught early, avoiding severe taste or contamination problems down the line.

If water testing reveals harmful contaminants like bacteria or heavy metals, it’s critical to act quickly. Professional-grade treatment systems and ongoing monitoring are key to protecting your family’s health and ensuring safe, clean water.

Water Treatment Method Comparison

Once you’ve identified the source of your water’s taste issues, the next step is finding the right treatment method to address them. The choice will depend on your water’s specific challenges, your home’s setup, and your budget. Here’s a breakdown of popular water treatment options to help you decide.

Activated Carbon Filters
These filters are excellent for tackling chlorine taste and odors. They work by adsorbing chemicals and organic compounds that affect water’s flavor. However, they won’t resolve mineral-related tastes, so they’re best suited for municipal water supplies with chlorine issues.

Reverse Osmosis Systems
If your water has multiple taste problems, reverse osmosis systems are a solid choice. They remove a wide range of dissolved contaminants, providing comprehensive filtration. While these systems require a higher upfront cost, they deliver reliable, long-term results for improving water quality and taste.

Whole-House Systems
For households that want better-tasting water at every tap, whole-house systems are the way to go. These systems treat all incoming water, addressing overall water quality. Though they come with higher installation costs and added complexity, they’re designed to enhance water taste and quality throughout your entire home.

When deciding between these options, think about factors like installation difficulty, ongoing maintenance, and the specific issues with your water supply. For example, if you’re on municipal water, a focus on chlorine removal might suffice. On the other hand, well water users may need a solution that also tackles minerals and other contaminants.

Conclusion: Enjoy Clean, Great-Tasting Water

Improving the taste of your water starts with understanding the root cause of the problem. Once you identify the issue, you can choose the right solution to address it effectively.

Begin by testing your water to pinpoint specific contaminants. For chlorine taste, an activated carbon filter works well. If your water has a mix of impurities, a reverse osmosis system might be the answer. For a more thorough approach, consider a whole-house filtration system.

Don’t forget regular maintenance – cleaning components and replacing filters as recommended is key to keeping your system running smoothly. Even the most advanced filtration system won’t deliver consistently great-tasting water if it’s not well-maintained.

Some water issues, like bacterial contamination or persistent off-flavors, may require professional help. For these more complex problems, experts like Hydrodynamics offer specialized solutions, including UV systems and water softeners, to ensure your water is safe and enjoyable.

FAQs

How can I tell if the bad taste in my water is caused by my plumbing or the water source?

If your water has an unpleasant taste, the first step is figuring out whether the issue stems from your home’s plumbing or the water source. Check all the faucets in your house. If the bad taste shows up everywhere, the water source is likely the culprit. But if it’s only happening at specific faucets, your plumbing might be to blame. Common causes include bacteria buildup on rubber fittings or stagnant water sitting in the pipes.

For plumbing-related problems, start by running the affected taps for a few minutes to flush out any stagnant water. If the odd taste doesn’t go away or you think the issue might be more serious, it’s a good idea to call in a professional for a detailed inspection and possible solutions.

What are the long-term advantages of installing a whole-house water filtration system over point-of-use filters?

Why Consider a Whole-House Water Filtration System?

Installing a whole-house water filtration system can bring a range of long-term benefits that go beyond what point-of-use filters can offer. These systems filter water at the source, ensuring that every faucet and appliance in your home provides clean, safe water. Whether it’s for drinking, cooking, bathing, or cleaning, the improved water quality can make a noticeable difference in your daily life.

Whole-house systems are designed to tackle contaminants like sediment, chlorine, heavy metals, and volatile organic compounds (VOCs). This not only enhances the taste of your water but can also be kinder to your skin and hair, especially if you’ve struggled with dryness or irritation caused by untreated water.

Another perk? These systems help protect your plumbing and appliances. By reducing impurities and preventing hard water buildup, they can extend the life of your pipes, water heater, and other appliances, potentially saving you money on maintenance and repairs down the line. While the upfront cost might seem steep, the combination of convenience, improved health, and long-term savings makes it a worthwhile investment for your home.

When should I call a professional to fix bad-tasting water, and what can they do that I can’t?

If your water still tastes off even after trying easy fixes like flushing the pipes or using basic filters, it might be time to bring in a professional. Persistent problems – especially if accompanied by discoloration, odd smells, or concerns about contamination – could point to bigger issues in your plumbing, well system, or water supply.

Experts can conduct comprehensive water quality tests, set up advanced filtration systems, and tackle underlying plumbing or well problems that DIY solutions often can’t handle. Their knowledge ensures your water is not only safe and clean but also tastes better, all while helping to prevent long-term damage to your home’s water system.

How to Replace Lead Water Filters

How to Replace Lead Water Filters

Replacing a lead water filter is essential to ensure your water is safe to drink and free from harmful contaminants like lead. Here’s a quick guide to help you get started:

  • Why Replace Filters? Over time, filters lose their effectiveness. Replacing them ensures your water stays clean and meets EPA safety standards for lead levels (below 0.015 mg/L).
  • When to Replace? Typically every 6–12 months, or sooner if water flow slows, taste changes, or the filter shows visible buildup.
  • What You’ll Need:
    • Tools: Adjustable wrench, filter housing wrench, plumber’s tape.
    • Safety Gear: Nitrile gloves, safety goggles.
    • Other Items: Replacement filter (NSF/ANSI 53-certified), cleaning supplies, and a bucket.
  • Steps to Replace:
    1. Shut off the water supply and release pressure.
    2. Remove the old filter using a wrench.
    3. Clean the filter housing thoroughly.
    4. Install the new filter, ensuring proper alignment and sealing.
    5. Test the system for leaks and flush with water for 5 minutes.

Pro Tip: Keep a log of replacement dates and test your water regularly to monitor filter performance.

If you encounter issues like damaged pipes or pressure problems, or if you have a complex system, consider hiring a professional like Hydrodynamics Inc. for assistance.

How To Change a Whole House Water Filter – Replace Water …

About Lead Water Filters

Lead water filters are designed to reduce lead levels in drinking water, helping to make it safer for household use. Here’s a closer look at how they work and what you need to know.

How Lead Filters Work

These filters rely on a multi-stage system that typically includes activated carbon and ion exchange resin. As water passes through, these materials trap and hold lead particles, effectively reducing the lead content in the water.

Meeting Safety Standards

To ensure effectiveness, filters should meet NSF/ANSI Standard 53. This certification guarantees that the filter can lower lead levels to below the EPA’s limit of 0.015 mg/L.

When to Replace Filters

Follow the replacement schedule provided by the manufacturer. Factors like heavy water usage, local water conditions, or noticeable changes in water pressure or taste can signal the need for a new filter.

Required Tools and Materials

To replace a lead water filter without interruptions, make sure you have everything ready. Here’s a breakdown of the tools and materials you’ll need.

Basic Tools

These are the essentials for a standard filter replacement:

  • NSF/ANSI 53-certified replacement filter: Ensure it matches your system.
  • Adjustable Wrench: A 12-inch or larger wrench to loosen the filter housing.
  • Safety Gear:
    • Heavy-duty nitrile gloves
    • Safety goggles with side protection
    • N95 dust mask (useful during cleanup)
  • Collection Items:
    • A 2-gallon bucket or basin
    • Clean towels or rags
    • Leak-proof disposal bag for used filters

Additional Tools

These extras can make the job easier and improve results:

  • Filter Housing Wrench: Designed specifically for your filter model.
  • Plumber’s Tape: Use 1/2-inch PTFE tape to seal connections properly.
  • Cleaning Supplies:
    • Food-grade silicone lubricant
    • A 50/50 white vinegar and water solution
    • Soft-bristled brush for scrubbing
  • Testing Materials:
    • Water pressure gauge
    • EPA-certified lead testing kit for post-replacement checks
  • Documentation Tools:
    • Filter replacement log to track changes
    • Permanent marker for labeling dates

Keep these tools organized in a maintenance kit for future use. Store cleaning supplies separately to prevent contamination. Before starting, inspect all tools for any signs of wear or damage.

Safety Steps

Stick to these safety measures to safeguard your health and minimize contamination risks.

Shutting Off Water

  • Find the main water shutoff valve in your home.
  • Turn the valve clockwise to stop the water flow.
  • Open a faucet to release any leftover water in the pipes.
  • Allow about two minutes for the system to fully depressurize.

Protective Gear

Use the right protective equipment to keep yourself safe:

  • Nitrile gloves (heavy-duty)
  • Safety goggles

Proper Filter Disposal

Dispose of used filters in line with local disposal rules. Not sure what to do? Reach out to Hydrodynamics Inc. for expert assistance.

Replacement Instructions

Now that you’ve taken the necessary safety measures, let’s go through the filter replacement process step by step.

Removing the Old Filter

Start by placing a bucket underneath to catch any leftover water. Use a filter wrench to unscrew the filter housing by turning it counterclockwise. If the housing feels stuck, avoid forcing it to prevent damage to the threads. Be cautious – the filter will be heavy due to trapped water, so hold it securely while removing it. If it remains stuck, contact a certified technician for assistance.

Cleaning the Housing

Check the housing for any damage, worn O-rings, mineral deposits, thread issues, or signs of corrosion.

Clean the inside of the housing with a soft cloth, focusing on the sealing areas. Avoid abrasive materials or harsh chemicals that could harm the components. Once cleaned and inspected, you’re ready to move on to installing the new filter.

Installing the New Filter

When setting up the new filter, follow these steps:

  • Ensure the replacement filter matches your system’s specifications.
  • Double-check that the O-rings are seated correctly.
  • Confirm the filter is positioned properly (look for “FLOW” arrows to guide you).
  • Hand-tighten the housing first, then use the filter wrench for final tightening. Be careful not to overtighten.

Testing the System

Once the new filter is installed, slowly turn the water back on at the main valve. Open the nearest faucet to release any trapped air and inspect the filter housing for leaks. Let cold water run for about 5 minutes to flush the system and confirm all connections are sealed properly. If you encounter any problems during installation or testing, reach out to Hydrodynamics Inc. Their certified technicians are ready to help ensure your lead water filter is installed and working correctly.

Filter Care and Longevity

Keeping your lead water filter in good condition is key to ensuring it works properly and keeps your household water safe.

Replacement Schedule

Replace your lead filter according to the manufacturer’s guidelines, usually every six months. This helps maintain its efficiency and extends its lifespan. Here are some signs it’s time for a replacement:

  • Slower water flow: Reduced water pressure might mean the filter is clogged.
  • Visible changes: Discoloration or debris buildup on the filter.
  • Timeframe: You’ve reached the replacement interval suggested by the manufacturer.
  • Water quality issues: Changes in taste, smell, or appearance of your water.

Maintenance Records

Keeping a record of your filter’s performance and maintenance is a simple way to stay on top of replacements. Here’s what to track:

Information to Record Why It Matters
Installation date Helps you know when the next replacement is due
Filter model number Ensures you buy the correct replacement parts
Replacement dates Keeps a history of your maintenance schedule
Water quality test results Tracks how well the filter is working
System pressure readings Can signal potential problems early

Water Testing

Regular water testing ensures your filter is effectively reducing lead and other contaminants. Companies like Hydrodynamics Inc. offer detailed water testing services that can:

  • Measure lead levels before and after filtration.
  • Detect other potential contaminants.
  • Confirm how well your filter is working.
  • Provide comprehensive water quality reports.

Professional Help

While many lead water filter replacements can be done on your own, certain situations require the expertise of a professional to ensure everything is done safely and effectively.

Common Problems

Below are some signs that it’s time to call in a professional:

Warning Sign What It Means Action Required
Pipe damage Cracks or corrosion near the filter housing Get a professional inspection ASAP
System pressure issues Pressure changes after replacing the filter Schedule professional pressure testing
Complex installations Systems with multiple filters or whole-house setups Hire an expert for proper installation
Water line concerns Problems with the main water line Have a professional assess the issue
Unusual water quality Quality problems persist after filter changes Arrange for comprehensive water testing

In these situations, professional help ensures your system operates as it should.

Hydrodynamics Inc. Support

Hydrodynamics Inc., a family-run business established in 1994, provides a full range of water filtration services for homes and businesses. Their team of certified technicians is equipped to handle installations, water quality testing, system maintenance, water line repairs, and even emergency services.

For more complex jobs, their Certified A.S.S.E Backflow Testing technicians can evaluate your system, perform water quality testing, install filters according to local regulations, check pressure and flow rates, and maintain detailed service records.

Professional installation is especially important for whole-house systems, commercial setups, or configurations involving multiple filters. Hydrodynamics Inc. ensures everything is done right the first time.

Summary

To ensure your drinking water stays safe, it’s crucial to maintain and replace your lead water filter regularly. This helps avoid contaminant buildup and keeps the filtration system working as it should.

Here are some key points to help with filter maintenance:

Aspect Key Points What to Do
Timing Filters lose effectiveness over time Replace according to the manufacturer’s timeline (usually every 6–12 months)
Safety Proper disposal and handling are important Wear protective gear and follow local disposal rules
Documentation Track your maintenance activities Log installation and replacement dates for easy reference
Professional Help Some systems may need expert care Hire certified technicians for complex or whole-house systems

FAQs

What are the signs that my lead water filter needs to be replaced earlier than expected?

If your lead water filter isn’t performing as expected, there are a few signs that it might need replacing sooner than the recommended schedule. These include:

  • Reduced water flow: If water pressure drops significantly, it could indicate the filter is clogged.
  • Unusual taste or odor: A metallic taste or unpleasant smell in your water might mean the filter is no longer effectively removing contaminants.
  • Cloudy or discolored water: This can be a sign that the filter is no longer functioning properly.

To ensure your water remains safe and clean, always follow the manufacturer’s guidelines for replacement and monitor for these signs regularly. If you’re unsure or need professional assistance, Hydrodynamics Inc. can help with expert water conditioning services tailored to your needs.

How do I choose a replacement filter that works with my water filtration system?

To ensure compatibility, check the model number or specifications of your current water filtration system. Most systems have this information printed on the unit or included in the user manual. Look for replacement filters specifically designed for your system’s brand and model. Be sure to match the filter type (e.g., sediment, carbon block) to your system’s requirements.

If you’re unsure, consult your system’s manufacturer or a professional service provider like Hydrodynamics Inc., who can guide you in selecting the right filter for your needs.

What should I do if my water quality doesn’t improve after replacing the lead water filter?

If your water quality remains poor even after replacing the lead water filter, it could point to a more complex issue in your water system. In such cases, it’s best to consult a professional to assess the problem and identify the root cause.

For expert assistance, consider reaching out to Hydrodynamics Inc., where professionals specialize in water conditioning services that can help resolve persistent water quality concerns effectively.

Water conditioner installation steps

Water Conditioner Installation Steps

Installing a water conditioner improves water quality, protects plumbing, and extends the life of appliances. This guide breaks down the process into simple steps: preparation, mounting the unit, connecting plumbing, and ensuring safety. Here’s what you need to know:

  • Preparation: Choose a stable, accessible spot near the main water line with adequate clearance. Gather tools like a drill, pipe cutter, and plumber’s tape.
  • Mounting: Secure the unit to a plywood backer board using mounting brackets.
  • Plumbing Connection: Use the right materials (e.g., flux for copper pipes, NSF-certified tape for PVC) and install valves for maintenance.
  • Safety Checks: Test for leaks, confirm proper grounding, and ensure pressure stays between 30-80 PSI.

Regular maintenance, like replacing filters every 6-12 months, keeps the system efficient. For complex setups, hiring professionals ensures compliance with safety codes and avoids costly mistakes.

Key Tip: Use push-to-connect fittings for easier, leak-resistant connections. Proper installation and upkeep save money and deliver clean, high-quality water for years.

How To Install Water Softener System – Complete Installation Guide

Preparation for Installation

Getting everything ready beforehand ensures your water conditioner works efficiently and protects your plumbing and appliances, as discussed earlier.

Selecting an Installation Site

Pick a spot close to the main water line that offers at least 60 inches of vertical clearance and 45 inches of floor space. Make sure it’s easy to access for future maintenance [4]. The area should be stable, well-lit, and away from direct sunlight. If your unit needs electricity, ensure there’s a nearby outlet.

Tools and Materials Needed

Essential Tools Required Materials
Drill, pipe cutter, level, safety gear Mounting brackets, plumber’s tape, pipe fittings, screws/anchors

Ensure the pipe fittings match your plumbing system [1]. Avoid using pipe dope or PVC primer/glue on threaded fittings to prevent damage to plastic components [4].

Checking Water and Power Supply

Make sure the water and power supplies are ready for safe installation. Completely shut off the main water valve [5]. If the unit needs electricity, confirm that an outlet is within reach. For metallic plumbing, install two grounding clamps to avoid electrical risks [4].

“Proper grounding is essential when installing on metallic plumbing. Securely install two grounding clamps to prevent electrical shock and ensure safety.” [4]

If the plumbing setup is complicated, it’s a good idea to consult professionals like Hydrodynamics. They specialize in water conditioner installations and can ensure everything meets local regulations.

Once the site is ready and utilities are secure, you can move on to the installation process.

Installation Steps

Now that everything is prepared, let’s walk through the installation process step by step.

Mounting the Unit

Start by attaching a plywood backer board to the wall studs for added stability. Make sure it’s level before moving forward. Align the mounting brackets with the unit’s mounting points, checking the level again, and then secure them using heavy-duty screws. Once the unit is firmly mounted, you’re ready to connect it to the plumbing system.

Connecting to Plumbing

Carefully measure and cut the pipes to the required length, then clean the ends with sandpaper for smooth connections. If you’re working with copper pipes, apply flux before soldering to ensure a strong bond [1]. Keep the alignment precise to avoid stress on the joints. Install valves and a bypass system to allow for maintenance without interrupting your home’s water supply [3].

Connection Type Materials Needed
Copper Flux, solder, torch
PVC NSF-certified tape
Metallic Grounding clamps, #4 copper wire

“Dry fit all connections before securing them, and use NSF-certified plumber’s tape on threaded fittings. Avoid using pipe dope or PVC primer/glue to prevent damage to plastic fittings” [4].

After securing the pipes and valves, it’s time to install the filter cartridges.

Installing Filter Cartridges

Handle the filter cartridges with clean hands to avoid contamination. Inspect each cartridge for any damage before inserting it into the housing. Turn the cartridges clockwise until they are snug, but don’t overtighten – this could harm the O-rings [6]. Make a note of the installation dates to keep track of replacements and maintain the system’s efficiency [3].

Once everything is installed, check all connections to ensure they are secure, and the system is ready to go.

Safety and Maintenance

Preventing Leaks and Ensuring Functionality

Once installation is complete, it’s time to test for leaks to confirm everything is working as it should. Slowly turn on the water supply and carefully check all connections – especially threaded fittings and joints – for any signs of leakage. A well-installed system will hold steady pressure without dripping or seeping.

Focus on these critical areas:

Testing Area What to Check & Fix
Connections Look for moisture; tighten fittings or replace seals if needed
Pressure Gauge Confirm pressure is within 30-80 PSI; adjust regulator if necessary
Filter Housing Ensure cartridge is seated properly and O-rings are intact; reseat or replace if needed

Once you’re sure the system is leak-free, regular maintenance will keep it running smoothly for years to come.

Maintenance Tips

How often your system needs attention depends on your water usage and quality. Most filter cartridges need replacing every 6-12 months, but this can vary based on your specific conditions [1][3].

“Regular inspections can help identify potential issues early, such as leaks or wear on components” [7][3].

Here are some key maintenance tasks to keep in mind:

  • Check pressure readings and inspect O-rings and seals every three months.
  • Clean the exterior of the system monthly to prevent dust and grime buildup.
  • Test the bypass system every six months to ensure it’s functioning properly.

During your inspections, confirm that the system’s electrical grounding is secure. Keep a log of all maintenance activities, like filter replacements and any repairs, to stay organized and maintain warranty coverage.

If you notice odd noises, reduced water flow, or changes in pressure, address these concerns quickly to avoid further issues. For more advanced repairs or troubleshooting, consider hiring a professional for added peace of mind.

Additional Tips and Professional Help

Using Push-to-Connect Connectors

Push-to-connect connectors make installation easier by providing secure, leak-resistant seals – no special tools required [1][6]. To ensure a proper seal, insert the connector fully until you hear a click. For best results, avoid sharp bends and keep the connector lines in smooth, gentle curves.

These connectors are especially helpful during the plumbing connection phase. However, for more intricate setups or to guarantee everything is installed correctly, hiring a professional can be a smart choice.

Professional Services from Hydrodynamics

Hydrodynamics

While many installations can be done on your own, more advanced water conditioning systems often require expert handling. Hydrodynamics Inc., a family-owned business since 1994, offers specialized water conditioning installation and maintenance services throughout Northeastern Pennsylvania.

Their services include:

  • System sizing and placement advice: Ensuring the system fits your specific needs and space.
  • Post-installation testing: Checking and fine-tuning the system for optimal performance.
  • Expert installation: Handling grounding and backflow prevention correctly.

For setups involving additional features like check valves or specialized grounding, professional installation can help you avoid expensive errors. Hydrodynamics’ team ensures installations meet safety codes and run efficiently.

Safety Tip: Professionals use grounding clamps and #4 copper wire to ensure proper safety measures. They also make sure the system is protected from freezing and direct sunlight [2][3].

Conclusion

Adding a water conditioner can enhance water quality and prolong the life of your plumbing system. Using durable materials and following the manufacturer’s instructions are key to avoiding leaks and inefficiencies [1][4].

Paying close attention to placement, connections, and safety measures ensures the system runs efficiently. While proper installation is essential, ongoing care – like regular maintenance – keeps the system performing well over time. Choosing NSF-certified materials and adhering to manufacturer guidelines can help sidestep common problems [1][4].

For more complex setups or installations requiring code compliance, working with experts like Hydrodynamics is a smart move. Their knowledge is particularly useful for systems with specialized features or those that need to integrate with existing plumbing.

Routine upkeep, such as replacing filters and conducting system checks, helps your water conditioner stay effective and last longer [3]. A properly installed and maintained unit not only delivers clean water but also protects your appliances and lowers overall costs.

Whether you’re tackling the installation yourself or hiring professionals, preparation and safety should remain your top priorities. Investing in a water conditioner pays off with better water quality, longer-lasting appliances, and fewer maintenance expenses over time [3].