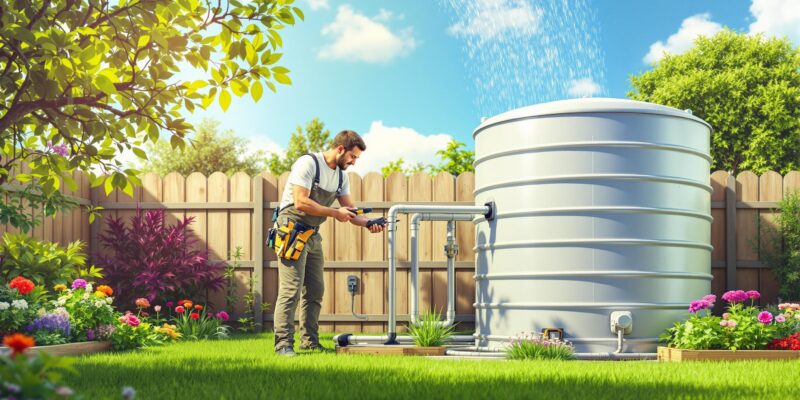
How to Install Rainwater Harvesting Systems
Want to save water and reduce your utility bills? Installing a rainwater harvesting system can help you collect, store, and use rainwater for tasks like irrigation, laundry, and toilet flushing. Here’s how to get started:
- Plan Your System: Assess your water usage, calculate your roof’s collection potential, and select the right equipment (tanks, filters, and pumps).
- Prepare the Site: Choose a stable, level location for the tank, close to downspouts, and ensure proper drainage.
- Set Up the Collection System: Clean and modify gutters, install pipes with filters, and protect components from freezing if needed.
- Install the Tank and Overflow System: Place the tank securely, align it with plumbing, and add an overflow outlet to prevent flooding.
- Integrate Plumbing: Connect the pump, pressure tank, and filtration system to supply non-drinking water for household use.
- Maintain the System: Regularly inspect and clean components like gutters, filters, and pumps to keep everything running smoothly.
Pro Tip: For expert installation and compliance with local codes, consider hiring professionals like Hydrodynamics Inc. Proper planning and regular maintenance can ensure your system operates efficiently year-round.
12 Steps to Creating the Complete Rain Harvesting System
System Planning
Planning is the foundation of an effective system that meets your non-potable water needs. Start by assessing your water usage and designing a system with the right capacity.
Evaluating Water Usage
Take a close look at your water bills from the past year. Break down your consumption into categories like toilet flushing, irrigation, and laundry. This will help you estimate how much water can be replaced with collected rainwater.
Planning Collection Capacity
Your collection potential depends on two main factors: the size of your roof and local rainfall. Here’s how to calculate it:
- Measure your roof area in square feet (ft²).
- Multiply this by your area’s annual rainfall in inches.
- Use a conversion factor to determine the volume of water, and subtract system losses (like evaporation or inefficiencies).
Once you know how much water you can collect and how much you need, you’re ready to choose equipment that fits your home.
Choosing Equipment
The right equipment ensures your system runs smoothly. Here’s what to consider:
- Storage Tanks: Pick tanks made of materials like polyethylene, fiberglass, or concrete. Decide between above-ground or underground placement based on your available space and capacity needs.
- Filtration: Install filters like first-flush diverters, leaf screens, and sediment filters to suit your water’s intended use. For expert help with filtration systems, check out services like Hydrodynamics Inc. (https://dynamichvacpa.com).
- Pumps and Pressure Tanks: Choose submersible or external pumps that match your system’s flow rate. Add a pressure tank to maintain steady water delivery.
When selecting equipment, keep local building codes, available space, budget, and maintenance in mind. If you’re thinking about future upgrades, plan for expansion now. Professional installers can help ensure everything is sized correctly, integrates well, and meets local regulations.
Site Preparation
After planning your system, it’s time to get the installation site ready for the best performance.
Tank Location
Once you’ve chosen your equipment, pick the ideal spot for the tank. Keep these factors in mind:
- Ground Stability: Use level, stable ground that can handle the tank’s full weight.
- Proximity to Downspouts: Place the tank close to roof downspouts to keep pipe lengths short and maintain good water flow.
- Accessibility: Leave enough space around the tank for regular maintenance and inspections.
- Local Codes: Follow local building codes and setback rules to ensure proper distance from property lines and buildings.
- Sun Exposure: For above-ground tanks, a shaded spot helps reduce algae growth and can extend the tank’s lifespan.
Foundation Setup
A solid foundation is critical for the system’s safety and long-term reliability. Here’s what to do:
- Ground Preparation: Remove any plants and loose soil to expose firm, stable ground.
- Base Construction: Use a foundation that suits your setup, such as a concrete pad or compacted gravel. Make sure the surface is level and can support the tank’s weight.
- Leveling and Drainage: Ensure the base is level and include drainage, like a French drain, especially in areas with heavy clay soil. Reinforce the foundation to prevent cracking and avoid water pooling.
Collection System Setup
Setting up a rainwater collection system starts with ensuring your gutters can properly channel water and that the connecting pipes allow for smooth flow.
Gutter Preparation
Begin by cleaning your gutters and checking for any leaks or damage. Add a leaf guard or screen to the gutters to filter out large debris before it reaches the storage tank. Modify your downspouts with diverters to direct water into the system while keeping maintenance simple. If you live in a colder area, consider using freeze-resistant parts to protect the system during winter.
Installing Tank Pipes
Once the gutters are ready, focus on connecting the pipes. PVC pipes are a popular choice due to their durability and ease of upkeep. Ensure the pipes are installed with a slight slope to maintain steady water flow. Add filter housings and access points for cleaning, which will help keep debris out and make maintenance easier.
For areas that experience frost, Hydrodynamics (https://dynamichvacpa.com) recommends using heat tape on exposed pipes or placing them underground according to local frost-depth guidelines. These steps help ensure your system operates efficiently, even in colder conditions.
Tank Installation
Tank Placement
Place the tank on a flat, stable surface that can support its weight when full. Make sure it’s level and easy to access for routine maintenance. Align the tank’s inlet and outlet with your plumbing system to simplify the connection process. Proper positioning is key to ensuring the system works smoothly.
Overflow System Setup
To avoid flooding, install an overflow outlet that channels excess water to a designated drainage or stormwater system. This prevents water from pooling around the tank and causing damage to your property. A well-thought-out overflow system works hand-in-hand with the rest of your plumbing setup.
Plumbing Integration
Once your collection system and tank are ready, the next step is to connect your plumbing. This involves setting up a pump, water treatment system, and dedicated lines for non-drinking water use.
Pump System Setup
Choose a pump and pressure tank that can deliver steady water pressure. For most homes, a flow rate of 8–12 gallons per minute (gpm) is ideal. Consider factors like the vertical lift distance and whether you need 120V or 240V power. If you’re unsure, companies like Hydrodynamics Inc. specialize in well pump services and can guide you through the process [1].
Water Treatment Installation
To ensure clean water, start with a 20-micron sediment filter to catch debris. Follow this with a carbon filter to handle organic materials, and finish with a UV sterilizer to eliminate 99.9% of bacteria. If you need help choosing the right setup for your non-drinking water needs, professional water conditioning services are a great resource [1].
Non-Drinking Water Lines
Set up separate lines for non-potable water to avoid mixing with drinking water. Use purple PVC pipes or tape to clearly mark these lines, and install backflow preventers at key points. These lines can be used for tasks like flushing toilets, watering gardens, doing laundry, and outdoor cleaning. For more complex setups, a professional plumber can ensure everything meets local codes and standards.
System Maintenance
Regular maintenance ensures your system runs efficiently and lasts longer. A well-planned routine can help you avoid costly repairs and unexpected breakdowns.
Inspection Schedule
A monthly maintenance checklist is essential for keeping your system in good shape. Pay attention to these critical components:
| Component | Inspection Frequency | Key Tasks |
|---|---|---|
| Gutters & Downspouts | Monthly | Clear debris, check for leaks, and confirm proper slope |
| First-flush Diverter | Monthly | Empty sediment and clean the filter screen |
| Storage Tank | Quarterly | Inspect for cracks, clean the interior, and check the overflow function |
| Pump System | Quarterly | Test pressure, inspect seals, and ensure proper operation |
| Filters | Every 2–3 months | Replace or clean filters; check for bypass issues |
For more in-depth evaluations, schedule annual professional inspections. Companies like Hydrodynamics Inc. offer detailed services, including pressure testing and filter performance checks. Additionally, take extra precautions during colder months to protect your system.
Winter Protection
Freezing temperatures can damage your system if proper steps aren’t taken. When the temperature drops below 32°F, follow these measures:
- Insulate exposed pipes: Use outdoor-rated foam insulation and apply heat tape to vulnerable sections.
- Drain above-ground components: Empty pipes, filters, and pump housings to prevent freezing.
- Monitor tank temperature: Install a water temperature sensor to avoid freezing inside the tank.
For underground tanks, ensure they are buried below the frost line (typically 36–48 inches in Pennsylvania). If your system includes a pump house, maintain its temperature above 40°F with a thermostat-controlled heater.
Problem Solving
Routine maintenance helps prevent issues, but problems may still arise. Address them promptly with the following solutions:
| Problem | Likely Cause | Solution |
|---|---|---|
| Low Water Pressure | Clogged filters or a failing pump | Clean or replace filters; check pump operation |
| Overflow Issues | Blocked overflow or full tank | Clear blockages; verify tank level sensors |
| Contaminated Water | Failed filter or UV system | Replace filters; service the UV sterilizer |
| Pump Cycling | Pressure tank issues or leaks | Inspect the pressure tank; repair any leaks |
Unusual noises, poor water quality, or fluctuating pressure are signs that something may be wrong. Contact a professional, such as Hydrodynamics Inc., for expert assistance.
Finally, maintain detailed records of all maintenance tasks, including dates, actions performed, and parts replaced. These records help you monitor system performance and anticipate future needs.
Next Steps
After completing your installation and initial setup, use the checklist below to inspect all components thoroughly:
| Component | Verification Steps | Critical Checks |
|---|---|---|
| System Connections | Check all pipe joints and fittings | Look for leaks while the system is under full pressure |
| Overflow System | Test with a simulated full tank | Ensure drainage directs water away from the foundation |
| Pump Operation | Run a full pump cycle | Monitor for consistent pressure and steady flow rate |
| Water Quality | Test the first batch of collected water | Confirm the filtration system is working effectively |
This checklist helps confirm that your system is functioning correctly before starting routine maintenance.
For homeowners in northeastern Pennsylvania, Hydrodynamics Inc. provides professional system assessments and fine-tuning services [1]. Their certified technicians ensure your setup complies with local codes and operates at its best.
“It was a good choice. They were prompt and knowledgeable and efficient. Very pleased with their work.” – Emma K., Drums, PA [1]
Plan for a professional inspection within the first month to catch and fix minor issues early. Hydrodynamics Inc. can also fine-tune your filtration system and make sure it integrates seamlessly with your plumbing.
Since temperatures in NEPA often drop below 32°F in winter, professional winterization services are highly recommended. A service agreement that includes regular maintenance and seasonal preparations can help protect your system and keep it running smoothly all year.
Make sure to keep detailed maintenance records. These will help you monitor system performance and plan for future needs.


