How to Test for High-Pressure System Leaks
Testing for leaks in high-pressure systems is critical to maintaining safety and performance in industries like oil and gas, manufacturing, and aerospace. Even small leaks can lead to serious risks and costly failures. Here’s a quick summary of the process and tools needed:
- Tools Required:
- Digital pressure gauges (rated for 2–4x the system pressure).
- Soap solution for bubble testing (1–30 psi range).
- Stainless steel test manifolds and fittings for durability.
- Testing Methods:
- Bubble Testing: Apply a soap solution and look for bubbles at suspected leak points.
- Pressure Decay Testing: Monitor pressure changes over time in an isolated system (5–150 psi range).
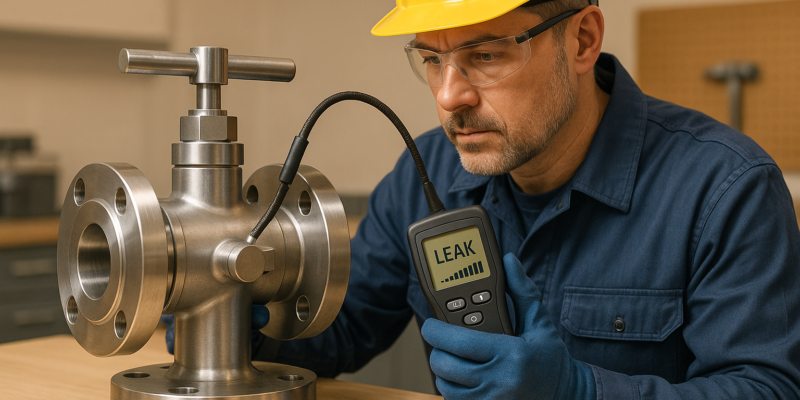
- Tracer Gas Testing: Use a gas detector to pinpoint leaks in pressurized sections.
- Ultrasonic Detection: Noninvasive option for hard-to-access systems.
- Preparation:
- Depressurize the system and inspect for visible damage.
- Use OSHA-compliant Lockout/Tagout (LOTO) procedures to ensure safety.
- Safety Tips:
- Always wear PPE, including goggles, gloves, and protective footwear.
- Inspect gear for damage before use.
- Be cautious of hazards like flying debris or chemical exposure.
Testing ensures systems are safe, efficient, and compliant with standards like ASME and ISO. Regular inspections help catch issues early, reducing downtime and repair costs.
Leak testing on high pressure reactors
Required Tools and Equipment for Leak Testing
When it comes to high-pressure leak testing, having the right tools is non-negotiable. These instruments must be designed to handle elevated pressures safely and deliver accurate results. Here’s a breakdown of the essential tools, their specifications, and the compliance measures required for effective leak testing.
Essential Tools for Leak Detection
- Digital Pressure Gauges: Opt for gauges that can measure pressures 2–4 times higher than the system’s operating requirements. This ensures both safety and precision.
- Bubble Immersion Testing: Use a soap solution to visually detect leaks. This method works best at pressures ranging from 1 to 30 psi.
- Test Manifolds and Fittings: Choose components rated to withstand pressures above the testing range. Stainless steel is a preferred material for its durability and reliability under high-pressure conditions.
Standards and Compliance for Accurate Measurements
- Calibration: All equipment must be calibrated to U.S. standards, recording pressure in psi and temperature in °F. Adhere to NIST calibration standards to maintain accuracy and compliance.
- Pressure Ranges: Different methods have specific pressure requirements. For example, Pressure Decay Testing operates effectively between 5 and 150 psi, while Bubble Immersion Testing is optimal at 1 to 30 psi.
- Material Selection: Metallic components like stainless steel or aluminum are better suited for high-pressure applications compared to polymer-based options. Seal materials, such as Viton or Buna-N, must be compatible with the test fluids and capable of maintaining integrity under pressure.
- Regulatory Standards: Always follow manufacturer-recommended pressure limits and comply with regulatory standards like ASME, ISO, and ASTM. Testing equipment should include built-in safety factors and clearly marked burst ratings to prevent failures.
Step-by-Step Leak Detection Process
Conducting a leak test requires careful planning and a detail-oriented approach. The process is broken down into several key phases to ensure accurate results while prioritizing safety.
System Preparation and Isolation
Start by fully depressurizing the system using relief valves or venting points. Give the system time to stabilize, allowing pressure and temperature to reach equilibrium.
Next, perform a visual inspection to spot obvious issues like corrosion, loose fittings, or signs of previous leaks. Pay close attention to joints and connectors, as these are common trouble spots.
Implement OSHA-approved Lockout/Tagout (LOTO) procedures. This includes tagging isolation valves, posting warnings, and documenting the test boundaries. Be sure to highlight any sections that remain energized.
To define the testing area and prevent interference, use temporary isolation points such as blind flanges or valve caps rated for the system’s specifications.
Selecting the Right Testing Method
The choice of testing method depends on the system’s pressure and specific needs. For low-pressure systems, visual techniques like bubble immersion or soap solution testing are effective for spotting leaks. For moderate-pressure systems, pressure decay testing is often the go-to method, where any drop in pressure over time is carefully monitored.
For situations requiring greater sensitivity, tracer gas testing is a reliable option. If depressurizing the system isn’t feasible, noninvasive methods like ultrasonic detection can be used as an initial screening tool. Once the method is chosen, proceed to the testing phase.
Performing the Leak Test
For soap solution or bubble testing, prepare the solution and apply it to areas where leaks are suspected. Pressurize the system to the test level and watch for bubble formation, which indicates escaping gas. The size and frequency of the bubbles can help gauge the severity of the leak.
In pressure decay testing, pressurize the test section and isolate it. Use calibrated gauges to monitor the pressure over a set period, noting any drops. Keep track of ambient conditions, as temperature changes can affect the readings.
For tracer gas testing, evacuate the section to be tested, then fill it with the tracer gas to the required pressure. Use a calibrated leak detector to scan the area systematically. If using ultrasonic detection, follow the manufacturer’s instructions for adjusting sensitivity and positioning the device near potential leak points.
Recording and Evaluating Results
Thorough documentation is critical. Record key details such as test pressure, ambient temperature, test duration, and the locations of any leaks. Use calibrated gauges for accuracy, and standardized forms can help maintain consistency and streamline future repairs.
If needed, calculate the leak rate based on industry standards. Compare the results to acceptable thresholds for the application to determine whether repairs or additional maintenance are required. Depending on the findings, follow up with further testing or repair work to address any issues uncovered during the initial test.
sbb-itb-99db659
Safety Measures and Best Practices
Once the detailed leak detection process is complete, implementing strict safety measures is essential to ensure testing is conducted securely. High-pressure leak testing can be hazardous, making adherence to safety protocols non-negotiable.
Personal Protective Equipment (PPE)
Personal protective equipment (PPE) serves as the first line of defense during high-pressure leak testing. Before entering the test area, all personnel must be equipped with the appropriate gear.
“Always wear appropriate PPE, including safety goggles, gloves, and protective footwear. Additional PPE, like face shields or protective suits, might be necessary depending on the test medium and the system.”
Essential PPE includes safety goggles, steel-toed boots, and work gloves. Depending on the testing environment, additional gear like face shields, hard hats, or hearing protection may also be required to shield against flying debris, sharp edges, or potential chemical exposure.
To ensure effectiveness, PPE should be regularly inspected and maintained. Before each use, check for damage – such as cracks in goggles, worn-out gloves, or compromised boot soles – and replace any defective items immediately.
The risks at pressure testing sites are real. Common injuries include eye damage, skin ruptures, lacerations, fractures, concussions, and contusions. In more severe cases, hazards like asphyxiation from inert gases or electrocution in electrically active areas can occur. Proper PPE and vigilance are critical to mitigating these dangers.
Summary and Service Overview
High-pressure leak testing plays a critical role in protecting both equipment and personnel. By focusing on proper system isolation, choosing the right testing methods, and maintaining thorough documentation, this process ensures systems are safe and reliable.
Regular testing helps identify weak points early on, reducing the risk of expensive repairs and improving energy efficiency. Safety measures are not just best practices – they are essential for preventing serious injuries and meeting regulatory requirements.
Investing in routine professional maintenance often offsets its cost by avoiding system failures and enhancing energy performance. If you’re looking for expert help to maintain these standards, keep reading to discover what our services can offer.
Hydrodynamics Inc. has been a trusted provider of high-pressure system maintenance since 1994. Serving residential, commercial, and industrial clients, they offer comprehensive leak detection services, preventative maintenance programs, and emergency repairs. Their skilled technicians are equipped to handle everything from straightforward leak detection to advanced testing for HVAC, plumbing, refrigeration, and industrial heating systems.
Whether it’s a residential heat pump, commercial rooftop HVAC unit, or industrial heating system, professional leak testing ensures your high-pressure systems run safely and efficiently.
FAQs
What are the common signs of a leak in a high-pressure system?
Leaks in high-pressure systems often make themselves known through unexpected sounds like banging, hissing, or gurgling. These noises can signal escaping air or imbalances in water pressure. You might also spot visible clues, such as water stains, mold growth, damp patches on walls or ceilings, or even an unusually high water bill – any of which could be a red flag for a potential leak.
Catching these signs early is key to avoiding further damage or reduced efficiency in your system.
How often should I test high-pressure systems for leaks to stay safe and compliant?
High-pressure systems need leak testing at least twice a year. However, for systems that are critical or operate in high-risk environments, testing should be done more frequently to ensure safety and meet regulatory requirements.
Routine inspections are key to catching problems early, maintaining system performance, and avoiding expensive repairs down the line. Be sure to stick to manufacturer recommendations and industry standards when it comes to testing schedules and procedures.
What steps should I take if I discover a leak during a high-pressure system test, and how can I avoid leaks in the future?
If you notice a leak during a high-pressure system test, shut down the system immediately. This step is critical to avoid further damage or putting safety at risk. To locate the leak, rely on tools like ultrasonic detectors, infrared cameras, or acoustic devices. Once you’ve identified the source, resolve the issue by tightening loose fittings, replacing any damaged parts, or applying the appropriate sealants.
To reduce the chances of leaks in the future, focus on regular maintenance and inspections. Use durable, high-quality seals, fittings, and materials specifically designed for high-pressure systems. Make leak detection a routine practice by conducting pressure tests and visual inspections. Staying consistent with upkeep is key to ensuring the system runs safely and efficiently.