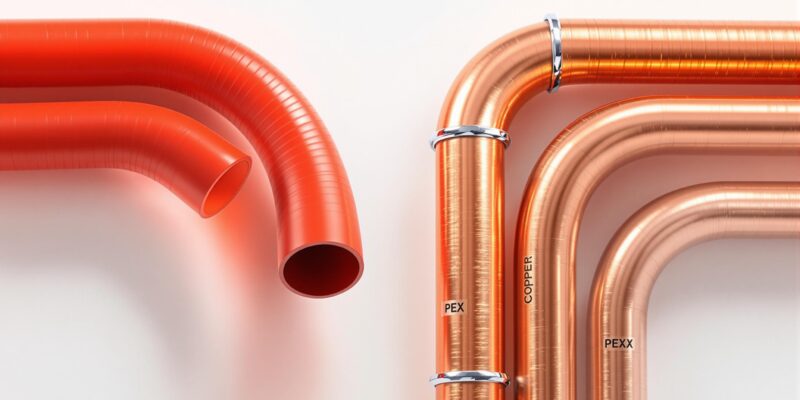
PEX vs. Copper: Leak Prevention Comparison

PEX vs. Copper: Leak Prevention Comparison

What’s better for preventing leaks: PEX or copper pipes?

Here’s the quick answer:

  • PEX pipes are flexible, resist freezing, and have fewer joints, which lowers the risk of leaks. But they’re prone to UV damage and require precise installation.
  • Copper pipes are durable, handle high pressure and temperatures, and resist bacterial growth. However, they can corrode in certain water conditions and are more likely to crack in freezing temperatures.

Quick Comparison:

Feature PEX Copper
Leak Prevention Fewer joints, corrosion-resistant Durable, antimicrobial, but more joints
Lifespan 30–50 years 50–70 years
Installation Faster, simpler, fewer tools Slower, requires soldering
Cost $4,000–$8,000 for a 2,000 sq. ft. home $8,000–$16,000 for a 2,000 sq. ft. home
Freeze Resistance Flexible, less likely to crack Rigid, higher freeze risk

Both options have pros and cons. PEX is affordable and quick to install, while copper is a long-term, recyclable option. Your choice depends on your budget, local water conditions, and durability needs.

PEX vs COPPER for Plumbing – Which Should You Use and …

PEX

How PEX and Copper Prevent Leaks

PEX and copper pipes each have unique characteristics that help reduce leaks. Here’s a closer look at how these materials work to keep your plumbing secure.

PEX Pipe Features

PEX pipes are flexible, which means fewer joints and weak spots in your plumbing system. They are also resistant to corrosion, making them a durable choice for many applications.

However, PEX has some drawbacks:

Limitation Impact on Leak Prevention
UV Sensitivity Prolonged exposure to sunlight can weaken the material.
Physical Damage Can be damaged by sharp objects or improper handling.
Connection Quality Requires precise installation to ensure fittings are secure.

Copper Pipe Features

Copper pipes are strong and durable, making them capable of handling high pressure and temperature changes. They also have natural antimicrobial properties, which help prevent bacterial growth and reduce the risk of corrosion.

Despite these advantages, copper has its own challenges:

Consideration Impact on Leak Prevention
Water Chemistry Certain water types can cause copper to corrode over time.
Freeze Risk Copper is more likely to crack in freezing temperatures.
Joint Requirements More connections are needed, increasing potential leak points.

Setup and Upkeep

When it comes to installation and maintenance, PEX and copper pipes have distinct requirements, each playing a key role in preventing leaks over time.

PEX Installation Steps

PEX installation is simpler and requires fewer tools compared to copper. Its manifold system, with fewer joints, minimizes potential leak points by centralizing distribution.

Installation Aspect Details Impact on Leak Prevention
Tool Requirements Crimping tool, pipe cutter, calibration tool Ensures secure connections via crimping
Connection Method Compression or expansion fittings Fewer joints reduce leak risks
Time Investment Faster than copper installation Lowers chances of installation mistakes
Space Requirements Flexible routing around obstacles Reduces strain on fittings and joints

To avoid leaks:

  • Keep to the recommended bend radius (usually 6–8 times the pipe diameter)
  • Use fittings approved by the manufacturer
  • Account for expansion and contraction
  • Shield pipes from UV exposure

On the other hand, copper installation follows a more detailed and skill-intensive process.

Copper Installation Steps

Installing copper pipes requires expertise, especially for soldering, which is critical for leak prevention.

Installation Aspect Details Impact on Leak Prevention
Tool Requirements Torch, flux, solder, pipe cutter, cleaning tools Proper soldering prevents joint failures
Connection Method Soldered joints or mechanical fittings Precision is key for each joint
Time Investment Slower, with curing time needed Ensures durable and reliable connections
Space Requirements Rigid routing with exact measurements Strategic joint placement reduces stress

Important maintenance steps for copper systems include:

  • Inspect soldered joints regularly
  • Watch for signs of corrosion
  • Test water pH levels periodically
  • Address issues like water hammer promptly

Both systems benefit from professional installation to maximize leak prevention. Next, we’ll explore how these installation differences affect durability and strength.

Life Expectancy and Strength

Durability plays a major role in preventing leaks. Let’s break down how PEX and copper hold up over time to help you make an informed choice.

PEX Lifespan

When installed correctly, PEX pipes can last between 30 and 50 years. Their flexible design helps absorb the impact of water hammer and freezing, which reduces the likelihood of leaks. Plus, the smooth interior resists scaling, keeping water flowing efficiently.

Here’s how PEX performs:

  • Temperature: Works well under typical household conditions.
  • Pressure: Handles standard residential water pressure without issues.
  • Chemical Resistance: Stands up to chlorine and acidic water.

Copper Lifespan

Copper pipes have an impressive lifespan of 50 to 70 years. Their rigid structure tolerates high pressure and temperature changes, making leaks less common. Additionally, copper’s natural resistance to corrosion contributes to its longevity.

Key copper traits include:

  • Temperature: Can handle both extreme heat and cold.
  • Pressure: Performs reliably under higher water pressures.
  • Corrosion Resistance: Minimizes the risk of leaks over time.

Both materials can be affected by water quality and environmental factors. If the water is particularly aggressive, additional protective measures might be needed. For personalized advice on choosing the right plumbing system and ensuring proper installation, consider reaching out to the experts at Hydrodynamics.

Next, we’ll look at the costs and resource demands of each option.

Price and Resource Use

Costs depend on materials, installation, and long-term resource consumption.

PEX Costs

PEX is a budget-friendly option for both materials and labor. PEX piping costs range from $0.50 to $2 per linear foot, and installing a PEX plumbing system in a typical 2,000‑square-foot home costs between $4,000 and $8,000, including materials and labor.

Here’s what impacts PEX costs:

  • Material Costs: PEX tubing is about one-third the cost of copper.
  • Installation Time: Installing PEX is 40–50% faster than copper.
  • Tool Costs: PEX tools run between $100 and $300 and can be reused.
  • Maintenance: Requires minimal upkeep over time.

While PEX is affordable, its recyclability is limited. When it reaches the end of its lifecycle, it often ends up in landfills, which may be a concern for some.

Copper Costs

Copper systems come with higher upfront expenses but are durable and recyclable. Installing copper plumbing in a 2,000‑square-foot home typically costs between $8,000 and $16,000.

Copper cost factors include:

  • Material Costs: Copper pipes cost $2.50 to $8 per linear foot.
  • Labor Costs: Professional plumbers charge $45 to $150 per hour for installation.
  • Joining Materials: Additional expenses for solder, flux, and fittings.
  • Tools: Standard plumbing tools, which most contractors already have.

Although the initial investment is higher, copper boasts a recyclability rate of over 90%. Scrap copper sells for $2 to $3 per pound, making it a more resource-conscious option.

For tailored advice on the best plumbing solution for your home, Hydrodynamics offers detailed estimates and recommendations based on your property and local water conditions.

Conclusion

PEX and copper pipes each bring their own strengths to leak prevention. PEX is a popular choice for residential projects due to its flexibility and affordability, while copper is often selected for its long-lasting performance in demanding environments. The right choice depends on your budget, the complexity of the installation, and specific application requirements.

Hydrodynamics’ certified technicians can evaluate factors like water quality, pressure, and local regulations to ensure your plumbing system is installed correctly. Whether you’re starting a new project or upgrading an existing system, they offer services for residential, commercial, and industrial needs.

Reach out to Hydrodynamics for expert advice and support.

Water conditioner installation steps

Water Conditioner Installation Steps

Installing a water conditioner improves water quality, protects plumbing, and extends the life of appliances. This guide breaks down the process into simple steps: preparation, mounting the unit, connecting plumbing, and ensuring safety. Here’s what you need to know:

  • Preparation: Choose a stable, accessible spot near the main water line with adequate clearance. Gather tools like a drill, pipe cutter, and plumber’s tape.
  • Mounting: Secure the unit to a plywood backer board using mounting brackets.
  • Plumbing Connection: Use the right materials (e.g., flux for copper pipes, NSF-certified tape for PVC) and install valves for maintenance.
  • Safety Checks: Test for leaks, confirm proper grounding, and ensure pressure stays between 30-80 PSI.

Regular maintenance, like replacing filters every 6-12 months, keeps the system efficient. For complex setups, hiring professionals ensures compliance with safety codes and avoids costly mistakes.

Key Tip: Use push-to-connect fittings for easier, leak-resistant connections. Proper installation and upkeep save money and deliver clean, high-quality water for years.

How To Install Water Softener System – Complete Installation Guide

Preparation for Installation

Getting everything ready beforehand ensures your water conditioner works efficiently and protects your plumbing and appliances, as discussed earlier.

Selecting an Installation Site

Pick a spot close to the main water line that offers at least 60 inches of vertical clearance and 45 inches of floor space. Make sure it’s easy to access for future maintenance [4]. The area should be stable, well-lit, and away from direct sunlight. If your unit needs electricity, ensure there’s a nearby outlet.

Tools and Materials Needed

Essential Tools Required Materials
Drill, pipe cutter, level, safety gear Mounting brackets, plumber’s tape, pipe fittings, screws/anchors

Ensure the pipe fittings match your plumbing system [1]. Avoid using pipe dope or PVC primer/glue on threaded fittings to prevent damage to plastic components [4].

Checking Water and Power Supply

Make sure the water and power supplies are ready for safe installation. Completely shut off the main water valve [5]. If the unit needs electricity, confirm that an outlet is within reach. For metallic plumbing, install two grounding clamps to avoid electrical risks [4].

“Proper grounding is essential when installing on metallic plumbing. Securely install two grounding clamps to prevent electrical shock and ensure safety.” [4]

If the plumbing setup is complicated, it’s a good idea to consult professionals like Hydrodynamics. They specialize in water conditioner installations and can ensure everything meets local regulations.

Once the site is ready and utilities are secure, you can move on to the installation process.

Installation Steps

Now that everything is prepared, let’s walk through the installation process step by step.

Mounting the Unit

Start by attaching a plywood backer board to the wall studs for added stability. Make sure it’s level before moving forward. Align the mounting brackets with the unit’s mounting points, checking the level again, and then secure them using heavy-duty screws. Once the unit is firmly mounted, you’re ready to connect it to the plumbing system.

Connecting to Plumbing

Carefully measure and cut the pipes to the required length, then clean the ends with sandpaper for smooth connections. If you’re working with copper pipes, apply flux before soldering to ensure a strong bond [1]. Keep the alignment precise to avoid stress on the joints. Install valves and a bypass system to allow for maintenance without interrupting your home’s water supply [3].

Connection Type Materials Needed
Copper Flux, solder, torch
PVC NSF-certified tape
Metallic Grounding clamps, #4 copper wire

“Dry fit all connections before securing them, and use NSF-certified plumber’s tape on threaded fittings. Avoid using pipe dope or PVC primer/glue to prevent damage to plastic fittings” [4].

After securing the pipes and valves, it’s time to install the filter cartridges.

Installing Filter Cartridges

Handle the filter cartridges with clean hands to avoid contamination. Inspect each cartridge for any damage before inserting it into the housing. Turn the cartridges clockwise until they are snug, but don’t overtighten – this could harm the O-rings [6]. Make a note of the installation dates to keep track of replacements and maintain the system’s efficiency [3].

Once everything is installed, check all connections to ensure they are secure, and the system is ready to go.

Safety and Maintenance

Preventing Leaks and Ensuring Functionality

Once installation is complete, it’s time to test for leaks to confirm everything is working as it should. Slowly turn on the water supply and carefully check all connections – especially threaded fittings and joints – for any signs of leakage. A well-installed system will hold steady pressure without dripping or seeping.

Focus on these critical areas:

Testing Area What to Check & Fix
Connections Look for moisture; tighten fittings or replace seals if needed
Pressure Gauge Confirm pressure is within 30-80 PSI; adjust regulator if necessary
Filter Housing Ensure cartridge is seated properly and O-rings are intact; reseat or replace if needed

Once you’re sure the system is leak-free, regular maintenance will keep it running smoothly for years to come.

Maintenance Tips

How often your system needs attention depends on your water usage and quality. Most filter cartridges need replacing every 6-12 months, but this can vary based on your specific conditions [1][3].

“Regular inspections can help identify potential issues early, such as leaks or wear on components” [7][3].

Here are some key maintenance tasks to keep in mind:

  • Check pressure readings and inspect O-rings and seals every three months.
  • Clean the exterior of the system monthly to prevent dust and grime buildup.
  • Test the bypass system every six months to ensure it’s functioning properly.

During your inspections, confirm that the system’s electrical grounding is secure. Keep a log of all maintenance activities, like filter replacements and any repairs, to stay organized and maintain warranty coverage.

If you notice odd noises, reduced water flow, or changes in pressure, address these concerns quickly to avoid further issues. For more advanced repairs or troubleshooting, consider hiring a professional for added peace of mind.

Additional Tips and Professional Help

Using Push-to-Connect Connectors

Push-to-connect connectors make installation easier by providing secure, leak-resistant seals – no special tools required [1][6]. To ensure a proper seal, insert the connector fully until you hear a click. For best results, avoid sharp bends and keep the connector lines in smooth, gentle curves.

These connectors are especially helpful during the plumbing connection phase. However, for more intricate setups or to guarantee everything is installed correctly, hiring a professional can be a smart choice.

Professional Services from Hydrodynamics

Hydrodynamics

While many installations can be done on your own, more advanced water conditioning systems often require expert handling. Hydrodynamics Inc., a family-owned business since 1994, offers specialized water conditioning installation and maintenance services throughout Northeastern Pennsylvania.

Their services include:

  • System sizing and placement advice: Ensuring the system fits your specific needs and space.
  • Post-installation testing: Checking and fine-tuning the system for optimal performance.
  • Expert installation: Handling grounding and backflow prevention correctly.

For setups involving additional features like check valves or specialized grounding, professional installation can help you avoid expensive errors. Hydrodynamics’ team ensures installations meet safety codes and run efficiently.

Safety Tip: Professionals use grounding clamps and #4 copper wire to ensure proper safety measures. They also make sure the system is protected from freezing and direct sunlight [2][3].

Conclusion

Adding a water conditioner can enhance water quality and prolong the life of your plumbing system. Using durable materials and following the manufacturer’s instructions are key to avoiding leaks and inefficiencies [1][4].

Paying close attention to placement, connections, and safety measures ensures the system runs efficiently. While proper installation is essential, ongoing care – like regular maintenance – keeps the system performing well over time. Choosing NSF-certified materials and adhering to manufacturer guidelines can help sidestep common problems [1][4].

For more complex setups or installations requiring code compliance, working with experts like Hydrodynamics is a smart move. Their knowledge is particularly useful for systems with specialized features or those that need to integrate with existing plumbing.

Routine upkeep, such as replacing filters and conducting system checks, helps your water conditioner stay effective and last longer [3]. A properly installed and maintained unit not only delivers clean water but also protects your appliances and lowers overall costs.

Whether you’re tackling the installation yourself or hiring professionals, preparation and safety should remain your top priorities. Investing in a water conditioner pays off with better water quality, longer-lasting appliances, and fewer maintenance expenses over time [3].