Checklist for HVAC Installation Success

Checklist for HVAC Installation Success

Getting HVAC installation right boils down to thorough preparation, precise execution, and detailed follow-up. Here’s what you need to know:

  • Preparation: Assess the site, check equipment, and secure permits to avoid delays and ensure compliance.
  • Installation: Safely remove old systems, install new components accurately, and focus on proper electrical and refrigerant connections.
  • Post-Installation: Test system performance, inspect for issues, and ensure everything meets safety and code standards.
  • Customer Handover: Educate the customer on usage, maintenance schedules, and warranty details while providing complete documentation.

HVAC Install Checklist: Your Essential Installation Guide

Pre-Installation Preparation

Getting everything ready before starting an HVAC installation is essential. Proper preparation helps avoid delays and costly mistakes, ensuring the process goes smoothly.

Site Assessment

Start with a detailed review of the site. This includes examining the layout, dimensions, and ventilation needs. Take a close look at the building’s structure to figure out the best spots for placing units, planning ventilation, and ensuring accessibility for installation. Don’t forget to account for any existing HVAC systems and obstacles that might get in the way.

Plan for where electrical connections and ductwork will go, including vents on exterior walls or the roof. Perform load calculations to choose the right HVAC unit size. These calculations should factor in the size of the home, the number of windows and doors, insulation quality, room count, ceiling height, orientation, and the number of occupants.

Inspect accessible components like ductwork, vents, filters, and coils for wear, damage, or blockages. Use tools to measure airflow velocity and pressure drop to detect any obstructions or imbalances. Once the site is fully assessed, confirm that all equipment aligns with the project’s requirements.

Equipment and Materials Check

Make sure all necessary equipment and materials are in good working order. Check filters and systems to see if replacements or upgrades are needed. Consider the filter’s pressure drop when designing the system to prevent performance issues. Use tools like thermal imaging cameras, gauges, and testing equipment to evaluate temperature control, humidity levels, and energy efficiency.

Permits and Code Compliance

Before starting the installation, secure any required permits from local authorities. This is especially important for replacing furnaces or air conditioning systems. Assess the existing infrastructure and account for any spatial limitations or unique challenges that could pose risks. Review all project specifications and requirements carefully to ensure compliance and avoid setbacks.

HVAC Installation Steps

Once preparations are complete, it’s time to move on to the actual installation process. Following each step carefully ensures the system operates safely, efficiently, and lasts for years to come.

Removing Old Equipment

Start by turning off the power supply at the electrical panel to avoid any accidents. This simple but essential step protects both the technicians and the property from electrical hazards.

Next, disconnect and label all electrical components, such as disconnect boxes and conduits. Labeling helps streamline the installation of the new system.

When it comes to refrigerant evacuation, this step must adhere strictly to regulatory guidelines. Certified professionals should handle this process to avoid environmental damage and ensure safety.

If the system includes gas lines, proceed with extreme caution. Test for leaks both before and after disconnecting the lines to prevent dangerous gas leaks.

Carefully remove old components in the proper order: upper ductwork, indoor evaporator coils, refrigerant lines, and condensation lines. Use appropriate tools or equipment when handling heavy parts like motors and ductwork to prevent injuries.

Good ventilation is critical, especially in confined spaces, to avoid the buildup of dust, fumes, or hazardous gases. Keep the work area clean and free of debris to improve safety and efficiency.

Installing New HVAC Components

Begin by placing major components – like condensers, air handlers, and ductwork – based on the site assessment completed earlier. Follow manufacturer specifications and local codes to ensure proper installation. Secure mounting is essential to reduce vibration and extend the equipment’s lifespan.

When installing ductwork, pay close attention to airflow design. Properly sized ducts are crucial for optimal performance and energy efficiency. Seal all joints and connections to eliminate air leaks, which can reduce effectiveness and increase energy costs.

Thermostat placement also plays a key role in system performance. Install thermostats in locations free from direct sunlight, heat sources, or drafts to ensure accurate readings. Protect thermostat wires by running them through safe pathways to prevent damage.

Position both indoor and outdoor units with adequate clearance for maintenance access and proper airflow. Follow manufacturer guidelines for minimum distances from walls, vegetation, or other obstructions. Double-check each step before moving on to ensure the system is set up for long-term reliability.

Electrical and Refrigerant Connections

With the components in place, focus on the electrical and refrigerant connections – both of which are critical for the system’s functionality.

Electrical safety cannot be overstated. Electrical incidents result in approximately 1,000 deaths and 30,000 injuries annually in the U.S.. Faulty wiring can lead to fires, power surges, and severe damage to both the HVAC system and the property.

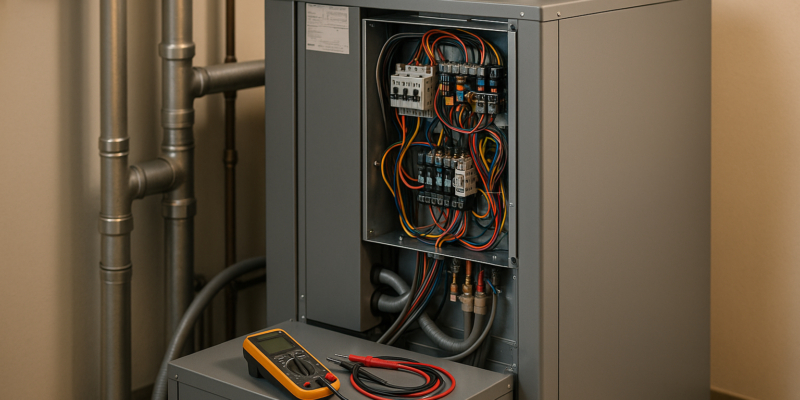
Before starting, de-energize the system completely. Use proper lockout/tagout (LOTO) procedures and verify circuits are off with testing equipment. Always wear insulated personal protective equipment (PPE) and use insulated tools to reduce electrical risks.

Ensure proper grounding of the system to prevent electrical issues and maintain safety. Choose the correct wire sizes to avoid overheating and other potential problems.

Keep cables organized to maintain airflow and reduce risks. Bundle wires neatly in raceways and use protective sleeves to minimize the chance of electric shocks. Inspect all components during installation to catch any damage or faults early.

For refrigerant lines, precision is key. Use the correct fittings and follow the manufacturer’s torque specifications. Leak testing is an absolute must to ensure the system is sealed properly, preventing refrigerant loss and costly repairs down the line. This step also helps avoid environmental harm caused by leaks.

Post-Installation Quality Checks

Once the installation and connections are complete, the next step is testing the system to ensure it’s safe, efficient, and ready for use. These checks help identify any potential issues before handing the system over to the customer, ensuring everything works as intended.

System Testing and Performance Check

Start by powering up the system gradually. Turn on the electrical supply at the main panel, then activate the system through the thermostat. Test both heating and cooling modes while listening for any unusual startup sounds, which could indicate installation issues.

Check the temperature differential to confirm the system’s performance. Use calibrated digital thermometers to measure the difference between the supply and return air. For cooling systems, the differential should fall between 15°F and 20°F, while heating systems should show a range of 30°F to 40°F. Deviations from these ranges may point to airflow problems or refrigerant issues.

Evaluate airflow at each register using tools like an anemometer or flow hood. Weak airflow could signal ductwork issues, while excessive airflow might indicate undersized return ducts. Ideally, each room should receive airflow within 10% of the calculated design values.

Verify refrigerant pressures using manifold gauges. The pressures should match the manufacturer’s specifications exactly. Incorrect readings could suggest refrigerant leaks, overcharging, or undercharging, all of which can reduce system efficiency and lifespan.

Ensure the system responds promptly to thermostat settings and that all programmed schedules work as expected. For smart thermostats, confirm they connect to Wi-Fi and respond to app commands.

Use a clamp meter to check motor and compressor electrical draws against the nameplate values. Significant deviations could indicate problems with motors, capacitors, or electrical connections. Once all these parameters are verified, move on to the final safety and visual inspections.

Final Inspections

Perform a visual inspection of the system components. Look for loose connections, missing screws, or improperly secured panels. Ensure all electrical boxes are covered properly, with no exposed or pinched wires.

Pay close attention to gas line connections when applicable. Use a leak detection solution on all joints and connections – any bubbles indicate a leak that must be addressed immediately. Gas leaks, no matter how small, are dangerous and cannot be ignored.

Inspect the condensate drainage system by pouring water into the drain pan to ensure proper flow. Blocked drains can lead to water damage and promote mold growth. Verify that drain lines have the correct slope and that condensate pumps, if present, are functioning properly.

Check ductwork sealing to ensure all joints are secured with appropriate sealants or tape, leaving no air leaks. Poorly sealed ducts waste energy and can significantly impact system performance.

Test safety controls, including limit switches, pressure switches, and emergency shutoffs. These mechanisms are critical for protecting the system and property in case of malfunctions.

Finally, confirm code compliance. Check that the installation meets local regulations, including equipment clearances, proper venting for gas appliances, and adherence to National Electrical Code standards for electrical work.

Customer Handover and Documentation

After completing the inspections, wrap up the process by educating the customer and providing thorough documentation. This ensures they understand how to operate and maintain their new system.

Conduct a system demonstration, walking the customer through thermostat programming, filter replacement, and basic troubleshooting. Show them how to locate the main electrical disconnect and safely reset circuit breakers.

Explain filter replacement schedules – monthly for standard 1-inch filters, and every 3-6 months for higher-efficiency filters. Homes with pets or smokers may require more frequent changes. Also, provide warranty details, which typically range from 5-10 years for major components, with some extending up to 20 years for heat exchangers. Register the warranties immediately to ensure coverage starts on the installation date.

Offer maintenance scheduling recommendations to help the customer protect their investment. Advise scheduling professional maintenance twice a year – once in the spring for cooling systems and again in the fall for heating systems. Provide your contact information for service appointments and emergency repairs.

Document the system’s specifications, including model numbers, serial numbers, refrigerant types, and electrical requirements. Leave a copy with the customer and keep the original in your company files for future reference.

Start a service history record beginning with the installation date. This record will track all maintenance, repairs, and modifications, making it easier for technicians to diagnose and resolve issues efficiently during future service visits.

sbb-itb-99db659

Documentation and Maintenance Planning

After completing final inspections and handing over the system to the customer, it’s essential to prioritize thorough documentation and a well-defined maintenance schedule. These steps not only protect the system’s long-term performance but also safeguard the contractor’s reputation and the customer’s investment. A well-maintained system ensures efficiency and reliability for years to come.

Installation Record Keeping

Detailed installation records are the foundation for future service and warranty claims. Start by documenting every piece of equipment, including model numbers, serial numbers, manufacture dates, and installation dates. This information becomes invaluable when ordering parts or verifying warranty coverage down the road.

Include system specifications and create a layout diagram that maps out equipment locations, electrical connections, gas lines, and thermostat wiring. For example, document a 3.5-ton Carrier heat pump charged with 8.2 pounds of R-410A refrigerant. Record details like refrigerant type, electrical specs, duct sizing, and any adjustments made during installation.

Take photographs of critical installation points before sealing components. Capture images of electrical connections, refrigerant lines, ductwork, and any custom mounting solutions. These visual references are incredibly helpful for troubleshooting or planning upgrades later.

Keep permits and certificates organized. Many jurisdictions require these documents to stay with the property, and they’re often needed for insurance claims or property sales. Store digital copies securely while also providing physical copies to the customer.

These records form the backbone of an effective maintenance strategy.

Creating a Maintenance Schedule

A clear maintenance schedule not only helps customers protect their system but also creates opportunities for ongoing service. Maintenance timing should align with seasonal system use – schedule cooling system checks in early spring and heating system checks in early fall to ensure peak performance during high-demand periods.

Tailor the frequency of maintenance to the system’s type and usage. Residential systems generally need professional servicing twice a year. However, homes with pets, smokers, or high levels of dust might require more frequent filter changes and inspections. Commercial systems, which often run longer hours, may need monthly attention.

Provide customers with simple maintenance tasks they can handle between professional visits. Monthly tasks might include replacing filters, clearing debris around outdoor units, and ensuring the thermostat is functioning properly. Quarterly tasks could involve inspecting ductwork for visible damage, checking for clogged drain lines, and testing safety shutoffs.

Track maintenance costs to help customers budget effectively. Professional maintenance visits typically cost between $150 and $300, depending on the system’s complexity and local labor rates. Offering preventive maintenance contracts can reduce these costs by 15-20% while providing benefits like priority scheduling and discounted repairs.

Set performance benchmarks during installation to monitor system health over time. Record initial measurements for temperature differentials, airflow rates, electrical loads, and refrigerant pressures. Comparing these benchmarks annually can help identify issues before they lead to system failures.

Use scheduling tools to simplify service tracking. Platforms like ServiceTitan or FieldEdge can send automated service reminders to customers and optimize technician scheduling.

Highlight warranty requirements to ensure customers maintain their coverage. Many manufacturers, like Carrier and Trane, require proof of annual professional maintenance to honor extended warranties. Provide customers with maintenance record cards to track service visits and explain these requirements clearly.

Finally, include emergency contact procedures in the maintenance plan. Share after-hours contact information and outline situations that require immediate attention, such as gas leaks, electrical sparking, or complete system failures during extreme weather. This ensures customers know when to act quickly and when issues can wait for regular business hours.

Conclusion: HVAC Installation Success

Achieving success in HVAC installation hinges on thoughtful preparation, precise execution, and thorough follow-up. Each phase of the process plays a crucial role in ensuring the system’s reliability and customer satisfaction.

It all starts with solid preparation. Conducting detailed site assessments helps uncover potential challenges early, while verifying equipment prevents unnecessary delays. Securing permits and adhering to local codes not only protects contractors and homeowners but also avoids compliance issues that could arise later. This groundwork sets the stage for a smooth installation process.

During installation, precision is everything. From removing outdated equipment to installing new components, every detail matters. Properly securing electrical connections, sizing refrigerant lines, and sealing ductwork according to manufacturer guidelines directly influence energy efficiency and system performance. These steps ensure the system operates as intended for years to come.

Post-installation checks are what separate good work from great work. Rigorous system testing identifies any issues while they’re still manageable, and meticulous inspections catch potential problems that could lead to warranty disputes or safety concerns. A thorough customer handover not only ensures they understand how to operate the system but also builds trust and confidence in the installation.

Finally, proper documentation and a clear maintenance plan protect the investment over the long term. Detailed records make warranty claims and future service easier, while a well-communicated maintenance schedule helps homeowners take an active role in system upkeep.

By following these steps, even the most complex HVAC projects can become seamless and professional. Consistently applying these best practices enhances contractor reputation, ensures homeowner comfort, and extends the life of the system.

The key to HVAC success is getting each step right the first time. This checklist serves as a reliable guide to achieving that goal, every single time.

FAQs

What are the key mistakes to avoid during an HVAC installation?

Common HVAC Installation Mistakes to Avoid

Getting your HVAC system installed correctly can save you a lot of headaches down the road. Here are some frequent mistakes to watch out for:

  • Picking the wrong unit size: If your HVAC system is too big or too small for your space, it can lead to uneven temperatures, higher energy costs, and reduced efficiency. Size matters here – get it right!
  • Poor ductwork design: Ducts that aren’t planned well can choke airflow, making your system work harder than it should.
  • Ignoring ventilation needs: Proper ventilation isn’t just a nice-to-have – it’s crucial for good air quality and keeping your system running smoothly.
  • Skipping leak tests: Refrigerant or duct leaks can waste energy and shorten your system’s lifespan. Testing for leaks is a step you don’t want to skip.
  • Crowding outdoor units: Outdoor units need space to breathe. Placing them too close to walls or other obstructions can block airflow and cause overheating.
  • Using the wrong filters: If you use high MERV-rated filters on a duct system that isn’t designed for them, you might strain your system and hurt its efficiency.

By avoiding these pitfalls during installation, you’ll not only boost your system’s performance but also help it last longer – saving you money and hassle in the long run.

What steps can I take to keep my HVAC system energy-efficient and reliable over time?

To keep your HVAC system running smoothly and efficiently, regular maintenance is a must. Start with the basics: replace or clean your air filters every 1–3 months to maintain good airflow. Check for leaks in your ductwork and seal them up to avoid wasting energy. It’s also smart to schedule professional check-ups twice a year. During these visits, a technician can handle tasks like inspecting refrigerant levels, cleaning coils, and lubricating moving parts.

Staying on top of maintenance not only cuts down on energy use but also minimizes wear and tear, helping your system last longer. These straightforward steps ensure your HVAC keeps your home comfortable no matter the season.

How should I prepare my home for an HVAC installation?

Tips for a Smooth HVAC Installation

Preparing for an HVAC installation? Start by clearing the area around the installation site. Both indoor and outdoor spaces should be free of clutter to ensure technicians can easily access the site and bring in equipment without any hiccups.

Another important step: secure pets and valuables. This precaution not only avoids disruptions but also minimizes the risk of accidental damage while the work is being done.

Lastly, take a moment to inspect your electrical connections to confirm they’re in good condition. Also, make sure all pathways are clear to allow technicians to move around safely. A little preparation goes a long way in making the entire process smooth and stress-free for everyone involved.

Electric Boilers vs Gas Boilers: Key Differences

Electric Boilers vs Gas Boilers: Key Differences

Electric and gas boilers serve different needs, and choosing the right one depends on efficiency, cost, safety, and environmental goals. Here’s a quick breakdown:

  • Efficiency: Electric boilers convert nearly 100% of electricity into heat, while modern gas boilers achieve 90–95% efficiency.
  • Costs: Electric boilers cost less to install ($6,469–$11,885) but have higher annual operating costs (~$1,700). Gas boilers are more affordable to run ($620–$1,260 annually) but require more maintenance.
  • Lifespan: Electric boilers last longer (15–25 years) compared to gas boilers (10–15 years).
  • Environmental Impact: Electric boilers produce no direct emissions, especially when powered by renewables, while gas boilers emit 0.215 kg of CO₂ per kWh.
  • Safety: Electric boilers eliminate risks like gas leaks and carbon monoxide, making them safer for facilities.

Quick Comparison

Feature Electric Boilers Gas Boilers
Efficiency 99–100% (point-of-use) 90–95% (modern systems)
Installation Cost $6,469–$11,885 $7,469–$14,885
Annual Operating Cost ~$1,700 $620–$1,260
Lifespan 15–25 years 10–15 years
Emissions Zero (with renewables) 0.215 kg CO₂/kWh
Safety No combustion risks Requires ventilation, risk of leaks

Electric boilers are ideal for precise heating and low-emission goals, while gas boilers excel in high-demand, cost-efficient operations. Choose based on your facility’s needs.

Industrial Boilers: Should You Go Electric or Gas-Fired?

How Electric and Gas Boilers Work

Electric and gas boilers generate heat in distinct ways, and these differences significantly influence their role in industrial applications. Below, we break down how each type operates.

Electric Boilers: Heating with Electrical Resistance

Electric boilers work by converting electricity directly into heat. Inside the system, resistance elements submerged in water heat it to produce steam or hot water for industrial use [5]. This process is highly efficient, with nearly 100% of the electrical energy converted into heat [8]. Because there’s no combustion involved, electric boilers don’t need flues or chimneys to vent exhaust gases. This not only simplifies installation but also eliminates safety risks tied to fuel storage and handling [5].

Gas Boilers: Heat from Combustion

Gas boilers operate by burning natural gas or propane. A burner mixes the gas with air and ignites it within a combustion chamber [6][7]. The resulting flame generates intense heat, which heats water to produce steam or hot water [5][7]. Key components include the burner, combustion chamber, heat exchanger, and a flue system that safely vents by-products like water vapor and carbon monoxide [6][9]. While modern gas boilers are quite efficient – typically achieving 90% to 95% efficiency – some energy is lost during combustion [5]. Unlike electric boilers, gas boilers require proper ventilation and adherence to strict safety standards due to the emissions and risks associated with fuel storage and combustion.

Efficiency Comparison: Electric vs Gas Boilers

When comparing boiler efficiency for industrial use, it’s essential to consider both the point-of-use efficiency and the broader system losses. While point-of-use numbers can look impressive, they don’t tell the whole story. Let’s break down these efficiencies and what they mean for overall performance.

Energy Conversion Efficiency

Electric boilers are highly efficient at converting energy into heat, with an impressive 99% efficiency rate. This is because they bypass the energy losses that occur during combustion [14].

Gas boilers, on the other hand, are efficient by combustion standards, with point-of-use efficiencies typically ranging from 90% to 95% [1]. However, they lose around 5% to 10% of energy through flue gases [1]. Modern condensing gas boilers can push efficiencies above 95% by capturing and using some of the heat that would otherwise escape [11].

The efficiency gap widens when you look at older systems. While modern electric boilers maintain their high efficiency over time, older gas boilers – those in operation for 25 years or more – can drop to around 60% efficiency [12]. These older systems often experience energy losses between 20% and 35%, making them prime candidates for replacement [11].

Boiler Type Point-of-Use Efficiency Overall System Efficiency
Electric 99–100% 30–45%
Gas (Modern) 90–95% 80–90%
Gas (Older) 60–80% 50–70%

System Energy Losses

System-wide efficiency paints a more complete picture, and this is where the differences between electric and gas boilers become clearer.

Electricity transmission comes with its own set of losses. As power travels from generation plants to industrial sites, transmission losses range from 7% to 12% [13]. Additionally, many fossil fuel power plants operate at only 30% to 50% efficiency when generating electricity [1]. These factors significantly impact the overall efficiency of electric boilers.

Gas delivery systems, however, are much more efficient. Natural gas pipelines lose only about 1% to 2% of energy during delivery [13], and the gas retains 90% to 95% of its efficiency when it reaches industrial facilities [1]. This delivery advantage helps gas boilers achieve better overall system efficiency compared to electric boilers, despite lower point-of-use efficiency.

Boilers also experience energy losses due to stack, radiation, and convection, which can account for 10% to 20% of energy loss [10]. Electric boilers avoid flue losses entirely since they don’t rely on combustion or chimneys [13]. Gas boilers, however, inherently lose energy during combustion and through the flue system [13]. That said, modern condensing gas boilers can recover some of this lost energy when exhaust temperatures fall below 176°F, achieving thermal efficiencies above 95% [15].

For applications requiring precise heating or in space-constrained environments, the 99% efficiency of electric boilers can outweigh grid-related losses. On the flip side, for high-demand, continuous operations, the superior overall system efficiency of gas boilers often makes them the more cost-effective option.

Cost Analysis: Installation, Operation, and Maintenance

When evaluating the total cost of ownership for boilers, you need to factor in installation, operation, and maintenance. Each type of boiler – electric or gas – affects long-term costs differently.

Installation Costs and Requirements

Electric boilers are generally simpler and less expensive to install than gas boilers. The cost of installing an electric boiler typically falls between $6,469 and $11,885, covering both labor and materials [16]. On the other hand, gas boiler installations often require additional work, such as installing flues, exhaust lines, drains, and fuel lines, which can add $1,000 to $3,000 to the overall cost [17]. Gas systems may also involve permits, coordination with utility companies, and safety inspections, which can extend the timeline and increase expenses.

Once the installation is complete, the next major cost consideration is the system’s day-to-day operation.

Operating Costs

The ongoing operational costs of electric and gas boilers differ significantly. Based on current U.S. energy rates – $0.2703 per kWh for electricity and $0.0699 per kWh for natural gas – gas boilers are more economical for continuous, high-demand operations. Natural gas is about three times cheaper than electricity per unit of energy [2]. While fuel costs are the primary factor, differences in system efficiency and infrastructure requirements also play a role in determining the overall operating expenses.

Beyond daily operation, maintenance expenses further distinguish these systems.

Maintenance Requirements

Maintenance needs are another key factor separating electric and gas boilers. According to the U.S. Energy Information Administration, the average annual maintenance cost for a natural gas boiler is about 16.2 times higher than that of an electric boiler [4]. Electric boilers, with their simpler designs and lack of combustion processes, require minimal upkeep. Maintenance for electric systems often involves only occasional replacement of heating elements, leading to costs that are up to 50% lower than those for fuel-fired systems [18].

Gas boilers, however, demand more extensive maintenance. Tasks include refractory repairs to address damage from high-temperature combustion, periodic non-destructive testing, burner cleaning and calibration, and regular inspection and maintenance of exhaust systems to ensure proper ventilation. These requirements contribute to higher long-term maintenance costs.

Industrial Applications: Choosing the Right Boiler

When it comes to selecting the right boiler for industrial use, the decision largely depends on aligning the system’s capabilities with the specific demands of your operation. Whether you opt for an electric or gas boiler will often hinge on factors like heating requirements, available space, and the need for temperature precision. Each type has its strengths, making it better suited to certain environments.

High-Demand Industrial Settings

For industries requiring substantial thermal output, gas boilers are often the go-to choice. Their ability to generate large amounts of heat almost instantly through combustion makes them ideal for manufacturing plants, foundries, and large-scale processing facilities. Unlike gas boilers, electric systems heat up more gradually and require a significant electrical supply to achieve similar output levels [3][19]. This makes gas boilers a more cost-effective option for operations that need continuous, high-output heating. However, when precise temperature control is a priority, electric boilers may be the better option.

Precision-Controlled Environments

Electric boilers shine in industries where maintaining exact temperatures is critical. Sectors like pharmaceutical manufacturing, healthcare, and laboratory research benefit from their ability to deliver nearly 99% efficiency by converting almost all electrical energy into heat [5]. Additionally, when powered by renewable energy sources, electric boilers can operate with minimal environmental impact [5]. Their precision and efficiency make them indispensable in applications where even minor temperature fluctuations cannot be tolerated.

Space-Limited Applications

In settings where space is limited, electric boilers offer a distinct advantage. Their compact design eliminates the need for bulky flues, ventilation systems, or extensive gas supply connections [3][20]. This makes them particularly well-suited for urban facilities, retrofitted buildings, or any location where maximizing floor space is crucial. On the other hand, gas boilers require additional infrastructure like ventilation systems and flues, which can significantly increase the overall footprint of the installation [3]. For facilities where space is at a premium, electric boilers provide a practical and space-efficient solution.

Safety and Environmental Impact

When choosing an industrial boiler, it’s essential to weigh both safety profiles and environmental impacts. Each system comes with unique risks and environmental considerations that can shape your operation’s safety measures and sustainability objectives.

Carbon Emissions and Renewable Energy

The environmental footprint of a boiler largely hinges on its energy source. Gas boilers release approximately 0.215 kg of CO₂ per kWh, while grid-powered electricity produces about 0.519 kg of CO₂ per kWh[1]. At first glance, electric boilers might seem to have a higher carbon footprint when relying on traditional grid electricity. However, when paired with renewable energy sources like solar or wind, electric boilers can achieve zero emissions, offering a completely carbon-neutral solution[22]. For instance, an all-electric boiler system has the potential to reduce emissions by about 708 tons of CO₂ annually and up to 17,700 tons over its operational lifetime[4].

Beyond emissions, the safety aspects of these systems are another critical factor to consider.

Safety Risks

The safety risks associated with gas and electric boilers differ significantly. Gas boilers, for instance, pose combustion-related dangers, including the risk of carbon monoxide (CO) poisoning. According to HSE statistics, unsafe gas appliances cause around seven fatalities annually in the UK due to CO poisoning[19]. Since carbon monoxide is both odorless and colorless, consistent monitoring is crucial to ensure safety[1].

Electric boilers, on the other hand, eliminate combustion risks entirely. Their simpler design minimizes the need for frequent safety inspections compared to gas systems. Robert Presser, Vice President of Acme Engineering Products, highlights the safety advantages of electric boilers:

“With gas burning boilers, any gas leak can increase the risk of an explosion wherever there are fuel lines, fumes, flames, or storage tanks. With electrode boilers, there are no combustion hazards because there are no flames, fumes, fuel lines, or storage tanks. Electric boilers – and specifically the electrode units – are inherently the safest boiler design today. These units do not need an operator because if anything goes wrong, a breaker trip automatically halts operations, preventing escalation.” [21]

Gas boilers demand regular servicing to detect leaks and ensure proper combustion. In contrast, electric boilers generally require less maintenance, making them an appealing option for facilities prioritizing worker safety and environmental responsibility. These distinctions are crucial when selecting a boiler system, as they tie directly into operational efficiency, regulatory compliance, and emerging technology trends, which will be addressed in the next section.

Regulatory shifts and energy policies are becoming key factors in determining boiler choices for industrial facilities. These changes emphasize the operational and environmental considerations discussed earlier, influencing the decision between electric and gas boilers.

Emissions Regulations

Gas boilers are under growing scrutiny due to stricter emissions standards across the U.S. Industrial boilers contribute up to 10% of industrial carbon emissions and 6% of industrial NOx pollution[24]. Alarmingly, 66% of the highest-emitting boilers are located in federally designated disadvantaged communities, where NOx levels are nearly double the national average[25].

Under the Clean Air Act, states have the authority to impose emissions limits on industrial boilers, often exceeding federal requirements[24]. A groundbreaking example is the South Coast Air Quality Management District’s (SCAQMD) Rule 1146.2, passed in June 2024. This rule mandates the electrification of industrial boilers and water heaters, aiming to cut NOx pollution by 5.6 tons daily once fully implemented[23].

In this regulatory landscape, electric boilers stand out as a cleaner alternative. Unlike gas boilers, they emit no pollutants such as carbon monoxide or nitrogen oxides during operation[26]. As emissions standards continue to tighten, electric systems are gaining increased governmental support.

Government Incentives for Electric Systems

Federal and state programs are actively promoting the adoption of electric boilers by offering financial incentives to offset their higher upfront costs compared to gas systems[28]. These incentives come in various forms, including tax credits, rebates, and low-interest loans, making the transition to electric systems more accessible.

The Clean Energy Rule, for instance, pushes federal agencies to minimize on-site fossil fuel use in new and significantly renovated facilities[29]. Some utilities are even offering reduced industrial electricity rates, further improving the return on investment for electric boilers[28]. Depending on factors like energy rates, usage, and available incentives, the payback period for these systems can range from 2 to 7 years[28].

Trevor Dolan, senior policy lead at Evergreen Action, highlights the transformative potential of these policies:

“By stepping in with supportive policies, states can correct market failures, drive meaningful emissions reductions, and help manufacturers modernize for a more competitive, low-carbon future – while protecting the communities that have long borne the brunt of industrial pollution.”[25]

These incentives, alongside advancements in technology, are setting the stage for electric boilers to seamlessly integrate with smart grids.

Smart Grid Integration

One of the standout features of electric boilers is their ability to integrate with smart grids. This capability allows them to participate in demand-response programs and adjust operations automatically based on grid conditions. Facilities can reduce energy costs by running boilers during off-peak hours when electricity rates are lower. Smart thermostats and control systems further enhance efficiency and monitoring of electric heating systems[31].

The global commercial electric boiler market is projected to grow at a CAGR of 15.5% between 2024 and 2032, with smart grid integration playing a significant role in this expansion[28]. The Renewable Thermal Collaborative’s Electrification Action Plan outlines ambitious goals for reducing industrial thermal emissions:

“Electrification Action Plan lays out an ambitious, multi-year strategy to address barriers to electrification. It provides a vision for the priority market, policy, and community actions that will drive the RTC towards its goal of a 30% reduction in U.S. industrial thermal emissions by 2030 and full sector decarbonization by 2050.”[27]

Industrial facilities are encouraged to explore local incentives and include them in their cost analyses when considering new equipment purchases[30]. As Kim Orbe from the Sierra Club points out:

“Despite gas industry claims, non-polluting electric equipment is already here and has far more momentum than its gas-powered rivals.”[23]

With regulatory and technological trends favoring electric systems, they are becoming an increasingly appealing choice for forward-thinking industrial operations.

Conclusion: Making the Right Choice

When it comes to selecting the right boiler, factors like efficiency, cost, safety, and compliance with regulations play a major role. The best choice ultimately depends on your facility’s specific needs, the regulatory landscape, and your long-term operational objectives. Each boiler type has its own strengths, tailored to different industrial requirements.

Electric boilers are ideal for settings where precision is key, offering nearly 100% energy conversion and precise temperature control. They also eliminate combustion-related risks and produce zero direct emissions, making them an appealing option as environmental regulations become stricter. On the other hand, gas boilers deliver powerful, rapid heating for high-demand operations. While their efficiency is slightly lower, the lower cost of natural gas often makes them more economical. However, it’s worth noting that, according to the U.S. Energy Information Administration, maintaining a natural gas boiler can cost about 16.2 times more annually than maintaining an electric system[4].

Regulations are also reshaping boiler preferences across industries. While electricity costs are about 2.4 times higher than natural gas in areas like Baltimore (based on 2024 utility rates), government incentives and smart grid technologies can help mitigate these higher expenses.

Given the complexities, a professional assessment is crucial. Every industrial facility has distinct heating requirements, space limitations, and operational goals. Hydrodynamics Inc., with over 30 years of experience, provides in-depth evaluations of energy usage, compliance needs, and long-term costs, helping facilities make informed decisions.

The right boiler choice comes down to aligning your operational needs, infrastructure, and financial priorities with expert guidance to ensure optimal results.

FAQs

What are the long-term costs of using an electric boiler instead of a gas boiler in industrial settings?

Electric Boiler vs. Gas Boiler: Weighing the Costs

Deciding between an electric boiler and a gas boiler for industrial applications means considering several long-term cost factors. While electric boilers typically come with a higher upfront price – about 12% more than gas boilers – they boast efficiency levels of up to 99%, significantly outperforming the 80–90% efficiency range of most gas boilers. They also require less maintenance, which can help cut down on ongoing service expenses.

That said, electricity tends to be more expensive than natural gas, which could lead to higher operating costs, especially for industries with substantial heating demands. Ultimately, the cost-effectiveness of either option hinges on local energy prices and the specific heating requirements of your facility. For businesses that prioritize energy efficiency and lower maintenance needs, electric boilers might still be the better investment, even with the higher energy costs.

What role do government incentives and smart grid technology play in choosing electric boilers over gas boilers?

Government Incentives and Efficiency of Electric Boilers

Government programs can make switching to electric boilers easier on your wallet. In the U.S., federal tax credits for energy-efficient home upgrades can help offset installation costs. For instance, homeowners might be eligible for up to $3,200 annually in tax credits when they invest in qualifying improvements. Combine that with the fact that many electric boilers boast efficiency ratings of over 98%, and you’re looking at significant long-term energy savings – even in areas where electricity prices are higher than gas.

Another benefit lies in smart grid technology. These systems enable buildings to adjust their energy use in response to real-time grid demand. This feature can lower costs during peak times while also enhancing overall efficiency. Plus, electric boilers pair seamlessly with renewable energy sources, making them a forward-thinking choice for a cleaner, more sustainable energy future.

What safety factors should you consider when choosing between electric and gas boilers for industrial use?

Safety Considerations: Electric vs. Gas Boilers in Industrial Settings

When choosing between electric and gas boilers for industrial use, safety is a critical factor to evaluate.

Electric boilers are often considered safer because they don’t rely on combustion. This means there’s no risk of carbon monoxide poisoning, a serious concern with gas systems. Additionally, electric boilers have fewer mechanical components and don’t require a flue system, which minimizes the risks of fires or explosions.

Gas boilers, however, operate through combustion. While effective, this process can release harmful gases or even lead to explosions if the system isn’t properly maintained. Regular inspections and diligent upkeep are absolutely necessary to ensure the safe operation of gas boilers.

In the end, the best choice depends on your specific industrial safety requirements. No matter which type you select, consistent maintenance is key to ensuring a safe and reliable operation.

Geothermal Heat Pump Electrical Issues: Common Fixes

Geothermal Heat Pump Electrical Issues: Common Fixes

Geothermal heat pumps rely on electrical systems to function effectively, but problems like frequent cycling, strange noises, or uneven heating can signal issues. Here’s how to address them:

  • Key Components to Monitor:
    • Control Board: Manages system operations; issues include sensor failures or programming errors.
    • Capacitors: Essential for motor function; look for weak starts or failures.
    • Wiring & Relays: Loose connections or damaged wires can cause erratic behavior.
    • Pump Motors: Problems like burned windings or vibrations can disrupt fluid circulation.
  • Common Signs of Trouble:
    • Tripped breakers, blown fuses, or voltage drops.
    • Clicking sounds, burning odors, or inconsistent operation.
    • Motor overheating, buzzing noises, or delayed starts.
  • Quick Fixes:
    • Tighten loose connections, replace blown fuses, or clean relay contacts.
    • Inspect wiring for damage and replace faulty capacitors.

Regular Maintenance Tips:

  • Monthly: Check for unusual sounds or performance drops.
  • Quarterly: Test safety switches and clear debris from vents.
  • Annually: Full system inspection and calibration.

For complex issues like motor replacements or persistent electrical failures, consult a certified HVAC technician. Hydrodynamics Inc. specializes in diagnosing and repairing geothermal systems to keep them running efficiently.

How to Troubleshoot a Run Capacitor on a Modine Geothermal Heat Pump

Modine

Main Electrical Parts

Understanding the main electrical components of your geothermal heat pump can help you spot potential issues early and keep the system running smoothly. These parts work together to ensure consistent performance.

Basic Component Guide

The control board acts as the system’s brain, coordinating sensors and managing operational timing.

Geothermal systems rely on two types of capacitors:

  • Start capacitors: Deliver the initial energy needed to start the motor.
  • Run capacitors: Maintain steady motor operation over time.

Key electrical components for the compressor include:

  • Contactor: Regulates power flow to the compressor.
  • Start relay: Oversees the startup process.
  • Overload protector: Shields the system from excessive current.

Circulation pump motors are made up of:

  • Motor windings
  • Terminal connections
  • Speed controllers
  • Thermal protection switches

The thermostat wiring system includes:

  • Low-voltage control circuits
  • Terminal connections
  • Safety switches
  • Zone control relays

Common Components and Issues

Component Primary Function Common Issues
Control Board Manages system operation Programming errors, sensor failures
Capacitors Powers the motor Weak starting power, complete failure
Compressor Electronics Directs power flow Worn contacts, relay malfunctions
Pump Motors Circulates system fluid Burned windings, bearing issues
Thermostat Wiring Regulates temperature Loose connections, wire damage

Regular inspections of these components are crucial for maintaining system efficiency. Professional technicians use specialized tools to test and repair these parts, so always rely on a qualified technician for electrical repairs. For expert service, reach out to Hydrodynamics Inc.

Up next: Learn how to recognize common warning signs.

Common Problems and Warning Signs

Spotting issues early can save you from expensive repairs and system breakdowns. Here are some key areas to keep an eye on.

Power Problems

Power-related issues can disrupt your system’s performance. Watch out for:

  • Tripped circuit breakers: Frequent trips might mean an overloaded circuit or a short.
  • Blown fuses: Repeated fuse failures often point to electrical issues.
  • Voltage fluctuations: If lights dim or the system loses power during operation, there may be a problem with the power supply.

Your geothermal system should use power consistently. Sudden changes in electrical behavior should be checked by a qualified technician.

Relay and Wiring Issues

Problems with relays and wiring can lead to inconsistent operation or even complete system failure. Here’s what to look for:

Warning Sign Likely Cause Impact
Clicking sounds Faulty relay contacts Irregular cycling of the system
Burning odors Damaged wire insulation Potential safety hazard, system shutdown
Erratic operation Loose connections Reduced efficiency, possible damage
Control board errors Corroded wiring System malfunction

Inspect wiring for discoloration, loose terminals, or corrosion – these are clear signs of trouble.

Motor and Pump Failures

Electrical issues with motors and pumps can lead to various warning signs. Pay attention to the following:

Blower Motor Problems:

  • Strange humming or buzzing noises
  • Motor feels hot to the touch
  • Delayed startup or failure to start
  • Uneven airflow

Circulation Pump Issues:

  • Noticeable vibrations during operation
  • Irregular cycling patterns
  • Reduced heating or cooling performance
  • Electrical overload warnings

If you spot any of these signs, get your system checked by a certified technician right away. Hydrodynamics Inc. offers expert diagnosis and repair for geothermal heat pump electrical problems, ensuring your system runs safely and effectively.

Even minor signs can indicate bigger issues. Professional evaluation is crucial.

Next, find out how to identify these problems using safety checks and testing equipment.

Problem Detection Steps

Identifying electrical problems in geothermal heat pumps requires careful safety measures and accurate diagnostics. Follow these steps to locate issues and determine the best course of action.

Safety and Visual Checks

  1. Power Disconnection
    Turn off the power at both the circuit breaker and the disconnect switch. Use a voltage tester to confirm the power is off.
  2. Visual Inspection
    Examine all accessible components for potential issues. Here’s what to check:
Component What to Look For Warning Signs
Wire Insulation Color and texture Browning or brittleness
Terminal Connections Tightness and corrosion Loose screws or green deposits
Relay Contacts Surface condition Black spots or pitting
Capacitors Physical appearance Swelling or oil leakage

Using Test Equipment

Once you’ve completed the visual inspection, move on to testing the system using the right tools.

  • Voltage Testing:
    • Set your digital multimeter to the AC voltage range (usually 240V).
    • Test the incoming power at the disconnect switch.
    • Measure voltage at terminal connections.
  • Resistance Testing:
    • Switch the multimeter to ohms (Ω) to check wire continuity and connections.
    • Test motor windings for proper resistance levels.
    • Measure relay contact resistance to ensure functionality.

Component Reset and Replacement

Sometimes, a simple reset can resolve minor faults. After resetting, inspect all connections before turning the power back on.

If the reset doesn’t work or if you find damaged components (e.g., bulging or leaking capacitors), replacement may be necessary. For parts like relays or components with stored electrical charge, consider consulting a professional technician.

For expert diagnostics and repairs, reach out to Hydrodynamics Inc. Their certified technicians have the skills and tools to handle your geothermal heat pump system.

Fixes and Maintenance

Basic Repairs

Here are some key fixes to ensure your system runs smoothly:

Connection Tightening
Make sure all connections at terminal blocks, contactors, and breakers are secure. Loose connections can cause system malfunctions and safety risks.

Fuse Replacement
Replace any blown fuses with ones that match the original ratings exactly. Using the wrong type can lead to further issues.

Component Repair Task Tools Needed
Terminal Blocks Torque to specifications Calibrated torque screwdriver
Contactors Clean contact surfaces Contact cleaner, fine-grit sandpaper
Ground Connections Check and tighten Wire strippers, crimping tool
Control Board Inspect for damage Multimeter, thermal camera

Sticking to regular maintenance alongside these repairs can help prevent recurring problems.

Regular Upkeep

Keep your system in top shape by following these routine checks:

Monthly Checks

  • Monitor overall system performance and listen for unusual sounds.
  • Inspect circuit breakers for any signs of wear or damage.
  • Look over wiring for signs of fraying or deterioration.

Quarterly Maintenance

  • Test all safety switches and control mechanisms.
  • Clear out any dust or debris from electrical cabinet vents.
  • Measure and record operating temperatures.

Annual Service

  • Perform a full inspection of the electrical system.
  • Test all safety controls to ensure proper function.
  • Update maintenance logs with detailed records.
  • Calibrate thermostats and sensors for accuracy.

Professional Service Guide

Some issues require expert attention. Reach out to Hydrodynamics Inc. for assistance with:

  • Faulty circuit boards
  • Motor replacements
  • Persistent electrical odors
  • Frequent circuit breaker trips
  • Complicated control system problems

Hydrodynamics Inc. has over 29 years of experience in geothermal system repairs. Their certified technicians offer advanced diagnostic services, replacement of factory-authorized parts, system adjustments, safety checks, and performance verification.

To keep your system running efficiently and avoid costly breakdowns, schedule professional maintenance at least once a year. Regular checkups can catch potential problems early, saving you time and money in the long run.

Conclusion

The steps and tips shared above are essential for keeping geothermal heat pumps running smoothly. Addressing electrical issues requires a careful, safety-first approach. By understanding the main components, using the right testing tools, and sticking to a regular maintenance routine, you can stop small problems from turning into big ones.

While simple issues might be handled with a quick visual check or tightening loose connections, more advanced problems should always be left to certified HVAC technicians. These professionals bring the tools and expertise needed to accurately diagnose and fix complex faults in these systems.

Staying on top of scheduled maintenance helps your system last longer and run more efficiently. A thorough maintenance plan not only keeps your system in top shape but also lowers repair costs and ensures safe operation.

Because electrical work on geothermal systems can be tricky and requires strict safety measures, it’s always best to consult a certified HVAC professional if you’re unsure. Hydrodynamics Inc. provides skilled, certified technicians who are experts in diagnosing and fixing electrical issues in geothermal heat pumps, helping to keep your system reliable and efficient.

FAQs

What are the common electrical problems in geothermal heat pumps, and how can you spot them early?

Geothermal heat pumps can occasionally face electrical issues that impact their performance. Frequent problems include tripped circuit breakers, faulty capacitors, or loose wiring connections. These issues can cause the system to stop running or operate inefficiently.

To identify problems early, watch for signs like unusual noises, frequent system shutdowns, or inconsistent heating and cooling. Regular maintenance and inspections can help catch these issues before they lead to costly repairs. If you’re unsure, consider reaching out to a professional HVAC service like Hydrodynamics Inc. for expert diagnosis and repair.

How does regular maintenance help prevent electrical issues in geothermal heat pumps?

Regular maintenance plays a crucial role in preventing electrical problems in geothermal heat pumps. By scheduling routine inspections, technicians can identify and address potential issues like loose connections, faulty wiring, or worn-out components before they escalate into costly repairs.

Maintenance tasks such as cleaning electrical contacts, checking voltage levels, and ensuring proper system grounding help keep the heat pump operating efficiently and safely. This proactive approach not only extends the lifespan of your system but also reduces the risk of unexpected breakdowns and improves energy efficiency, saving you money on utility bills over time.

How do I know when to call a certified HVAC technician for electrical problems with my geothermal heat pump?

If your geothermal heat pump is experiencing persistent electrical problems, such as frequent tripped breakers, unusual noises, or inconsistent operation, it’s a good idea to call a certified HVAC technician. These issues can indicate underlying electrical faults that require professional expertise to diagnose and repair safely.

Additionally, if you notice burning smells, your system won’t start, or it shuts down unexpectedly, don’t attempt to fix it yourself. Electrical components in geothermal systems are complex and best handled by trained professionals to avoid further damage or safety risks.

How to Choose Energy-Efficient Rooftop Units

How to Choose Energy-Efficient Rooftop Units

Want to save on energy bills and improve comfort in your commercial space? Choosing the right energy-efficient rooftop unit (RTU) is key. Here’s what you need to know:

  • Key Features: Look for variable-speed fans, smart controls, and multi-stage compressors to reduce energy use.
  • Efficiency Ratings: Check for SEER2, EER, and IEER values that exceed DOE standards. ENERGY STAR models are ideal.
  • Sizing Matters: Match the RTU size to your building’s square footage, insulation, and occupancy.
  • Maintenance: Regular filter changes, coil cleaning, and professional inspections can extend the RTU’s life (typically 15–20 years).

Pro Tip: Advanced RTUs with smart controls and energy recovery systems can further cut costs and improve performance. For expert advice, consult certified technicians.

Keep reading for a detailed breakdown of RTU components, efficiency metrics, and maintenance tips.

What Makes RTUs Energy-Efficient

RTU Basics and Components

RTUs (Rooftop Units) are designed with several components that help reduce energy consumption:

  • ECMs (Electronically Commutated Motors) use up to 20% less energy compared to traditional PSC motors.
  • Smart sensors and controls adjust airflow and temperature dynamically based on real-time conditions.
  • Advanced heat exchangers improve heat transfer efficiency by as much as 30%.

These systems are made up of outdoor components (like the compressor and condenser) and indoor modules (such as the evaporator and air handler).

Cost and Energy Benefits

By aligning capacity with actual demand, RTUs minimize unnecessary cycling, which helps reduce energy waste. Advanced controls can also lower peak demand charges. Operating with less stress means fewer service calls and longer equipment life. Other perks include more consistent temperatures, improved air quality with high-MERV filters and demand-controlled ventilation, and a reduced environmental impact.

These factors are essential when determining the right size for your RTU.

How to Select the Right RTU

Size and Load Requirements

To properly size your rooftop unit (RTU), calculate the cooling and heating loads based on key building factors:

  • Square footage: Total area of the space to be conditioned.
  • Building envelope: Consider insulation levels, window types, and air infiltration.
  • Peak occupancy: Account for the number of people typically present.
  • Heat-generating equipment: Include items like computers, machinery, and lighting.

Once you’ve determined the appropriate size, review efficiency metrics to ensure optimal performance.

Energy Ratings Guide

When comparing RTUs, pay attention to efficiency ratings like SEER2, Energy Efficiency Ratio (EER), and Integrated Energy Efficiency Ratio (IEER). Opt for models with the ENERGY STAR label, as they meet high-performance standards for energy savings.

Modern RTU Technology

Many of today’s RTUs come with advanced features designed to boost efficiency and performance, such as:

  • Variable-speed compressors for better temperature control.
  • Smart controls that allow remote monitoring and adjustments.
  • Energy recovery ventilators to reuse energy from exhaust air.
  • Fault detection systems to identify issues early.

For even greater efficiency, integrate your RTU with a building automation system (BAS). This setup can adjust setpoints based on occupancy, manage zones, track energy use in real time, and send maintenance reminders.

For expert sizing, installation, and servicing, collaborate with Hydrodynamics‘ certified technicians to keep your RTU running efficiently.

Energence® Rooftop Unit

Energence

RTU Care and Service Life

Once you’ve chosen the right RTU, keeping it in good shape requires regular maintenance.

Routine Maintenance Tips

To ensure your RTU runs efficiently, follow these maintenance steps:

  • Replace filters every 1–3 months to keep airflow steady.
  • Clean coils every quarter to maintain efficient heat transfer.
  • Schedule professional checks twice a year (spring and fall) to inspect thermostat calibration, compressor performance, controls, and ductwork.

A technician should handle the biannual inspections to ensure everything is functioning as it should.

Signs It’s Time to Replace Your RTU

Most RTUs have a lifespan of 15–20 years [1]. Consider replacing your unit if you notice:

  • Higher energy bills, even with regular maintenance.
  • Frequent breakdowns or increasing repair costs.
  • Uneven temperatures, strange noises, or longer run times.

Hydrodynamics offers professional advice, maintenance plans, and replacement services to help keep your system running smoothly.

[1] RAG doc2 – Typical RTU lifespan

Conclusion

By following these guidelines – focusing on proper sizing, efficiency ratings, and easy service access – you can boost your RTU’s performance while reducing costs.

Since 1994, Hydrodynamics Inc., a family-owned business, has been helping customers with expert advice and certified technicians. They assess your load requirements, recommend energy-efficient RTUs, and offer maintenance services to keep your equipment running longer.

Get in touch with Hydrodynamics today to choose, install, and maintain your energy-efficient rooftop unit.

What Is Particulate Matter in HVAC Systems?

What Is Particulate Matter in HVAC Systems?

Particulate matter in HVAC systems refers to tiny particles, like dust, pollen, mold spores, and bacteria, that can affect air quality and system performance. These particles can reduce airflow, increase energy costs, and even pose health risks.

Key signs of particulate issues include:

  • Visible dust near vents
  • Higher energy bills
  • Weak airflow
  • Allergy symptoms
  • Strange odors

How to manage it:

  • Replace filters regularly
  • Clean ducts and vents
  • Schedule professional maintenance
  • Use high-efficiency filters (MERV ratings 9-16 for better air quality)

Indoor Air Quality (IAQ) Basics 3D

Understanding Particulate Matter

Particulate matter in HVAC systems consists of tiny airborne particles that get drawn into the system and circulate throughout indoor spaces. These particles often make their way inside through air intake vents, as well as gaps around doors and windows. Knowing how these particles enter your building highlights why maintaining your HVAC system is so important.

Keeping up with routine HVAC maintenance can significantly lower particulate matter levels, leading to better indoor air quality.

Effects on HVAC Systems

Let’s take a closer look at how particulate matter impacts HVAC systems, from where it accumulates to the problems it causes.

Where Particles Accumulate

Dust and debris tend to gather in specific HVAC components, which can reduce system efficiency over time. Key areas include:

  • Air Handler Units: Dust and debris collect on fan blades and motor housings, affecting performance.
  • Evaporator Coils: Particles stick to the cold, moist surfaces, leading to buildup.
  • Return Air Ducts: Particulates settle along bends and seams, restricting airflow.
  • Supply Vents: Debris gathers near registers and grilles, blocking proper air distribution.

How It Impacts Performance

When particulate matter builds up, it can lead to several performance issues that strain the system:

  • Restricted airflow: Clogged coils and ducts make it harder for air to move through the system.
  • Reduced heat transfer: Dirty coils can’t transfer heat efficiently, lowering system effectiveness.
  • Higher energy consumption: The system works harder to compensate for restricted airflow, increasing energy usage.
  • Faster wear and tear: Components wear out more quickly, shortening the system’s lifespan.

These problems not only reduce efficiency but also increase maintenance costs and energy bills.

Indoor Air Quality Concerns

The buildup of particles doesn’t just harm the HVAC system – it also impacts the air you breathe. Some common issues include:

  • Recirculated particles: Dust and debris get pushed back into the air, disrupting air balance.
  • Mold and bacteria growth: Moisture combined with trapped particles creates ideal conditions for harmful growth.
  • Unpleasant odors: Musty or stale smells often result from buildup in the system.

Regular professional cleaning and inspections can help prevent these issues, ensuring both system performance and better air quality.

Testing and Control Methods

Testing and control methods help address performance and air quality problems caused by particulate buildup.

Measurement Tools

Technicians rely on specialized tools to assess particulate levels. Commonly used equipment includes:

  • Particle Counters: Measure particles of various sizes in the air, typically from 0.3 to 10 microns.
  • Air Quality Monitors: Provide real-time data on particulate concentrations and air quality changes.
  • Duct Inspection Cameras: Allow visual inspection of ductwork for particle buildup without needing to disassemble the system.

Air Filter Options

Different air filters are available to capture particles based on size and application needs:

MERV Rating Captured Particle Size Best For Typical Applications
1-4 > 10 microns Basic filtration Window units, portable ACs
5-8 3-10 microns Residential use Home HVAC systems
9-12 1-3 microns Higher filtration Office buildings
13-16 0.3-1 microns Advanced filtration Hospitals, clean rooms

Regular Upkeep Steps

Routine maintenance is key to preventing particulate buildup. Here’s a breakdown of tasks:

Monthly Tasks:

  • Replace standard air filters as needed.
  • Remove visible dust from vents and registers.
  • Clear debris around outdoor units.

Quarterly Tasks:

  • Perform a deep cleaning of return air grilles.
  • Clean condensate drain lines.
  • Inspect ductwork for any visible contamination.

Annual Professional Service:

  • Conduct a full system inspection.
  • Clean coils thoroughly.
  • Evaluate ductwork for any issues.

Hydrodynamics Inc. suggests scheduling biannual maintenance for the best performance and air quality, including detailed inspections and cleaning of all system components.

Medical Concerns

Understanding the health risks of particulate matter is crucial for maintaining safe and high-quality indoor air.

The size of particulate matter plays a big role in how it affects health. Here’s a quick breakdown:

Particle Size Description Primary Health Effects
PM10 (≤10 microns) Coarse particles Can cause irritation in the upper respiratory system, coughing, and discomfort in the eyes
PM2.5 (≤2.5 microns) Fine particles Can reach deep into the lungs, increasing the likelihood of bronchitis and asthma symptoms

PM2.5 particles are especially concerning because they can bypass the body’s natural defenses, posing serious risks to both respiratory and cardiovascular health.

Air Quality Guidelines

To maintain safe indoor air, follow EPA recommendations: keep PM2.5 levels below 12 µg/m³ annually and PM10 levels under 150 µg/m³ within a 24-hour period. ASHRAE 62.1 also emphasizes the importance of proper ventilation, effective filtration, and consistent air quality monitoring.

Building managers can take these steps to maintain healthy air:

  • Install air quality sensors for real-time monitoring.
  • Replace air filters based on usage and particle accumulation.
  • Adjust fresh air intake to match occupancy needs.
  • Schedule regular professional inspections to ensure system efficiency.

These measures help ensure HVAC systems are working effectively to support healthier indoor environments.

Hydrodynamics HVAC Services

Dealing with particulate matter requires more than just routine maintenance – it calls for expert care and precision.

Service and Repair Options

Hydrodynamics Inc. offers a range of maintenance and repair services to keep HVAC systems in top condition. Their certified technicians conduct detailed inspections to identify buildup and air quality concerns. Here’s a breakdown of their services:

Service Type Description Benefits
Preventative Maintenance Regular checks and cleanings Reduces buildup and extends system life
Duct Inspection Assessment of ductwork condition Detects contamination and leaks
System Repairs Fixes and component replacements Restores proper filtration and airflow

Air Cleaning Systems

Hydrodynamics provides air cleaning solutions tailored to meet the unique needs of any facility. These systems work alongside regular maintenance to maintain high air quality. Their certified team can install and service:

  • Central air filtration systems equipped with MERV-rated filters
  • Ductless mini-split systems for targeted air purification
  • Specialized industrial filtration systems for demanding environments

These solutions effectively capture a range of particles, from visible dust to microscopic pollutants that can impact health.

System Improvements

Hydrodynamics technicians conduct thorough evaluations of HVAC systems to enhance performance. Their approach combines energy-efficient upgrades with long-term monitoring. Key enhancements include:

  • Variable speed fan controls for better airflow management
  • Smart thermostat integration for improved energy control
  • Advanced filtration systems for superior particle capture

With decades of expertise, Hydrodynamics ensures systems stay efficient and clean through regular maintenance, performance tracking, and fine-tuning. These improvements help reduce particulate buildup, keeping indoor air quality and system efficiency intact.

“It was a good choice. They were prompt and knowledgeable and efficient. Very pleased with their work.” – Emma K., Drums, PA

Hydrodynamics serves residential, commercial, and industrial clients across Northeastern Pennsylvania (NEPA), offering tailored solutions to tackle particulate matter in HVAC systems effectively.

Summary

Particulate matter doesn’t just hurt HVAC performance – it also affects indoor health. Keeping it under control is key to maintaining efficient systems and healthier spaces.

Here are some effective service solutions:

Solution Type Key Benefits Impact on Particulate Matter
Preventative Maintenance Extends system lifespan, lowers costs Reduces particle buildup
Air Cleaning Systems Improves indoor air quality Cuts down particulate levels
System Upgrades Boosts efficiency and control Limits particulate circulation

Since 1994, Hydrodynamics Inc. has specialized in maintaining cleaner, more efficient HVAC systems. Their strategy combines regular maintenance with advanced filtration to manage particulate matter in homes, businesses, and industrial facilities.

To keep your system in top shape, follow these steps:

  • Schedule routine maintenance
  • Replace filters as recommended
  • Upgrade to high-efficiency filters when possible

Best Practices for Industrial Heating Controls

Best Practices for Industrial Heating Controls

Want precise temperature control, lower energy costs, and reliable heating systems? Industrial heating controls are essential for maintaining efficiency and product quality in industries like food processing, manufacturing, and more. Here’s a quick guide to the best practices:

  • Digital Controls: Achieve ±1% temperature accuracy, reducing waste and improving consistency.
  • Regular Maintenance: Routine inspections and calibration extend equipment life and prevent breakdowns.
  • Proper Heater Sizing: Match heater size to the space and requirements to avoid inefficiencies.
  • IoT Integration: Real-time monitoring and predictive maintenance streamline operations.
  • Building Management Systems (BMS): Automate energy use and optimize performance.

Key Technologies: Tools like PID controllers, solid-state relays, and thermal cameras enhance precision, safety, and reliability. Regular maintenance and safety protocols, including overheating protection, are critical for long-term performance.

Ready to optimize your heating systems? Keep reading to learn how to implement these practices effectively.

PID vs. Other Control Methods: What’s the Best Choice

Best Practices for Effective Heating Control

Following proven strategies can help industrial heating systems work efficiently, stay reliable, and minimize energy use.

Use Digital Temperature Control Systems

Modern digital controls offer precise temperature management, maintaining accuracy within +/- 1% even at high temperatures. This helps reduce energy waste and ensures consistent product quality, which is crucial for smooth operations and meeting production standards [1].

Regularly Calibrate and Inspect Sensors

The performance of temperature sensors directly affects the entire system. Routine professional checks help maintain sensor accuracy and ensure everything runs smoothly [4]. Aim for regular calibration, quarterly inspections, and bi-annual testing of key components to keep the system dependable.

Ensure Proper Heater Sizing and Placement

The size and positioning of heaters play a big role in system performance. Consider the size of the area, temperature requirements, and any obstacles. Undersized heaters may struggle to reach the desired temperature, while oversized ones can lead to energy waste from rapid cycling [3].

Leverage IoT for Smarter Heating Systems

Smart heating systems powered by IoT provide real-time monitoring, allow for remote adjustments, and offer tools for predictive maintenance and performance analysis.

Connect Heating Controls to Building Management Systems

Integrating heating systems with a Building Management System (BMS) helps optimize performance by factoring in variables like occupancy and weather. This enables automated adjustments that can significantly cut down on energy use [2].

These practical steps lay the groundwork for improving heating control and making the most of cutting-edge technologies.

Advanced Technologies in Industrial Heating

Modern industrial heating systems use cutting-edge tools to achieve impressive precision and efficiency. These advancements in heating controls directly improve how systems operate, the quality of products, and overall reliability.

Solid-State Relays and PID Controls

Solid-state relays are a step up from mechanical switches. They switch faster, last longer, and work seamlessly with PID (Proportional-Integral-Derivative) controls for precise temperature management. Together, they adjust heating power with speed and accuracy, ensuring steady performance, reducing energy waste, and extending the system’s lifespan [1].

Infrared Thermometers and Thermal Cameras

Non-contact tools like infrared thermometers and thermal cameras make it easier to detect and resolve heating issues early. Infrared thermometers allow quick temperature readings without contact, while thermal cameras give a detailed view of system performance. These tools help teams identify hotspots and avoid potential failures.

The benefits of these advanced technologies include:

  • Longer equipment lifespan
  • Reduced maintenance requirements
  • Improved energy use
  • Consistent product quality
  • Reliable system operation

Maintenance and Safety Guidelines

Keeping heating systems well-maintained is key to running them efficiently, avoiding breakdowns, and ensuring safety. Maintenance and safety protocols are especially important for advanced systems using technologies like PID controls and IoT, helping them perform at their best.

Install Overheating Protection Systems

Overheating protection systems play a major role in preventing equipment failures – studies show they can reduce failures by up to 70% [3]. These systems include features like automatic shut-offs, real-time monitoring, and smart alerts, all designed to safeguard equipment and improve safety. When integrated with Building Management Systems (BMS), they allow centralized monitoring and quick action to address potential problems [3].

Schedule Routine Maintenance Checks

Maintenance Task Frequency Key Focus Areas
Routine Inspections Monthly-Quarterly Sensors, heating elements, control valves
Deep Cleaning Semi-annually Ducts, vents, filters
Component Testing Annually Control systems, safety mechanisms

During maintenance, it’s important to focus on:

  • Unusual temperature changes, which might signal sensor or system issues.
  • Energy usage patterns to identify inefficiencies.
  • Physical wear, such as corrosion, leaks, or damage to components.
  • Testing the functionality of control systems and safety features.

“Regular maintenance can reduce energy consumption by up to 30% and extend the lifespan of heating equipment by up to 50%. Additionally, overheating protection systems can prevent up to 70% of equipment failures” [3][1].

Training staff in system operations, safety protocols, and troubleshooting is also essential for effective maintenance. IoT sensors further simplify the process by providing real-time data and predictive insights [3].

Examples and Case Studies

These examples highlight how advanced industrial heating controls can boost efficiency and reliability across various industries.

Hydrodynamics’ Role in Industrial Heating

Hydrodynamics Inc., a trusted name in industrial heating since 1994, introduced an IoT-enabled heating control system for a pharmaceutical facility. The results? A 20% reduction in energy use, temperature precision within ±1°C, and 35% lower maintenance costs. This project showcases the impact of integrating smart control systems.

Efficiency Gains Across Industries

Industries of all kinds have seen measurable benefits from modern heating controls. For instance, a food processing plant using solid-state relays and PID controls achieved temperature accuracy within ±1% at 300°C, leading to better product quality and less waste [1].

“By controlling the voltage supplied to the heating element, operators can increase or decrease the kilowatt output, directly impacting the heat output.” – Secomak [1]

In the automotive sector, a manufacturing facility integrated heating controls with its Building Management System, resulting in:

  • 15% lower energy costs
  • Consistent temperature control, improving production quality
  • Enhanced reliability through predictive maintenance

These examples highlight how advanced heating controls can cut energy use, improve product outcomes, and ensure system reliability. However, achieving these results requires proper system integration and regular maintenance, as outlined in earlier discussions.

Conclusion and Key Points

Technologies like PID controls, which can achieve ±1% accuracy at 300°C, and IoT-enabled integration with Building Management Systems (BMS) are transforming industrial heating systems. These advancements automate energy use, regulate temperatures, and ensure consistent performance, all while improving precision and efficiency [1][3].

Routine maintenance – such as inspections, replacing filters, and cleaning ducts – is essential to prevent failures and maintain optimal performance [4]. This upkeep supports the continued effectiveness of advanced systems like PID controls and IoT technologies.

“Regular maintenance can help stave off corrosion on the system, such as cleaning and changing filters” [4]

Overheating protection systems play a critical role by identifying issues early, preventing damage, and enhancing safety [3]. With modern thermal monitoring tools, temperature problems can be spotted and addressed quickly, reducing risks. Together, these elements form a solid approach to achieving efficient, reliable, and safe heating operations.

Key Factors for Industrial Heating Control

Factor Impact Benefit
Digital Controls ±1% precision at 300°C Better quality, less waste
Regular Maintenance Extended equipment life Lower costs, higher output
Safety Systems Early anomaly detection Prevents damage, reduces downtime
BMS Integration Automated energy regulation Optimized energy efficiency

Water conditioner installation steps

Water Conditioner Installation Steps

Installing a water conditioner improves water quality, protects plumbing, and extends the life of appliances. This guide breaks down the process into simple steps: preparation, mounting the unit, connecting plumbing, and ensuring safety. Here’s what you need to know:

  • Preparation: Choose a stable, accessible spot near the main water line with adequate clearance. Gather tools like a drill, pipe cutter, and plumber’s tape.
  • Mounting: Secure the unit to a plywood backer board using mounting brackets.
  • Plumbing Connection: Use the right materials (e.g., flux for copper pipes, NSF-certified tape for PVC) and install valves for maintenance.
  • Safety Checks: Test for leaks, confirm proper grounding, and ensure pressure stays between 30-80 PSI.

Regular maintenance, like replacing filters every 6-12 months, keeps the system efficient. For complex setups, hiring professionals ensures compliance with safety codes and avoids costly mistakes.

Key Tip: Use push-to-connect fittings for easier, leak-resistant connections. Proper installation and upkeep save money and deliver clean, high-quality water for years.

How To Install Water Softener System – Complete Installation Guide

Preparation for Installation

Getting everything ready beforehand ensures your water conditioner works efficiently and protects your plumbing and appliances, as discussed earlier.

Selecting an Installation Site

Pick a spot close to the main water line that offers at least 60 inches of vertical clearance and 45 inches of floor space. Make sure it’s easy to access for future maintenance [4]. The area should be stable, well-lit, and away from direct sunlight. If your unit needs electricity, ensure there’s a nearby outlet.

Tools and Materials Needed

Essential Tools Required Materials
Drill, pipe cutter, level, safety gear Mounting brackets, plumber’s tape, pipe fittings, screws/anchors

Ensure the pipe fittings match your plumbing system [1]. Avoid using pipe dope or PVC primer/glue on threaded fittings to prevent damage to plastic components [4].

Checking Water and Power Supply

Make sure the water and power supplies are ready for safe installation. Completely shut off the main water valve [5]. If the unit needs electricity, confirm that an outlet is within reach. For metallic plumbing, install two grounding clamps to avoid electrical risks [4].

“Proper grounding is essential when installing on metallic plumbing. Securely install two grounding clamps to prevent electrical shock and ensure safety.” [4]

If the plumbing setup is complicated, it’s a good idea to consult professionals like Hydrodynamics. They specialize in water conditioner installations and can ensure everything meets local regulations.

Once the site is ready and utilities are secure, you can move on to the installation process.

Installation Steps

Now that everything is prepared, let’s walk through the installation process step by step.

Mounting the Unit

Start by attaching a plywood backer board to the wall studs for added stability. Make sure it’s level before moving forward. Align the mounting brackets with the unit’s mounting points, checking the level again, and then secure them using heavy-duty screws. Once the unit is firmly mounted, you’re ready to connect it to the plumbing system.

Connecting to Plumbing

Carefully measure and cut the pipes to the required length, then clean the ends with sandpaper for smooth connections. If you’re working with copper pipes, apply flux before soldering to ensure a strong bond [1]. Keep the alignment precise to avoid stress on the joints. Install valves and a bypass system to allow for maintenance without interrupting your home’s water supply [3].

Connection Type Materials Needed
Copper Flux, solder, torch
PVC NSF-certified tape
Metallic Grounding clamps, #4 copper wire

“Dry fit all connections before securing them, and use NSF-certified plumber’s tape on threaded fittings. Avoid using pipe dope or PVC primer/glue to prevent damage to plastic fittings” [4].

After securing the pipes and valves, it’s time to install the filter cartridges.

Installing Filter Cartridges

Handle the filter cartridges with clean hands to avoid contamination. Inspect each cartridge for any damage before inserting it into the housing. Turn the cartridges clockwise until they are snug, but don’t overtighten – this could harm the O-rings [6]. Make a note of the installation dates to keep track of replacements and maintain the system’s efficiency [3].

Once everything is installed, check all connections to ensure they are secure, and the system is ready to go.

Safety and Maintenance

Preventing Leaks and Ensuring Functionality

Once installation is complete, it’s time to test for leaks to confirm everything is working as it should. Slowly turn on the water supply and carefully check all connections – especially threaded fittings and joints – for any signs of leakage. A well-installed system will hold steady pressure without dripping or seeping.

Focus on these critical areas:

Testing Area What to Check & Fix
Connections Look for moisture; tighten fittings or replace seals if needed
Pressure Gauge Confirm pressure is within 30-80 PSI; adjust regulator if necessary
Filter Housing Ensure cartridge is seated properly and O-rings are intact; reseat or replace if needed

Once you’re sure the system is leak-free, regular maintenance will keep it running smoothly for years to come.

Maintenance Tips

How often your system needs attention depends on your water usage and quality. Most filter cartridges need replacing every 6-12 months, but this can vary based on your specific conditions [1][3].

“Regular inspections can help identify potential issues early, such as leaks or wear on components” [7][3].

Here are some key maintenance tasks to keep in mind:

  • Check pressure readings and inspect O-rings and seals every three months.
  • Clean the exterior of the system monthly to prevent dust and grime buildup.
  • Test the bypass system every six months to ensure it’s functioning properly.

During your inspections, confirm that the system’s electrical grounding is secure. Keep a log of all maintenance activities, like filter replacements and any repairs, to stay organized and maintain warranty coverage.

If you notice odd noises, reduced water flow, or changes in pressure, address these concerns quickly to avoid further issues. For more advanced repairs or troubleshooting, consider hiring a professional for added peace of mind.

Additional Tips and Professional Help

Using Push-to-Connect Connectors

Push-to-connect connectors make installation easier by providing secure, leak-resistant seals – no special tools required [1][6]. To ensure a proper seal, insert the connector fully until you hear a click. For best results, avoid sharp bends and keep the connector lines in smooth, gentle curves.

These connectors are especially helpful during the plumbing connection phase. However, for more intricate setups or to guarantee everything is installed correctly, hiring a professional can be a smart choice.

Professional Services from Hydrodynamics

Hydrodynamics

While many installations can be done on your own, more advanced water conditioning systems often require expert handling. Hydrodynamics Inc., a family-owned business since 1994, offers specialized water conditioning installation and maintenance services throughout Northeastern Pennsylvania.

Their services include:

  • System sizing and placement advice: Ensuring the system fits your specific needs and space.
  • Post-installation testing: Checking and fine-tuning the system for optimal performance.
  • Expert installation: Handling grounding and backflow prevention correctly.

For setups involving additional features like check valves or specialized grounding, professional installation can help you avoid expensive errors. Hydrodynamics’ team ensures installations meet safety codes and run efficiently.

Safety Tip: Professionals use grounding clamps and #4 copper wire to ensure proper safety measures. They also make sure the system is protected from freezing and direct sunlight [2][3].

Conclusion

Adding a water conditioner can enhance water quality and prolong the life of your plumbing system. Using durable materials and following the manufacturer’s instructions are key to avoiding leaks and inefficiencies [1][4].

Paying close attention to placement, connections, and safety measures ensures the system runs efficiently. While proper installation is essential, ongoing care – like regular maintenance – keeps the system performing well over time. Choosing NSF-certified materials and adhering to manufacturer guidelines can help sidestep common problems [1][4].

For more complex setups or installations requiring code compliance, working with experts like Hydrodynamics is a smart move. Their knowledge is particularly useful for systems with specialized features or those that need to integrate with existing plumbing.

Routine upkeep, such as replacing filters and conducting system checks, helps your water conditioner stay effective and last longer [3]. A properly installed and maintained unit not only delivers clean water but also protects your appliances and lowers overall costs.

Whether you’re tackling the installation yourself or hiring professionals, preparation and safety should remain your top priorities. Investing in a water conditioner pays off with better water quality, longer-lasting appliances, and fewer maintenance expenses over time [3].

How to Handle a Water Heater Emergency

How to Handle a Water Heater Emergency

If your water heater is leaking, making strange noises, or overheating, quick action is essential to prevent damage or safety risks. Here’s what to do immediately:

  • Turn off power: For electric heaters, switch off the circuit breaker. For gas heaters, rotate the gas valve to “off.”
  • Shut off water supply: Locate the cold water inlet valve and turn it clockwise to stop water flow.
  • Check for hazards: If you smell gas or see sparks, evacuate immediately and call emergency services.
  • Limit damage: Use towels or buckets to manage leaks, and document damage for insurance.

Routine maintenance, like testing safety valves annually, can help prevent emergencies. For serious issues, call a professional service promptly. Stay safe and act fast to minimize risks.

How To Turn Off a Leaking Water Heater

Step 1: Prioritizing Safety

Act quickly during a water heater emergency to reduce potential dangers.

1.1: Shutting Off the Power

Start by disconnecting the power supply to your water heater:

Heater Type Steps to Shut Down Important Note
Electric Heater Turn off the dedicated circuit breaker Ensure your hands are dry before touching electrical panels.
Gas Heater Rotate the gas valve to the “off” position Be alert for any hissing sounds.
Dual-Fuel Systems Disconnect both gas and electricity (gas first)

1.2: Checking for Hazards

Once the power is off, carefully inspect for any safety risks:

Gas Safety
If you detect a gas smell or hear a hissing sound, take these steps:

  • Leave the building immediately.
  • Call emergency services from a safe location.
  • Avoid using electrical switches or phones inside.
  • Wait for professionals to handle the situation.

Electrical and Water Hazards
Be on the lookout for:

  • A burnt smell near electrical connections.
  • Visible sparks or smoke.
  • Water near electrical components.

If there’s a leak, address it quickly to avoid further damage to your property. For immediate help, professional services like Hydrodynamics Inc. are equipped to handle water heater emergencies.

Once you’ve addressed safety concerns, focus on preventing additional damage caused by the issue.

Step 2: Limiting the Damage

2.1: Turning Off the Water

Stopping the water flow quickly is key to reducing damage. Look for the valve connected to the cold water supply line, typically located on or near the water heater. It will either be a gate valve (wheel-shaped) or a ball valve (lever-style handle).

To shut off the water supply:

  • Find the valve: Locate the cold water inlet valve on or near the heater.
  • Turn and confirm: Rotate the valve clockwise until it stops, then check to ensure the water has stopped flowing.

If you can’t access this valve or the leak persists, shut off your home’s main water valve. This will cut off water to the entire house until the issue can be addressed.

2.2: Handling Leaks and Water

While waiting for professional help, take steps to manage the water and contain further damage:

Action Method Safety Tip
Block Water Spread Use towels or plastic sheets Keep electrical items away from water
Remove Standing Water Use a wet/dry vacuum or mops
Document the Damage Take photos for insurance purposes Avoid touching electrical components

For larger leaks, consider these extra precautions:

  • Place buckets under active leaks to catch water.
  • Redirect water away from walls, outlets, and other sensitive areas.
  • Improve air circulation by opening windows and doors.

These steps help reduce immediate risks and make the repair process easier once professionals arrive. Companies like Hydrodynamics Inc. specialize in water heater emergencies and have the tools and expertise to handle the situation efficiently.

After containing the immediate damage, reach out to professionals to assess and fix the issue properly.

Step 3: Calling for Professional Help

3.1: Sharing Clear Details

When reaching out to a professional, it’s important to provide as much relevant information as possible. This helps technicians assess the situation and prepare before they arrive. Be sure to:

  • Let them know if you’ve turned off the power and water supply.
  • Describe any visible problems, like leaks, strange noises, or discoloration.
  • Mention any steps you’ve taken to limit the damage.
  • Provide the water heater’s make, model, and age.

The more accurate and detailed you are, the easier it will be for the technician to diagnose the issue and arrive with the right tools and parts.

3.2: Choosing the Right Service Provider

Picking a dependable service provider is just as important as providing clear details. Consider companies like Hydrodynamics Inc., which offers 24/7 emergency services and employs certified technicians with expertise in water heater repairs. They’re equipped to handle complex and potentially hazardous situations involving electricity, gas, or high-pressure systems.

While waiting for the technician, keep your phone handy for updates or to answer any follow-up questions. Their expertise and tools will ensure the issue is resolved safely and efficiently.

Preventing Future Emergencies

4.1: Scheduling Regular Checks

Getting your water heater inspected annually by a professional can help catch problems before they turn into expensive repairs. During these inspections, technicians focus on critical parts like safety valves, temperature controls, and the tank’s overall condition [2][3].

Hydrodynamics provides thorough inspections that include:

  • Testing safety features, such as pressure relief valves and temperature controls
  • Reviewing electrical connections and ensuring proper grounding
  • Assessing the condition of the anode rod
  • Checking the tank for any signs of wear or damage

For optimal performance and safety, set your water heater to 140°F [2].

In addition to routine inspections, installing modern safety devices can add another layer of protection against potential water heater issues.

4.2: Adding Safety Devices

Safety devices are an effective way to minimize risks associated with water heaters. For instance, smart leak detectors can notify you of leaks before they cause significant damage [2].

Here are some key upgrades to consider:

  • Automatic shutoff and pressure relief valves: These help prevent leaks and control pressure buildup.
  • Anti-scald devices: These can be installed on faucets and showerheads to regulate water temperature and prevent burns [2].

For electric water heaters, using the correct circuit breaker size is essential. Always follow the manufacturer’s recommendations to avoid electrical hazards [2]. Additionally, keep the area around your water heater clear to maintain a safe environment.

Conclusion: Quick and Reliable Action

Taking steps to prevent water damage is crucial, but knowing how to act quickly and seek professional help can save you from bigger problems. According to the Insurance Information Institute, the average water damage claim is around $11,000 – a hefty price for delayed action.

Shutting off power and water immediately can help you avoid dangers like electrical shorts or scalding water. Professional services, such as Hydrodynamics, bring the expertise needed to handle these situations effectively. Their offerings include:

  • 24/7 emergency response
  • Licensed and insured technicians
  • Thorough diagnostic services
  • Expert repairs and maintenance

Water heaters typically last 10-15 years, so regular maintenance is key to keeping them running smoothly. Hydrodynamics doesn’t just handle emergencies – they also provide preventative services to help you avoid future issues. Using tools like smart leak detectors and scheduling routine maintenance can extend the life of your water heater and reduce the risk of unexpected breakdowns.

“Professional services like Hydrodynamics are not only essential for emergency repairs but also for regular maintenance and preventative measures. By identifying issues such as faulty thermostats, corroded pipes, and malfunctioning pressure relief valves during routine checks, we can prevent major emergencies before they occur.” [5]

FAQs

How to turn off a water heater in an emergency?

If you need to turn off a water heater during an emergency, here’s what to do:

  • Disconnect the power:
    • For gas heaters: Turn the thermostat dial to OFF.
    • For electric heaters: Flip the circuit breaker to the OFF position.
  • Shut off the water supply by turning the valve clockwise.
  • Relieve pressure by opening the hot water taps.

For more details on shutting off the water, refer to Step 2 in the emergency guidelines [1][4].

When is a broken water heater an emergency?

A water heater becomes an emergency when there are immediate safety concerns. Here are some examples of serious situations and the actions to take:

Emergency Situation What to Do
Major leaks or flooding Call a professional immediately.
Excessive heat or scalding Contact emergency services.
Gas smell or hissing Evacuate and call emergency services.

Minor issues, such as small drips or no hot water, can usually wait for service within 24-48 hours [1][2].

“Water heaters can become dangerous if improperly installed or neglected, leading to risks such as carbon monoxide poisoning, explosions, gas leaks, and scalding” [2].

In emergencies, quick action is crucial. Knowing these steps can help you reduce risks and get professional assistance faster.

Common Well Pump Problems and Solutions

Common Well Pump Problems and Solutions

Well pumps are essential for over 15 million American households, but issues like low water pressure, frequent cycling, or loss of prime can disrupt daily life. Regular maintenance every 3-4 years and early troubleshooting can prevent costly repairs. Here’s how to identify and fix common well pump problems:

  • Low Water Pressure: Check for clogged filters, blocked pipes, or a faulty pressure tank.
  • Frequent Cycling: Inspect the pressure switch, air pressure in the tank, or waterlogged components.
  • Loss of Prime: Look for air in the system, spitting faucets, or a pump running continuously.

Quick Fixes:

  • Reset tripped breakers or replace blown fuses.
  • Clean or tighten pressure switch connections.
  • Test air pressure in the pressure tank and adjust if needed.

When to Call a Professional:

  • Pump won’t turn on or makes unusual noises.
  • Sudden drops in water pressure or changes in water quality.
  • Visible rust or corrosion on components.

With proper care, well pumps can last 8-15 years. Regular inspections and addressing minor issues early can save you time, money, and stress.

Common Pressure Tank and Well System Problems

Recognizing Well Pump Issues

Spotting well pump problems early can save you from expensive repairs and potential system failures. Knowing the common warning signs allows you to address issues before they escalate.

Causes of Low Water Pressure

Low water pressure is a common indicator that your well pump might need attention. A healthy system should deliver steady pressure throughout your home. If you’re noticing weak water flow from multiple fixtures, the problem could be:

Issue Description
Clogged Filters Sediment or mineral buildup causing a gradual drop in pressure
Blocked Pipes Scale or debris restricting water flow, leading to inconsistent pressure
Faulty Pressure Tank Pressure swings due to bladder failure or excess water in the tank

Why Pumps Cycle Too Often

If your pump turns on and off rapidly, it’s a sign of stress on the system, which can wear out the pump prematurely. Common signs of this issue include:

  • Rapid clicking sounds from the pressure switch
  • Noticeable shifts in water pressure during use
  • Higher-than-usual electricity bills

Scheduling inspections twice a year can help avoid these problems, often caused by wear or environmental factors.

What Causes Loss of Prime

When air gets into the pump system, it can disrupt water flow, leading to a loss of prime. Ignoring this issue may damage your pump. Watch for these signs:

  • Faucets spitting air
  • Pump running continuously without building pressure
  • Sudden loss of water supply

Even seemingly minor issues can signal deeper problems. For example, frequent pump cycling might indicate a failing pressure switch or waterlogged pressure tank [1][3].

Regular checks of your well cover, pipes, and pressure tank can help identify problems early. Once you’ve pinpointed the issue, it’s time to tackle it with proper troubleshooting steps.

Fixing Common Well Pump Problems

Simple Troubleshooting Steps

Start by checking the basics of your electrical system – this often resolves many well pump issues. A steady power supply is crucial for your pump to work properly. Look at your circuit breaker panel for any tripped switches, as this is a common and quick fix for pumps that have stopped working.

Basic Check What to Look For Action Required
Power Supply Tripped breakers, blown fuses Reset the breaker or replace fuse
Pressure Switch Wear, loose connections Clean contacts, tighten connections
Control Panel Burnt components, loose wires Secure connections, replace parts

To quickly test your pressure switch, tap it lightly with a screwdriver handle. If the pump starts running, the switch likely needs replacing [3].

Advanced Troubleshooting Methods

For pressure-related problems, try these diagnostic steps:

  • Ensure the voltage remains within 10% of the motor’s rated value.
  • Check all connections for signs of corrosion.
  • Test the air pressure in your pressure tank by draining it and measuring the levels.

If you have a submersible pump, it’s a good idea to schedule professional inspections every three years [4]. Between inspections, keep an eye out for warning signs like:

  • Sudden drops or surges in water pressure
  • Strange noises while the pump is running
  • Visible rust or corrosion on accessible parts
  • Higher-than-usual electricity bills

If your pump is cycling on and off too often, try draining the tank and adjusting the air pressure to the correct level. Regular maintenance and addressing these issues early can help you avoid bigger, costlier problems. However, some situations call for professional help to ensure your system stays reliable.

Maintaining Your Well Pump

Taking care of your well pump regularly helps it run smoothly and can save you from expensive repairs. A pump that’s properly looked after not only lasts longer but also ensures consistent water service for your home.

Tips for Routine Maintenance

Perform visual checks every 3-6 months. If you live in a humid area, you may need to inspect more often to keep an eye on potential corrosion risks [2].

Here’s a handy maintenance schedule to follow:

Timeframe Maintenance Task Purpose
Monthly/Every 3-6 months Check pipes, connections, pressure tank, and switch Spot leaks or cycling problems
Annually Clean cooling fans and components Avoid motor overheating
Every 3 years Hire a professional for a full inspection Ensure the entire system is in good shape

When checking your system, focus on these key areas:

  • Pressure Tank: Make sure it’s not waterlogged and that air pressure levels are correct.
  • Corrosion Control: Use anti-corrosion products on metal parts to help them last longer.
  • Cleaning Components: Keep cooling fans clean to prevent overheating and maintain efficiency.

“Regular maintenance can significantly extend the lifespan of a well pump by preventing wear and tear, addressing minor issues before they become major problems, and ensuring the pump operates efficiently” [2][4].

Keeping a record of your maintenance activities is a smart move. It helps you track performance, spot patterns, and address recurring issues before they escalate. If you notice anything unusual, like fluctuating water pressure or odd noises, reach out to a professional for a closer look [2][4].

While routine care handles most issues, some situations will need expert attention.

When to Call a Professional

Knowing when to bring in a professional can save you from expensive repairs and prevent further damage. While regular upkeep and simple fixes can solve many issues, some problems need a trained expert to ensure your well pump stays reliable for years to come.

Signs You Need Expert Help

Certain well pump problems are clear indicators that it’s time to call a professional. Here are some common warning signs and what they might mean:

Warning Sign Possible Cause Risk Level
Pump Won’t Turn On Electrical or mechanical failure High – Requires immediate action
Unusual Noises Damage to internal components Medium to High – Service needed soon
Sudden Drop in Pressure Malfunction in the system or well issues High – Needs professional diagnosis
Water Quality Changes Potential contamination or pump issues High – Health and safety risk

With proper care, well pumps can last up to 15 years. Neglected systems, however, often fail within 5-8 years [4]. If these signs appear, contacting a reliable professional is crucial.

Hydrodynamics Inc.: Your Local Well Pump Experts

Hydrodynamics Inc., a family-run company founded in 1994, has been providing top-notch well pump services in the NEPA area for decades. Our offerings include diagnostics, repairs, system upgrades, preventative maintenance, and energy-efficient solutions.

Our team of certified technicians can handle a wide range of complex problems, such as:

  • Faulty pressure switches
  • Waterlogged pressure tanks
  • Well casing issues
  • Electrical system failures

For the best performance, it’s recommended to schedule a professional inspection every 3-5 years for submersible pumps [4]. Hydrodynamics Inc. adheres to NGWA standards, ensuring repairs are safe and dependable.

Keeping Your Well Pump Working

Taking care of your well pump can help you avoid unexpected issues. Most well pumps last between 8 to 15 years, but proper maintenance and quick action when problems arise can make a big difference [4].

Key Takeaways

  • Maintenance is crucial: Regular upkeep can prevent up to 90% of common problems [1]. Inspections and servicing are essential, especially in humid areas where moisture can cause damage. If you live in such an environment, consider scheduling inspections twice a year [2].
  • Catch issues early: Pay attention to unusual sounds or shifts in water pressure. These are often early signs of trouble. Addressing them quickly can help maintain your pump’s efficiency and avoid costly repairs [3].
  • Know when to call a pro: While some basic maintenance can be done yourself, more complex problems require a certified technician. Our expertise ensures proper diagnosis and solutions [1].