How to Troubleshoot HVAC Thermostat Failures

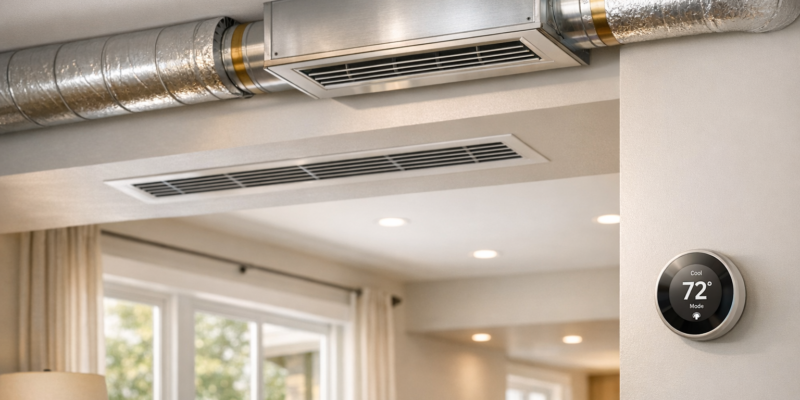
Your thermostat is the control center of your HVAC system, ensuring your home stays comfortable year-round. If it malfunctions, your heating or cooling system may stop working efficiently. Here’s a quick guide to fixing common thermostat problems:

  • Reset the Thermostat: Turn off power, follow reset instructions for your model, and reprogram settings.
  • Replace Batteries: Weak or dead batteries often cause issues. Replace them annually or when you notice dim screens or alerts.
  • Clean Internal Components: Dust buildup can affect performance. Turn off the power, remove the cover, and gently clean with a soft brush.
  • Check Wiring: Look for loose, corroded, or damaged wires. Tighten connections or call a professional if needed.
  • Verify Placement: Ensure the thermostat is on an interior wall, away from heat sources, drafts, or direct sunlight.
  • Calibrate for Accuracy: Compare readings with a thermometer and adjust settings if necessary.

If these steps don’t resolve the issue, persistent problems like blank screens, short cycling, or wiring concerns may require professional help. Licensed HVAC technicians can diagnose and fix complex issues safely.

How to Troubleshoot a Thermostat | The Home Depot

The Home Depot

Step-by-Step Thermostat Troubleshooting Process

Before diving into complex fixes, start with the basics: resetting your thermostat, checking the batteries, and inspecting wiring or sensor placement. These steps are organized from the simplest to the more involved solutions.

How to Reset Your Thermostat

Resetting your thermostat can fix issues like unresponsive displays, programming errors, or incorrect temperature readings. Essentially, this process restores the thermostat to its factory settings, clearing minor glitches that might be causing problems.

To reset, first, turn off the power at the circuit breaker. Then, follow the specific reset instructions for your thermostat model. For instance:

  • Honeywell Thermostats: Press the system button, hold the blank box in the center, and then press “done”.
  • Nest Thermostats: Press and hold the outer ring for 10 seconds until the screen shuts off, then release and press it again. The Nest logo will appear, confirming the reset.
  • Carrier Thermostats: Select “mode” on the main screen, set it to “off”, turn off the circuit breaker for 30 seconds, and then turn it back on. Finally, set the thermostat to your desired mode.
  • Trane Smart Thermostats (XL824, ComfortLink® II 850/1050, Link UX360): Make sure the HVAC system is idle, then navigate to Menu > Settings > Reboot on the thermostat screen and confirm. Alternatively, you can turn off the circuit breaker for 20–30 seconds and then switch it back on.

After resetting, reprogram your thermostat settings as needed, and move on to checking the batteries.

Check and Replace Thermostat Batteries

Weak or dead batteries are a frequent cause of thermostat malfunctions. Depending on your model, you might need AA, AAA, 3V lithium button-style, or 9-volt batteries – check your owner’s manual for the correct type. A good rule of thumb is to replace them annually, perhaps when you also change your carbon monoxide detector batteries.

Signs of low batteries include:

  • A flashing battery icon or dimmed screen
  • An LED light or low-frequency alert
  • A malfunctioning HVAC system

To replace the batteries:

  1. Remove the thermostat cover.
  2. Use a small flathead screwdriver to take out the old batteries.
  3. Insert new batteries, ensuring the positive and negative terminals match the markings inside the compartment.
  4. Reattach the cover securely.

If your thermostat is older or the batteries seem to drain quickly, inspect for corroded contacts or aging components. Note that some models, like the Nest Learning Thermostat, use batteries primarily as backup power.

Clean and Inspect Internal Components

Dust buildup can interfere with your thermostat’s calibration, leading to inaccurate readings and reduced performance. Regular cleaning can help keep it functioning properly.

Before cleaning, always turn off the power to your HVAC system at the circuit breaker. Remove the thermostat cover (you may need a screwdriver), and use a soft brush or compressed air to gently clean the interior. Avoid using liquid cleaners or chemicals, as these could damage the components.

For electromechanical thermostats, clean the bimetal coil with a soft brush and use a dollar bill to clean contact points. If you notice significant grime or corrosion, a small amount of rubbing alcohol can be used. Smart thermostats like the Google Nest typically only require light dusting.

Additionally, wipe the exterior with a damp cloth and check for visible damage. Make sure the thermostat is level on the wall, as improper positioning can affect its performance. Cleaning every few months is a good maintenance practice.

Once cleaned, check the wiring to ensure everything is secure.

Check Wire Connections

Loose or damaged wires can cause your thermostat to behave erratically or fail altogether. Start by removing the thermostat cover to access the wiring.

Inspect each wire for looseness, corrosion, or visible damage. Gently tug on each wire to ensure it’s securely connected. Look for corrosion, which often appears as green or white buildup, and check that all wire nuts are tight with no exposed copper.

Common issues include loose terminal screws, corroded connections, or wires that have come loose from their terminals. Tighten any loose connections carefully. If you spot damaged wires or extensive corrosion, or if you’re unsure about handling electrical work, it’s best to call a professional technician.

After securing the connections, replace the cover, restore power, and test the system by adjusting the temperature to see if the HVAC responds correctly.

Check Thermostat Location and Placement

The placement of your thermostat significantly affects its ability to read the room’s temperature accurately. Poor placement can lead to inefficient HVAC operation, uncomfortable temperatures, and higher energy bills.

The thermostat should be installed on an interior wall, away from direct sunlight, drafts, or heat sources like lamps and appliances. Ideally, it should be positioned 52–60 inches above the floor in a spot that represents the average temperature of the home. Avoid placing it near windows, doors, fireplaces, or air vents.

If your thermostat is on an exterior wall or in a location that misrepresents the room’s temperature, consider relocating it. Keep in mind that moving a thermostat often involves rewiring, which may require professional assistance.

Proper placement ensures the thermostat provides accurate readings, complementing the earlier troubleshooting steps.

Diagnosing Electrical and Wiring Problems

If basic troubleshooting hasn’t resolved your thermostat issues, the problem might be rooted in the electrical system itself. Faulty wiring, inconsistent voltage, or damaged connections can lead to unpredictable behavior that a simple reset won’t fix. Addressing these problems requires a careful and systematic approach to ensure safety.

Before inspecting any wiring or testing electrical components, always turn off the power at the circuit breaker. This step is crucial to avoid accidental short circuits or further damage to your HVAC system. Once the power is off, you can begin with a visual inspection and use a multimeter to check the system’s electrical integrity.

Inspect Wires for Damage

Worn-out or damaged wires are a common reason for thermostat malfunctions. Over time, wires can loosen, corrode, or sustain physical damage, disrupting the connection between your thermostat and the HVAC system.

To inspect the wiring, remove the thermostat cover to expose the terminals and wires. Look closely for any signs of trouble. Loose or disconnected wires may have slipped from their terminals, and damaged insulation might appear cracked or missing. Pay special attention to areas where wires bend or enter the wall, as these spots are prone to wear. Corrosion around the terminals is another red flag. If you find any issues, the affected wires may need to be repaired or replaced.

Test Voltage with a Multimeter

A multimeter is an essential tool for measuring power voltage in your electrical system. Set the multimeter to the appropriate voltage range – typically 50V AC for a 24-volt system. To test, access the wiring and place the red probe on the “R” terminal (the power wire) and the black probe on any other terminal. For a 24-volt system, the reading should fall between 22 and 26 volts.

To check internal components, switch the multimeter to ohms mode. If the reading exceeds 200 ohms, it could indicate a fault in the system. Voltage readings outside the 22-26 volt range might point to problems with the transformer or wiring, which may require professional attention.

When Wiring Problems Need Professional Repair

While some wiring issues can be handled with basic troubleshooting, more complex problems often demand the expertise of a licensed professional. Handling intricate electrical systems can be risky, and professionals have the training to ensure safe and accurate repairs. They also ensure compliance with local electrical codes and safety standards.

If you notice extensive wire damage, multiple loose connections, or voltage readings that don’t match your system’s specifications – or if your multimeter results are inconsistent – it’s a good idea to call in an expert. Professional repair costs typically range from $80 to $200, depending on local rates.

For those in Pennsylvania, Hydrodynamics offers expert thermostat diagnostics and electrical repair services. Their licensed technicians can safely address complex wiring issues, ensuring your HVAC system runs smoothly and efficiently.

Fix Temperature Reading and Placement Issues

A thermostat that works electrically but delivers inaccurate readings or is poorly positioned can lead to uneven temperatures and higher energy bills. Fortunately, addressing both calibration and placement can solve these problems.

“Proper thermostat placement is crucial not only for your home’s overall comfort but also for energy use. A mislocated thermostat can gradually increase your monthly utility bills and create additional wear and tear for your HVAC unit.” – Quality Heating, Cooling, & Plumbing

Calibrate Your Thermostat

Getting accurate temperature readings starts with calibration. To check if your thermostat needs adjusting, place a reliable thermometer nearby and wait about 15 minutes for both to stabilize. If the readings differ by more than a degree or two, calibration is necessary.

Before calibrating, clean the thermostat’s cover and sensors, as dust buildup can interfere with accuracy.

For smart thermostats, refer to your user manual for built-in calibration tools. Many models allow you to adjust temperature readings directly through the settings menu. If no calibration option is available, try resetting the thermostat to its factory settings – this can sometimes fix accuracy issues.

For mechanical thermostats, locate the calibration screw or lever inside the unit. Adjust it incrementally, checking the temperature after each small change, until the readings align with your thermometer. Remember to allow a few minutes between adjustments to see the results.

“Regularly checking and calibrating your thermostat can help ensure that your home remains comfortable and that your heating and cooling system operates efficiently.” – Legacy Heating & Cooling

To keep your thermostat functioning at its best, check its calibration at least once a year. If calibration doesn’t fix the issue, the internal sensors might be failing, and professional assistance could be required.

Once calibration is complete, it’s equally important to ensure your thermostat is placed in the right spot for consistent performance.

Choose the Best Thermostat Location

Proper placement is just as critical as calibration for maintaining accurate temperature control. The ideal spot is typically on an interior wall, centrally located in your home, and positioned 52 to 60 inches above the floor. This height ensures the thermostat measures the air temperature where people live and minimizes the impact of external factors like drafts or sunlight. Choosing a room that’s frequently used helps the thermostat reflect your household’s comfort needs.

In multi-story homes, placing the thermostat on the first floor is often the best choice. Since heat rises, this location provides a more balanced reading for the entire house. Avoid areas with direct sunlight, air vents, doors, windows, or heat-producing appliances, and make sure there’s plenty of airflow around the thermostat.

If your thermostat’s current location is causing problems, relocating it to a better spot can significantly improve both your HVAC system’s efficiency and your home’s comfort. Consulting professionals, like Hydrodynamics, can help pinpoint the optimal placement for your thermostat and enhance overall system performance.

sbb-itb-99db659

When to Call Professional HVAC Technicians

If the basic troubleshooting steps mentioned earlier don’t solve your thermostat issues, it’s time to bring in the experts. While many thermostat problems can be fixed with simple DIY methods, some require professional expertise. Knowing when to step back and call for help can save you both time and money in the long run.

Signs You Need Professional Help

Before reaching out to a technician, make sure you’ve tried basic troubleshooting. If the problem persists, here are some telltale signs that it’s time to involve an HVAC professional:

  • Persistent display issues: If your thermostat screen stays blank, dim, or refuses to light up, it could point to failing internal components. These problems often stem from electrical issues that need specialized diagnostic tools.
  • Inaccurate temperature readings: If recalibrating doesn’t resolve incorrect temperature displays, the internal sensors might be damaged or failing.
  • HVAC system performance issues: When your system keeps running non-stop or short-cycles even after replacing filters, it could indicate a thermostat malfunction. This not only drives up energy costs but can also wear out your HVAC system prematurely.
  • Smart thermostat connectivity problems: If your programmable thermostat frequently loses its settings or struggles to maintain a Wi-Fi connection despite troubleshooting, there may be internal malfunctions at play.
  • Electrical or wiring concerns: If tightening loose wires doesn’t fix the problem, or if you notice corroded, frayed, or damaged wires, it’s best to call a professional. Handling electrical issues on your own can be risky and may even violate building codes.

Hydrodynamics Provides Expert Thermostat Service

Hydrodynamics

Hydrodynamics delivers top-tier thermostat repair and HVAC services across Northeastern Pennsylvania. Their certified technicians are equipped with advanced tools to diagnose and resolve complex issues like component failures, compatibility mismatches, and intricate wiring problems. They also offer preventive maintenance to address common concerns such as calibration drift.

Whether it’s a residential, commercial, or industrial property, Hydrodynamics understands that each setting has unique needs when it comes to thermostat performance. Plus, their 24/7 emergency service ensures you’re never left without heating or cooling, even during extreme weather conditions.

Their comprehensive approach includes evaluating thermostat placement, verifying compatibility with your HVAC system, and ensuring seamless integration to boost overall system performance and energy efficiency.

Conclusion: Thermostat Troubleshooting Summary

Fixing your HVAC thermostat can feel straightforward when you follow a step-by-step process. This guide has outlined the key actions to help you identify and address the most common thermostat problems.

Start with the essentials: reset your thermostat, replace the batteries if necessary, and clean out dust or corrosion from the internal components. These simple steps often resolve many issues and set the stage for further troubleshooting if needed.

If the basics don’t work, inspect the wiring connections. Loose or corroded terminals are a frequent culprit behind thermostat malfunctions.

To ensure your thermostat provides accurate temperature readings, compare its display with a reliable thermometer. Also, make sure it’s installed in the right spot – away from direct sunlight, heat sources, or drafts that could skew its performance.

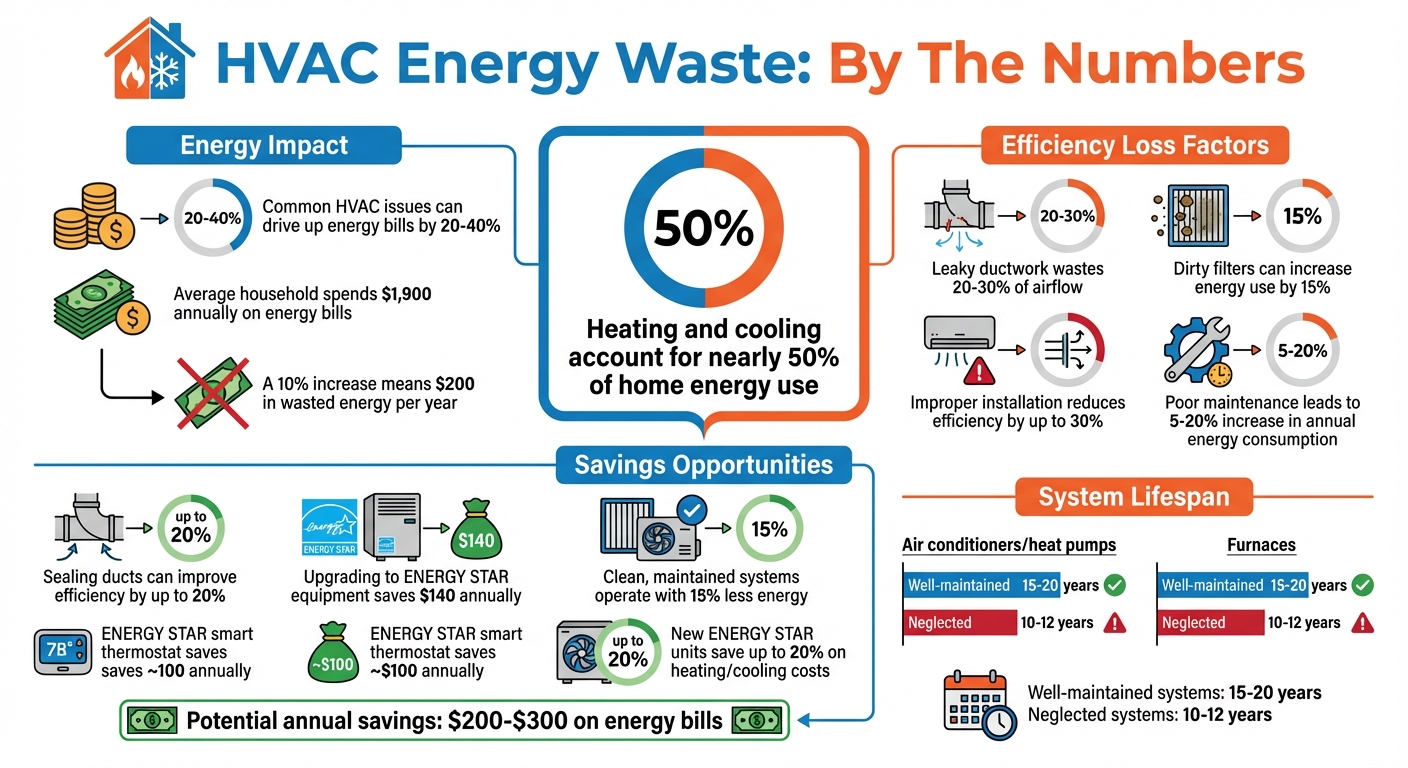
Scheduling bi-annual HVAC servicing is another smart move. Regular maintenance helps catch problems like worn-out parts or electrical issues early, extending your system’s lifespan, which typically ranges from 10 to 15 years. However, even with consistent upkeep, some issues will require a professional touch.

If you’ve gone through these steps and the problem persists – or if you encounter electrical wiring concerns – it’s best to call in a qualified HVAC technician. They have the expertise to diagnose and repair complex issues that go beyond what DIY fixes can handle.

FAQs

What can I do if resetting my thermostat doesn’t solve the problem?

If adjusting your thermostat doesn’t resolve the problem, the next step is to check the circuit breaker. A tripped breaker could be cutting power to your thermostat, so make sure it’s in the correct position. For battery-operated thermostats, replacing the batteries is a simple way to rule out power-related issues.

You’ll also want to examine the wiring connections. Look for any loose or damaged wires and ensure everything is securely in place. If your thermostat has a system switch, double-check that it’s set to the appropriate mode, whether that’s heating or cooling.

Still having trouble? Try rebooting the thermostat – sometimes a quick reset can do the trick. If that doesn’t help, refer to your HVAC system’s manual for more troubleshooting tips. However, if the issue continues, it might be a sign of a more serious fault in the system. At that point, it’s best to call in a professional HVAC technician to diagnose and fix the problem.

How do I know if my thermostat is placed in the right location for accurate performance?

Why Thermostat Placement Matters

Where you install your thermostat greatly impacts how well it works. To get the best performance, place it in a central spot, away from anything that could block airflow, like furniture or curtains. Steer clear of areas with direct sunlight, drafts, or heat sources such as vents, radiators, or kitchen appliances. These factors can throw off the readings. Similarly, spots near windows, doors, or exterior walls – where temperatures can shift – aren’t ideal either. A well-placed thermostat helps your HVAC system maintain a steady, comfortable temperature throughout your home.

When should I call a professional for thermostat issues?

If your thermostat is completely unresponsive, keeps resetting itself, or troubleshooting doesn’t resolve the issue, it’s time to call a professional HVAC technician. Other warning signs, like persistent temperature fluctuations or error messages on the thermostat display, also point to the need for expert help.

Suspecting wiring issues or calibration problems? These are best handled by a trained technician to ensure your HVAC system runs safely and efficiently. Tackling these problems quickly can prevent more serious damage to your system down the line.

10 Tips To Extend HVAC System Lifespan

10 Tips To Extend HVAC System Lifespan

Your HVAC system is a big investment, and taking care of it can save you money, improve home comfort, and avoid costly repairs. Here’s how to make it last longer:

  • Schedule Regular Maintenance: Book professional checkups twice a year – spring for cooling, fall for heating.
  • Replace Air Filters: Change filters regularly to maintain airflow and prevent system strain.
  • Clean Air Ducts: Keep ducts free from dust and debris to improve efficiency.
  • Use a Smart Thermostat: Automate temperature control to reduce wear and lower energy use.
  • Clear Outdoor Units: Remove debris and keep at least 2 feet of space around the unit.
  • Seal Duct Leaks: Prevent air loss by sealing and insulating ductwork.
  • Check Home Insulation: Improve insulation in attics, walls, and basements to ease system workload.
  • Set Fan to “Auto”: Avoid running the fan continuously to reduce motor wear.
  • Fix Issues Quickly: Address small problems early to prevent costly breakdowns.
  • Work with Professionals: Partner with certified technicians for expert care and repairs.

These simple steps can extend your HVAC system’s lifespan, improve efficiency, and save you money over time.

How Do I Prolong the Life of My HVAC System? | Western …

1. Book Regular Maintenance Checks

Scheduling regular HVAC maintenance helps keep your system running smoothly and avoids expensive repairs. Aim to schedule these checks twice a year – once in early spring for cooling and again in early fall for heating. This timing ensures that any potential problems are addressed before peak usage.

During these visits, certified technicians handle key tasks, such as:

  • Testing system performance to ensure efficiency
  • Inspecting electrical connections for wear and tear
  • Calibrating the thermostat for accurate operation
  • Cleaning components to remove dust buildup

Keeping up with maintenance not only extends the life of your HVAC system but also ensures it operates efficiently. Hydrodynamics Inc. offers comprehensive maintenance programs, including detailed inspections of every component. Schedule your spring and fall maintenance today to stay ahead of potential issues.

2. Change Air Filters on Schedule

Replacing your air filters regularly is key to keeping your HVAC system running smoothly and lasting longer. Clean filters prevent dust and debris from clogging important components, reduce strain on the system, and maintain proper airflow. The first step is figuring out how often to change them based on your household’s needs.

The replacement schedule depends on factors like indoor air quality. For example:

  • A single-person household might need a change every few months.
  • Homes with pets or high activity levels may require monthly replacements.
  • Vacation homes typically need less frequent changes.

Choose filters with the right MERV rating for your system. Filters rated between 8 and 13 work well for most residential setups, offering good filtration without restricting airflow too much. However, using filters with higher ratings can strain your system if it’s not designed for them.

To stay on track, mark your calendar for filter changes, check them periodically, and keep extras on hand. Always follow the directional arrows when installing new filters.

A clogged filter makes your HVAC system work harder, which can lead to higher energy bills and potential damage. If you’re not sure which filter or schedule is best for your setup, Hydrodynamics Inc. can help with tailored advice based on your system and usage.

3. Keep Air Ducts Clean

Dust and debris in your air ducts can block airflow, making your system work harder and lowering its efficiency. Look out for signs like dust buildup around vents, inconsistent temperatures between rooms, or musty smells – these often indicate it’s time for a professional cleaning.

Here are some signs your ducts might need attention:

  • Dust collecting around air vents
  • Uneven heating or cooling across rooms
  • Musty smells coming from the vents

DIY cleaning usually isn’t enough to tackle the hidden buildup inside ducts. Professional services, like those offered by Hydrodynamics Inc., use specialized tools to thoroughly clean your air ducts without causing damage.

If you notice any of these issues, don’t wait – schedule a professional duct cleaning to keep your system running smoothly.

4. Use a Smart Thermostat

A smart thermostat helps lower energy bills and reduces wear on your HVAC system by maintaining steady temperature control and limiting unnecessary use.

Here’s what makes it effective:

  • Automated scheduling: Keeps your system running smoothly without constant manual adjustments.
  • Learning capabilities: Adjusts to your daily habits, cutting down on frequent on/off cycling.
  • Remote control: Lets you avoid extreme, sudden temperature changes from anywhere.

By preventing short cycling – when your system turns on and off too often – a smart thermostat supports longer, more efficient operating cycles.

For the best results, adjust temperatures gradually following the manufacturer’s instructions. It’s also a good idea to have a professional handle the installation and calibration to ensure everything is set up correctly.

Adding a smart thermostat is a simple way to enhance your system’s performance while pairing well with regular maintenance.

5. Keep Outdoor Units Clear

Make sure your outdoor HVAC unit has proper airflow. When debris builds up, it forces the system to work harder, which can lead to more wear and tear and a shorter lifespan.

Maintain at least 2 feet of space around all sides of the unit. Regularly take these steps to keep the area clear:

  • Remove grass clippings, leaves, and twigs from around the unit
  • Trim back shrubs and plants nearby
  • Clear snow and ice during winter
  • Keep storage items away from the unit

Check the top of the unit for debris, especially after storms. Leaves and other materials can fall through the grille and block internal parts. You can gently clean the exterior, but avoid using pressure washers – they can damage the delicate fins.

Using a protective cover in the fall can help keep leaves out, but be sure to remove it before using the system.

Inspect the base of the unit to ensure it’s level and stable. An uneven foundation can cause vibrations that wear down components faster. If the concrete pad is settling or cracking, have a professional check it out.

For best results, schedule professional cleaning of the condenser coils at least once a year. This removes dirt and grime that regular maintenance can’t handle, improving heat transfer and system efficiency. Stick to these steps, and your unit will run smoothly until its next professional inspection.

Leave internal cleaning and repairs to the experts.

6. Fix Duct Leaks and Add Insulation

Sealing and insulating your ducts is key to keeping your HVAC system running efficiently and lasting longer. When air leaks out or insulation is lacking, your system has to work harder, which can wear it out faster.

Check your ductwork by looking at accessible areas like attics, basements, and crawl spaces. Look for gaps or disconnects where air might escape. If you spot leaks, use duct-specific sealing products to close them up. Adding insulation to the ducts helps keep air at the right temperature, reducing energy waste and improving system performance.

Taking these steps can help your HVAC system run more efficiently and last longer.

7. Check Home Insulation

Your home’s insulation plays a big role in how efficiently your HVAC system runs and how long it lasts. If your insulation isn’t up to par, your system has to work overtime, leading to quicker wear and tear.

Here are the key areas to focus on:

  • Attic: Proper insulation helps reduce heat loss.
  • Exterior Walls: Good insulation keeps indoor temperatures steady.
  • Basement/Crawl Space: Insulation here helps maintain consistent temperatures throughout your home.

Signs of poor insulation include uneven room temperatures, drafts, or rising energy bills. By improving your home’s insulation, you can ease the burden on your HVAC system and make sure all your maintenance efforts pay off.

8. Set Fan to “Auto” Mode

The fan setting on your HVAC system might seem like a small detail, but it has a big impact on energy use and system durability. Most systems give you two options: “On” and “Auto.” Choosing “Auto” means the fan runs only when heating or cooling is needed, while “On” keeps it running non-stop. Using the right setting can reduce wear and help your system last longer.

Here’s a quick breakdown of the differences:

Feature “Auto” Mode “On” Mode
Operating Time Runs only during heating/cooling cycles Runs continuously
Energy Usage Lower energy use Higher energy use
Motor Wear Less strain on the motor More wear on the motor
Filter Life Lasts longer, slower dust buildup Shortens due to constant airflow

Switching your fan to “Auto” can help you save energy, reduce strain on your system, and extend filter life. If you’re unsure about your settings, ask a professional to check them during your next service visit.

9. Fix Small Problems Quickly

Small HVAC issues can snowball into expensive repairs if ignored. Catching problems early and addressing them right away can save you from bigger headaches. Here are some common warning signs to watch for:

Warning Sign Possible Issue What Could Happen
Unusual noises Loose parts or failing components Total component failure
Weak airflow Blocked ducts or blower issues System strain and eventual breakdown
Short cycling Thermostat or sizing problems Higher energy bills and wear
Strange odors Mold or burnt wiring Health risks or potential fire
Inconsistent temperatures Failing parts or duct problems Reduced comfort and efficiency

Ignoring these signs makes your HVAC system work harder than it should, which speeds up wear and increases repair costs. Acting quickly when you notice changes in performance can prevent small problems from spiraling into major issues.

Calling a professional at the first sign of trouble not only helps avoid costly repairs but also keeps your system running efficiently for longer. Regular maintenance is key to ensuring your HVAC system stays in top shape.

10. Work with Hydrodynamics Inc.

Extend the life of your HVAC system by teaming up with seasoned professionals. Hydrodynamics Inc. specializes in HVAC maintenance and repair services designed to keep your equipment running smoothly and efficiently. Their proactive care approach aligns perfectly with the maintenance tips mentioned earlier.

Their certified technicians provide:

Service Type Benefits for Your System
Preventative Maintenance Identifies issues early, avoiding costly breakdowns
System Repairs Uses high-quality parts for durable fixes
Performance Optimization Fine-tunes systems to improve efficiency and reduce strain
Ductwork Service Cleans and seals ducts to enhance airflow and minimize wear
Energy Efficiency Updates Implements updates to lower stress and operating costs

Hydrodynamics Inc. employs EPA 609 Certified Technicians, ensuring they meet the highest industry standards. Their services include detailed inspections, expert cleaning, and precise adjustments to keep your HVAC system in top condition.

“Prompt, knowledgeable, and efficient”, says Emma K. from Drums, PA, praising the exceptional service that helps HVAC systems perform at their best.

They also handle a wide range of systems, including:

  • Central air conditioning systems
  • Heat pumps
  • Ductless mini-split systems
  • Industrial heating equipment
  • Rooftop HVAC units

Conclusion

The tips shared here can help keep your HVAC system running smoothly and dependably. Regular upkeep and thoughtful usage not only improve performance but also help avoid expensive replacements.

Simple actions like changing filters and clearing debris around outdoor units can stop small problems from turning into major headaches. Regular checkups, using smart thermostat settings, and addressing minor issues quickly are key to maintaining your system’s efficiency over the years.

Taking these steps ensures your HVAC system stays in great shape and protects your investment.

Signs of Refrigerant Leaks and What to Do Next

Signs of Refrigerant Leaks and What to Do Next

  • Common Signs: Hissing/bubbling noises, weak cooling, frozen evaporator coils, and higher energy bills.
  • Immediate Actions: Turn off your HVAC system, ventilate the area, and keep people/pets away.
  • Professional Help: Call a licensed HVAC technician for leak detection and repairs.
  • Prevention Tips: Schedule regular maintenance, fix small issues promptly, and ensure professional installation.

Quick Tip: Acting fast when you spot a refrigerant leak can save you from expensive repairs and keep your system running efficiently. Learn more about how to address leaks and prevent future issues below.

Top 3 Refrigerant Leak Detection Methods

How to Spot Refrigerant Leaks

Catching refrigerant leaks early can save your HVAC system from serious damage and help you avoid expensive repairs. Here are some common signs to keep an eye (and ear) on:

Hissing or Bubbling Noises

If you hear a hissing noise, it might mean gas is escaping through a small hole. Bubbling sounds, on the other hand, often indicate a larger leak [1][3].

Weak Cooling Performance

A drop in refrigerant levels makes it harder for your system to cool properly. Look out for:

  • Reduced airflow
  • Longer cooling cycles
  • Uneven room temperatures

These are all signs your system is struggling due to low refrigerant [1][3].

Frozen Evaporator Coils

When refrigerant levels are too low, moisture can build up on the evaporator coils and freeze into ice. This is a clear warning sign [1][3].

Higher Energy Bills

A sudden spike in your energy bill could mean trouble. With less refrigerant, your HVAC system has to work harder and run longer to maintain your desired temperature, which uses more electricity [1][3].

Spotting these warning signs early can make a big difference, but knowing how to address the issue is just as important.

First Steps After Finding a Leak

If you discover a refrigerant leak in your HVAC system, acting quickly is key to ensuring safety and minimizing damage. Here’s what to do:

Turn Off Your HVAC System

Switch off your HVAC system at the circuit breaker. This helps avoid further refrigerant loss, damage to the system, added strain on the compressor, and potential electrical risks. It’s an essential first step to protect both your equipment and the environment.

Ventilate the Area

Open windows and doors to let fresh air circulate and clear out any refrigerant gases. If you have ceiling fans, turn them on to help with air movement. Keep the area well-ventilated until a professional arrives to check the air quality and address the issue.

Keep People and Pets Away

Move your family members and pets to another part of the house and block access to the affected area. Mark the space with clear warnings to prevent anyone from entering. Avoid attempting any DIY fixes – refrigerant handling is dangerous and requires certified expertise.

“Handling refrigerants requires specialized training and equipment to ensure safety and compliance with environmental regulations”, stress HVAC safety guidelines from industry professionals.

After these steps, call a licensed HVAC technician. They’ll perform detailed leak detection tests and recommend the right repairs for your system.

Getting Professional Help

After addressing immediate safety concerns, the next step is to bring in professionals to properly diagnose and repair the issue. This ensures your system is safe, efficient, and meets regulatory standards.

Leak Detection Tests

Technicians rely on specialized tools to accurately locate leaks. Common methods include:

  • Electronic tools and pressure tests to detect leaks and identify pressure drops in the system.
  • Visual inspections to spot oil stains or ice buildup on coils and lines.
  • UV dye testing for locating hard-to-spot leaks.

“Leak detectors and monitoring systems alert technicians to rising refrigerant levels in the air” – US EPA, Refrigerant Safety [2]

Fix or Replace Decision

Deciding whether to repair or replace your HVAC system depends on a few important factors:

Factor Repair Replace
System Age Under 10 years old Over 10 years old
Leak Location One accessible spot Multiple spots or internal damage
Repair Cost Less than 30% of replacement More than 30% of replacement cost
System Efficiency Performs well overall Declining performance, higher bills

For older systems, replacement is often the smarter choice, especially if the unit has a history of frequent repairs or uses outdated refrigerants. Consulting a professional can help you make the best decision for your situation.

Hydrodynamics Inc.: HVAC Service Experts

Hydrodynamics Inc.

Hydrodynamics Inc., a family-owned business since 1994, offers a full range of HVAC services. Their certified technicians follow EPA guidelines and use state-of-the-art tools to address refrigerant leaks and other system issues. Services include:

  • Consultation and installation for system replacements.
  • Preventative maintenance programs to reduce the risk of future problems.

They work with systems of all sizes – residential, commercial, and industrial – providing reliable solutions tailored to your needs.

Stop Future Leaks

After fixing your system, it’s important to take steps to prevent leaks from happening again. It’s much cheaper and less stressful to prevent refrigerant leaks than to deal with system breakdowns later.

Schedule Regular Checkups

Routine inspections are key to catching problems early. These checkups should include annual pressure tests, checks on system components, and monitoring refrigerant levels. This helps keep your system running smoothly and can spot leaks before they become major issues.

“Refrigerant concentrations can be lowered by designing equipment with reduced leakage and promptly repairing leaks that do occur.” – US EPA, Refrigerant Safety [2]

Address Small Issues Quickly

Even minor problems can snowball into major system failures if ignored. Watch for early signs like inconsistent cooling, small ice buildup, or strange noises. Fixing these issues right away can save you from bigger headaches down the road.

Choose Professional Installation

How your system is installed plays a huge role in preventing leaks. Professional installation ensures:

  • Proper Sealing: Connections are tightly sealed and thoroughly tested.
  • High-Quality Materials: Only industry-grade refrigerant lines and fittings are used.
  • Manufacturer Guidelines Followed: Installation is done according to your system’s specific requirements.

The EPA highlights that proper installation can significantly lower risks tied to refrigerant leaks [2]. Skilled installers use advanced tools and techniques to ensure your system is leak-free and performs at its best from the start.

Next Steps

Once you’ve addressed a refrigerant leak, it’s crucial to shift your attention to keeping your HVAC system in good shape and preventing future problems.

Reach out to a certified HVAC technician to thoroughly inspect your system. They can run leak detection tests using specialized tools. Make sure to hire someone with plenty of experience in both detecting and fixing leaks.

Here’s what a professional inspection typically involves:

Inspection Component Why It Matters
Pressure Testing Pinpoints leaks and helps avoid damage
Component Check Spots wear and tear before it becomes a problem
Refrigerant Level Analysis Keeps your system running efficiently
Safety Assessment Identifies potential hazards and ensures safety

Regular maintenance is key. Set up a schedule for routine inspections and filter replacements. According to the EPA, timely repairs and proper upkeep are critical for the safe and efficient operation of your HVAC system.

FAQs

How do I know if my HVAC is leaking Freon?

Look out for these common warning signs:

Warning Sign What It Means
Poor Cooling Your system isn’t cooling as effectively as it should.
Longer Cycles The unit runs longer than usual to maintain the set temperature.
High Humidity Struggles to remove moisture, leaving indoor air feeling damp.
Frozen Coils Ice buildup on the evaporator coils caused by low refrigerant levels.
Rising Bills Increased energy costs due to reduced efficiency.

If you notice any of these issues:

  • Turn off the system and ensure the area is well-ventilated.
  • Reach out to a certified HVAC technician immediately.

Professionals like those at Hydrodynamics Inc. have the tools and expertise to pinpoint and fix refrigerant leaks safely, following all necessary safety regulations [2][4].

Taking quick action can help maintain your system’s performance and prevent expensive repairs down the line.

Spring HVAC Maintenance Checklist for Homeowners

Spring HVAC Maintenance Checklist for Homeowners

Spring is the perfect time to prepare your HVAC system for the hot months ahead. Regular maintenance can lower energy bills, prevent costly repairs, and ensure reliable cooling. Here’s a quick checklist to get started:

  • Replace Air Filters: Check monthly; replace every 1-3 months for better air quality and efficiency.
  • Clean Vents and Registers: Remove dust and obstructions to improve airflow.
  • Inspect the Outdoor Unit: Clear debris, clean condenser coils, and check fan blades.
  • Program Thermostats: Optimize settings for energy savings, especially with smart thermostats.
  • Check Condensate Drain Line: Clear clogs to prevent leaks and moisture damage.

For a thorough tune-up, consider scheduling professional HVAC maintenance. It includes detailed inspections, component testing, and performance checks to keep your system running smoothly all season long.

HVAC Maintenance Checklist For Homeowners

Indoor HVAC Maintenance Tasks

Keeping your HVAC system in good shape starts indoors. Here are some essential spring tasks to focus on.

Check and Replace Air Filters

Air filters play a big role in maintaining air quality and keeping your system running smoothly. ENERGY STAR recommends checking them monthly and replacing them every 1-3 months, depending on the type [1]. For specifics: fiberglass filters should be swapped out every 30 days, pleated filters every 60-90 days, and HEPA filters every 6-12 months.

Verify and Program Thermostats

Make sure your thermostat is functioning correctly and set up to save energy. If you’re using a smart thermostat, you could cut cooling costs by as much as 10% annually [2].

Clean Vents and Registers

Dust buildup in vents can block airflow and force your system to work harder. Use a vacuum or soft brush to clean them. Also, check that vents are open, unobstructed, and properly aligned to ensure smooth airflow.

Inspect and Clean the Condensate Drain Line

The condensate drain line helps prevent moisture damage. Look for any clogs or leaks and clear slow drainage with a wet/dry vacuum. For more stubborn clogs, it’s best to call a professional to avoid damaging the system [1].

Once your indoor tasks are complete, it’s time to tackle outdoor maintenance for a well-rounded HVAC checkup.

Outdoor HVAC Maintenance Tasks

Once you’ve wrapped up indoor maintenance, it’s time to shift your attention to the outdoor unit. Keeping up with outdoor maintenance is key to ensuring your system runs efficiently, as noted by ENERGY STAR [2].

Clear Debris Around the Outdoor Unit

Start by turning off the power at the circuit breaker for safety. Remove any debris around the unit by hand (use protective gloves), trim plants within a 3-foot radius, and clean the area with a soft brush. Check that the unit is sitting level on its mounting surface. This open space helps with proper airflow and makes future maintenance easier.

Clean Condenser Coils

Condenser coils should be cleaned at least once a year or whenever you notice dirt buildup. If you live in a humid area, you might need to clean them more often.

“Using a garden hose to gently spray the coils from the inside out is an effective DIY method. However, avoid using high-pressure washes as they can damage the delicate fins.” [5]

Check Fan Blades and Motor

Examine the fan blades for signs of damage or looseness. Pay attention to any unusual noises coming from the motor, such as squealing or grinding. If you notice anything off, it’s best to call a professional HVAC technician to avoid causing further damage [5].

If you live in a humid climate or an area with extreme weather, consider scheduling more frequent inspections to prevent issues like corrosion and to keep your system running smoothly [3]. After finishing your outdoor maintenance, think about booking a professional tune-up to ensure your system is ready for the season ahead.

Professional HVAC Maintenance and Tune-Ups

When it comes to HVAC maintenance, professional tune-ups tackle the more intricate tasks that DIY efforts can’t handle. Here’s a breakdown of what happens during a professional service visit:

Service Component What’s Included Why It Matters
System Inspection Examining electrical connections, measuring voltage Helps prevent breakdowns and ensures safety
Component Testing Testing motors, checking fan functionality Catches potential problems early
Cleaning Services Thorough cleaning of parts, coil upkeep Keeps the system running efficiently and prolongs its life
Performance Check Measuring airflow, verifying refrigerant levels Ensures the system operates at its best

Schedule a Professional Tune-Up

Book your tune-up in early spring to stay ahead of any peak-season challenges. Professional technicians come equipped with the tools and knowledge to perform in-depth diagnostics and make precise adjustments that go hand-in-hand with your DIY efforts.

Hydrodynamics HVAC Services

Hydrodynamics HVAC Services

Since 1994, Hydrodynamics Inc. has been delivering top-notch residential HVAC services. Their offerings include inspections, energy efficiency evaluations, and customized preventative maintenance to suit your system’s needs.

Conclusion: Preparing Your HVAC System for Spring

Key Maintenance Tasks to Focus On

Getting your HVAC system ready for spring means combining simple DIY tasks with professional check-ups. Indoors, swapping out filters and cleaning vents can boost air quality and keep your system running smoothly. Outdoors, clearing debris and cleaning coils can prevent overheating and improve performance. While many of these tasks are manageable for homeowners, a professional tune-up can uncover deeper issues and fine-tune the system.

According to ENERGY STAR, clean condenser coils can increase efficiency by up to 15% [4]. This shows how small maintenance efforts can have a big impact on both performance and energy use during the cooling season.

Besides immediate improvements, these steps also offer long-term benefits.

Why Regular Maintenance Pays Off

Keeping up with HVAC maintenance offers three major perks:

  • Longer System Life: Prevents early wear and tear or costly breakdowns
  • Better Energy Efficiency: A well-maintained system uses less energy
  • Lower Utility Bills: Efficiency translates to savings on monthly costs

Professional inspections are particularly valuable for spotting issues early, ensuring your system runs reliably during high-demand periods. ENERGY STAR’s checklist highlights the importance of tasks like tightening electrical connections and lubricating moving parts during professional tune-ups [4].

“Regular maintenance can significantly lower energy costs by improving system efficiency. For example, sealing and insulating ducts can improve efficiency by up to 20 percent. Additionally, installing a smart thermostat can save approximately $100 a year.” [2]

FAQs

How to get your AC unit ready for summer?

Getting your AC unit ready for summer involves a mix of simple DIY tasks and professional checks. Here’s what you need to know:

Indoor Preparation

  • Replace air filters regularly – every 1 to 3 months, depending on how often the system is used [1][2].
  • Set your thermostat for the warmer months ahead.
  • Clean vents and registers to keep airflow unobstructed [3].

Outdoor Unit Care

  • Remove any debris around the outdoor unit to maintain proper airflow.
  • Clean the condenser coils – this can boost efficiency by up to 15% [4].
  • Run the system for 15–30 minutes to check for unusual sounds or cooling problems.

Professional Assessment

It’s a good idea to have a technician inspect key components like electrical connections, refrigerant levels, and system controls. They can also lubricate moving parts [2].

If you notice any of these warning signs, call a professional:

  • Strange noises while the system is running
  • Weak airflow from vents
  • Frequent cycling on and off
  • Unexpectedly high energy bills [1][3]

For the best performance, schedule professional maintenance in early spring – before the summer heat kicks in [1][2][4]. These steps will help your HVAC system stay efficient and keep your home cool all summer long.

Heating vs. Cooling Maintenance: Key Differences

Heating vs. Cooling Maintenance: Key Differences

Want to keep your HVAC systems running efficiently and avoid costly breakdowns? Here’s what you need to know:

  • Heating systems use 4x more energy than cooling systems, so they require regular checks for burners, heat exchangers, and gas lines.
  • Cooling systems focus on removing heat and need attention to refrigerant levels, coil cleanliness, and condensate drains.
  • Shared tasks include changing filters, thermostat calibration, and system inspections.

Quick Comparison

Aspect Heating Maintenance Cooling Maintenance
Energy Usage Higher energy consumption More efficient but heavy in summer
Key Components Heat exchangers, burners, gas lines Evaporator coils, refrigerant lines
Seasonal Timing Early fall Early spring
Safety Concerns Gas leaks, carbon monoxide Refrigerant levels, electrical risks

Pro Tip: Schedule professional heating maintenance in fall and cooling check-ups in spring to ensure optimal performance year-round.

Yearly HVAC Maintenance Checks

Heating System Maintenance: Requirements

Maintaining your heating system is crucial for keeping it running efficiently during the colder months. Let’s break down the key components, tasks, and schedules involved.

Components in Heating Systems

Heating systems are made up of several essential parts, including furnaces, boilers, heat pumps, heat exchangers, burners, fuel lines, and air filters. Each of these requires specific attention to ensure everything works smoothly.

Maintenance Tasks for Heating

A major focus is on inspecting and replacing filters. Dirty filters can lead to up to a 15% increase in energy use [3]. Here’s a quick guide for filter replacement:

  • 1-inch filters: Replace every 2-3 months.
  • Media filters: Replace every 6-12 months [5].

Other important tasks include:

  • Checking the heat exchanger for cracks or other damage.
  • Cleaning burners to ensure proper combustion.
  • Inspecting fuel lines for leaks.
  • Lubricating moving parts to minimize wear and tear.

Heating Maintenance Schedule

Sticking to a regular maintenance schedule helps prevent issues and keeps your system running efficiently. Here’s a helpful timeline:

Frequency Tasks Purpose
Monthly Check filters, perform visual inspections Avoid airflow restrictions
Semi-annually Clean burners, inspect fuel lines Ensure safe and efficient operation
Annually Conduct full system inspection, service heat exchanger Catch and prevent major problems

By following this schedule, you’ll reduce the risk of breakdowns and improve your system’s performance.

Heating systems require specific care, but cooling systems come with their own set of maintenance needs, which we’ll cover next.

Cooling System Maintenance: Considerations

Cooling systems work differently from heating systems. Instead of producing warmth, they remove heat, which means they require specific upkeep and care.

Key Components of Cooling Systems

Cooling systems are made up of several parts that work together to keep your space comfortable:

  • Evaporator coils: Absorb heat from indoor air.
  • Condenser units: Release heat outside.
  • Refrigerant lines: Move coolant through the system.
  • Electrical connections: Power the system and keep everything running.

Essential Cooling Maintenance Tasks

According to the U.S. Department of Energy, keeping up with maintenance can cut energy costs by up to 30% [2]. Here’s what you need to do:

Task Frequency & Purpose
Clean or replace air filters Every 1-3 months to maintain airflow and efficiency
Clean evaporator and condenser coils Annually to ensure the system cools effectively
Check refrigerant levels Annually to maintain optimal performance
Inspect electrical connections Twice a year to avoid breakdowns
Clear the condensate drain Every three months to prevent water damage

Tips for Effective Cooling Maintenance

Timing and attention to detail are key when it comes to maintaining cooling systems. Here’s how you can stay ahead:

  • Schedule professional inspections in early spring, before summer demand kicks in.
  • Keep outdoor units free from debris, leaves, and overgrown plants.
  • Address strange noises or reduced cooling performance as soon as they arise.

Professional services are especially important for tasks like refrigerant handling and electrical inspections. These ensure your system runs efficiently, avoids costly breakdowns, and lasts longer. With regular care, your cooling system will deliver consistent comfort throughout the hottest months.

Next, we’ll look at how some maintenance practices overlap with heating systems.

Comparing Heating and Cooling Maintenance

Understanding the specific needs of heating and cooling systems ensures they run safely and perform at their best.

Shared Maintenance Practices

Both systems benefit from regular upkeep like filter changes, system inspections, and thermostat calibration. Clean filters prevent energy waste and help systems operate as they should.

Differences in Maintenance Needs

Heating and cooling systems have distinct components, which means their maintenance needs differ.

  • Heating systems: Require checks for gas lines, burners, and heat exchangers to ensure safety and efficiency.
  • Cooling systems: Need attention to refrigerant levels, coil cleanliness, and condensate drains to maintain proper function.

Timing matters too. Heating systems are best serviced in early fall, while cooling systems should be checked in early spring.

Heating and Cooling Maintenance Comparison Table

Aspect Heating Maintenance Cooling Maintenance
Energy Usage Uses 4x more energy than cooling More efficient but heavier use in hot climates
Critical Components Heat exchangers, burners, gas lines Evaporator coils, condensers, refrigerant lines
Safety Concerns Gas leak detection, carbon monoxide testing Refrigerant level monitoring
Seasonal Timing Early fall before cold weather Early spring before summer heat
System-Specific Tasks Combustion analysis, heat exchanger inspection Coil cleaning, refrigerant pressure check

For example, variable-speed air conditioners can save up to 30% on energy costs [4]. Meanwhile, high-efficiency furnaces require extra care, like ensuring condensate lines don’t freeze during cold weather [3]. Knowing these differences helps you provide the right care for each system.

Up next: weighing the pros and cons of professional versus DIY maintenance.

Professional vs. DIY Maintenance: Choosing

Taking the right approach to HVAC maintenance can help you save money and avoid system breakdowns. Knowing which tasks you can handle on your own and when to call in a professional is key to keeping your system running smoothly.

DIY Maintenance Tasks

Homeowners can safely tackle a few basic maintenance tasks:

  • Basic Upkeep: Clear debris from outdoor units and check for visible issues like strange noises, blocked vents, or changes in system performance.
  • Filter Replacement: Changing filters regularly boosts efficiency and improves air quality, keeping your system in good shape [5].
  • Visual Checks: Look out for signs of wear or unusual operation that may need professional attention.

When to Hire Professional HVAC Services

Some tasks are best left to certified professionals. These include more complex maintenance that requires specialized skills and tools:

Task Type Why Professional Help is Needed
Refrigerant Handling Requires EPA certification and proper equipment
Electrical Components Risk of electrical shock and potential damage
Gas Line Issues Involves safety risks and legal regulations
Complex Diagnostics Needs advanced testing tools and expertise
Annual Tune-ups Provides a thorough system evaluation

Benefits of Professional Maintenance

Hiring a professional comes with several advantages:

  • Safety and System Life: Trained technicians handle intricate components safely and catch issues early to extend your system’s lifespan [5].
  • Lower Costs Over Time: Routine professional care prevents costly emergency repairs and improves energy efficiency, cutting down your bills [1].

“A professional eye can also detect problems you might not notice and make the necessary repairs before they become major concerns.” [6]

  • Warranty Protection: Many warranties require professional maintenance. DIY fixes could void your warranty and lead to denied claims [5].

For the best results, combine simple DIY tasks with professional check-ups twice a year – once in the spring for cooling systems and again in the fall for heating systems [1].

Conclusion: Key Points on Heating and Cooling Maintenance

Keeping heating and cooling systems in good shape means understanding their unique requirements while sticking to some shared upkeep practices. Regular care plays a big role in how well these systems perform and how efficiently they use energy.

As mentioned earlier, while there are overlapping maintenance tasks, each system has parts that need special care. Heating systems focus on components like heat exchangers and burners, while cooling systems require attention to evaporator coils and condensers. Both systems also benefit from regular filter replacements and routine inspections to keep them running smoothly.

To get the best performance, combine simple do-it-yourself tasks with scheduled professional services. For heating systems, plan professional maintenance in the fall. For cooling systems, spring is the best time for check-ups. This seasonal approach ensures both systems are ready when you need them most.

Professional HVAC services are crucial for keeping systems efficient and extending their lifespan. Companies like Hydrodynamics provide expert care, offering detailed inspections and addressing potential problems before they escalate [5].

7 Warning Signs Your Furnace Needs Repair

7 Warning Signs Your Furnace Needs Repair

Is your furnace acting up? Don’t ignore the signs – it could lead to costly repairs, safety risks, or even a total breakdown. Here’s what to look out for:

  1. Strange Noises: Rattling, booming, or grinding sounds could mean loose parts, gas buildup, or motor issues.
  2. Inconsistent Heating: Uneven room temperatures might be caused by clogged filters, thermostat issues, or blocked vents.
  3. Unpleasant Smells: Odors like gas, burning, or mustiness may indicate leaks, faulty wiring, or mold.
  4. Frequent Cycling: If your furnace turns on and off too often, it could be due to a dirty filter, thermostat problems, or an oversized unit.
  5. High Energy Bills: A sudden spike in costs often signals worn components or efficiency issues.
  6. Pilot Light Changes: A yellow or flickering flame might mean combustion problems or carbon monoxide risks.
  7. Humidity Problems: Dry air or excess moisture could stem from ventilation or furnace sizing issues.

Why It Matters

Ignoring these warning signs can lead to unsafe conditions, higher energy bills, or a full system failure. Regular maintenance and prompt repairs keep your furnace efficient, safe, and reliable.

What to Do Next:

  • Inspect your furnace for these signs.
  • Replace filters and check vents.
  • Call an HVAC technician for professional help if issues persist.

Stay warm and safe by addressing furnace problems early!

Furnace Troubleshooting – Common Problems

1. Strange Noises Coming from the Furnace

Strange noises are often the first sign that something might be wrong with your furnace. While some sounds during operation are normal, certain noises can point to issues that need attention right away to avoid expensive repairs or safety risks.

Here’s a quick breakdown of common furnace sounds and what they might mean:

Sound Type Likely Cause What You Should Do
Rattling/Vibrating Loose parts, panels, or screws Tighten or secure components
Whistling/Hissing Blocked airflow, dirty filter Replace the filter, check vents
Booming Delayed ignition or gas buildup Shut down immediately, call a pro
Grinding/Squealing Worn belts or motor problems Get professional repairs
Excessive Clicking Faulty ignition system Schedule an inspection

A furnace in good condition should run quietly. Ignoring these sounds can lead to:

  • Lower heating performance
  • Increased energy bills
  • Safety risks
  • Full system breakdown

Some noises, like booming, could even signal dangerous issues like gas leaks or improper combustion [2][3].

What to Do If You Hear Strange Noises

  1. Note when the noise happens and describe it (e.g., rattling, booming).
  2. Turn off the furnace if you hear booming or grinding.
  3. Check for and tighten any loose panels.
  4. Call a certified HVAC technician for help.

Regular maintenance can help spot these issues early [2][3]. Avoid trying to fix complex problems yourself – DIY repairs can be risky and may void your warranty [1][4].

Addressing these noises quickly keeps your furnace running smoothly and safely, saving you from bigger headaches down the line.

2. Uneven or Inconsistent Heating

When some rooms in your home feel like an icebox while others are warm and cozy, it could mean your furnace is having trouble. Uneven heating isn’t just annoying – it often points to deeper issues that need professional attention.

Common Signs and Possible Causes

Issue Impact Symptoms
Clogged Air Filters Limits airflow Cold spots in rooms farther from the furnace
Burner Assembly Issues Reduces heat output Persistent cold areas even after adjustments
Faulty Thermostat Poor temperature control Room comfort doesn’t match thermostat settings
Blocked Vents Impairs air distribution Noticeable temperature differences between rooms

Uneven heating makes your furnace work harder than it should, leading to higher energy bills and extra wear on the system. Over time, this can shorten the lifespan of your furnace.

Quick Fixes You Can Try

  • Replace dirty air filters to restore proper airflow.
  • Make sure all vents are open and not blocked by furniture or other obstacles.
  • Test your thermostat to ensure it’s working properly.

If these steps don’t solve the problem, it’s time to call an HVAC technician. They can check for more complex issues, like problems with the burner assembly or heat exchanger, which require professional expertise.

To keep your furnace running smoothly, schedule yearly inspections with a qualified technician. Avoid attempting DIY repairs on complicated components – this can be dangerous and might even void your warranty.

Also, keep an eye (or nose) out for unusual odors from your furnace. These can indicate more serious problems that need immediate attention.

3. Odd or Unpleasant Smells

Strange smells coming from your furnace can point to serious safety concerns that need immediate action. Knowing what these odors mean can help you address problems before they escalate.

What Furnace Odors Could Indicate

Odor Type Possible Cause What to Do
Rotten Eggs/Gas Gas leak Leave the house immediately and call your gas company.
Burning Electrical Faulty wiring or overheating parts Turn off the furnace and call an HVAC technician.
Metallic Cracked heat exchanger Shut down the system and arrange urgent repairs.
Musty/Damp Mold or condensation problems Get a professional inspection.

If you detect any of these odors, turn off your furnace right away, ventilate the area, and reach out to an HVAC expert. A properly maintained furnace should not release strong or unusual smells.

How to Prevent Furnace Odors

Regular upkeep can help avoid odor issues and ensure your furnace operates safely. Here’s how:

  • Schedule yearly professional inspections.
  • Keep the area around your furnace well-ventilated.
  • Install carbon monoxide and smoke detectors nearby.
  • Remove any flammable materials from the furnace area. [2]

Catching these issues early not only keeps your home safe but also helps you avoid expensive repairs down the line. Keep in mind, other signs like frequent cycling or higher energy bills might also indicate your furnace needs attention. [3]

4. Furnace Turns On and Off Too Often

If your furnace keeps starting and stopping in short bursts, it’s a red flag. Typically, a furnace should run for 10-15 minutes per cycle before shutting off. Short cycles mean there’s an issue that needs attention.

Common Causes and Their Effects

Issue What Happens Signs to Watch For
Clogged Air Filter Causes overheating Furnace shuts off too soon
Malfunctioning Thermostat Misreads temperatures Irregular cycling patterns
Dirty Flame Sensor Fails to detect the flame System shuts down prematurely
Oversized Furnace Heats too quickly Frequent starts and stops

Short cycling puts extra strain on furnace components, wearing them out faster. This reduces efficiency and can lead to costly repairs or even system failure.

What You Can Do Right Now

Before calling in a pro, try these quick fixes:

  • Inspect your air filter: A dirty filter can block airflow. Replace it if needed.
  • Check your setup: Make sure vents are open and the thermostat is placed in a suitable spot.

If these steps don’t help, it’s time to bring in a certified HVAC technician. They can check more complex parts like the heat exchanger or ignition system, which might be causing the problem [2].

Stay Safe

Frequent cycling isn’t just inefficient; it can also pose safety risks, like potential combustion gas leaks [3]. Install carbon monoxide detectors near your furnace for extra protection, and schedule regular inspections to keep your system running smoothly [4].

Ignoring this issue can lead to inconsistent heating or other complications, so don’t delay professional assessment. It’s key to ensuring your furnace operates safely and efficiently.

sbb-itb-99db659

5. Higher Energy Bills Without Explanation

Noticing a sudden increase in your energy bills without a clear reason? This could mean your furnace isn’t running as efficiently as it should. The U.S. Department of Energy states that a well-maintained furnace can lower heating costs by up to 30% [2]. Since heating accounts for about 45% of a home’s energy use [5], addressing these issues quickly can make a big difference.

What Could Be Causing Higher Energy Costs?

Issue Effects and Warning Signs
Faulty Heat Exchanger Leads to a 15-25% increase in costs, uneven heating, and unusual odors
Worn Components Causes higher energy usage, strange noises, and longer heating cycles
Malfunctioning Thermostat Results in inconsistent temperatures and irregular system operation

While clogged filters and blocked vents (mentioned earlier) can reduce efficiency, unexplained spikes in energy costs often point to more complex problems that need professional evaluation.

How to Spot and Fix Efficiency Issues

Several factors can lower your furnace’s performance. Aging parts tend to work less effectively, and neglecting regular maintenance can worsen the situation. Routine system inspections can help catch these problems early, preventing expensive repairs down the line.

Steps You Can Take

Start by monitoring your energy usage for unexpected increases. Replace air filters monthly during high-use periods and make sure vents are free from obstructions. If these steps don’t solve the problem, it’s time to call an HVAC technician for a detailed inspection. Regular maintenance not only helps cut down energy costs but also prolongs your furnace’s life and keeps your home safe.

Keep an eye out for other warning signs, like changes in the color of your furnace’s flame, which could indicate more serious issues needing immediate attention.

6. Pilot Light or Flame Color Changes

Keeping an eye on your furnace’s flame color is an important way to catch potential problems that could affect both safety and performance. A healthy furnace typically has a steady, bright blue flame, which shows that combustion is efficient and gas flow is working as it should.

What Different Flame Colors Mean

Flame Color What It Means Risk Level
Blue Normal operation with complete combustion Safe
Yellow/Orange/Red Indicates combustion problems – safety risks High
Flickering Blue Issues like unstable gas flow or dirty burners Moderate

Why Paying Attention to Flame Color Is Important

If your furnace’s flame changes to yellow or orange, it could mean incomplete combustion. This is a serious problem because it may produce carbon monoxide, a dangerous gas that’s both colorless and odorless and poses major health risks.

What Causes Flame Color Changes?

Several issues can lead to changes in flame color, such as:

  • Burners clogged with dirt
  • Malfunctioning gas valves
  • Poor airflow
  • A damaged heat exchanger

What to Do If You Notice Changes

If the flame color looks off, take these steps:

  1. Turn off your furnace right away and contact a certified HVAC technician for an inspection.
  2. Confirm that your carbon monoxide detectors are functioning correctly.

Avoid attempting any repairs on your own. DIY fixes can be dangerous and might void your furnace’s warranty. Scheduling regular professional maintenance is the best way to prevent these problems and keep your furnace running safely during the colder months.

Flame color isn’t the only thing to watch – your furnace’s performance can also affect your home’s air quality, sometimes causing humidity problems or making the air too dry.

7. Humidity Problems or Dry Air in Your Home

Your furnace isn’t just about heating – it also helps keep indoor air comfortable and balanced. If your home’s humidity feels off, it might point to furnace issues. Ideally, indoor humidity should stay between 30% and 50%, and your furnace plays a big role in maintaining that range.

Humidity Issue Warning Signs Potential Furnace Problems
Excessive Moisture Condensation on windows, musty odors, mold growth Poor moisture removal, faulty heat exchanger
Too Dry Static shocks, dry skin, nosebleeds Over-drying air, incorrect furnace sizing
Inconsistent Levels Uneven comfort between rooms Ventilation issues

Why Humidity Problems Matter

When your furnace can’t manage humidity properly, it affects both comfort and energy use. Dry air can drive up heating costs, while high humidity encourages mold and can pose health risks [2].

Several furnace problems can throw off your home’s humidity levels:

  • A clogged heat exchanger that disrupts air conditioning
  • A faulty humidistat that struggles to regulate moisture
  • Improper furnace sizing that doesn’t fit your home’s needs
  • Restricted airflow that limits system performance

Taking Action

If you’re dealing with humidity issues, try these steps first:

  • Replace air filters if they’re dirty.
  • Ensure your furnace area has proper ventilation.
  • Use a hygrometer to track humidity levels.
  • Call a professional for an inspection if problems persist.

A qualified HVAC technician can pinpoint whether your furnace is causing the issue and suggest fixes to restore balance. Tackling humidity problems not only makes your home more comfortable but also helps your furnace work more efficiently. Regular maintenance is key to keeping everything running smoothly.

Conclusion

Spotting furnace issues early helps keep your home warm and safe while avoiding costly breakdowns. Taking quick action ensures your furnace stays reliable and your home comfortable throughout the winter.

Key Points to Keep in Mind

Postponing furnace repairs can lead to expensive problems and potential dangers, such as carbon monoxide leaks or even fires. Scheduling regular checkups with certified HVAC technicians ensures your furnace runs safely and keeps your home cozy.

Checking your furnace regularly to see if there are any visible signs of maintenance needed is a great way to keep your furnace safe [2]

What to Do Next

If you notice any of the warning signs mentioned earlier:

  • Write down the issues or symptoms you observe.
  • Book an inspection with a certified HVAC technician.
  • Stick to a regular maintenance schedule.

Taking care of your furnace is a smart way to protect your home’s comfort and safety. A properly maintained furnace not only works more efficiently but also delivers dependable heating during the coldest months. Routine professional checkups can help you avoid breakdowns and extend the life of your system for years to come.

FAQs

How do you know when your furnace needs to be replaced?

Sometimes a repair is enough to fix furnace problems, but there are clear signs that a complete replacement might be necessary.

When to Consider Replacing Your Furnace:

  • Age: If your furnace is over 15-20 years old and not performing well.
  • Frequent Repairs: Constant breakdowns or expensive fixes.
  • Physical Damage: Cracks, rust, or leaks in the unit.
  • Heating Issues: A noticeable decline in how well it heats your home.
  • Corrosion: Visible rust or damage on components.

When to Call a Professional

Warning Sign What It Means Action Required
Inconsistent Performance Issues with components or heat flow Schedule an inspection immediately
Higher Energy Bills Efficiency has dropped significantly Compare repair costs to replacement

If your furnace shows these symptoms and repairs aren’t cutting it, it’s probably time for a replacement. An HVAC technician can help you decide whether repairs can extend its life or if a new system is the smarter choice [1][4].

Why Upgrade to a New Furnace?

A new furnace can bring several advantages, including:

  • Better Heating: More reliable and effective performance.
  • Lower Energy Bills: Improved efficiency saves money over time.
  • Enhanced Safety: Modern systems come with updated safety features.
  • Consistent Comfort: Even heating throughout your home [2].

Upgrading to a new furnace not only improves comfort and efficiency but also ensures your home stays safe and warm for years to come. Don’t forget – routine maintenance on your new system can help it last even longer!

5 Ways to Reduce Your Winter Heating Bills

5 Ways to Reduce Your Winter Heating Bills

Cutting down your heating bills this winter is easier than you think. Here’s how you can stay warm without overspending:

  1. Adjust Your Thermostat: Lower it by 7–10°F for 8 hours daily to save up to 10%. Use a smart thermostat for better control and efficiency.
  2. Seal Drafts and Improve Insulation: Prevent heat loss by sealing windows, doors, and upgrading insulation. This can reduce energy costs by up to 30%.
  3. Maintain Your Heating System: Schedule regular HVAC maintenance and consider upgrading to energy-efficient systems like heat pumps or high-efficiency furnaces.
  4. Adopt Energy-Saving Habits: Use smart devices, wear warmer clothes, and heat only the rooms you use to minimize waste.
  5. Leverage Rebates and Incentives: Take advantage of local and federal programs offering rebates of $200–$1,000 for energy-efficient upgrades.

How to Save Money on Heating Bills

1. Adjust Your Thermostat to Lower Costs

Tweaking your thermostat settings can be a simple yet effective way to cut heating expenses. Even a small change, like reducing the temperature by just one degree, can lower your heating bill by 5-7% [5].

Install a Programmable or Smart Thermostat

Using a programmable or smart thermostat can help you avoid wasting energy. These devices make it easy to manage your home’s temperature with automation and remote control features.

“Smart thermostats are a simple way to save energy and money. They can learn your schedule and preferences to optimize your heating and cooling.” – U.S. Department of Energy

Key features to look for include:

  • Geofencing and smart scheduling for automatic adjustments
  • Remote control access and energy usage tracking

Smart thermostats typically cost between $100 and $300, while basic programmable models are available for $20 to $100. The U.S. Department of Energy estimates that smart thermostats can reduce heating costs by up to 12% annually [7].

Set Your Thermostat to Energy-Saving Temperatures

Adjusting your thermostat to specific temperatures throughout the day can help you save money without sacrificing comfort. Here’s a quick guide to recommended settings:

Time of Day Recommended Temperature Notes
When Active/Awake 20°C (68°F) Comfortable for most people
While Sleeping 17°C (63°F) Cooler temperatures may improve sleep
When Away 13°C (55°F) Prevents freezing while saving energy

Research from the U.S. Department of Energy shows that homeowners using smart thermostats with these optimized settings save an average of 10-15% on heating bills [6].

To make the most of these adjustments, use your thermostat’s energy monitor to track savings. Pairing these changes with proper insulation and sealing can further reduce energy waste and increase savings.

2. Stop Heat Loss with Better Insulation and Sealing

Air leaks and poor insulation can lead to heat loss, which increases heating bills. By sealing drafts and improving insulation, you could reduce your energy costs by as much as 30% [8].

Seal Drafts Around Windows and Doors

Drafts around windows and doors are common culprits of heat loss. You can locate them using a smoke test or by feeling for cold air on windy days. Popular weatherstripping choices include:

  • Foam tape: Lasts 2-3 years, costs $0.50-$1.00 per foot
  • Vinyl: Lasts 5+ years, costs $0.75-$1.50 per foot
  • Metal: Lasts 10+ years, costs $2.00-$3.50 per foot

For the best outcome, pair weatherstripping with quality caulk around these areas:

  • Window frames and sills
  • Door frames and thresholds
  • Electrical outlets on exterior walls
  • Cable and utility entry points

Add Insulation to Key Areas of Your Home

Upgrading insulation in specific parts of your home can result in noticeable energy savings. For instance, adding attic insulation with an R-value of R-30 to R-60 could save you $150-$300 annually [2]. Here’s a breakdown of insulation options:

Area Key Locations Insulation Type R-Value Cost/sq.ft
Upper Level Attic spaces, hatches Fiberglass batts R-30 to R-60 $0.50-$1.50
Lower Level Basement walls, rim joists, crawl spaces Spray foam R-11 to R-19 $1.00-$3.00
Exterior Wall cavities Cellulose R-13 to R-21 $0.75-$2.00

Fiberglass batts work well for attics, while spray foam is better for basements and crawl spaces. Cellulose is a great option for insulating wall cavities.

“Smart thermostats are a simple way to save energy and money. They can learn your schedule and preferences to optimize your heating and cooling.” – U.S. Department of Energy

3. Keep Your Heating System in Good Shape

Maintaining your heating system can make a big difference in your winter energy costs. Regular upkeep and timely upgrades ensure your system runs efficiently, which could save you hundreds of dollars each year.

Schedule Regular HVAC Maintenance

Routine maintenance can boost furnace efficiency from 70% to as much as 95%, lowering your energy expenses [4]. Here are some key tasks to keep your system in top shape:

Maintenance Task Frequency Benefits
Professional tune-up Annually (before winter) Improves efficiency, reduces breakdown risks
Filter replacement Every 1-3 months Enhances airflow, lowers energy use
Duct inspection Every 2-3 years Ensures consistent heating
System cleaning Annually Optimizes overall performance

Hydrodynamics Inc., a trusted HVAC service provider since 1994, advises scheduling maintenance in early fall to prepare your system for the colder months.

Consider Upgrading to an Energy-Efficient System

If your heating system is over 15 years old or struggling to keep up, upgrading to a modern, energy-efficient model could lead to significant savings:

System Type Efficiency Rating Annual Savings Potential
Geothermal Heat Pump Up to 400% Highest savings
Air-Source Heat Pump Up to 300% Significant savings
High-Efficiency Furnace 95-98% Moderate savings

When choosing a new system, think about your home’s size, local climate, and existing setup. While these systems may cost more upfront, the lower energy bills over time often make the investment worthwhile.

Once your heating system is running efficiently, you can adopt simple habits and tools to cut energy use even further without sacrificing comfort.

sbb-itb-99db659

4. Use Simple Tools and Habits to Save Energy

You can keep your home warm and your energy bills manageable with a mix of smart technology and small lifestyle changes. Pair these tools and habits with efficient heating methods to make the most of your energy savings this winter.

Use Smart Devices to Manage Heating

Smart home gadgets make controlling your heating system easier and more effective. Here’s how some devices can help:

Device Type What It Does Possible Savings
Smart Thermostat Adjusts schedules, senses motion 10-15% on heating
Energy Monitor Tracks usage and spots inefficiencies 5-10% on total energy
Smart Plugs Manages space heaters 3-5% on heating

For the best results, link these devices into a single system. Seeing real-time energy data can make it easier to spot and cut wasteful habits.

Dress Warmly and Use Space Heaters Wisely

Small changes, like wearing warmer clothes indoors or using space heaters strategically, can help you save energy without sacrificing comfort. Here’s how to make it work:

Strategy How to Do It Energy Impact
Layered Clothing Wear warm indoor outfits Lower thermostat by 2-3°C
Zone Heating Heat only the rooms you’re using Reduce whole-house heating needs
Smart Timing Heat spaces only when they’re in use Avoid wasting energy on empty rooms

Always prioritize safety: use UL-certified heaters, keep them away from flammable items, and never leave them unattended.

By combining these tips with a smart thermostat, you can lower your home’s base temperature and rely on space heaters only when necessary. This focused heating approach keeps you comfortable while cutting energy use.

Don’t forget to check for rebates and incentives that can make energy-efficient upgrades even more affordable.

5. Save Money with Rebates and Incentives

Smart tools and habits can help cut heating costs, but rebates and incentives can make upgrading to energy-efficient systems even more affordable.

Explore Local and Federal Rebates

You can reduce the cost of upgrades by taking advantage of rebates from ENERGY STAR, federal programs, and local utility providers. For example:

  • Federal programs may offer up to $1,000 for high-efficiency systems.
  • Utility rebates typically range from $200 to $800 for items like smart thermostats and HVAC upgrades.

To make the most of these programs:

  • Check eligibility before making a purchase.
  • Save all receipts and documents for proof.
  • Apply as soon as possible, as funds are often limited.

These rebates make it easier to invest in upgrades like high-efficiency heating systems or better insulation, which can significantly lower your energy bills.

Work with HVAC Professionals

HVAC experts can help you maximize savings by:

  • Performing energy audits to pinpoint upgrades that qualify for rebates.
  • Ensuring installations meet rebate program standards.
  • Assisting with the necessary paperwork for rebate claims.

With professional support and available rebates, you can get the best value while upgrading your home’s energy efficiency.

Conclusion: Steps to Cut Heating Costs This Winter

Bringing together smart habits and home upgrades can make a big difference in reducing heating costs.

Adjusting your thermostat, improving insulation, and sealing drafts work well together to lower expenses. For example, setting your thermostat 7-10°F lower for eight hours a day can reduce heating costs by around 10%. Adding insulation or sealing drafts boosts these savings even further, keeping your home cozy while reducing energy waste.

Better insulation and draft sealing are especially effective at preventing heat loss. According to the Environmental Protection Agency, comprehensive air sealing and insulation upgrades can lower heating and cooling costs by up to 30% – a strong option for long-term savings.

Don’t overlook HVAC maintenance. Regular check-ups keep your system running efficiently, ensuring you get the most out of your energy-saving efforts. Pair this with smart energy tools and good usage habits for consistent performance all winter.

Lastly, take advantage of rebates and incentives. Many local utilities offer rebates ranging from $200 to $800 for energy-efficient upgrades, making it easier to afford these improvements while saving even more.

FAQs

How to lower heating bill in winter?

Cutting down your winter heating bill involves smart temperature control, efficient heating systems, and proper home care. Along with thermostat strategies, applying multiple energy-saving methods together can make a big difference [1].

Modern heating systems can help reduce costs while improving efficiency:

Heating System Type Efficiency Estimated Heating Cost
Geothermal Heat Pump Up to 4.5x more efficient $17.26 per 1M BTU
Air-Source Heat Pump Up to 2.75x more efficient $28.24 per 1M BTU

Although these systems may cost more upfront, rebates and incentives can help offset the expense. Federal programs and local utilities often provide $200 to $1,000 for eligible upgrades [4]. When you combine these incentives with long-term energy savings, upgrading your heating system can be a smart investment.

Preventing heat loss is another key factor in improving efficiency. Focus on:

  • Sealing drafts around windows and doors
  • Insulating areas where utilities enter the home
  • Ensuring your home has adequate insulation [3]

Smart devices can also help you monitor and control heating, adding another layer of savings. When paired with proper insulation and regular maintenance, these steps create an effective plan to lower your winter heating costs.

How to Prepare Your HVAC System for Winter

How to Prepare Your HVAC System for Winter

Want to avoid costly HVAC repairs this winter? Proper maintenance is the key to keeping your system efficient, extending its lifespan, and ensuring your home stays warm. Here’s a quick guide to get started:

  • Schedule a professional inspection to catch potential problems early.
  • Replace air filters every 1–3 months to improve efficiency and air quality.
  • Seal air ducts and home gaps to prevent energy loss.
  • Test and calibrate your thermostat for accurate temperature control.
  • Clear debris around outdoor units and inspect venting systems for safety.

These simple steps can lower energy bills, reduce wear and tear, and keep your HVAC running smoothly all winter. Let’s dive into the details!

Furnace Maintenance Checklist: Get Your HVAC Ready For Winter

Key Maintenance Steps Before Winter

Here’s a breakdown of essential tasks to keep your heating system running smoothly and avoid expensive repairs.

Book a Professional HVAC Inspection

Scheduling an HVAC inspection is a smart way to avoid heating problems during winter. Certified technicians use tools like tube brushes, fin combs, and coil cleaners to inspect and maintain your system thoroughly [6].

Here’s what they typically do:

Task Why It Matters
Check moving parts Avoid mechanical failures by ensuring components work properly
Remove dirt and debris Boost efficiency by keeping the system clean
Test operation Ensure the system runs safely and reliably
Measure output Maximize heating capacity and performance

Once the inspection is complete, it’s time to focus on maintaining components like air filters.

Clean or Replace Air Filters

Replacing air filters every 1-3 months during heavy use is key to keeping your system efficient [3][4].

Clean filters offer several advantages:

  • Lower energy consumption and utility bills
  • Improved indoor air quality
  • Less wear and tear on your HVAC system
  • Longer equipment lifespan

For the best results, choose filters designed for your system and set reminders for regular replacements. With clean filters in place, you’re ready to tackle another important area – your ductwork.

Check and Seal Air Ducts

Leaky air ducts can waste a lot of energy by allowing heat to escape [2][5]. Ensuring your ducts are sealed properly helps your system work more efficiently.

Here’s how professionals handle it:

  • Visual Inspection: Look for visible damage or gaps in accessible ductwork.
  • Leak Detection: Use tools to pinpoint hidden air leaks.
  • Sealing: Apply materials like mastic or metal-backed tape to close leaks.

Sealing ducts keeps your home evenly heated and reduces energy waste, making your system more effective overall.

Important System Checks Before Winter

Test and Calibrate Thermostats

Calibrating your thermostat each year helps maintain accurate temperature readings and keeps your system running efficiently [1].

Here are some key maintenance steps:

  • Use a separate thermometer to verify temperature accuracy (every six months).
  • Replace the batteries to avoid unexpected shutdowns (once a year).
  • Adjust program settings to align with your schedule (at the start of each season).

Smart thermostats like Nest Learning or Ecobee SmartThermostat can help lower heating costs by as much as 23% [4]. Once your thermostat is set up, shift your focus to your outdoor unit to prepare it for winter.

Inspect Outdoor Units and Clear Debris

To protect your outdoor unit from harsh winter conditions:

  • Insulate any exposed pipes.
  • Remove debris within a two-foot radius.
  • Check for physical damage.
  • Ensure the unit is sitting level [8].

After securing the outdoor unit, take time to inspect your venting systems to ensure they’re clear and safe.

Check Chimneys and Vent Connections

Use a flashlight to carefully inspect chimneys and vents for:

  • Cracks or gaps in masonry.
  • Loose or damaged vent connections.
  • Rust or signs of corrosion.
  • Bird nests or other blockages.
  • Proper sealing at pipe joints [7].

If you spot any issues, contact a certified HVAC technician immediately. Faulty venting can lead to carbon monoxide leaks and pose serious safety risks [5]. Ensuring your vents are in good condition is essential for both safety and efficient HVAC operation throughout winter.

Extra Steps to Improve Winter Efficiency

Clean and Maintain Humidifiers

Keeping humidity levels between 30% and 60% helps reduce airborne pathogens and makes your indoor environment more comfortable [7]. To keep your humidifier running smoothly:

  • Clean the unit monthly using vinegar or a solution recommended by the manufacturer.
  • Replace filters as directed in the product manual.
  • Monitor humidity levels with a humidity monitor to ensure they stay within the ideal range.
  • Remove mineral deposits and disinfect any mold growth as soon as you notice it.

Proper humidity not only improves comfort but also helps your HVAC system work more efficiently in the colder months.

Seal Gaps Around Windows and Doors

Sealing air leaks can cut heating costs by up to 30% while reducing the workload on your HVAC system [2]. Pay attention to these areas:

Location Best Sealing Material
Window Frames Silicone Caulk
Door Frames Weatherstripping
Electrical Outlets Foam Gaskets

Use silicone caulk for fixed gaps and weatherstripping for areas that move, like doors. Combined with duct sealing, this step helps keep the warm air inside where it belongs.

Adjust Air Registers for Better Airflow

Adjusting air registers can lower heating costs by up to 5%, according to the U.S. Department of Energy [5]. Follow these tips to improve airflow:

  • Clean registers monthly to prevent blockages.
  • Direct airflow strategically – aim registers upward on lower floors and centrally on upper floors.
  • In two-story homes, fully open downstairs registers and leave upstairs ones partially closed (around 75% open).

“Regular HVAC maintenance is often seen as an unnecessary expense by homeowners. However, neglecting maintenance can lead to costly repairs, decreased efficiency, and premature system failure.” – Generation Air Conditioning & Heating [1]

Keep an eye on room temperatures and adjust registers as needed to maintain even heat distribution throughout your home [7].

When to Upgrade Your HVAC System

Regular maintenance can keep your HVAC system running smoothly, but there comes a point when an upgrade might be the smarter choice – especially as winter approaches.

Assess the Age and Performance of Your System

If your system is more than 15 years old, it might be time to consider a replacement [1]. Watch for signs like higher energy bills, frequent breakdowns, uneven heating, or strange noises. A good rule of thumb: if repairs cost more than 50% of a new system, upgrading is usually the better investment [1].

Benefits of Upgrading to a Modern System

New HVAC systems bring improved efficiency and performance. For instance, Energy Star-certified models can cut heating costs by up to 30% compared to older units [1][5]. Here’s what you can expect:

  • Smart features for precise temperature control
  • Improved humidity regulation
  • Quieter operation
  • Consistent heating throughout your home
  • Lower energy bills
  • Fewer maintenance issues
  • Possible tax credits or rebates
  • Increased home resale value

Hydrodynamics HVAC Services

Since 1994, Hydrodynamics Inc. has been helping homeowners upgrade to more efficient heating solutions. Their services include:

  • Professional evaluations of existing systems
  • Expert installation of high-efficiency units
  • Specialization in gas, propane, and oil systems

Their certified technicians ensure your system is ready to handle winter’s demands, whether through maintenance or an upgrade. A well-prepared HVAC system means reliable comfort during the colder months.

Conclusion: Steps to Get Your HVAC Ready for Winter

Preparing your HVAC system for winter involves focusing on a few key areas to ensure it performs reliably during the colder months.

Schedule Professional Maintenance
Book a fall inspection with a certified technician to catch any potential problems early and keep your warranty intact. Alongside professional servicing, take care of simple tasks like replacing air filters every 1–3 months and sealing any air leaks around windows, doors, or ductwork. These steps can help improve system performance and lower energy bills [1] [2].

Keep an Eye on Performance
Throughout the winter, pay attention to how your system is running. Watch for warning signs such as:

  • Uneven room temperatures
  • Strange noises during operation
  • The system turning on and off more than usual
  • Higher-than-expected energy bills
  • Unusual odors coming from vents or equipment

“Regular HVAC maintenance is not just a cost-effective investment but also ensures that your system operates safely and efficiently” [1]