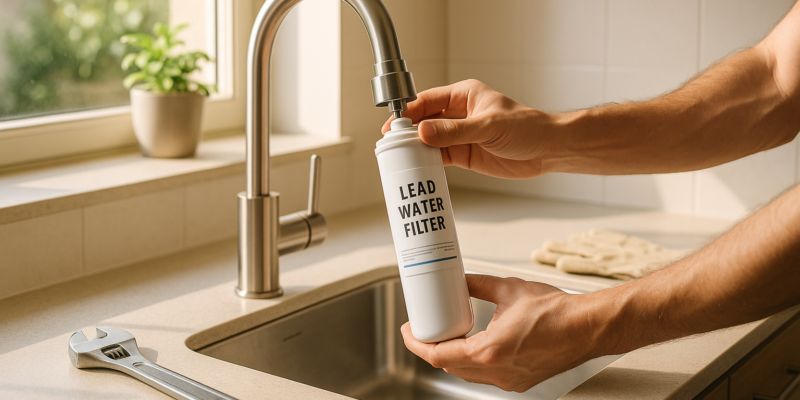
6 Causes of Low Water Pressure in Homes
A weak water flow can disrupt your day and make everyday tasks frustrating. Low water pressure usually stems from one of six common issues:
- Blocked Pipes: Mineral deposits or debris can clog pipes, reducing water flow.
- Water Leaks: Hidden leaks waste water and lower pressure. Look for damp spots or high water bills.
- Old or Corroded Pipes: Aging pipes, especially galvanized steel, can rust and restrict water flow.
- Broken Pressure Regulator: A malfunctioning regulator impacts pressure across the whole house.
- Closed Water Valves: Partially closed valves limit water flow to fixtures or the entire home.
- Water Supply or Well Problems: Municipal supply issues or well system failures can cause pressure drops.
Quick fixes like cleaning aerators or opening valves can solve minor issues. However, leaks, corroded pipes, or well problems often require professional help. Addressing these problems early prevents bigger headaches and costly repairs.
1. Blocked Pipes
Blocked pipes can choke water flow, often caused by mineral deposits, debris, or foreign objects lodged inside.
These blockages usually build up over time, making it easy to overlook gradual pressure drops. You might not even notice your shower’s water pressure dwindling until one day, you’re left with barely more than a dribble.
Spotting the Signs
One of the most telling signs of blocked pipes is localized pressure issues. If just one fixture – like your kitchen sink or a single bathroom faucet – has low water pressure, the problem is likely a clog in that specific pipe. On the other hand, if the entire house is experiencing low pressure, the issue is probably more widespread.
If the pressure issue is noticeable only when using hot water, the culprit might be mineral buildup or blockages in your water heater’s piping.
Your drains can also give you valuable clues. Slow drainage, standing water in sinks or tubs, gurgling noises, or air bubbles in the drains often point to blockages that are restricting water flow and trapping air. When water pools instead of draining smoothly, it’s a clear sign that something is obstructing the system.
Another indicator is unpleasant odors coming from drains. Blocked pipes can trap debris, which decomposes over time and releases foul smells through your fixtures.
Figuring out whether blocked pipes are behind your water pressure problems becomes easier once you know what to look for. Pay attention to whether the issue is isolated to a single fixture or affects the whole house. Up next, we’ll explore how water leaks can lead to low pressure.
2. Water Leaks
Water leaks are like invisible culprits, quietly draining your water supply and lowering the pressure at your faucets and showerheads. Even the smallest leaks can have a noticeable impact on your water pressure.
When water seeps out through cracks or loose connections, less of it is available to flow where you need it. The bigger the leak, the more pronounced the pressure drop becomes.
Spotting Hidden Leaks
An unexpected jump in your water bill is often the first clue that something’s wrong. If your water usage suddenly increases by 20% or more without any changes in your household habits, there’s a good chance water is escaping somewhere in your plumbing system.
Check for damp spots on walls or ceilings near plumbing fixtures. Yellow or brown stains often indicate a leak behind the surface, slowly causing damage over time.
Another red flag is unexpected mold growth, which thrives in damp areas caused by leaks. You might notice this in basements, crawl spaces, or behind appliances like water heaters where moisture tends to accumulate.
To confirm your suspicions, use your water meter. Turn off all water-using appliances and fixtures in your home, then check the meter. If the dial is still moving, water is flowing where it shouldn’t be.
Where Leaks Happen Most Often
Leaks can develop in several places, often where they’re hard to spot:
- Underground supply lines: These are the pipes that connect your home to the water main. Shifting soil, freezing temperatures, or aging materials can cause hidden leaks here, which not only reduce pressure but also waste significant amounts of water.
- Pipe joints and connections: Inside your home, areas like under sinks, around water heaters, and behind toilets are common trouble spots. Frequent temperature changes and vibrations can loosen fittings over time, leading to leaks.
- Fixture connections: Anywhere supply lines meet faucets, showerheads, or appliances can develop leaks. Even a small drip from these connections can add up to major water loss and a noticeable drop in pressure.
If you suspect a leak, it’s best to act quickly. Professionals specializing in plumbing can locate and repair leaks, restoring your water pressure and preventing further damage. Up next, we’ll dive into how aging, corroded pipes can affect your water flow.
3. Old or Corroded Pipes
If your home was built before the 1960s, chances are it has galvanized steel pipes. These older pipes are especially prone to corrosion, which can take a serious toll on your water pressure over time.
As galvanized pipes age, rust forms on their interior walls. Over time, this rust flakes off and builds up inside the pipes, narrowing the space for water to flow. Imagine trying to drink through a straw that’s partially blocked – that’s essentially what’s happening inside corroded pipes.
The issue tends to be worse at pipe bends and joints. These areas slow the water flow even more, allowing rust and debris to settle and create stubborn blockages.
How Corrosion Impacts Water Pressure
Even if the water pressure entering your home is strong, corroded pipes can make it seem like you’re only getting a weak stream from your faucets or showerheads. This happens because the rust and buildup reduce the pipe’s internal diameter, limiting how much water can flow through at any given time – even when the external pressure remains unchanged.
Hard water compounds the problem. Water with high levels of calcium and magnesium leaves behind mineral deposits, further narrowing the pipes. Over time, this scale buildup can significantly restrict water flow.
Recognizing the Signs of Corroded Pipes
If your home still has its original plumbing, it’s worth checking for signs of corrosion. One clue is a gradual decline in water pressure over the years, as opposed to a sudden drop. This slow change often points to internal pipe deterioration.
Another red flag is discolored water. If you notice brown, yellow, or reddish water – especially when turning on a faucet after hours of inactivity – it could mean rust particles are breaking loose from the pipes. The water typically clears up after running for a bit, but the discoloration is a sign of trouble.
In severe cases, corroded pipes may need to be replaced. A professional plumber can inspect your plumbing to determine the extent of the damage and advise whether partial or complete repiping is necessary to restore proper water flow. Up next, we’ll look at how pressure regulator issues can also disrupt your water supply.
4. Broken Pressure Regulator
The pressure regulator in your home plays a crucial role in managing your water supply. Typically located near your water meter or where the main water line enters your house, this device ensures the water pressure reaching your faucets and fixtures stays within a safe and functional range. When it malfunctions, you’ll likely experience a noticeable and widespread drop in water pressure throughout your home.
A failing pressure regulator often leads to significantly reduced or erratic water pressure. For instance, you might notice a strong flow one minute and a weak trickle the next, or consistently low pressure across all fixtures. Unlike issues confined to a single faucet or showerhead, this problem affects the entire household, signaling internal failures within the regulator.
How Pressure Regulators Fail
Most pressure regulators rely on a diaphragm and spring mechanism to respond to changes in water pressure. The diaphragm, which is particularly prone to wear and tear, can crack, tear, or stiffen over time. When this happens, the regulator can no longer effectively control the incoming water pressure, resulting in reduced flow.
Additionally, sediment and debris from your water supply can clog the internal screen and orifices, further compromising the regulator’s performance.
Signs of a Faulty Pressure Regulator
If you’re dealing with fluctuating shower pressure or consistently low water flow despite a normal supply, your pressure regulator might be struggling. Most homes are designed to operate at a pressure range of 70–85 PSI. A failing regulator may not reach these levels, leaving you with insufficient pressure. Another telltale sign is water leaking from the bottom of the regulator’s bell housing, which often points to internal damage, particularly to the brass components. This type of damage, combined with potential diaphragm failure or sediment buildup, usually means the regulator needs attention – whether through repair or full replacement.
Should You Repair or Replace?
Not all pressure regulator problems require a complete replacement. In many cases, cleaning the internal components, such as the screen and orifices, can resolve issues caused by debris buildup. Rebuild kits, which often cost less than $100, can also be a practical solution for repairing minor issues. However, if the damage is extensive, a full replacement may be necessary.
Before starting any repairs, make sure to shut off your main water supply and relieve any pressure in the pipes. Once you’ve rebuilt or replaced the regulator, use a pressure gauge to gradually adjust the water pressure to your preferred level. Be sure to check for leaks and securely tighten the adjustment screw to avoid future issues.
Addressing a broken pressure regulator promptly ensures steady water flow and prevents further complications. For professional repair or replacement services, you can always reach out to Hydrodynamics Inc. Next, we’ll explore how closed water valves can also affect your home’s water pressure.
sbb-itb-99db659
5. Closed Water Valves
Sometimes, low water pressure is as simple as a partially closed water valve. It’s one of the easiest things to check and fix, but it often gets overlooked when troubleshooting.
Water valves are responsible for managing the flow of water into your home and to individual fixtures. If these valves aren’t fully open, they create a bottleneck, restricting water flow and reducing pressure. Depending on where the closed valve is located, the problem could affect your entire house or just specific areas.
Main Water Valves: Affecting the Whole House
If the water pressure is low throughout your entire home, the main water shut-off valve or the water meter valve could be to blame. The main shut-off valve is usually found where the main water line enters your home – commonly in the basement, a crawl space, or near your water heater. The water meter valve, which is managed by your local utility company, is located nearby and can sometimes be partially closed during maintenance or by accident.
When either of these valves isn’t fully open, it restricts the overall water flow coming into your home. This results in consistently low pressure across all faucets, showers, and appliances – not just one or two isolated fixtures.
Individual Fixture Valves: Isolated Issues
For low pressure at a single fixture, the issue might be with its individual shut-off valve. These valves are located near the specific fixture or appliance they serve – for example, under sinks, behind toilets, near water heaters, or behind shower cartridges. If one of these valves is only partially open, it will reduce water pressure at that specific fixture, while the rest of the house remains unaffected.
How to Identify and Check Valves
Different types of valves require specific checks:
- Ball and butterfly valves: If the lever is parallel to the pipe, the valve is open; if it’s perpendicular, the valve is closed.
- Gate, globe, and stop valves: Turn these counterclockwise until you feel resistance to fully open them.
Quick Fix Guide
Start by inspecting your main water shut-off valve and the water meter valve to confirm they’re fully open. If the issue is isolated to one fixture, locate its individual shut-off valve and ensure it’s open. Be gentle – stop turning as soon as you feel resistance to avoid damaging the valve.
This quick inspection can save you from unnecessary service calls. However, if all valves are fully open and the pressure problem persists, the cause could lie elsewhere in your plumbing system. For more complex issues, consider reaching out to Hydrodynamics Inc. for expert diagnosis and solutions. Next, let’s dive into potential problems with your water supply or well system.
6. Water Supply or Well Problems
Low water pressure isn’t always caused by something inside your home – it could be an issue with your water supply system. Whether you’re connected to a municipal water system or rely on a private well, problems at the source can significantly impact your water pressure.
Municipal Water Supply Issues
If your home is connected to city water, your water pressure depends on how well the municipal system is functioning. One common cause of low pressure is water main breaks, which can reduce pressure across entire neighborhoods. Depending on the severity and location of the break, repairs can take anywhere from a few hours to several days.
Scheduled maintenance by your water utility is another potential cause. While most utilities try to perform maintenance during off-peak hours, you may still notice temporary pressure dips. Additionally, high demand periods, such as summer mornings when many people are watering their lawns, can strain the system and lower pressure for individual homes.
In older neighborhoods, aging infrastructure can lead to ongoing pressure problems. Water mains installed decades ago may not be able to handle modern water demand, especially during peak usage times. If your neighbors are experiencing similar issues, it could point to a larger infrastructure problem that needs to be addressed by your utility provider.
Private Well System Problems
For homes using private wells, the challenges are different. A failing well pump is often the first sign of trouble, as it can cause noticeable pressure drops. Even if the pump is still working, it may lose efficiency, resulting in reduced water pressure throughout your home.
Seasonal changes can also affect wells. During dry periods or droughts, dropping water levels in the well can force the pump to work harder, leading to pressure fluctuations. If the water table falls below the pump’s intake, you may experience inconsistent pressure or even a temporary loss of water.
The pressure tank in your well system plays a crucial role in maintaining steady pressure. A faulty tank – whether due to waterlogging or a malfunctioning pressure switch – can cause significant pressure drops, especially when multiple fixtures are in use.
Identifying Supply vs. Home Issues
To figure out whether the problem stems from your water supply or something inside your home, start by checking with your neighbors. If they’re experiencing similar issues, it’s likely a supply problem. For well owners, keeping an eye on the pressure gauge is key. Residential well systems typically operate within a range of 30-50 PSI, with the pump activating at 30 PSI and shutting off at 50 PSI. If your readings are consistently outside this range, your well system may need attention.
If you’re on municipal water, contacting your utility provider can help confirm whether there are known issues or ongoing repairs in your area.
When to Call for Professional Help
Once you’ve determined the source of the problem, it may be time to call in the experts. Water supply and well system issues often require specialized tools and expertise to diagnose and fix. Problems like failing well pumps, faulty pressure tanks, or complex municipal supply issues are best handled by professionals. Companies like Hydrodynamics Inc. specialize in well pump services, offering diagnosis, repairs, and maintenance to keep your system running smoothly.
Professional help ensures accurate diagnosis and prevents prolonged disruptions that could leave you without water while repairs are underway.
Problem Comparison Chart
The chart below outlines six common causes of water pressure problems, offering a quick guide to determine when a simple DIY fix might work or when it’s time to bring in a professional. Identifying the issue early can save you time, money, and unnecessary stress.
| Cause | Typical Signs | Affected Areas | DIY Steps | When to Call a Professional |
|---|---|---|---|---|
| Blocked Pipes | Reduced flow at specific fixtures, especially after cleaning aerators; gradual pressure drop | Specific fixtures or sections of the home | Clean faucet aerators and showerheads; check for visible debris or mineral buildup | If cleaning aerators doesn’t improve flow or if multiple fixtures are impacted |
| Water Leaks | Wet spots on walls or floors, hissing sounds near pipes, sudden spikes in water bills, or a sharp pressure drop | Isolated areas or the entire house | Inspect visible pipes for moisture and listen for running water when all fixtures are off | Call immediately to avoid property damage or mold |
| Old or Corroded Pipes | Gradual pressure loss, rusty or discolored water, restricted flow at multiple fixtures | Often affects multiple fixtures or the entire house | Check for discolored water when turning on taps, compare flow rates, and inspect exposed pipes for rust | If widespread pressure loss occurs, pipes are visibly corroded, or discoloration persists |
| Broken Pressure Regulator | Sudden pressure drops or fluctuations throughout the house | Entire house | Inspect the pressure regulator near the water meter for visible damage; test with a gauge if available | If pressure fluctuates dramatically, can’t be adjusted, or if you’re unsure how to handle it |
| Closed Water Valves | Low pressure or no flow, often after recent plumbing work | Whole house or specific zones, depending on the valve | Ensure all main and fixture valves are fully open | If valves are stuck, hard to turn, or appear damaged |
| Water Supply or Well Problems | Low pressure at all fixtures, neighbors experiencing similar issues, or sudden widespread pressure drop | Entire house – and potentially neighboring homes for municipal issues | Check with neighbors and review utility company updates; monitor well system pressure gauges | If the issue affects your well equipment or persists after municipal updates |
This chart is a handy tool for deciding your next step, whether it’s unclogging an aerator or calling in a professional like Hydrodynamics Inc. for more complex problems.
Some issues, like water leaks, demand immediate attention to prevent property damage, while others, such as a clogged aerator, can wait. Persistent pressure problems shouldn’t be ignored, as they might signal deeper concerns that could lead to costly repairs if left unchecked. Municipal water supply problems typically affect multiple homes, while private well issues are confined to your property.
For more advanced diagnostics or repairs – such as pressure regulator malfunctions, well system issues, or extensive pipe problems – professional services like those offered by Hydrodynamics Inc. can provide precise solutions. Their expertise ensures repairs are done correctly and comply with local codes, avoiding the frustration of trial-and-error fixes.
Conclusion
As outlined earlier, common culprits behind water pressure problems include blocked pipes, water leaks, corroded pipes, broken pressure regulators, closed valves, and supply issues. Each of these requires a specific approach to resolve.
Taking swift action is key to avoiding bigger headaches later on. For example, unclogging an aerator is a quick fix that takes just a few minutes, but ignoring a hidden leak could lead to thousands of dollars in damage. Addressing problems early not only saves money but also prevents unnecessary stress.
Some fixes, like cleaning aerators or ensuring valves are fully open, are simple tasks most homeowners can handle. On the other hand, more complex issues – like faulty pressure regulators, well system malfunctions, or widespread pipe corrosion – call for professional expertise to ensure the job is done right and complies with plumbing codes.
Persistent water pressure issues shouldn’t be ignored, as they often point to deeper problems that can worsen over time. While municipal supply issues may resolve on their own, problems with private wells or internal plumbing require immediate attention to avoid further complications.
For more advanced diagnostics, pipe replacements, or well system repairs, turning to professional services like Hydrodynamics Inc. can make all the difference. Their experienced team has the tools and knowledge to address core water pressure problems and provide lasting solutions.
Quick action not only protects your plumbing but also ensures a consistent water supply. By tackling these issues early, you can enjoy uninterrupted water flow and sidestep costly repairs down the line.
FAQs
How can I tell if my low water pressure is caused by a municipal issue or something in my home?
To determine if low water pressure stems from a municipal supply issue or a problem within your home, start by testing your water pressure. You can do this by attaching a gauge to an outdoor faucet. If the reading shows pressure below 40 psi, it might signal an issue with the municipal supply or your plumbing system.
Next, identify whether the problem is isolated to a single fixture or impacts the entire house. If it’s just one fixture, the culprit is likely a clog or a faulty valve. On the other hand, if the low pressure affects every fixture in your home, it’s a good idea to contact your local water provider to check if there are any supply issues in your area.
How can I identify and fix a faulty water pressure regulator in my home?
If you think your water pressure regulator might be acting up, check for telltale signs like fluctuating or low water pressure, strange noises coming from your pipes, or leaks around the regulator itself. These symptoms often point to a regulator that might need attention.
To start troubleshooting, turn off the main water supply to avoid causing further issues. Open a faucet to release any leftover pressure in the system. After that, take a close look at the regulator for any visible signs of damage or wear. If needed, you can remove it for a more thorough inspection or replace it entirely – just make sure to follow the manufacturer’s instructions carefully.
Not feeling confident about handling it yourself? It’s a good idea to call in a professional plumber. They can diagnose and fix the problem safely and without hassle.
When should I call a professional to fix low water pressure, and what services will they provide?
If you’ve been struggling with a sudden or persistent drop in water pressure and DIY fixes aren’t cutting it, it might be time to bring in a professional. Signs like leaks, clogged pipes, or a faulty pressure regulator are clear indicators that expert help is needed. Professionals come equipped with the right tools and experience to pinpoint the problem, run pressure tests, and resolve the issue efficiently.
A licensed plumber can handle tasks like repairing or replacing damaged components, clearing out blockages, or sealing leaks to get your water flow back to normal. They’ll also inspect your system for any hidden problems, helping to prevent future disruptions and ensuring your home’s water pressure stays steady and dependable.