How to Troubleshoot Solar Water Heater Issues
Solar water heaters are cost-effective and eco-friendly but can encounter problems like lukewarm water, leaks, or odd noises. Fixing these issues often involves simple steps like adjusting the thermostat, cleaning panels, or checking for leaks. Here’s what you should know:
- Common Problems: Inconsistent water temperature, visible leaks, strange noises, reduced water pressure.
- Causes: Dirty collector panels, air pockets in lines, low system pressure, poor insulation, or faulty components.
- Fixes: Clean panels, bleed air from lines, inspect for leaks, adjust thermostat settings, and test the circulation pump.
- Safety Tips: Turn off power and gas, let the system cool, wear protective gear, and inspect the work area for hazards.
- Maintenance: Regular cleaning, flushing, pressure checks, and annual professional inspections can prevent future problems.
For complex issues like electrical repairs or major leaks, call a professional to ensure safety and proper repairs.
Solar water heating system, not heating, element, thermostat, anode replacement. Thermosiphon Geyser
Common Solar Water Heater Problems
Solar water heaters can run into issues from time to time, and catching the warning signs early can save you from expensive repairs down the road.
Warning Signs of System Problems
One of the most common red flags is inconsistent water temperatures. Maybe your water takes longer to heat up in the morning, stays lukewarm even when the sun is shining bright, or suddenly turns cold mid-shower. If you notice temperature swings of more than 10°F from your usual settings, it’s worth investigating.
Visible leaks are another clear indicator. Look for drips or moisture around pipes, connections, or the storage tank. Even small leaks can waste water and lead to further damage. Pay close attention to the collector panels, pump housing, and pipe joints for signs of moisture or mineral residue, which could point to slow leaks.
Odd noises coming from the system should also raise a red flag. Gurgling sounds often mean air is trapped in the lines, while grinding or squealing noises from the circulation pump could signal worn bearings or debris. If you hear banging or hammering when water flows, it might be a pressure issue that needs immediate attention.
Your system’s digital controller can also provide valuable clues. Error messages like sensor failures, pump issues, or temperature warnings shouldn’t be ignored. Persistent error codes usually require a professional to diagnose the problem.
Lastly, if you’re experiencing reduced water pressure throughout your home, it could be related to your solar water heater. Sediment buildup in the heat exchanger or blocked circulation lines is often to blame. If the pressure drop occurs after installing or servicing the system, it’s likely connected.
Recognizing these warning signs is important because they often point to common underlying problems.
What Causes Performance Problems
Dirty or damaged solar collector panels are a frequent culprit when heating issues arise. Dust, debris, or mineral buildup on the panels can block sunlight and reduce heat absorption by as much as 25%. Cracked glass or damaged absorber plates further disrupt heat transfer.
Air pockets in the circulation lines can also cause trouble. These pockets block water flow and create hot spots that may damage components. Air often gets trapped after maintenance, power outages, or when system fluid levels are low, preventing the circulation pump from doing its job efficiently.
Incorrect system pressure is another common issue. Low pressure can reduce circulation and allow air to enter the system, while high pressure puts stress on seals and connections, leading to leaks. Most residential systems operate best in the 15-30 PSI range.
Poor insulation around pipes and the storage tank can lead to heat loss before the water even reaches your faucets. Over time, insulation breaks down due to UV exposure, moisture, or temperature changes, which can cut system efficiency by 15-20%.
Faulty temperature sensors can cause the system to malfunction. For example, they might send inaccurate readings to the controller, causing the backup heater to run unnecessarily or preventing the circulation pump from activating when it should. These issues often develop gradually, making them harder to spot early on.
Scale and sediment buildup is especially problematic in areas with hard water. Mineral deposits can clog heat exchangers and restrict water flow, acting like insulation that blocks efficient heat transfer. Systems in regions with water hardness above 10 grains per gallon are particularly prone to this issue.
Finally, pump and controller failures can disrupt the system’s automatic functions. Circulation pumps generally last 8-12 years, but they can wear out sooner if debris or air pockets cause strain. Electronic controllers, on the other hand, are vulnerable to power surges, moisture, and aging components.
Safety Steps Before Starting
Working on a solar water heater requires careful preparation to avoid injuries. These systems can reach extremely high temperatures and involve electrical and plumbing components that demand proper handling.
Turn Off Power and Gas
Start by shutting off the system’s circuit breaker and any nearby disconnect switches.
If your system includes a backup gas water heater or gas booster, turn off the gas supply valve. This valve is typically located on the gas line leading to the unit. Rotate it until it’s perpendicular to the pipe to stop the gas flow. Once the valve is closed, allow a few minutes for any remaining gas to dissipate before starting your work.
To ensure all power sources are off, check the system’s digital display or controller. Some systems may have multiple electrical connections, so double-checking is essential.
Once the power and gas are fully turned off, you can move on to cooling the system and preparing for the task ahead.
Let System Cool and Wear Protection
Solar collectors can reach extreme temperatures during operation. According to NextEnergy, “Solar collectors can reach temperatures exceeding 180°F on sunny days”. Additionally, the water in the storage tank can become dangerously hot, with discharge temperatures potentially exceeding 125°F.
Before starting any repairs, let the system cool completely to avoid burns.
Wear the right protective gear, including heat-resistant gloves, safety glasses, and long-sleeved clothing. If the system uses heat transfer fluids like propylene glycol, handle them carefully, as they can be hazardous.
Check Your Work Area
Inspect the work area thoroughly for potential hazards. Look for standing water, which could indicate leaks or create slip risks, especially near electrical components.
Ensure the area is well-lit. Many solar water heater components are located in basements, utility rooms, or rooftops where natural light may be limited. Using a flashlight or work light can help you work more safely.
Pay attention to any unusual smells, such as burning, gas, or chemicals. If you notice anything concerning, stop immediately and call a qualified technician.
Clear away debris and obstacles to prevent trips and maintain easy access to the electrical panel. Keep a phone within reach in case of emergencies.
For rooftop work, check the weather conditions. Avoid working during windy, wet, or icy conditions. If you’re not comfortable with heights, it’s best to leave rooftop tasks to a professional. Always use proper ladder safety techniques if you decide to proceed.
How to Fix Common Issues
Once safety measures are in place, you can tackle common problems step by step. Start with the simplest fixes before moving on to more complex solutions.
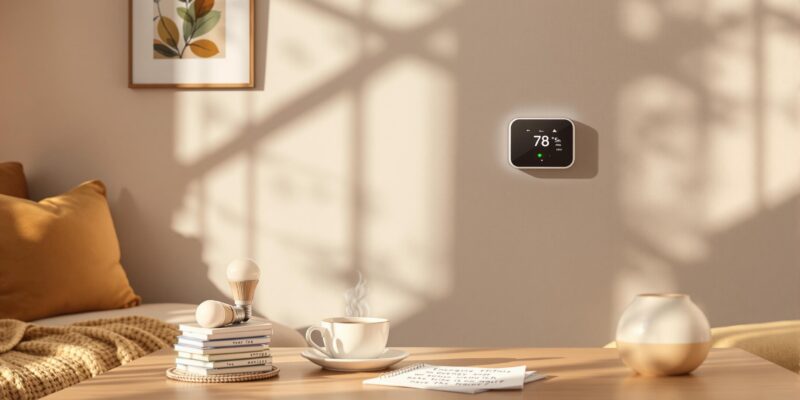
Check Thermostat Settings
Temperature issues are often the easiest to address. Solar water heaters may use various control systems, like thermostatic mixing valves (TMVs), dedicated thermostats for backup heaters, or manual controls. Before adjusting the thermostat, consult your owner’s manual and gather any necessary tools.
Most systems are designed to maintain water temperatures between 120°F and 140°F (49°C to 60°C). If your system includes an electric backup heater, make sure the power is switched off at the circuit breaker before you begin. Locate the thermostat, usually near the bottom of the tank, and remove its cover. Adjust the settings as follows:
- For primary thermostats, use the dial or digital display to set the temperature within the recommended range.
- For TMVs, adjust the knob located near the outlet pipe.
- For backup heaters, set the thermostat to approximately 50–60°C for safety.
Once adjustments are complete, replace the cover and restore power.
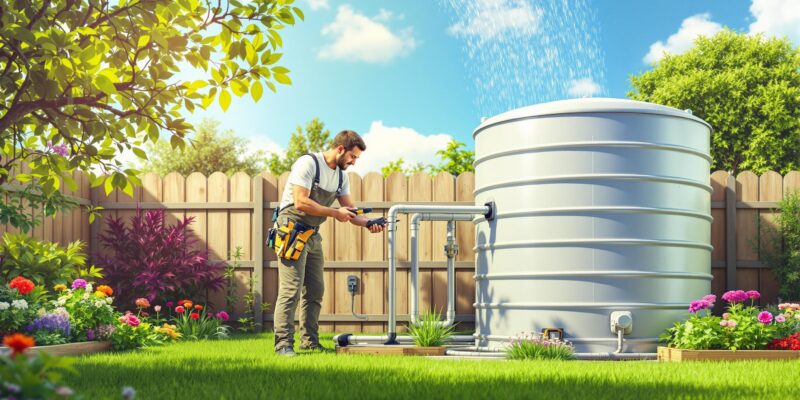
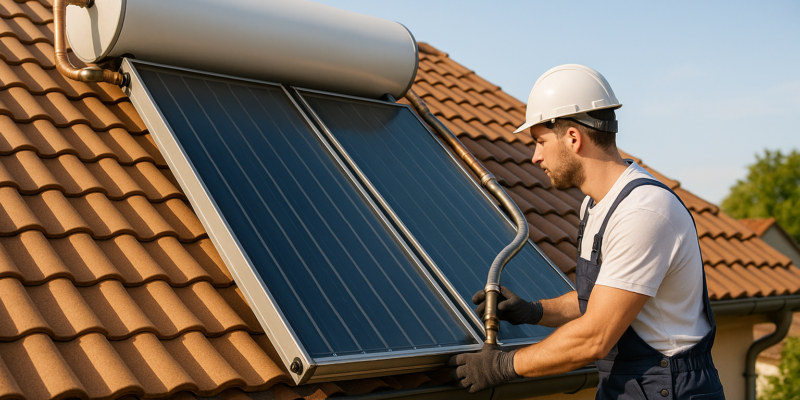
Clean and Inspect Solar Panels
Keeping your solar panels clean and intact is essential for efficient performance. Start by inspecting the panels for any visible damage, such as cracks, chips, or broken glass. Even small imperfections can affect efficiency, so address them as soon as possible.
Check for new sources of shade that could block sunlight, like overgrown trees, new buildings, or accumulated debris. Clean the panels during cooler times of the day using mild soap, water, and a soft brush or cloth. Avoid abrasive tools, as they can scratch the surface.
Be on the lookout for damage caused by severe weather, such as hail, strong winds, or falling debris, which can harm both the glass and the components underneath.
Look for Leaks and Worn Parts
Leaks and damaged components can reduce performance and cause further issues if not addressed. Common problems include loose or damaged pipe connections, cracked storage tanks, faulty valves, worn solar collector tubes, sediment buildup, corrosion, and effects of thermal expansion or contraction .
Signs of trouble include water stains, pressure drops, pooling water, or hissing sounds.
Inspect pipes, fittings, and components for moisture or corrosion. If you find minor issues – like a loose fitting or a worn seal – tighten or replace the parts. For major problems, such as a cracked tank or significant leaks, seek professional help immediately to prevent further damage.
Test Circulation Pump Function
If your system uses a circulation pump to transfer heated fluid from the solar collectors to the storage tank, ensure the pump is working properly. A functioning pump should emit a quiet humming sound. If it’s silent or making loud grinding or rattling noises, it might be failing.
Feel the pipes near the pump to check for warmth or slight vibrations, which indicate water flow. Inconsistent heating or gurgling sounds could mean air is trapped in the system. If this happens, refer to your owner’s manual for instructions on bleeding air from the collector loop’s highest points. Also, check the pump’s electrical connections to ensure they’re secure and free of corrosion.
Once the pump is working correctly, you can reset the system.
Reset the System
After completing repairs, reset your system. Restore power and gas, then check the pressure gauge, which should read between 12–30 PSI when cold. Monitor the system as it stabilizes and ensure hot water flows consistently at all faucets.
If problems persist despite your efforts, it’s time to reach out to professionals like Hydrodynamics Inc. for expert service and maintenance.
sbb-itb-99db659
Maintenance Tips
Keeping your solar water heater in good shape not only ensures efficient operation but also helps you avoid costly repairs. With regular care, your system can serve you reliably for years, making maintenance a smart way to boost your home’s energy efficiency. Incorporate these tips into your routine to extend the life of your system.
Regular Cleaning and Inspections
Clean your solar collectors a few times a year to remove dust, pollen, and bird droppings that can reduce their efficiency. Aim to clean during the cooler parts of the day to avoid temperature-related stress on the panels.
Use a garden hose with a gentle spray nozzle to rinse off debris. For tougher spots, a soft brush or squeegee with mild detergent works well. Stay away from abrasive cleaners, steel wool, or high-pressure washers, as these can damage the protective glass coating. If your panels are hard to access, a telescoping brush designed for solar panels can make the job easier.
While cleaning, take a moment to inspect the system. Look for shading caused by overgrown trees, debris like leaves or snow, and signs of wear on mounting hardware. Check pipes and fittings for discoloration, leaks, or mineral deposits, which could signal potential issues.
Keep an eye on your energy usage and utility bills – sudden changes might indicate a drop in system performance. Recording your maintenance activities can also help you identify patterns and address problems early.
Flushing and Pressure Checks
Routine system flushing, as recommended by the manufacturer, helps prevent mineral buildup that can compromise performance. Additionally, test the pressure relief valve regularly. If it doesn’t release water or if it drips constantly, it may need replacement.
For closed-loop systems, periodic draining and refilling are essential to maintain the heat transfer fluid, which can degrade over time. This task requires specialized equipment, so it’s best left to a professional.
Professional Inspections
While many maintenance tasks can be handled at home, scheduling an annual inspection with a qualified technician is a wise move. Professionals can test electrical components, fine-tune system controls, and conduct a thorough performance assessment, catching potential issues before they escalate.
Keep detailed records of all maintenance, including dates, tasks performed, and parts replaced. These records are not only helpful for technicians but can also be crucial for warranty claims.
For expert care and troubleshooting, you can rely on Hydrodynamics Inc. Their team can optimize your system’s performance and address any component issues promptly. Tackling small problems early can save you from bigger headaches down the road.
Quick Reference Guide
When problems pop up, this guide can help you quickly identify and address common issues. It builds on earlier troubleshooting steps to provide a handy reference for frequent problems and their fixes.
Take a look at the chart below to diagnose issues and find practical solutions.
Problem and Solution Chart
| Problem | Likely Cause | Solution | When to Call a Pro |
|---|---|---|---|
| No hot water at all | Thermostat set too low, tripped circuit breaker, or pump failure | Check the thermostat (set it between 120–140°F), reset the breaker, and listen for pump activity | If major repairs are required |
| Water not hot enough | Dirty solar collectors, shading, or low fluid levels | Rinse off the panels, trim any obstructing vegetation, and check the fluid reservoir | If fluid replacement or system rebalancing is needed |
| Takes too long to heat | Air in system lines, weak pump, or mineral buildup | Bleed air from the system, listen for unusual pump sounds, and flush the system if minerals are clogging it | If the pump needs replacing or mineral deposits require professional cleaning |
| Strange noises (gurgling, banging) | Air bubbles, loose hardware, or pump cavitation | Bleed air, tighten bolts and brackets, and inspect the pump inlet for clogs | If pump bearings are worn or pressure adjustments are beyond DIY |
| Pipe leaks | Loose fittings, worn gaskets, or freeze damage | Tighten fittings with a wrench and replace worn seals | If pipes are cracked, corroded, or leaking at collector connections |
| System pressure too high | Faulty relief valve or overheating | Test the relief valve by lifting its lever and ensure proper ventilation around the collectors | If the valve needs replacing or system controls need recalibration |
| Rusty or discolored water | Corroded tank, deteriorated anode rod, or contaminated fluid | Inspect the anode rod, flush the tank, and test water quality | If the tank needs replacing or fluid contamination requires professional help |
| Pump runs constantly | Faulty sensors, stuck relay, or incorrect controller settings | Check sensor connections, review controller settings, and test differential adjustments | If sensors need replacing or the controller shows internal errors |
| Ice formation in winter | Poor freeze protection, failed circulation, or low antifreeze levels | Ensure circulation during freezing conditions and check antifreeze concentration in closed systems | If freeze damage has occurred or the antifreeze mixture needs professional testing |
Quick Temperature and Pressure Tips
- Temperature: Ideal water temperature is between 120–140°F.
- Pressure: Normal system pressure should stay within 12–25 PSI.
For major leaks or more complex problems, reach out to Hydrodynamics Inc. Their certified technicians have been solving residential, commercial, and industrial water system issues since 1994. With decades of expertise, they’re equipped to handle even the toughest repairs.
Emergency Situations
If you smell gas, notice sparking electrical components, or encounter significant water leaks, shut off both the power and water supply immediately. Then, call a professional for assistance.
This guide focuses on the most frequent issues homeowners face with solar water heaters. Some problems might have multiple causes or require several steps to fix, so it’s always best to begin with the simplest solution and move on if the problem persists.
Final Tips
Let’s tie everything together with some practical advice for tackling solar water heater issues. The key? Start simple. Check the thermostat settings, look for leaks, and clean the panels. These straightforward steps often resolve common problems without needing specialized tools or technical know-how.
Know when to step back. While tasks like adjusting temperatures, cleaning panels, or bleeding air from the system are safe for most homeowners, it’s best to leave complex jobs – like electrical repairs, significant plumbing fixes, or pump replacements – to the pros.
Document your troubleshooting and maintenance efforts. Keeping a record not only helps professionals understand what’s already been done but also makes future troubleshooting quicker and smoother.
Routine maintenance is your best defense against problems. Regularly clean the collectors, monitor system pressure, and consider scheduling annual inspections. A little upkeep goes a long way in preventing bigger headaches.
If you hit a wall with DIY solutions, Hydrodynamics Inc. is a trusted resource. This family-owned business has been delivering dependable HVAC and plumbing services since 1994. Their certified technicians are well-versed in all types of water heating systems, serving residential, commercial, and industrial clients alike.
And let’s not forget the golden rule: safety first. If you notice gas odors, sparks, or major leaks, immediately shut off the power and water, then call for emergency assistance. With proper care and professional support when needed, your solar water heater can provide reliable hot water and energy savings for years to come.
FAQs
Why is my solar water heater making strange noises, and how can I fix it?
Unusual sounds coming from your solar water heater – like banging, gurgling, or popping – can often point to trapped air, sediment buildup, or water flow challenges. Here’s how you can tackle these issues:
- Release trapped air by bleeding the system. This helps restore smooth operation.
- Flush and clean the tank to clear out sediment deposits, which are common culprits behind popping or banging noises.
If these noises don’t go away, the problem might be more serious, such as overheating or mineral buildup inside the system. Regular maintenance, including draining and flushing, can go a long way in preventing these problems. For more complicated issues, it’s a good idea to reach out to professionals, like Hydrodynamics Inc., to keep your system running smoothly.
How can I tell if the temperature sensors in my solar water heater aren’t working?
To determine whether the temperature sensors in your solar water heater are functioning properly, start by using a multimeter to measure their resistance at room temperature. Then, compare the measurement to the manufacturer’s guidelines. If there’s a noticeable difference between the reading and the specified range, this could point to a problem.
A key red flag: if the resistance remains unchanged when the sensor is exposed to hot water or varying temperatures, it’s likely not working as it should. Additionally, resistance readings that are unusually high or low, instead of staying steady, can also signal a malfunction. If you notice any of these issues, consider replacing the sensor or seeking help from a professional for a thorough inspection.
What regular maintenance should I perform to keep my solar water heater working efficiently?
To ensure your solar water heater stays in good working condition, make it a habit to visually inspect the system every six months. During these checks, watch for any signs of damage, leaks, corrosion, or debris buildup. It’s also important to keep the area around the system clean and free from obstructions.
Clean the solar collectors once a year to clear away dirt, dust, and leaves that can hinder their efficiency. Similarly, flushing the tank annually helps remove sediment buildup, which can otherwise affect performance and reduce the system’s lifespan.
Regular maintenance like this helps your solar water heater run efficiently and keeps it performing well for years.