ASHRAE Standards for HVAC Testing
ASHRAE standards are the backbone of HVAC system testing, ensuring systems perform efficiently, maintain indoor air quality, and meet energy use goals. These guidelines cover key areas such as airflow, temperature, humidity, and duct leakage testing. They also establish protocols for inspections, maintenance, and energy audits for both residential and commercial buildings.
Key highlights include:
- Energy Audits (Standard 211): Three audit levels to assess energy-saving opportunities.
- Ventilation & IAQ (Standards 62.1 & 62.2): Minimum ventilation rates for commercial and residential spaces.
- Duct Testing: Updated requirements for low- and medium-pressure ducts to minimize energy loss.
ASHRAE standards also guide system commissioning for new constructions and retrofits for older systems, ensuring compliance with performance and safety benchmarks. Whether for residential or commercial applications, these standards help technicians evaluate, maintain, and optimize HVAC systems effectively.
“An Overview of Ashrae Standard & its Applications”
Main ASHRAE Standards for HVAC Testing
ASHRAE has developed several key standards that form the backbone of professional HVAC testing practices. These standards outline the necessary requirements and procedures to ensure HVAC systems function effectively, delivering the desired levels of thermal comfort, energy efficiency, and indoor air quality in both new and existing commercial buildings. Below is an overview of the primary standards and their specific roles in HVAC testing.
ANSI/ASHRAE Standard 180: Inspection and Maintenance
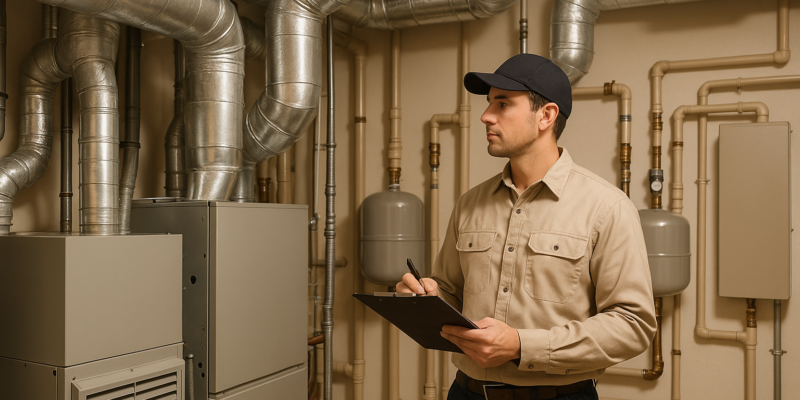
ANSI/ASHRAE Standard 180 establishes the minimum requirements for inspecting and maintaining HVAC systems. Its goal is to help professionals maintain system performance through a structured maintenance program. This includes creating a detailed inventory of equipment, documenting information such as manufacturer details, location, capacity, and system identifiers. The standard also differentiates inspection tasks – like testing and condition checks – from maintenance tasks, which involve cleaning, aligning, lubricating, adjusting, and making necessary corrections.
Additionally, it emphasizes the importance of regular reviews, such as startup meetings and annual assessments, with more frequent checks if any system degradation is observed. These guidelines ensure that HVAC systems are maintained not only for efficiency but also to meet ventilation and indoor air quality requirements.
ANSI/ASHRAE Standards 62.1 and 62.2: Ventilation and Indoor Air Quality (IAQ)
ANSI/ASHRAE Standard 62.1 focuses on ventilation and indoor air quality requirements for commercial buildings. It defines minimum ventilation rates based on factors like building occupancy and function. The standard also provides methods for calculating outdoor air requirements and evaluating ventilation effectiveness.
For residential applications, ANSI/ASHRAE Standard 62.2 sets guidelines for whole-house ventilation and local exhaust systems. These requirements take into account variables such as home size, occupancy levels, and local climate conditions. Both standards offer performance-based compliance options, giving flexibility while ensuring that essential health and safety standards are upheld.
ANSI/ASHRAE Standards 211 and 100: Energy Audits and Performance
Energy audit and performance standards complement the above by addressing energy consumption and efficiency. Standard 211 outlines three levels of energy audits:
- Level I: A preliminary assessment to identify quick energy-saving opportunities.
- Level II: A more detailed analysis, including financial and energy evaluations.
- Level III: A comprehensive engineering study with detailed project plans and cost estimates.
Meanwhile, Standard 100 focuses on energy performance by setting specific performance targets and establishing baseline energy usage. It also provides guidelines for ongoing commissioning and tracking improvements over time. Together, these standards support continuous efforts to optimize energy use and improve overall building performance.
HVAC Testing Methods Based on ASHRAE Standards
ASHRAE standards provide a framework for testing HVAC systems to confirm they meet design specifications, operate efficiently, and maintain indoor air quality. Certified technicians follow these protocols to evaluate system performance and detect potential issues before they impact a building’s overall efficiency. These testing methods ensure HVAC systems align with ASHRAE guidelines, achieving energy efficiency and air quality goals. Below are the primary testing methods based on these standards.
Airflow and Ventilation Testing
Measuring airflow is a critical step in verifying an HVAC system’s performance. Technicians use specialized instruments to assess airflow at various points in the system, comparing the results to ASHRAE’s recommended outdoor air intake rates. These rates are calculated based on the building’s occupancy and intended use, ensuring proper ventilation and air quality.
Temperature and Humidity Testing
Temperature and humidity levels play a significant role in maintaining indoor comfort, as outlined in ASHRAE Standard 55. Technicians measure these parameters at strategic points, such as supply and return air vents, to confirm the system meets its design specifications. Psychrometric calculations help verify the system’s ability to dehumidify effectively during heating or cooling cycles. In some cases, data loggers are employed to monitor temperature and humidity changes over time, ensuring consistent performance within the desired setpoints.
Additionally, the integrity of air distribution systems must be maintained to prevent inefficiencies.
Duct and Building Leakage Testing
Duct leakage testing has gained importance as energy efficiency standards become more stringent. ASHRAE Standard 189.1 now mandates testing for low- and medium-pressure ducts (3-inch water gauge) in addition to high-pressure ones (4-inch WG). This update addresses a major source of energy loss, as lower-pressure ducts can leak significantly more than their high-pressure counterparts.
“I spearheaded this update because of concerns that it is very rare to have ducts greater than 4-inch pressure class to be used today, while it was very common when the original requirement was to test the leakage of ducts greater than 3-inch WG pressure class. This resulted in much less leak testing today, while standard 189.1 is attempting to reduce energy use.”
– Jeff Boldt, Director of Innovation and Quality, IMEG Corp.
The testing process involves pressurizing the duct system and measuring air leakage rates using advanced tools. ASHRAE SPC215P provides guidelines for calculating both leakage airflow and the percentage of leakage in operating systems. Testing typically begins with 20% of the ductwork, expanding to the entire system if initial results reveal significant issues.
Industry data highlights the prevalence of duct leakage. A 2015 survey by the Building Commissioning Association revealed that 75% of engineers identified leaky ducts as a major source of energy loss in U.S. buildings, with 68% reporting leakage rates of 15% or more. These findings emphasize the importance of thorough duct testing to optimize energy efficiency.
“The industry has resisted testing because of the additional cost involved. But in reality, building owners can either make a relatively small payment upfront to ensure their ducts are operating properly, or they can continue to pay higher operating costs throughout the life of the building. The 189.1 updates to duct testing will help ensure that today’s buildings are operating as efficiently and cost effectively as possible.”
– Bob Reid, Former Chairman of ASHRAE Technical Committee 5.2 and Chief Engineer, SPOT (Spiral Pipe of Texas)
Building envelope leakage testing uses blower door equipment to pressurize the entire structure and measure air infiltration rates. This process identifies areas where conditioned air escapes or unconditioned air enters, allowing targeted sealing efforts. Properly addressing these leaks enhances building performance and reduces long-term operating costs.
HVAC Testing Process: Step-by-Step Guide
The HVAC testing process, as outlined by ASHRAE standards, involves detailed planning, precise fieldwork, and thorough data analysis. These steps ensure accurate results, compliance with industry standards, and actionable insights for system improvements. Professional technicians follow a structured protocol to assess performance, uncover deficiencies, and recommend solutions, all while minimizing errors and maximizing the value of the testing process.
Planning and Documentation Before Testing
Preparation is key to effective HVAC testing. This starts with reviewing system documentation, including design drawings, specifications, maintenance records, and occupancy schedules. These materials provide a baseline understanding of the system and help identify potential problem areas.
Testing schedules are influenced by building occupancy and usage patterns. For example, testing during peak occupancy can reveal how the system performs under real-world conditions, while off-hours testing allows for more controlled measurements. Weather conditions also play a role, particularly for outdoor air intake and building envelope evaluations.
Instrument calibration is another critical step. Tools like digital manometers, airflow measurement devices, and temperature sensors must be regularly calibrated to meet accuracy standards. Calibration certificates ensure that these instruments comply with strict error tolerance requirements, which is essential for reliable results.
Once the planning phase is complete, the process moves seamlessly into field testing.
Field Testing Procedures
Field testing begins with a visual inspection of the system. This step helps identify and address obvious issues, such as damaged ducts, missing insulation, or malfunctioning equipment.
Baseline conditions are established by recording indoor and outdoor temperature, humidity, and barometric pressure. These initial measurements provide context for any performance variations observed during testing.
Airflow testing is conducted using traverse measurements across duct cross-sections. Technicians take readings at specific grid points to calculate average velocities. Properly calibrated tools, such as pitot tube arrays and thermal anemometers, are vital for obtaining accurate airflow data.
Temperature and humidity readings are taken simultaneously at supply, return, and outdoor air locations. Psychrometric analysis is then used to evaluate the system’s ability to condition air according to design specifications. These measurements are compared to ASHRAE standards for comfort and energy efficiency.
Pressure testing assesses the integrity of ductwork and the building envelope. Duct blaster equipment pressurizes individual duct sections to measure leakage rates, while blower door fans create pressure differentials to quantify air infiltration through the building envelope.
Analyzing Results and Creating Reports
Once field measurements are complete, technicians analyze the data to evaluate system performance. Measured airflow and temperature differentials are compared to design specifications to identify any discrepancies.
Statistical analysis, such as confidence interval evaluations, helps distinguish between normal measurement variability and actual performance issues. ASHRAE standards provide guidelines on acceptable tolerance ranges, ensuring that findings are both accurate and meaningful.
Field data is converted into standardized metrics like ventilation effectiveness, energy efficiency ratios, and indoor air quality indicators. This ensures consistency across evaluations and simplifies the interpretation of results.
Reports are then created to document the testing process, measurements, and findings. Executive summaries highlight key issues and recommendations for building owners and facility managers, while technical sections provide detailed data for engineers and maintenance teams.
To help prioritize corrective actions, issues are categorized by severity, cost impact, and compliance requirements. Immediate safety concerns are addressed first, followed by recommendations for improving energy efficiency and occupant comfort. Reports often include cost estimates, implementation timelines, and return on investment calculations to demonstrate the financial benefits of addressing identified deficiencies.
Finally, follow-up testing schedules are established to monitor ongoing performance and compliance with ASHRAE standards. Trending analysis over time can reveal gradual performance declines and help optimize maintenance intervals, ensuring the system continues to operate efficiently.
ASHRAE Standards for Different Building Types
ASHRAE standards customize HVAC testing protocols based on the type of building and the project phase. The complexity of testing depends on whether it’s a new construction project, an upgrade to an existing system, or the differences between residential and commercial applications. Let’s break down how these standards address each scenario.
New Construction and System Commissioning
For new buildings, ASHRAE standards play a key role during the design and installation phases. They guide the selection of equipment, proper system sizing, and ensure compliance with energy efficiency and indoor air quality (IAQ) requirements. Commissioning, as defined by ASHRAE, is a systematic process to confirm that HVAC systems align with the owner’s expectations and function as intended. This involves testing system components under various operating conditions, verifying automatic controls, safety features, and energy management systems. Detailed documentation ensures that the system meets performance, safety, and comfort standards.
Existing Building Upgrades and Retrofits
When it comes to older buildings, ANSI/ASHRAE/IES Standard 100-2024 provides guidelines to improve energy efficiency and system performance. This standard covers all aspects of a building, including the envelope and HVAC systems, with the goal of enhancing thermal performance and reducing energy use. Retrofit testing includes energy audits, equipment efficiency checks, and assessments based on the system’s operational history. It also outlines strategies for creating energy management plans and methods for ongoing performance monitoring, ensuring that upgrades lead to measurable, long-term improvements.
Residential vs. Commercial Testing Requirements
ASHRAE standards take a different approach when comparing residential and commercial applications. For instance, ASHRAE Standard 90.1 sets energy efficiency benchmarks for commercial buildings but excludes low-rise residential properties. Commercial systems face stricter design and testing demands, particularly in large buildings where failures can have serious consequences. Standards like ASHRAE 62.1 (ventilation) and ASHRAE 55 (thermal conditions) apply broadly but are more rigorously enforced in commercial settings. Commercial projects often require detailed performance verification and permits, while residential testing focuses on basic energy efficiency, safety, and comfort.
| Aspect | Residential | Commercial |
|---|---|---|
| Energy Standards | Excluded from ASHRAE 90.1 | Must comply with ASHRAE 90.1 |
| Testing Complexity | Basic performance checks | Comprehensive testing and documentation |
| Regulatory Oversight | Limited requirements | Extensive compliance and permit needs |
| Documentation | Minimal reporting | Detailed reports and continuous monitoring |
Commercial buildings demand more frequent and detailed testing, along with ongoing monitoring and extensive documentation. On the other hand, residential testing places greater emphasis on safety, comfort, and basic energy efficiency rather than complex regulatory compliance.
sbb-itb-99db659
Hydrodynamics: HVAC Testing Services

Hydrodynamics has built its reputation on delivering energy-conscious HVAC solutions that meet modern building standards. By adhering to strict testing protocols and prioritizing sustainable practices, the company ensures its services are both effective and environmentally responsible.
HVAC testing plays a critical role in maintaining system performance and ensuring occupant comfort. Hydrodynamics combines time-tested expertise with cutting-edge technologies to align its work with ASHRAE guidelines, addressing the needs of residential, commercial, and industrial clients. Here’s a closer look at how these principles shape their services.
Complete HVAC Services
Hydrodynamics provides a wide range of HVAC services, covering every phase of a system’s lifecycle. From installations and repairs to maintenance and specialized testing, their offerings are designed to adhere to ASHRAE protocols. Their expertise spans:
- Heating systems, air conditioning, and ductless systems
- Heat pumps and geothermal heating and cooling solutions
- Complex industrial systems, including rooftop HVAC units, waste oil systems, and gas, propane, and oil heating installations
Their proactive maintenance programs aim to extend system longevity and sustain peak performance. Beyond HVAC, Hydrodynamics also tackles plumbing, refrigeration, water conditioning systems, and grinder pump services. This comprehensive approach ensures that interconnected systems work together efficiently, enhancing overall building performance and air quality.
Energy Efficiency and Indoor Air Quality Solutions
Hydrodynamics goes beyond basic installations and maintenance by focusing on energy optimization and indoor air quality. They leverage advanced technologies to deliver measurable improvements in efficiency and comfort. One standout offering is their hydronic HVAC systems, which use water instead of air to regulate temperature. These systems are not only quieter and easier to maintain but also significantly more efficient – water can carry nearly six times more heat than air and requires much less space to transport the same amount of thermal energy.
The company also integrates Computational Fluid Dynamics (CFD) into its HVAC design and testing processes. CFD simulations allow for energy savings of 15–30%, far surpassing the 5–10% efficiency gains typical of traditional methods. Additionally, CFD optimization can enhance thermal comfort by 20–35%. Over multiple design iterations, energy consumption reductions of up to 30% are achievable, compared to just 10% with conventional techniques.
Indoor air quality is another key focus area for Hydrodynamics. By adhering to ASHRAE Standards 62.1 and 62.2, the company ensures proper ventilation and healthier indoor environments. Their water conditioning services, such as softeners and UV systems, further enhance HVAC performance by addressing water quality issues that could impact system efficiency and durability.
Conclusion: Why ASHRAE Standards Matter for HVAC Testing
ASHRAE standards are essential for ensuring HVAC systems operate efficiently while prioritizing the health and comfort of occupants. These guidelines serve as a trusted framework, shaping HVAC systems into reliable and effective solutions for indoor environments.
FAQs
How do ASHRAE standards help improve HVAC system energy efficiency?
ASHRAE standards play a key role in boosting the energy efficiency of HVAC systems by establishing minimum efficiency requirements for equipment such as furnaces, air conditioners, and heat pumps. For instance, standards like ASHRAE 90.1 and 90.2 ensure that HVAC systems are built and operated to align with up-to-date energy-saving benchmarks.
Beyond efficiency requirements, ASHRAE also offers detailed guidelines for system design, controls, and maintenance. Take Guideline 36, for example – it provides recommendations for standardized control sequences, which help fine-tune system performance and cut down on energy waste. Following these standards allows HVAC systems to run more efficiently, reducing energy use and utility bills, all while supporting environmentally conscious practices.
What are the main differences between ASHRAE standards for testing residential and commercial HVAC systems?
The Primary Differences Between ASHRAE Standards for Residential and Commercial HVAC Testing
The key differences between ASHRAE standards for residential and commercial HVAC testing lie in the complexity of the systems and their performance demands. Residential standards are designed with smaller, standalone systems in mind, focusing on straightforward inspections, routine upkeep, and energy-saving measures. Meanwhile, commercial standards cater to larger, more intricate systems, requiring detailed protocols for testing, adjusting, and balancing to ensure optimal energy efficiency, air quality, and occupant comfort.
For instance, commercial standards often specify testing methods tailored for advanced equipment and complex systems. Residential standards, by contrast, stick to simpler guidelines aimed at individual units. This approach ensures that each type of system is assessed and maintained according to its specific operational and performance requirements.
Why is duct leakage testing crucial for improving energy efficiency, and how is it performed following ASHRAE standards?
Why Is Duct Leakage Testing Important?
Duct leakage testing plays a key role in improving energy efficiency by pinpointing and reducing air leaks in HVAC systems. Air leaks can cause conditioned air to escape, leading to higher energy bills and wasted resources. When ducts are properly sealed, the air reaches its intended destination, boosting system performance and cutting down on energy waste.
As outlined by ASHRAE standards, the process involves pressurizing the duct system and measuring how much air escapes. This is done using specialized equipment like a duct blaster or blower door. Adhering to these standards helps HVAC systems meet efficiency benchmarks, conserve energy, and deliver better comfort for homes, businesses, and industrial spaces.