Best Practices for Reducing Particulates During Renovations
Renovations can release harmful particulates like dust and fine matter (PM2.5), impacting health and HVAC systems. These particles can cause respiratory issues and reduce HVAC efficiency, circulating dust throughout buildings. To minimize risks, follow these key practices:
- Contain Dust: Use barriers like modular wall systems or heavy plastic sheeting to isolate work zones.
- Control Airflow: Create negative pressure with HEPA-filtered exhaust fans to keep particles contained.
- Protect HVAC Systems: Shut down or seal vents in work areas to prevent dust infiltration.
- Daily Cleaning: Use HEPA vacuums, damp cloths, and proper waste disposal to maintain cleanliness.
- Worker Safety: Provide N95 masks, protective clothing, and handwashing stations to reduce exposure.
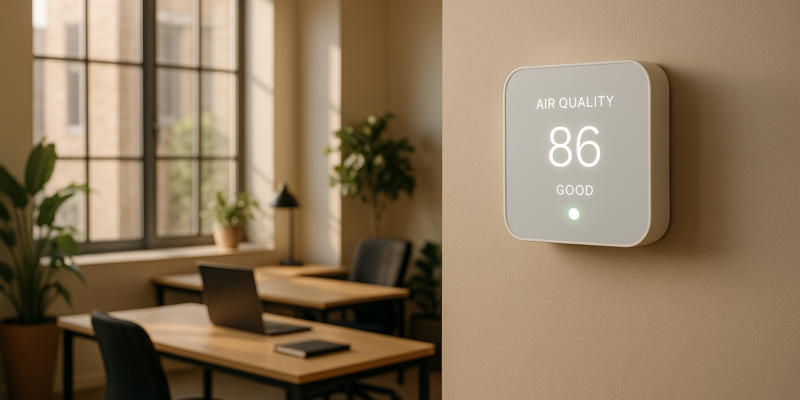
- Monitor Air Quality: Regularly inspect barriers and measure particle levels to ensure containment methods are effective.
Best Practices To Control Remodeling Dust
Where Particulates Come From in Renovation Projects
Understanding which renovation activities and materials produce airborne particulates is key to managing dust and maintaining a safer environment during construction.
Main Sources of Particulates
Demolition work is a major contributor to airborne dust. Activities like breaking down walls, removing old flooring, and tearing out fixtures release particulates from materials such as drywall, plaster, concrete, and wood. In older buildings, this dust may also contain hazardous substances like asbestos fibers or lead-based paint particles.
Cutting and drilling operations generate concentrated bursts of fine dust. Whether it’s power saws slicing through wood, concrete, or metal, or drills creating holes in masonry, these tasks release clouds of tiny particles that can quickly spread throughout a space.
Sanding activities produce some of the smallest and most persistent particulates. Sanding drywall seams, refinishing wood floors, or prepping surfaces for paint turns materials into microscopic fragments that linger in the air. These fine particles can infiltrate HVAC systems and even reach deep into the respiratory system.
Material handling and transport also keeps dust circulating. Moving bags of cement, clearing debris, or simply walking through dusty areas stirs up settled particles, spreading them to areas not directly involved in the renovation.
Adhesives, sealants, and finishing products can add to particulate levels as well. Products like spray-applied textures or insulation release airborne particles during application. Even mixing joint compound can produce dust, while curing adhesives and sealants emit volatile compounds that condense into fine particulates.
All these sources not only reduce indoor air quality but also place additional strain on HVAC systems, as explained below.
How Particulates Affect HVAC Systems and Air Quality
Renovation dust doesn’t just settle on surfaces – it can wreak havoc on HVAC systems and indoor air quality. These fine particles clog filters, reducing airflow and forcing systems to work harder. Particulates that slip past filters may settle on evaporator coils, cutting down heat transfer efficiency, or accumulate on blower wheels, leading to motor strain and imbalances. In severe cases, fine particles can even infiltrate the compressor, resulting in expensive repairs.
Once particulates settle in ductwork, they become a recurring issue. Every time the HVAC system circulates air, these particles can be redistributed into spaces like bedrooms, offices, and common areas – even if those spaces are separated by barriers.
The size of the particles determines their impact. Larger particles (over 10 microns) settle quickly and mainly cause equipment fouling. Mid-sized particles (2.5 to 10 microns) can penetrate deeper into HVAC components and the respiratory system. The smallest particles (under 2.5 microns) are the most concerning. These can bypass standard filters, stay airborne for long periods, and pose ongoing health risks.
Temperature and humidity swings during renovations can make things worse. They can impair HVAC performance and encourage condensation, which may lead to mold growth and further air quality issues.
Given how critical HVAC systems are to maintaining clean air, it’s important to seek professional advice. Companies like Hydrodynamics Inc. specialize in HVAC maintenance and energy-efficient solutions, ensuring systems stay protected and operate efficiently during and after renovation projects. Their expertise can make a significant difference in safeguarding both the equipment and the health of building occupants.
Site Preparation and Containment Methods
Keeping dust under control starts with proper site preparation. This means separating work zones from areas in use by employing physical barriers, managing airflow, and smart scheduling. These steps are essential for safeguarding workers and protecting HVAC systems.
Building Physical Barriers Around Work Areas
To keep dust contained, install sturdy modular wall systems like STARC. These are especially useful in environments where cleanliness is critical, such as hospitals, offices, or airports. For smaller or less demanding projects, heavy-duty plastic sheeting (6 mil or thicker) can be taped over openings, ensuring all HVAC registers are securely sealed.
One major advantage of modular systems is their speed of installation. Contractors can set up as much as 100 feet of STARC wall in under an hour. This not only reduces reliance on subcontractors but also saves space, as the panels are reusable across multiple projects.
For projects generating significant dust, full isolation containment is key. This method seals off the work area completely, with workers accessing it through airlocks or designated pathways to limit dust migration. Modular dust containment systems with specialized panels and accessories create airtight enclosures, offering better functionality than basic plastic sheeting.
Controlling Airflow to Limit Dust Spread
Once barriers are in place, managing airflow is the next step. Negative air machines or exhaust fans can create negative pressure, pulling air into the work zone and preventing particles from escaping. To ensure proper filtration, route the extracted air through HEPA filters.
For effective air control, aim for 4–6 air changes per hour. For example, in a 1,000 cubic foot space, this means moving 4,000–6,000 cubic feet of air per hour.
In adjacent clean areas, positive pressure can be used to block dust infiltration. By slightly pressurizing these spaces, air flows outward, keeping particles at bay. However, it’s crucial to avoid creating pressure differences that disrupt HVAC systems or the building structure.
Monitor pressure differences with tools like manometers or digital pressure gauges. Aim for a difference of 0.02 to 0.05 inches of water column between the work zone and nearby areas for effective containment.
Scheduling Renovations to Limit Exposure
Thoughtful scheduling can significantly reduce exposure to dust during renovations. Plan high-dust tasks during off-peak hours or when HVAC systems are off. This allows dust to settle and gives additional time for cleaning. Organize tasks so that the dustiest work happens first, followed by a thorough cleanup before finishing touches begin.
Consider the building’s usage patterns. For example, schools, offices, and healthcare facilities have predictable peak times. Collaborating with facility managers can help identify the best times to schedule disruptive work, minimizing inconvenience and exposure.
Protecting HVAC Systems During Renovations
Beyond managing dust containment, safeguarding HVAC systems is critical to prevent contamination inside the system. During renovations, HVAC systems can easily become a target for dust and debris, which can clog ductwork, damage equipment, and spread particles throughout the building. Protecting these systems is key to preserving indoor air quality.
Shutting Down or Sealing HVAC Systems
The best way to shield HVAC systems during renovation is to turn them off entirely during high-dust activities. By doing so, you stop dust from circulating through the system and spreading to other parts of the building. However, this isn’t always an option, especially in occupied spaces or during extreme weather.
When a complete shutdown isn’t practical, consider turning off the HVAC zones that serve the renovation area. This allows you to maintain climate control in other parts of the building while keeping the work zone isolated. If shutting down even part of the system isn’t feasible, sealing the vents becomes essential.
To protect the system, cover supply and return vents in the work area with heavy plastic sheeting secured using painter’s tape to ensure no gaps. Additionally, seal all vents and access points in the construction zone with plastic and tape to block dust from entering the system. For added protection, hang plastic sheets over doorways to create a barrier between the renovation zone and occupied areas.
It’s worth noting that covering vents while the HVAC system is running can strain the unit, potentially reducing its lifespan. Taking these precautions minimizes the risk of dust infiltration and helps maintain system integrity during renovations.
sbb-itb-99db659
Daily Cleaning and Dust Control Practices
Daily cleaning and dust control measures are crucial to maintaining a safe and efficient renovation environment. These practices build on earlier steps like containment and HVAC protection, ensuring that dust and debris don’t spiral out of control. The goal is simple: tackle dust before it becomes a problem, keeping the workspace manageable and safeguarding both workers and building occupants.
Methods to Reduce Dust Creation
The best way to control dust is to stop it at the source. Wet cutting and sanding techniques are highly effective in reducing airborne particles. For example, when working with drywall, concrete, or tile, tools equipped with water delivery systems – or even a light spray of water before cutting – can help keep particles grounded. Instead of floating through the air, the dust becomes heavier and falls to the floor.
Using oscillating multi-tools instead of circular saws can also minimize dust production. Similarly, orbital sanders with dust collection attachments capture particles as they’re created, making them a smarter choice for sanding tasks. For demolition, a careful, methodical approach – controlled dismantling – is far better than aggressive tearing down, which often creates unnecessary dust clouds.
Another effective strategy is material staging. Store dusty materials like drywall and insulation in sealed areas, away from active work zones. When possible, pre-cut materials in a designated, ventilated area rather than cutting them throughout the job site. This approach keeps dust generation confined to one easily managed location.
Once you’ve taken steps to limit dust creation, consistent daily cleaning is key to maintaining control.
Daily Cleaning and Waste Removal
To effectively manage renovation dust, HEPA vacuum systems are a must. Use these vacuums at the end of each workday and after completing particularly dusty tasks to keep the area clean.
For surfaces, ditch the broom – damp microfiber cloths and mops are far more effective at capturing fine dust. Sweeping tends to stir up particles, while damp cleaning methods trap them. A two-step approach works best for floors: vacuum first to remove larger debris, then follow up with a damp mop to catch any lingering dust.
Promptly removing waste is another critical step. Don’t let debris like drywall scraps or insulation pile up for days. Bag these materials immediately using heavy-duty plastic bags, seal them tightly, and transport them to disposal areas to prevent particles from escaping.
At the end of each workday, implement these end-of-day protocols:
- Seal any opened material packages.
- Cover tools and equipment with plastic sheeting.
- Ensure all waste containers have tight-fitting lids.
These steps prevent overnight dust migration and set the stage for a cleaner start the next day.
Worker Safety Equipment
Protecting workers is just as important as controlling dust. Respiratory protection is essential; N95 masks work for light dust exposure, but for heavier tasks, P100 respirators offer better filtration. Workers should use fresh masks daily and replace them as needed, especially if breathing becomes difficult.
Protective clothing acts as a barrier between workers and dust. Disposable coveralls with elastic cuffs and ankles prevent dust from settling on regular clothing. At the end of a shift, workers should remove and properly dispose of their protective gear in the containment area to avoid spreading dust to clean areas.
To further prevent the spread of particles, use boot covers and sticky mats. Place adhesive walk-off mats at every exit point from the work zone, and ensure workers step on them with both feet before leaving. Replace mats once they lose their stickiness, which typically happens after 30-60 uses, depending on the dust level.
Finally, set up hand and face washing stations near containment exits. Even with gloves and masks, fine dust can settle on exposed skin and hair. Simple stations with soap and water allow workers to clean up before leaving the work area, significantly reducing the risk of dust spreading throughout the building.
Checking That Control Methods Are Working
Keeping dust containment, HVAC protection, and cleaning practices effective requires regular inspections and air quality checks.
Daily Barrier Inspections
Physical barriers act as the first line of defense, but they only work if they remain intact. Each morning, inspect all plastic sheeting, tape seals, and zipper doors for any tears, loose edges, or areas where tape may have lost adhesion overnight. Factors like temperature changes and building movement can cause even properly installed barriers to shift or separate.
Pay close attention to high-traffic areas, such as doorways and material transport paths, as these are most likely to develop gaps. If you notice dust accumulating outside the designated work zone, it’s a clear sign the barriers may be compromised.
To confirm negative air pressure, ensure exhaust fans are running at appropriate speeds, filters are clear, and test by holding a lightweight tissue near the barrier edges – it should be drawn inward. After these visual checks, use particle counters to gather objective data on air quality.
Measuring Air Quality
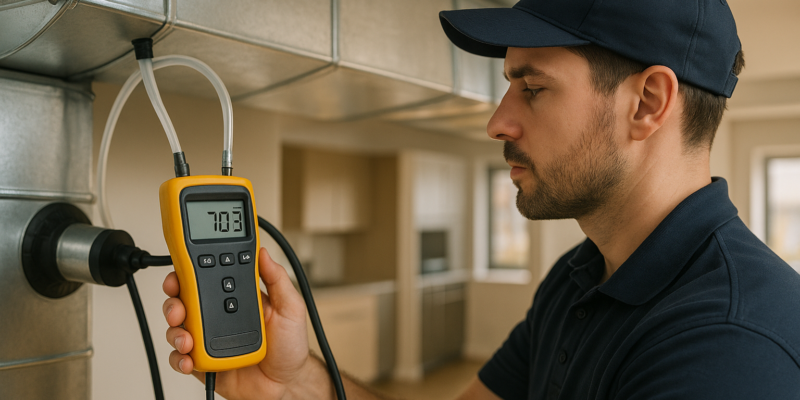
While visual inspections are helpful, they don’t provide the full picture. Handheld particle counters can measure dust levels inside and outside work zones, typically detecting particles between 0.3 and 10 microns. Pay special attention to particles in the 0.5 to 2.5 micron range, as these can stay airborne for hours and pose risks to respiratory health and HVAC systems.
Start by establishing baseline dust levels in clean areas before work begins, then monitor these levels daily. Dust levels outside the work zone should stay close to the baseline throughout the project. If particle counts rise significantly, it may indicate that containment measures need improvement.
Real-time monitoring during active work can also identify which tasks, such as cutting or demolition, produce the most dust. If you’re managing an HVAC system, check air quality near return air grilles and in mechanical rooms – construction dust can quickly clog filters and reduce efficiency.
Keep a record of these measurements to identify trends and adjust containment strategies as needed.
Keeping Records
Consistent documentation turns routine monitoring into actionable project insights. Maintain a daily log that includes barrier conditions, air quality readings (with specific particle counts, times, and locations), and any repairs made. Weather notes and photos of barrier installations or damage can provide additional accountability.
For example, your log might include entries like:
- Main hallway outside work zone: 1,200 particles/cubic foot at 9:00 AM
- Main hallway outside work zone: 2,800 particles/cubic foot at 3:00 PM
Photographic evidence of barriers, damage, or dust accumulation can be critical for addressing occupant concerns or resolving cleanup responsibilities.
Additionally, track your filter replacement schedule and note the condition of filters during each change. If filters clog faster than expected, it could indicate that your containment methods aren’t capturing dust effectively. This information allows you to adjust strategies and better plan for future projects.
Weekly summaries of daily logs can reveal patterns that might not be obvious day-to-day, such as recurring spikes in particle levels or weak spots in containment. These trends can also signal when professional HVAC maintenance is necessary. Expert support, like that from Hydrodynamics, can help ensure your HVAC system remains efficient and air quality stays protected during renovations.
Key Points for Reducing Particulates During Renovations
When it comes to renovations, keeping particulates under control is all about using a mix of effective strategies. Here’s a closer look at some essential methods to manage dust and protect both air quality and equipment.
Physical containment is a must. Using sealed plastic sheeting and setting up negative air pressure systems creates a barrier to keep dust from spreading. But here’s the catch: these barriers only work if air is actively being pulled out of the work area. Without that pressure difference, even tiny gaps can let dust escape.
Protecting HVAC systems is another critical step. Isolating the renovation zones from the HVAC system prevents dust from circulating throughout the building. Shut down or block off air handling units in the renovation area, and install MERV 13 or higher filters to trap particles as small as 0.3 microns. This not only keeps dust contained but also safeguards expensive HVAC equipment.
Daily wet cleaning and HEPA vacuuming are key to keeping settled dust under control. By regularly cleaning surfaces and removing waste, you prevent dust buildup that could overwhelm containment systems, especially during busier phases of the project.
Continuous monitoring ensures everything is working as it should. Regular visual inspections of barriers and using particle counters to measure airborne dust levels help confirm the effectiveness of your containment efforts. Pay close attention to particles in the 0.5 to 2.5 micron range – they’re the most likely to stay airborne and pose risks to both respiratory health and HVAC systems.
FAQs
What health risks do particulates from renovations pose, and how can they be reduced?
Particulates released during renovation projects can seriously impact health, leading to respiratory problems like asthma, bronchitis, and COPD. Prolonged exposure can even result in more severe conditions such as silicosis or lung cancer. These risks are particularly concerning for workers and nearby residents.
To minimize exposure, it’s essential to take precautions. Start by suppressing dust with water when cutting or sanding materials. Next, contain the work area using barriers or plastic sheeting to keep particles from spreading. Finally, improve ventilation by using exhaust fans or creating negative air pressure to push contaminants outside. These measures can dramatically reduce airborne particles, providing better protection for everyone involved in the renovation process.
What are negative pressure systems, and how can they help control dust during renovations?
Negative pressure systems are a practical way to keep dust and debris contained during renovations. By creating lower air pressure in the work area compared to the surrounding spaces, they prevent airborne particles from drifting into other parts of the building.
Setting up a negative pressure system involves a few key steps. Start by using exhaust fans or negative air machines equipped with hoses that vent directly outdoors. To seal the work area, cover gaps, doors, and vents with plastic sheeting to block any escape routes for dust. Position the negative air machine as close as possible to the source of dust for maximum efficiency. To maintain proper containment, use pressure gauges to monitor airflow, aiming for a rate of 150–200 CFM. Following these guidelines can help keep your renovation space cleaner and safer.
How can I protect my HVAC system from dust during a renovation?
To protect your HVAC system from dust during renovations, begin by covering all vents, duct openings, and air handlers with plastic sheeting or vent covers designed for this purpose. This stops dust from infiltrating the system and spreading around your home. If possible, turn off the HVAC system during demolition or construction to reduce the risk of dust circulation.
Once the renovation wraps up, give the system a deep clean and replace the air filters to eliminate any leftover dust. Incorporating HEPA filters, setting up physical barriers, and keeping the workspace tidy throughout the project are additional steps that can safeguard your HVAC system and help maintain better indoor air quality.