ROI of Smart Air Quality Systems
Smart air quality systems improve indoor air by monitoring and adjusting factors like particulate matter, VOCs, CO₂, and humidity. These systems deliver measurable benefits:
- Energy Savings: Optimize HVAC performance, reduce utility bills, and extend equipment life.
- Health & Productivity: Cleaner air reduces sick days and enhances cognitive performance.
- Compliance & Risk Reduction: Meet air quality standards, avoid fines, and lower insurance costs.
They are used in homes, offices, schools, hospitals, and industrial facilities, with payback periods often within a few years due to reduced energy and healthcare costs. Whether for residential or commercial purposes, these systems are a smart investment for better air quality and financial returns.
Improve the Built Environment with Indoor Air Quality Monitoring
What Are Smart Air Quality Monitoring Systems?
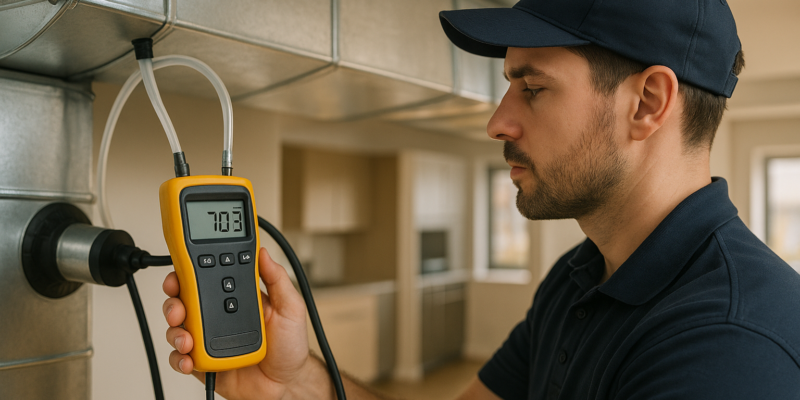
Smart air quality monitoring systems combine advanced sensors and software to keep tabs on indoor air quality and adjust HVAC (heating, ventilation, and air conditioning) systems in real time. Unlike traditional setups that rely on fixed schedules or basic temperature controls, these systems use live data to fine-tune ventilation, filtration, and overall climate management.
By integrating with existing HVAC systems, they respond dynamically to changes in air quality. Using a mix of sensors, cloud-based analytics, and automation, these systems make ongoing adjustments. The result? Healthier indoor air and more energy-efficient operations.
Here’s a closer look at their components, how they work, and where they’re most effective.
Key Components and How They Work
At the heart of these systems are precise sensors and reliable connectivity. These compact, multi-functional sensors are equipped to measure a range of air quality factors simultaneously. They can detect tiny particles (even those in the sub-micron range), measure low-level gas concentrations, and monitor temperature and humidity with impressive accuracy.
To function effectively, these systems rely on continuous data transmission. Many use wireless networks like Wi-Fi or cellular, while others opt for hardwired Ethernet connections. This flow of data feeds into cloud platforms, enabling real-time monitoring and immediate responses when air quality changes.
An analytics platform processes this data, comparing it against established health guidelines. Some systems even use machine learning to spot patterns, predict air quality trends, and optimize performance based on factors like occupancy, weather, or seasonal shifts.
Integration with HVAC systems is seamless. These systems often connect directly to building management platforms or work with smart thermostats and controllers. When air quality dips below acceptable levels, the system can automatically adjust fresh air intake, boost filtration, or tweak ventilation rates – all without manual input.
Where These Systems Are Used
Smart air quality systems are versatile, finding applications in homes, offices, schools, hospitals, and industrial facilities. Each setting has unique air quality needs, and these systems adapt accordingly.
- Residential Use: These systems often pair with existing HVAC units to monitor spaces like living rooms, bedrooms, and basements – areas where air quality can fluctuate.
- Commercial Buildings: In offices, they manage air quality in conference rooms, open workspaces, and shared areas, promoting a comfortable environment and boosting productivity. Many are tied into broader building automation systems, giving facility managers centralized control.
- Educational Institutions: Schools and universities use these systems to maintain healthy air in classrooms, libraries, and dorms, especially in crowded spaces.
- Healthcare Facilities: Hospitals deploy specialized systems to meet strict standards in patient rooms, operating theaters, and isolation units, ensuring optimal conditions for both care and compliance.
- Industrial Settings: Factories and manufacturing plants rely on these systems to monitor chemicals, dust, and ventilation, safeguarding worker health and maintaining product quality.
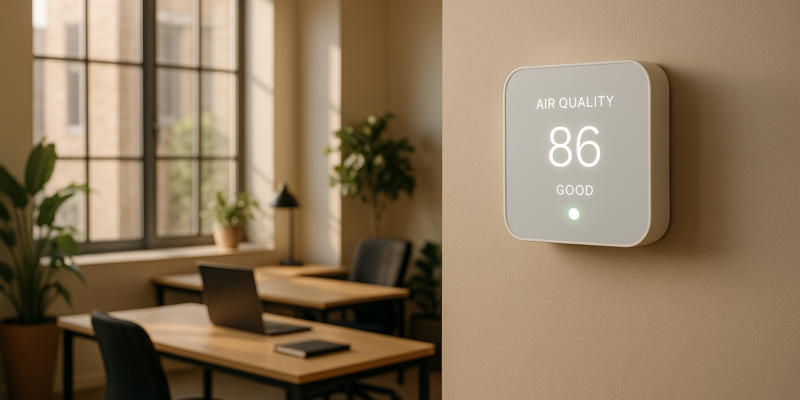
Pollutants and Metrics These Systems Track
These systems monitor a variety of pollutants and environmental factors, including particulate matter (PM2.5 and PM10), volatile organic compounds (VOCs), carbon dioxide (CO₂), humidity, and temperature. They then adjust ventilation and filtration to keep conditions safe and comfortable.
- Particulate Matter (PM2.5 and PM10): These fine particles can pose serious health risks when inhaled. PM2.5, in particular, is small enough to penetrate deep into the lungs.
- Volatile Organic Compounds (VOCs): Emitted by everyday items like furniture, cleaning products, and building materials, VOCs can impact health. Modern sensors track total VOC levels and, in some cases, even identify specific compounds.
- Carbon Dioxide (CO₂): High CO₂ levels often indicate poor ventilation or overcrowding. These systems adjust airflow to maintain fresh air circulation.
- Humidity and Temperature: Proper humidity levels prevent mold growth and ensure comfort, while temperature control supports both comfort and system efficiency.
Some systems go beyond these basics to monitor carbon monoxide, nitrogen dioxide, ozone, specific allergens, or workplace-specific contaminants, depending on the environment. In industrial settings, customized sensors may track pollutants in line with safety regulations.
Main Ways Smart Air Quality Systems Deliver ROI
Smart air quality systems bring measurable returns in three key areas: energy savings, productivity boosts, and risk reduction. These systems often pay for themselves by lowering operating expenses and improving conditions in homes, offices, and industrial spaces.
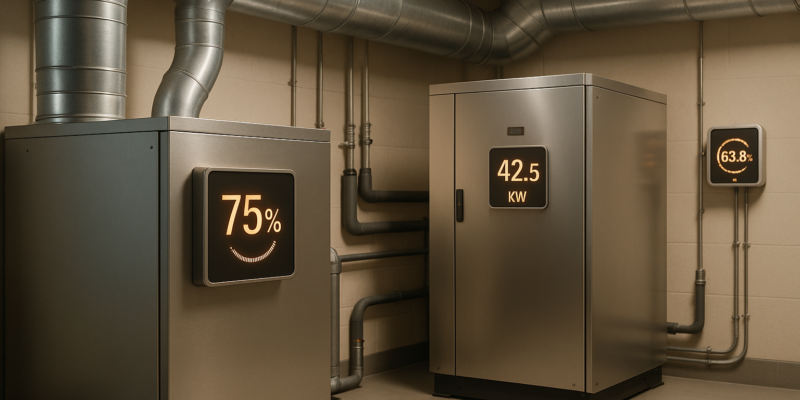
Energy Efficiency and Cost Savings
A major advantage of smart air quality systems is their ability to optimize HVAC performance. Unlike traditional systems that rely on fixed schedules or basic temperature settings, these advanced systems use real-time data to adjust ventilation based on actual needs, reducing unnecessary energy use.
Take demand-controlled ventilation as an example. By monitoring indoor factors like CO₂ levels and occupancy, these systems adjust airflow to match current requirements. This approach has been shown to significantly cut HVAC energy consumption in commercial buildings. Additionally, they track filter performance and notify facility managers when maintenance is required, which extends the life of filters and lowers material and labor costs.
These energy efficiencies lead to noticeable reductions in utility bills. By optimizing HVAC operations during high-cost peak hours, businesses can also avoid hefty demand charges. Together, these savings create a solid foundation for broader benefits in workplace productivity and health.
Productivity and Health Improvements
Better indoor air quality directly enhances cognitive performance and overall productivity. Studies from respected institutions show that improved air quality in offices can lead to measurable gains in workers’ cognitive function while reducing absenteeism caused by respiratory issues, headaches, or eye irritation. Even small improvements in productivity can translate into significant financial returns when applied across an entire organization. Reduced sick days and lower healthcare claims further add to the overall savings.
In schools, cleaner indoor air has been linked to better student performance and attendance, which supports stronger educational outcomes and reduces the need for remedial efforts. Beyond these immediate benefits, improved air quality can also provide regulatory and legal advantages.
Regulatory Compliance and Risk Reduction
Smart air quality systems help organizations stay compliant with workplace air quality standards. Automated monitoring and reporting ensure that businesses meet regulatory requirements, reducing the risk of costly fines.
Some insurers acknowledge the value of continuous air quality monitoring by offering discounts on premiums. Additionally, having documented air quality data can strengthen legal defenses in cases involving worker compensation claims or tenant disputes.
These systems also play a role in achieving green certifications like LEED, which can enhance property values and attract high-quality tenants. Their predictive maintenance features are another bonus, allowing facility managers to identify HVAC issues early, preventing costly emergency repairs and extending equipment lifespans.
Cost-Benefit Analysis and Payback Periods
Investing in smart air quality systems might seem like a hefty expense at first, but the long-term savings in energy and productivity often make it a worthwhile decision. While the upfront costs can vary widely, the financial and health benefits these systems bring typically outweigh the initial investment for most scenarios.
Installation and Maintenance Costs
The cost of installing a smart air quality system depends on factors like building size, system complexity, and existing infrastructure. For residential properties, systems are designed to be efficient while covering essential monitoring needs. On the other hand, commercial setups often involve more advanced features – like a larger sensor network, sophisticated analytics, and integration with building management systems – which can drive up the initial cost.
Maintenance expenses, such as sensor calibration, software updates, and equipment replacements, are generally modest compared to the upfront investment. Many HVAC service providers offer bundled maintenance packages, including regular inspections and preventive care, which help maintain system reliability. Although commercial systems come with higher installation costs, the savings they generate can offset these expenses relatively quickly.
ROI Returns and Payback Periods
Research indicates that commercial smart air quality systems often pay for themselves within a few years. This quick recovery is largely due to energy savings achieved through demand-controlled ventilation, which adjusts airflow based on real-time needs. Beyond energy efficiency, these systems also contribute to better indoor air quality, which has been linked to improved cognitive performance and fewer health issues like respiratory problems. These benefits can translate into higher productivity and lower healthcare costs.
The exact payback period and return on investment depend on variables like local energy rates and building occupancy. However, the overall trend is clear: the combined savings in energy, productivity, and health far exceed the costs of installation and upkeep over the system’s lifespan.
Costs vs Benefits Outlook
In summary, smart air quality systems deliver a compelling mix of cost savings and health advantages. While residential systems may take a bit longer to recover their costs due to smaller energy usage, they still provide solid long-term benefits. To maximize performance and shorten payback periods, it’s crucial to choose the right system size and ensure seamless integration with existing HVAC setups. This combination of financial savings and improved well-being makes the investment worthwhile for both residential and commercial applications.
sbb-itb-99db659
Case Studies: Smart Air Quality Systems in Action
In healthcare facilities, where patient safety and compliance are non-negotiable, smart air quality systems have proven to be transformative. These systems are not just about clean air – they directly impact infection control and patient outcomes, making them a critical investment in such environments. Many medical facilities have reported noticeable improvements in reducing infections and enhancing patient care after adopting these systems. This highlights their role in achieving both safety and regulatory goals.
“Managing indoor air quality in healthcare facilities is critical for reducing health risks to protect patients and staff and meet regulatory requirements.”
Hospitals, for instance, see tangible benefits like lower infection transmission rates. By continuously monitoring air quality, these systems adjust ventilation to minimize airborne pathogens and maintain optimal humidity levels. These measures directly influence patient recovery, leading to shorter hospital stays, fewer readmissions, and higher satisfaction scores. Additionally, compliance with air quality regulations helps facilities avoid costly penalties and ensures they meet required safety standards.
“Air quality is more than just comfort in healthcare settings; it’s essential for both staff and patient safety.”
The advantages extend beyond patient care. For healthcare staff, a healthier indoor environment means fewer sick days and better overall productivity. Real-time alerts from these systems allow for quick corrective actions, creating a safer workplace.
The combined effect of improved patient outcomes, reduced liability risks, and enhanced staff performance makes the investment in smart air quality systems highly worthwhile. While the initial cost may be higher, the financial and operational returns – through better health outcomes and compliance – are undeniable. This case study demonstrates how these systems go beyond safeguarding health to deliver measurable economic benefits.
Conclusion: The Value of Investing in Smart Air Quality Systems
Smart air quality monitoring systems offer a range of benefits, from improving energy efficiency and productivity to delivering operational savings. Whether for residential or commercial use, they provide measurable returns with relatively short payback periods.
Better indoor air quality can lead to fewer sick days, sharper cognitive function, and an overall boost in well-being. For businesses, this often translates to happier employees, reduced turnover, and increased efficiency. Beyond health and energy advantages, these systems play a vital role in meeting air quality standards. This is especially important in sectors like healthcare, education, and commercial spaces, where compliance helps avoid penalties and reduces legal or operational risks.
To fully unlock these benefits, professional installation and consistent maintenance are essential. Hydrodynamics Inc. specializes in providing comprehensive indoor air quality services, ensuring systems run at peak performance. Their team of EPA 609 Certified Technicians handles installation, maintenance, and repairs across residential, commercial, and industrial settings. They also offer energy-efficient solutions paired with maintenance plans that include same-day and 24-hour emergency support, backed by guaranteed work and transparent pricing.
“Our team of highly trained, professional HVAC/R technicians are committed to the best quality HVAC/R service in the area. Customer satisfaction is always our number one goal.”
Whether you’re overseeing a healthcare facility, office building, school, or home, smart air quality systems are a wise investment. They enhance health, boost productivity, and deliver long-term value. The evidence is clear: these systems are a cost-effective solution for improving both quality of life and operational efficiency.
FAQs
How do smart air quality systems help reduce energy costs for homes and businesses?
How Smart Air Quality Systems Reduce Energy Costs
Smart air quality systems are transforming the way HVAC systems operate by making them more efficient and cost-effective. These systems rely on real-time air quality data to fine-tune heating, cooling, and ventilation, ensuring energy is used only when necessary.
Equipped with advanced sensors, these systems adjust ventilation based on actual indoor conditions, cutting down on wasted energy. Research shows that retrofitting buildings with smart air quality technology can slash energy use – and costs – by an impressive 30–50%. Beyond saving money, this approach creates a more comfortable indoor space while promoting energy efficiency.
What health and productivity benefits can smart air quality systems provide?
Smart air quality systems play a key role in promoting both better health and increased productivity by ensuring a cleaner and more comfortable indoor environment. By filtering out pollutants, allergens, and harmful particles, these systems help lower the risk of respiratory issues like allergies and asthma. Cleaner air doesn’t just stop at respiratory health – it also contributes to overall well-being, including benefits for vascular health.
Beyond health, these systems can have a noticeable impact on productivity. Cleaner air reduces fatigue and sharpens focus, creating a more comfortable atmosphere where people feel more energized and capable, whether they’re working from home or at the office. Choosing to invest in smart air quality systems isn’t just about comfort – it’s about building healthier, more efficient spaces where people can truly thrive.
What should you consider when evaluating the ROI of a smart air quality system?
When evaluating the return on investment (ROI) for a smart air quality system, it’s worth looking at several key factors: health improvements, energy efficiency, and lower operational costs. For instance, better indoor air quality has been shown to cut sick days by up to 35% and improve cognitive function by as much as 61%. These changes can translate into higher productivity in workplaces and a healthier, more comfortable environment at home.
On top of that, smart systems can significantly reduce energy bills by fine-tuning HVAC performance and minimizing the risk of equipment breakdowns, which helps avoid costly repairs. For businesses, staying compliant with air quality regulations and steering clear of potential fines is another major advantage. Research indicates that the ROI on these systems often falls between 3 to 8 times the initial cost, making them a practical investment for both residential and commercial settings.