How to Fix Bad Water Taste at Home

How to Fix Bad Water Taste at Home

If your tap water tastes off – like chlorine, metal, or even rotten eggs – you’re not alone. Bad water taste can hint at underlying issues like pipe corrosion, bacterial growth, or excessive chemicals. Ignoring it may lead to dehydration or unnecessary spending on bottled water. Here’s how to fix it:

  • Identify the cause: Check for chlorine, metallic, sulfur, or musty flavors to pinpoint the issue.
  • Test your water: Use simple at-home tests or a water test kit to detect contaminants.
  • Quick fixes: Add citrus slices, chill the water, or let chlorine dissipate by leaving water uncovered.
  • Install filters: Use activated carbon for chlorine, reverse osmosis for metals, or whole-house systems for widespread problems.
  • When to call a pro: Persistent issues like corroded pipes or well contamination may need professional help.

Clean, great-tasting water starts with understanding the problem and choosing the right solution. Whether it’s a quick DIY fix or a professional-grade system, you can enjoy better water without breaking the bank.

How to get rid of tastes and smells in your water

Finding the Source of Bad Water Taste

Pinpointing the cause of an unpleasant water taste is the first step toward solving the problem. Different contaminants produce specific flavors and odors, so recognizing these patterns can help you address the issue more effectively. Identifying the root cause ensures you can apply the right fix.

Types of Bad Water Taste

Water can take on a variety of unpleasant tastes, each hinting at a specific problem.

  • Chlorine taste: This is one of the most common complaints, especially for those using city water. It has a sharp, chemical flavor – much like swimming pool water. Municipal water supplies often have a chlorinated taste due to bacteria treatment processes.
  • Metallic flavors: If your water tastes like you’re sucking on a penny, it may indicate copper, iron, or zinc leaching from your plumbing. This is especially common in homes with older copper pipes or galvanized steel systems.
  • Sulfur or rotten egg taste: This unmistakable odor points to hydrogen sulfide gas in your water. It’s more frequently found in well water but can sometimes affect city water supplies.
  • Musty, earthy, or fishy flavors: These tastes often signal organic matter in your water system, such as algae, bacteria, or decomposing plant material. These flavors tend to intensify during warmer months when organic growth is more active.

Once you’ve identified the type of taste, the next step is to figure out whether the problem originates from your water source or your home’s plumbing.

Check Your Water Source

Start by determining if the issue stems from your water supply or your plumbing system. If you’re on city water, reach out to your local water utility to inquire about recent changes in treatment or any known issues in your area. Many utilities provide annual water quality reports that detail the contents of your water supply.

For private well owners, taste problems often trace back to the well or its storage tank. Wells that aren’t properly maintained can develop bacterial growth. The depth and location of your well also play a role – shallow wells are more prone to surface contaminants that can affect taste.

Your plumbing system might also be the culprit. Older pipes, especially those made of galvanized steel, can corrode over time, releasing iron or zinc into your water. Even newer copper pipes can cause metallic flavors if your water is acidic. If the bad taste only occurs in hot water, your water heater may need maintenance or replacement.

Test Your Water at Home

You can perform simple tests at home to identify common water issues. Start by comparing your tap water to bottled distilled water. Pour each into separate clear glasses and examine their color, smell, and taste side by side. Look for unusual tints – yellow, brown, red, orange, blue, or green – and note any odd odors before tasting.

For hard water, try the soap suds test: Fill a container with 12 oz of tap water, add liquid dish soap 10 drops at a time, and shake. If you get lots of suds quickly, your water is soft. If it takes 40 to 50 drops to produce suds, you likely have hard to very hard water. Another method is the hardness evaporation test: Place tap water in a spoon and let it evaporate over 24 to 48 hours. White spots or sticky residue signal hard water minerals.

A magnifying glass inspection can also help. Fill a clean, clear glass with water, hold it up to bright light, and examine it closely. Look for floating particles, persistent cloudiness, or foam that lingers.

If these basic tests reveal potential issues, consider purchasing a home water test kit from a hardware store or online. These kits can measure chlorine levels, pH, total dissolved solids, and common contaminants like copper or iron. For persistent problems, professional water analysis may be necessary.

Quick Fixes for Immediate Relief

When you’re stuck with bad-tasting water, you don’t always have to wait for a permanent filtration system to swoop in and save the day. There are plenty of quick and simple tricks you can try at home to make your water more palatable while you work on a long-term solution.

Add Flavors and Adjust the Temperature

One of the easiest ways to deal with unpleasant water is to infuse it with natural flavors. Citrus slices – like lemon, lime, or orange – are a great choice for neutralizing metallic or mineral-heavy tastes. Just drop a few slices into a pitcher of water and let it chill in the fridge for a few hours. Voilà, a refreshing upgrade.

If the water has an earthy or musty flavor, try adding cucumber slices or fresh herbs like mint, basil, or rosemary. These not only mask the off-taste but also add a refreshing twist. For a touch of natural sweetness, toss in some berries (strawberries or raspberries) or chunks of watermelon. They can help balance out harsh chemical flavors.

Temperature tweaks are another quick fix. Simply chilling your water or adding ice cubes can make it taste better by muting unpleasant flavors. Cold temperatures naturally dull our ability to detect certain off-notes, making your water more enjoyable without any extra effort.

If chlorine is the culprit, there are a couple of easy tricks to reduce that sharp, pool-like taste. Letting tap water sit uncovered for a few hours allows the chlorine to dissipate naturally. For faster results, boil the water for 5–15 minutes and then let it cool.

Try Carbonation or a Splash of Juice

Flat or stale water? Carbonation to the rescue! If you have a home soda maker, adding bubbles can instantly make your water more appealing. You can even sprinkle in a pinch of salt if the water tastes flat or seems low in minerals.

Another option is to add a small splash of natural fruit juice. Go for sugar-free varieties to avoid unnecessary sweetness while still giving your water a flavor boost.

These quick fixes won’t solve the root problem, but they’ll provide some much-needed relief while you work on installing a more permanent water treatment system. Whether it’s citrus slices, chilling, or a bit of fizz, these hacks can make a big difference in the short term.

Water Filters and Treatment Systems

If you’re tired of quick fixes that only temporarily mask bad water taste, a proper filtration system could be the long-term solution you need. The secret lies in matching the right treatment system to the specific issues in your water. By addressing the root causes, these systems go beyond temporary relief to deliver consistently better-tasting water.

Match Filters to Your Water Problems

Different water problems call for different filtration technologies. Here’s a breakdown of common issues and the systems that can tackle them:

  • Chlorine taste and odor: Activated carbon filters are the best choice here. These filters trap chlorine molecules as water flows through the carbon media, neutralizing both the taste and smell. They also target certain organic compounds that affect flavor. To keep them effective, plan to replace the filters every 3-6 months, depending on your water usage.
  • Metallic tastes: If your water tastes metallic due to iron, copper, or lead, a reverse osmosis (RO) system is often the answer. RO systems force water through a semi-permeable membrane, removing up to 99% of dissolved metals and other contaminants. They’re especially useful for homes with well water or older plumbing systems that can leach metals into your water.
  • Sulfur odors: That unmistakable “rotten egg” smell from hydrogen sulfide requires a specialized approach. Whole-house oxidation systems convert the gas into filterable particles. For more severe cases, combining oxidation with activated carbon filtration can completely eliminate both the smell and taste of sulfur.
  • Hard water: If your water has a bitter taste or leaves a chalky residue, ion exchange systems can help. These systems replace calcium and magnesium ions with sodium or potassium, softening the water and improving its flavor.

Once you’ve identified the right filter, the next step is determining the best location for installation.

Pick the Right Installation Location

Where you install your filtration system can make a big difference in its effectiveness. Here’s how to choose:

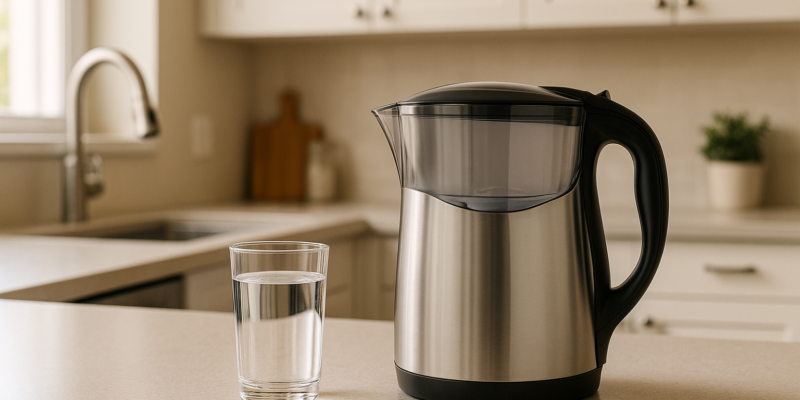
  • Point-of-use systems: These are ideal for addressing taste issues in specific areas, like drinking water from your kitchen faucet. Options like faucet-mounted filters or countertop units are budget-friendly, typically ranging from $30 to $300, and are easy to install.
  • Under-sink systems: If you want a more discreet option with higher filtration capacity, under-sink systems are a great middle ground. They treat all the water from your kitchen sink and provide better flow rates.
  • Whole-house systems: When your water issues affect the entire home – such as sulfur odors noticeable in showers or laundry – a whole-house system is the way to go. These systems treat all incoming water before it reaches any faucet or appliance. While they require a larger upfront investment (around $1,000 to $5,000 installed), they offer comprehensive treatment and even protect your plumbing and appliances from damage.

If you have a larger household, make sure to choose a system that can handle peak water usage. For example, a family of four typically needs a system capable of processing 10-15 gallons per minute to avoid water pressure drops.

Keep Your System Working Properly

To keep your water filtration system delivering clean, great-tasting water, regular maintenance is a must. Neglecting maintenance can lead to expired filters, which may even worsen water quality as trapped contaminants start to break down.

Here’s what you need to stay on top of:

  • Filter replacement: Replace activated carbon filters every 3-6 months, depending on water quality and usage.
  • RO membrane care: Change the membrane every 2-3 years, and replace pre-filters every 6-12 months to protect the system.
  • System sanitization: Clean the system annually with a mild bleach solution to prevent bacterial growth.
  • Water pressure checks: Ensure your system maintains at least 40 psi. If pressure drops, consider installing a booster pump.

For RO systems, replacing pre-filters on schedule is crucial to extending the life of the membrane. Many modern systems make maintenance easier with features like indicator lights or smartphone apps that track filter life and send reminders for replacements. Keeping records and setting calendar alerts can also help you stay organized and ensure your system runs smoothly.

sbb-itb-99db659

When to Call Water Treatment Professionals

After trying DIY fixes and maintaining your filtration system, there comes a point when some water issues demand professional attention. While many taste and odor problems can be addressed at home, certain situations are too complex for DIY solutions. Knowing when to bring in experts can save you time, money, and ensure your water is safe for your family.

When the Problem Goes Beyond DIY Fixes

Some water quality problems are simply beyond the scope of home filtration systems. If you’ve tried multiple filters and still notice persistent bad tastes or odors, it’s time to call in professionals. Expert water testing can identify the root cause and point to solutions that go beyond what household systems can handle.

For example, if your water tastes metallic, sulfurous, or chemically treated despite proper filtration, the issue could stem from corroded pipes, failing well components, or even systemic contamination. These are not problems you can solve with a new filter – they require professional diagnosis and treatment.

Corroded plumbing systems are another red flag. Discolored water, especially reddish-brown or greenish hues, paired with metallic tastes, often indicates deteriorating pipes. Corrosion doesn’t just affect taste; it can also damage your plumbing. A professional can assess whether you need pipe replacements, water chemistry adjustments, or specialized treatments to resolve the issue.

Well water problems are particularly tricky. Issues like bacterial contamination or mineral imbalances often require more than a DIY approach. Professionals can test for harmful bacteria, adjust your well pump system, and install advanced treatment solutions that go far beyond standard filtration.

Sometimes, water pressure problems accompany taste issues, especially in homes with well systems. These could point to issues with your pump or pressure tank rather than the water itself. In such cases, a professional evaluation is essential to get to the root of the problem.

Hydrodynamics Water Treatment Services

When home remedies aren’t enough, professional water treatment services step in to tackle the tough challenges. Hydrodynamics, a family-owned company since 1994, specializes in addressing complex water quality issues for both residential and commercial properties.

Their water conditioning services include installing and maintaining water softeners and UV sterilization systems. These solutions are ideal for addressing hard water, bad tastes, and bacterial contamination – problems that standard filters just can’t fix. This is especially important for homes relying on well water or dealing with challenging municipal water conditions.

Hydrodynamics also offers well pump and grinder pump services. If your water taste issues stem from failing pumps or contaminated well components, their team can diagnose and replace faulty equipment, ensuring your well system consistently delivers clean, great-tasting water.

For water quality problems linked to plumbing, they provide comprehensive plumbing services. Corroded pipes or failing plumbing components can significantly impact water taste and system reliability. Hydrodynamics technicians can inspect your entire plumbing system and recommend repairs or replacements to improve both water quality and performance.

For businesses or homes requiring industrial-grade solutions, they offer advanced heating and cooling systems alongside water treatment options. This integrated approach is particularly beneficial for commercial properties where water quality affects not just drinking water but also operational equipment.

Hydrodynamics also provides maintenance programs to help prevent gradual declines in water quality. Regular upkeep ensures small issues are caught early, avoiding severe taste or contamination problems down the line.

If water testing reveals harmful contaminants like bacteria or heavy metals, it’s critical to act quickly. Professional-grade treatment systems and ongoing monitoring are key to protecting your family’s health and ensuring safe, clean water.

Water Treatment Method Comparison

Once you’ve identified the source of your water’s taste issues, the next step is finding the right treatment method to address them. The choice will depend on your water’s specific challenges, your home’s setup, and your budget. Here’s a breakdown of popular water treatment options to help you decide.

Activated Carbon Filters
These filters are excellent for tackling chlorine taste and odors. They work by adsorbing chemicals and organic compounds that affect water’s flavor. However, they won’t resolve mineral-related tastes, so they’re best suited for municipal water supplies with chlorine issues.

Reverse Osmosis Systems
If your water has multiple taste problems, reverse osmosis systems are a solid choice. They remove a wide range of dissolved contaminants, providing comprehensive filtration. While these systems require a higher upfront cost, they deliver reliable, long-term results for improving water quality and taste.

Whole-House Systems
For households that want better-tasting water at every tap, whole-house systems are the way to go. These systems treat all incoming water, addressing overall water quality. Though they come with higher installation costs and added complexity, they’re designed to enhance water taste and quality throughout your entire home.

When deciding between these options, think about factors like installation difficulty, ongoing maintenance, and the specific issues with your water supply. For example, if you’re on municipal water, a focus on chlorine removal might suffice. On the other hand, well water users may need a solution that also tackles minerals and other contaminants.

Conclusion: Enjoy Clean, Great-Tasting Water

Improving the taste of your water starts with understanding the root cause of the problem. Once you identify the issue, you can choose the right solution to address it effectively.

Begin by testing your water to pinpoint specific contaminants. For chlorine taste, an activated carbon filter works well. If your water has a mix of impurities, a reverse osmosis system might be the answer. For a more thorough approach, consider a whole-house filtration system.

Don’t forget regular maintenance – cleaning components and replacing filters as recommended is key to keeping your system running smoothly. Even the most advanced filtration system won’t deliver consistently great-tasting water if it’s not well-maintained.

Some water issues, like bacterial contamination or persistent off-flavors, may require professional help. For these more complex problems, experts like Hydrodynamics offer specialized solutions, including UV systems and water softeners, to ensure your water is safe and enjoyable.

FAQs

How can I tell if the bad taste in my water is caused by my plumbing or the water source?

If your water has an unpleasant taste, the first step is figuring out whether the issue stems from your home’s plumbing or the water source. Check all the faucets in your house. If the bad taste shows up everywhere, the water source is likely the culprit. But if it’s only happening at specific faucets, your plumbing might be to blame. Common causes include bacteria buildup on rubber fittings or stagnant water sitting in the pipes.

For plumbing-related problems, start by running the affected taps for a few minutes to flush out any stagnant water. If the odd taste doesn’t go away or you think the issue might be more serious, it’s a good idea to call in a professional for a detailed inspection and possible solutions.

What are the long-term advantages of installing a whole-house water filtration system over point-of-use filters?

Why Consider a Whole-House Water Filtration System?

Installing a whole-house water filtration system can bring a range of long-term benefits that go beyond what point-of-use filters can offer. These systems filter water at the source, ensuring that every faucet and appliance in your home provides clean, safe water. Whether it’s for drinking, cooking, bathing, or cleaning, the improved water quality can make a noticeable difference in your daily life.

Whole-house systems are designed to tackle contaminants like sediment, chlorine, heavy metals, and volatile organic compounds (VOCs). This not only enhances the taste of your water but can also be kinder to your skin and hair, especially if you’ve struggled with dryness or irritation caused by untreated water.

Another perk? These systems help protect your plumbing and appliances. By reducing impurities and preventing hard water buildup, they can extend the life of your pipes, water heater, and other appliances, potentially saving you money on maintenance and repairs down the line. While the upfront cost might seem steep, the combination of convenience, improved health, and long-term savings makes it a worthwhile investment for your home.

When should I call a professional to fix bad-tasting water, and what can they do that I can’t?

If your water still tastes off even after trying easy fixes like flushing the pipes or using basic filters, it might be time to bring in a professional. Persistent problems – especially if accompanied by discoloration, odd smells, or concerns about contamination – could point to bigger issues in your plumbing, well system, or water supply.

Experts can conduct comprehensive water quality tests, set up advanced filtration systems, and tackle underlying plumbing or well problems that DIY solutions often can’t handle. Their knowledge ensures your water is not only safe and clean but also tastes better, all while helping to prevent long-term damage to your home’s water system.

PEX vs. Copper: Leak Prevention Comparison

PEX vs. Copper: Leak Prevention Comparison

What’s better for preventing leaks: PEX or copper pipes?

Here’s the quick answer:

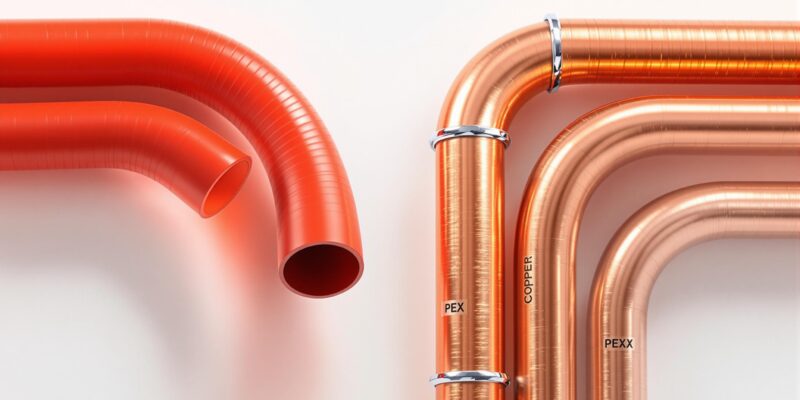
  • PEX pipes are flexible, resist freezing, and have fewer joints, which lowers the risk of leaks. But they’re prone to UV damage and require precise installation.
  • Copper pipes are durable, handle high pressure and temperatures, and resist bacterial growth. However, they can corrode in certain water conditions and are more likely to crack in freezing temperatures.

Quick Comparison:

Feature PEX Copper
Leak Prevention Fewer joints, corrosion-resistant Durable, antimicrobial, but more joints
Lifespan 30–50 years 50–70 years
Installation Faster, simpler, fewer tools Slower, requires soldering
Cost $4,000–$8,000 for a 2,000 sq. ft. home $8,000–$16,000 for a 2,000 sq. ft. home
Freeze Resistance Flexible, less likely to crack Rigid, higher freeze risk

Both options have pros and cons. PEX is affordable and quick to install, while copper is a long-term, recyclable option. Your choice depends on your budget, local water conditions, and durability needs.

PEX vs COPPER for Plumbing – Which Should You Use and …

PEX

How PEX and Copper Prevent Leaks

PEX and copper pipes each have unique characteristics that help reduce leaks. Here’s a closer look at how these materials work to keep your plumbing secure.

PEX Pipe Features

PEX pipes are flexible, which means fewer joints and weak spots in your plumbing system. They are also resistant to corrosion, making them a durable choice for many applications.

However, PEX has some drawbacks:

Limitation Impact on Leak Prevention
UV Sensitivity Prolonged exposure to sunlight can weaken the material.
Physical Damage Can be damaged by sharp objects or improper handling.
Connection Quality Requires precise installation to ensure fittings are secure.

Copper Pipe Features

Copper pipes are strong and durable, making them capable of handling high pressure and temperature changes. They also have natural antimicrobial properties, which help prevent bacterial growth and reduce the risk of corrosion.

Despite these advantages, copper has its own challenges:

Consideration Impact on Leak Prevention
Water Chemistry Certain water types can cause copper to corrode over time.
Freeze Risk Copper is more likely to crack in freezing temperatures.
Joint Requirements More connections are needed, increasing potential leak points.

Setup and Upkeep

When it comes to installation and maintenance, PEX and copper pipes have distinct requirements, each playing a key role in preventing leaks over time.

PEX Installation Steps

PEX installation is simpler and requires fewer tools compared to copper. Its manifold system, with fewer joints, minimizes potential leak points by centralizing distribution.

Installation Aspect Details Impact on Leak Prevention
Tool Requirements Crimping tool, pipe cutter, calibration tool Ensures secure connections via crimping
Connection Method Compression or expansion fittings Fewer joints reduce leak risks
Time Investment Faster than copper installation Lowers chances of installation mistakes
Space Requirements Flexible routing around obstacles Reduces strain on fittings and joints

To avoid leaks:

  • Keep to the recommended bend radius (usually 6–8 times the pipe diameter)
  • Use fittings approved by the manufacturer
  • Account for expansion and contraction
  • Shield pipes from UV exposure

On the other hand, copper installation follows a more detailed and skill-intensive process.

Copper Installation Steps

Installing copper pipes requires expertise, especially for soldering, which is critical for leak prevention.

Installation Aspect Details Impact on Leak Prevention
Tool Requirements Torch, flux, solder, pipe cutter, cleaning tools Proper soldering prevents joint failures
Connection Method Soldered joints or mechanical fittings Precision is key for each joint
Time Investment Slower, with curing time needed Ensures durable and reliable connections
Space Requirements Rigid routing with exact measurements Strategic joint placement reduces stress

Important maintenance steps for copper systems include:

  • Inspect soldered joints regularly
  • Watch for signs of corrosion
  • Test water pH levels periodically
  • Address issues like water hammer promptly

Both systems benefit from professional installation to maximize leak prevention. Next, we’ll explore how these installation differences affect durability and strength.

Life Expectancy and Strength

Durability plays a major role in preventing leaks. Let’s break down how PEX and copper hold up over time to help you make an informed choice.

PEX Lifespan

When installed correctly, PEX pipes can last between 30 and 50 years. Their flexible design helps absorb the impact of water hammer and freezing, which reduces the likelihood of leaks. Plus, the smooth interior resists scaling, keeping water flowing efficiently.

Here’s how PEX performs:

  • Temperature: Works well under typical household conditions.
  • Pressure: Handles standard residential water pressure without issues.
  • Chemical Resistance: Stands up to chlorine and acidic water.

Copper Lifespan

Copper pipes have an impressive lifespan of 50 to 70 years. Their rigid structure tolerates high pressure and temperature changes, making leaks less common. Additionally, copper’s natural resistance to corrosion contributes to its longevity.

Key copper traits include:

  • Temperature: Can handle both extreme heat and cold.
  • Pressure: Performs reliably under higher water pressures.
  • Corrosion Resistance: Minimizes the risk of leaks over time.

Both materials can be affected by water quality and environmental factors. If the water is particularly aggressive, additional protective measures might be needed. For personalized advice on choosing the right plumbing system and ensuring proper installation, consider reaching out to the experts at Hydrodynamics.

Next, we’ll look at the costs and resource demands of each option.

Price and Resource Use

Costs depend on materials, installation, and long-term resource consumption.

PEX Costs

PEX is a budget-friendly option for both materials and labor. PEX piping costs range from $0.50 to $2 per linear foot, and installing a PEX plumbing system in a typical 2,000‑square-foot home costs between $4,000 and $8,000, including materials and labor.

Here’s what impacts PEX costs:

  • Material Costs: PEX tubing is about one-third the cost of copper.
  • Installation Time: Installing PEX is 40–50% faster than copper.
  • Tool Costs: PEX tools run between $100 and $300 and can be reused.
  • Maintenance: Requires minimal upkeep over time.

While PEX is affordable, its recyclability is limited. When it reaches the end of its lifecycle, it often ends up in landfills, which may be a concern for some.

Copper Costs

Copper systems come with higher upfront expenses but are durable and recyclable. Installing copper plumbing in a 2,000‑square-foot home typically costs between $8,000 and $16,000.

Copper cost factors include:

  • Material Costs: Copper pipes cost $2.50 to $8 per linear foot.
  • Labor Costs: Professional plumbers charge $45 to $150 per hour for installation.
  • Joining Materials: Additional expenses for solder, flux, and fittings.
  • Tools: Standard plumbing tools, which most contractors already have.

Although the initial investment is higher, copper boasts a recyclability rate of over 90%. Scrap copper sells for $2 to $3 per pound, making it a more resource-conscious option.

For tailored advice on the best plumbing solution for your home, Hydrodynamics offers detailed estimates and recommendations based on your property and local water conditions.

Conclusion

PEX and copper pipes each bring their own strengths to leak prevention. PEX is a popular choice for residential projects due to its flexibility and affordability, while copper is often selected for its long-lasting performance in demanding environments. The right choice depends on your budget, the complexity of the installation, and specific application requirements.

Hydrodynamics’ certified technicians can evaluate factors like water quality, pressure, and local regulations to ensure your plumbing system is installed correctly. Whether you’re starting a new project or upgrading an existing system, they offer services for residential, commercial, and industrial needs.

Reach out to Hydrodynamics for expert advice and support.

7 Ways to Detect Hidden Plumbing Leaks

7 Ways to Detect Hidden Plumbing Leaks

Hidden plumbing leaks can cause expensive water damage and increase your utility bills. Here’s how you can find and address them quickly:

  • Check your water meter: Turn off all water sources and monitor your meter for changes. Movement indicates a leak.
  • Look for physical signs: Watch for water stains, mold, warped materials, or wet spots around your home.
  • Use sound detection tools: Specialized microphones can detect leaks by picking up water movement sounds.
  • Try thermal imaging: Heat-sensing cameras can spot leaks by identifying temperature differences in walls and floors.
  • Test your toilets: Add food coloring to the tank; if color appears in the bowl without flushing, there’s a leak.
  • Review water bills: Sudden spikes in usage could signal hidden leaks.
  • Get a camera pipe inspection: Professionals can use cameras to inspect pipes for cracks, blockages, or damage.

Act fast to prevent costly repairs and water waste. While some methods are DIY-friendly, professional tools and expertise are often necessary for accurate results.

How To Do Water Leak Detection Like A Plumbing Pro

1. Check Your Water Meter

Your water meter is one of the best tools for spotting hidden plumbing leaks. It can help you identify leaks that might otherwise go unnoticed for months.

Here’s how to check your water meter for leaks:

  • Turn off all water sources
    Make sure no water is being used inside or outside your home. Shut off all faucets, and avoid using appliances like dishwashers, washing machines, or sprinklers.
  • Locate and read your meter
    Find your water meter, usually located in a covered box near the street. Carefully remove the cover and write down the exact reading, including any decimals. Pay attention to the flow indicator, which is often a small triangle or gear.
  • Wait and observe
    With all water turned off, wait for 30 minutes. If the meter reading changes during this time, it’s a clear sign of a leak.

What do the results mean?
If the reading changes – even slightly – it indicates a leak that needs attention. Taking a photo of your meter readings can help keep a record. If you notice any movement, it’s time to call a professional to investigate further.

After checking your meter, it’s a good idea to inspect your property for any visible signs of leaks.

2. Spot Physical Leak Signs

Hidden leaks can often leave visible clues. Check areas like under sinks and around appliances for any signs of moisture.

Here are some common indicators of a leak:

  • Water stains: Dark or discolored patches on walls, ceilings, or floors may mean water is seeping through.
  • Mold growth: Mold appearing in unexpected areas is often a sign of constant moisture.
  • Wet spots: Damp areas or puddles that don’t have an obvious source could point to a leak.
  • Warped materials: Flooring or walls that are swollen, buckled, or deformed might indicate water damage.

If you don’t notice visible signs, specialized detection tools can help locate hidden leaks.

3. Listen with Sound Detection Tools

When visual checks aren’t enough, sound detection offers a precise way to locate leaks. Using specialized tools, plumbers can identify leaks based on the sounds they produce.

Here are some common tools used for this:

  • Ground microphones: These pick up sounds from leaks beneath soil or concrete.
  • Contact microphones: Attached directly to pipes, these detect water movement inside.
  • Correlators: Combine data from multiple sensors to pinpoint the exact location of a leak.

The success of these tools depends on factors like pipe material and depth. For example, metal pipes carry sound better than PVC, and sensitive equipment can detect leaks as small as 1 gallon per hour, even at depths of up to 8 feet.

Plumbers often work during quiet hours, like 2–4 AM, when there’s less background noise to interfere with detection.

At Hydrodynamics, we use advanced sound detection tools along with the expertise of our technicians to locate leaks accurately. This non-invasive method reduces damage while ensuring precise results.

While basic acoustic tools are available for homeowners, professional equipment and experience are essential for handling complex systems or deeply buried pipes.

4. Use Heat-Sensing Cameras

Thermal imaging cameras have changed the way leaks are detected, exposing hidden water damage that might otherwise stay concealed. These devices work by identifying tiny temperature differences in walls, floors, and ceilings, allowing experts to locate leaks without tearing into structures.

Water leaks often cool the surrounding areas, creating a thermal pattern that skilled technicians can interpret. Today’s thermal cameras are sensitive enough to detect even small temperature changes, making them useful for spotting:

  • Leaks behind drywall
  • Plumbing issues under slabs
  • Roof and ceiling leaks
  • Pipe condensation
  • Hidden moisture pockets

At Hydrodynamics, we use professional-grade thermal cameras, like those from the FLIR E-Series, alongside moisture meters to thoroughly assess and diagnose problems – without resorting to invasive methods.

Why Thermal Imaging Stands Out

  • Non-invasive: No need to tear down walls or ceilings.
  • Early detection: Catch problems before they cause visible damage.
  • Efficient: Quickly scan large areas for potential issues.
  • Detailed visuals: Create thermal maps for accurate repairs.

For the best results, thermal imaging works well when there’s a noticeable temperature difference between indoors and outdoors, often early in the morning or during mild weather. While consumer-grade cameras exist, professional equipment used by our team can detect problems deep within walls and floors, providing precise guidance for repairs.

Thermal imaging is just one part of a broader toolkit for identifying leaks. When combined with sound detection and other advanced methods, it becomes a powerful way to pinpoint hidden issues efficiently and effectively.

5. Test Your Toilet for Leaks

A leaking toilet can waste a surprising amount of water every day. The food coloring test is a quick and easy way to spot hidden leaks in just 15-20 minutes.

Here’s how to do it:

  • Take off the tank lid.
  • Add about 10 drops of dark food coloring (blue or red works best) to the tank.
  • Don’t flush the toilet.
  • Wait 15-20 minutes.
  • Check the bowl for any traces of color.

If you see colored water in the bowl without flushing, you’ve got a leak. This is often caused by a worn-out flapper or a faulty flush valve.

Common Causes of Toilet Leaks

  • Worn-out flapper valve
  • Damaged flush valve seal
  • Corroded overflow tube
  • Faulty flush valve assembly
  • Incorrect chain length

At Hydrodynamics, we know that catching leaks early can save water and cut down on repair costs. While the food coloring test is a great starting point, some issues may require a professional inspection to pinpoint and fix the problem.

Pro Tips for Leak Testing

  • Use dark food coloring instead of dye tablets, which can stain the porcelain.
  • Clean the toilet thoroughly after the test to avoid stains.
  • Make this test part of your routine maintenance every six months.
  • Test all the toilets in your home – leaks can happen anywhere.

Fixing leaks as soon as possible prevents wasted water and expensive repairs. While this test is a helpful first step, a professional plumber can ensure that no hidden issues are left unresolved. Regular checks like this are a simple way to maintain your plumbing system.

6. Review Water Bill Changes

Your water bill can help you uncover hidden plumbing leaks. While it’s not as direct as inspections or specialized tools, keeping an eye on your bill is a practical way to detect potential issues.

Look at your water usage over several months to identify steady increases or sudden spikes. Pay attention to key details like:

  • Total water consumption (in gallons)
  • Daily averages
  • Cost per gallon
  • Comparisons to previous billing periods

Seasonal changes might impact outdoor water use, but indoor usage should stay relatively stable. To account for seasonal differences, compare your current bill to the same month last year and look for unusual patterns.

Here are some warning signs to watch for:

  • Steady increases in usage over multiple billing cycles
  • Large, unexpected spikes in water consumption
  • Usage levels that are higher than typical for similar households

Hydrodynamics suggests keeping a simple log to track your monthly water usage. If you notice anything unusual, act quickly by using other detection methods or calling a professional for an inspection.

Many utility companies now offer online tools that give you daily usage data, send alerts, and show historical billing information. These tools make it easier to spot problems early.

7. Get a Camera Pipe Inspection

A camera pipe inspection is a precise way to uncover hidden plumbing leaks. With this method, plumbers can see inside your pipes without tearing into walls or floors.

This approach builds on earlier non-invasive techniques, offering a clear, real-time look at your plumbing. Using high-resolution cameras, plumbers can spot:

  • Cracks, corrosion, or fractures in pipes
  • Misaligned or separated joints
  • Tree root invasions
  • Mineral buildup
  • Blockages causing pressure issues

Here’s how it works: A technician inserts a small camera into an access point, like a cleanout or disconnected fixture. As the camera travels through the pipe, it sends live footage to a monitor. This allows the plumber to locate and assess any problems immediately.

Camera inspections are especially useful for:

  • Diagnosing recurring leaks
  • Checking pipes during a home purchase
  • Routine maintenance
  • Confirming repairs were done correctly
  • Providing documentation for insurance purposes

This process doesn’t just reveal current leaks; it can also catch early signs of pipe damage, helping to avoid costly repairs down the line.

While you can rent basic inspection cameras from hardware stores, professional-grade tools and expert analysis deliver far better results. Professionals provide a detailed report that highlights issues and suggests fixes.

For the best results, have your pipes cleaned before the inspection. This ensures a clear view and makes it easier to detect even small problems.

Conclusion

Hidden plumbing leaks can cause serious damage if they go unnoticed. Using these seven detection methods – from simple water meter checks to advanced camera inspections – can help you spot and fix leaks before they escalate.

Even small leaks waste water and drive up costs, so catching them early is crucial. While basic methods like visual checks and water meter tests can be done by homeowners, more advanced techniques like thermal imaging and camera inspections need specialized tools and trained professionals for accurate results.

Hydrodynamics Inc., with over 29 years of experience, offers customized solutions to tackle leaks. Their skilled technicians are equipped to handle all the methods mentioned, helping you prevent water damage and cut down on repair expenses.

Don’t wait for damage to show up. Taking action now can save both time and money. Reach out to Hydrodynamics Inc. to evaluate your plumbing system and keep it running smoothly.

Seasonal Plumbing Inspection Checklist

Seasonal Plumbing Inspection Checklist

Avoid costly plumbing repairs with regular inspections. Seasonal changes can stress your plumbing system, but a simple checklist can help you stay ahead of issues. Here’s a quick breakdown of what to focus on each season:

  • Spring: Check for frozen pipe damage, sump pump failures, and outdoor faucet leaks.
  • Summer: Inspect sprinkler systems, AC condensate lines, and washing machine hoses.
  • Fall: Insulate pipes, winterize outdoor plumbing, and prepare your water heater.
  • Winter: Prevent frozen pipes, test your main water valve, and monitor for freezing signs.

Monthly Tip: Check under sinks for leaks, test water pressure, and schedule professional inspections for peace of mind.

ESSENTIAL Home Maintenance Checklist

Spring Inspection Tasks

After winter, it’s smart to check your plumbing to avoid springtime headaches.

Outdoor Faucet Check

Take a close look at outdoor faucets and hose bibs for any signs of winter damage. Look for cracks, leaks near the handles, and make sure the water flows strongly and evenly.

If the water pressure seems weak or the spray pattern is off, it might be time to call a professional to check for hidden damage.

Sump Pump Testing

Once you’ve checked the outdoor fixtures, turn your attention indoors to the sump pump. Here’s how to make sure it’s in good shape:

  • Visual Check
    Look for debris or damage in the pump and sump pit. Make sure the float switch moves easily.
  • Test It Out
    Pour water into the sump pit and see if the pump kicks on and drains the water automatically.
  • Inspect the Discharge Line
    Ensure the pipe is free from cracks and directs water safely away from your home’s foundation.

If everything works as it should, you’re ready to move on to inspecting your pipes for any winter-related issues.

Post-Winter Pipe Inspection

Cold weather can cause hidden damage to pipes that only shows up as temperatures warm. Inspect for cracks, bulges, or leaks, and keep an eye out for wet spots or discoloration around:

  • Exposed pipes
  • Pipe joints
  • Plumbing installations

Pay extra attention to pipes in unheated areas like crawl spaces, basements, and exterior walls. Even minor leaks can waste water and lead to costly structural damage.

Summer Inspection Tasks

Summer often puts additional pressure on plumbing systems, making regular maintenance a smart move to avoid surprises. Start by focusing on parts that are more likely to wear out, like washer hoses.

Washer Hose Inspection

Take a close look at your washing machine hoses for signs of wear, such as bulges, cracks, rust, or kinks. It’s a good idea to inspect these hoses every three months. If you’re using rubber hoses, plan to replace them every 3–5 years to reduce the risk of leaks.

Fall Inspection Tasks

Get your plumbing ready for winter to avoid frozen pipes and expensive repairs.

How to Insulate Pipes

Start by locating exposed pipes in unheated areas such as basements, crawl spaces, and exterior walls. Protect them using foam pipe sleeves or heat tape. Here’s what to do:

  • Measure the pipe diameter to ensure the insulation fits properly.
  • Secure foam sleeves with zip ties every 1–2 feet.
  • Pay extra attention to pipes near exterior walls.
  • Seal any gaps around pipes with expanding foam to block cold air.

After insulating the pipes, move on to preparing outdoor water sources for the colder months.

Storing Outdoor Hoses

Take these steps to winterize your outdoor plumbing:

  • Disconnect garden hoses from outdoor faucets.
  • Lay the hoses flat to drain all water.
  • Store coiled hoses in a climate-controlled area to prevent cracking.
  • Add insulated covers to outdoor faucets.
  • Shut off and drain outdoor water supply lines if possible.

Adjusting Your Water Heater

Fall is a great time to prepare your water heater for colder weather. The Department of Energy advises setting your water heater to 120°F (49°C). This temperature is warm enough for daily needs, helps prevent burns, and lowers energy bills.

Key maintenance tasks include:

  • Draining 1–2 gallons of water from the tank to clear out sediment.
  • Testing the pressure relief valve for proper function.
  • Inspecting the anode rod for signs of corrosion.
  • Adding insulation to the unit if it’s in an unheated space.

If you have a tankless water heater, schedule a professional inspection to ensure it’s ready for winter. Reach out to Hydrodynamics for a thorough checkup and adjustments before temperatures drop.

Winter Inspection Tasks

Winter puts extra stress on your plumbing system, but regular checks can help you avoid expensive problems.

Main Water Valve Check

Knowing where your main water shut-off valve is located is essential during winter emergencies. You’ll usually find it in the basement, crawl space, or an outdoor underground box near the street. Here’s how to check it:

  • Locate the shut-off valves (both inside and outside, if applicable).
  • Turn the handle clockwise until it stops to shut off the water.
  • Test by opening a faucet – if no water flows, the valve is working.
  • Turn the valve counterclockwise to restore water flow.

If the valve feels stuck or shows signs of rust, it’s time to call a professional for a replacement.

Cold Weather Drip Guide

Letting a faucet drip during extreme cold can help prevent pipes from freezing. While you’re at it, inspect exposed pipes for any early signs of freezing.

Frozen Pipe Prevention

Keep an eye out for warning signs like reduced water flow or frost forming on visible pipes. If you suspect a pipe is freezing – like noticing a significant drop in flow – don’t wait. Call a professional immediately to avoid further damage. For a thorough winter inspection and tailored advice, reach out to Hydrodynamics.

Monthly Maintenance Tasks

Monthly checks help address small plumbing issues before they turn into bigger problems. These tasks work hand-in-hand with seasonal inspections to keep your system in good shape.

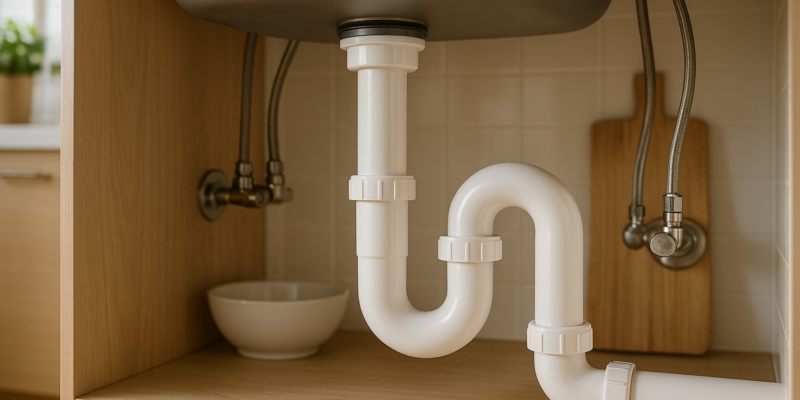
Under-Sink Inspection

Take a close look under your sinks each month:

  • Check pipe joints and supply lines for any signs of moisture.
  • Look for water stains or warping on nearby surfaces.
  • Run water to ensure drain connections are secure.
  • Inspect supply hoses for corrosion or cracks.

Pay special attention to areas near garbage disposals and where pipes enter walls. If you notice dampness or strange odors, it’s time to call a plumber.

Water Pressure Test

Use a water pressure gauge on an outdoor faucet to measure your home’s water pressure. It should typically fall between 40–80 PSI. If it’s too high or too low, reach out to a professional plumber for adjustments.

Professional Inspection Guide

While monthly DIY checks are helpful, professional inspections dig deeper into your plumbing system. These inspections are a great way to catch hidden issues and ensure everything is running smoothly.

Hydrodynamics Inc., a trusted name in plumbing since 1994, offers detailed evaluations to keep your system in top condition.

“We are dedicated to provide prompt repairs, expert installation services, and satisfaction to our valued customers.” – Hydrodynamics Inc. [1]

Keep an eye out for ongoing problems like frequent clogs or unusual noises, and don’t hesitate to schedule a professional inspection when necessary.

Summary

Keeping up with plumbing maintenance throughout the year can save you from expensive repairs and potential water damage. A seasonal checklist ensures your plumbing stays in good shape, no matter the weather.

Here’s how each season plays a role:

  • Spring: Focus on recovering from winter’s impact and preventing flooding.
  • Summer: Pay attention to outdoor systems and make sure cooling systems are running smoothly.
  • Fall: Get your plumbing ready for colder temperatures.
  • Winter: Protect pipes from freezing and maintain a comfortable indoor environment.

These tasks help maintain your plumbing system for the long haul. Adding professional inspections to your routine can provide extra peace of mind. Companies like Hydrodynamics Inc. offer seasonal inspections, with certified technicians trained to spot and fix issues before they turn into costly problems [1].

Combining your own checks with expert maintenance is a smart way to protect your plumbing. Keep a record of all inspections and repairs – this helps you spot recurring issues and address them early.

Signs of Refrigerant Leaks and What to Do Next

Signs of Refrigerant Leaks and What to Do Next

  • Common Signs: Hissing/bubbling noises, weak cooling, frozen evaporator coils, and higher energy bills.
  • Immediate Actions: Turn off your HVAC system, ventilate the area, and keep people/pets away.
  • Professional Help: Call a licensed HVAC technician for leak detection and repairs.
  • Prevention Tips: Schedule regular maintenance, fix small issues promptly, and ensure professional installation.

Quick Tip: Acting fast when you spot a refrigerant leak can save you from expensive repairs and keep your system running efficiently. Learn more about how to address leaks and prevent future issues below.

Top 3 Refrigerant Leak Detection Methods

How to Spot Refrigerant Leaks

Catching refrigerant leaks early can save your HVAC system from serious damage and help you avoid expensive repairs. Here are some common signs to keep an eye (and ear) on:

Hissing or Bubbling Noises

If you hear a hissing noise, it might mean gas is escaping through a small hole. Bubbling sounds, on the other hand, often indicate a larger leak [1][3].

Weak Cooling Performance

A drop in refrigerant levels makes it harder for your system to cool properly. Look out for:

  • Reduced airflow
  • Longer cooling cycles
  • Uneven room temperatures

These are all signs your system is struggling due to low refrigerant [1][3].

Frozen Evaporator Coils

When refrigerant levels are too low, moisture can build up on the evaporator coils and freeze into ice. This is a clear warning sign [1][3].

Higher Energy Bills

A sudden spike in your energy bill could mean trouble. With less refrigerant, your HVAC system has to work harder and run longer to maintain your desired temperature, which uses more electricity [1][3].

Spotting these warning signs early can make a big difference, but knowing how to address the issue is just as important.

First Steps After Finding a Leak

If you discover a refrigerant leak in your HVAC system, acting quickly is key to ensuring safety and minimizing damage. Here’s what to do:

Turn Off Your HVAC System

Switch off your HVAC system at the circuit breaker. This helps avoid further refrigerant loss, damage to the system, added strain on the compressor, and potential electrical risks. It’s an essential first step to protect both your equipment and the environment.

Ventilate the Area

Open windows and doors to let fresh air circulate and clear out any refrigerant gases. If you have ceiling fans, turn them on to help with air movement. Keep the area well-ventilated until a professional arrives to check the air quality and address the issue.

Keep People and Pets Away

Move your family members and pets to another part of the house and block access to the affected area. Mark the space with clear warnings to prevent anyone from entering. Avoid attempting any DIY fixes – refrigerant handling is dangerous and requires certified expertise.

“Handling refrigerants requires specialized training and equipment to ensure safety and compliance with environmental regulations”, stress HVAC safety guidelines from industry professionals.

After these steps, call a licensed HVAC technician. They’ll perform detailed leak detection tests and recommend the right repairs for your system.

Getting Professional Help

After addressing immediate safety concerns, the next step is to bring in professionals to properly diagnose and repair the issue. This ensures your system is safe, efficient, and meets regulatory standards.

Leak Detection Tests

Technicians rely on specialized tools to accurately locate leaks. Common methods include:

  • Electronic tools and pressure tests to detect leaks and identify pressure drops in the system.
  • Visual inspections to spot oil stains or ice buildup on coils and lines.
  • UV dye testing for locating hard-to-spot leaks.

“Leak detectors and monitoring systems alert technicians to rising refrigerant levels in the air” – US EPA, Refrigerant Safety [2]

Fix or Replace Decision

Deciding whether to repair or replace your HVAC system depends on a few important factors:

Factor Repair Replace
System Age Under 10 years old Over 10 years old
Leak Location One accessible spot Multiple spots or internal damage
Repair Cost Less than 30% of replacement More than 30% of replacement cost
System Efficiency Performs well overall Declining performance, higher bills

For older systems, replacement is often the smarter choice, especially if the unit has a history of frequent repairs or uses outdated refrigerants. Consulting a professional can help you make the best decision for your situation.

Hydrodynamics Inc.: HVAC Service Experts

Hydrodynamics Inc.

Hydrodynamics Inc., a family-owned business since 1994, offers a full range of HVAC services. Their certified technicians follow EPA guidelines and use state-of-the-art tools to address refrigerant leaks and other system issues. Services include:

  • Consultation and installation for system replacements.
  • Preventative maintenance programs to reduce the risk of future problems.

They work with systems of all sizes – residential, commercial, and industrial – providing reliable solutions tailored to your needs.

Stop Future Leaks

After fixing your system, it’s important to take steps to prevent leaks from happening again. It’s much cheaper and less stressful to prevent refrigerant leaks than to deal with system breakdowns later.

Schedule Regular Checkups

Routine inspections are key to catching problems early. These checkups should include annual pressure tests, checks on system components, and monitoring refrigerant levels. This helps keep your system running smoothly and can spot leaks before they become major issues.

“Refrigerant concentrations can be lowered by designing equipment with reduced leakage and promptly repairing leaks that do occur.” – US EPA, Refrigerant Safety [2]

Address Small Issues Quickly

Even minor problems can snowball into major system failures if ignored. Watch for early signs like inconsistent cooling, small ice buildup, or strange noises. Fixing these issues right away can save you from bigger headaches down the road.

Choose Professional Installation

How your system is installed plays a huge role in preventing leaks. Professional installation ensures:

  • Proper Sealing: Connections are tightly sealed and thoroughly tested.
  • High-Quality Materials: Only industry-grade refrigerant lines and fittings are used.
  • Manufacturer Guidelines Followed: Installation is done according to your system’s specific requirements.

The EPA highlights that proper installation can significantly lower risks tied to refrigerant leaks [2]. Skilled installers use advanced tools and techniques to ensure your system is leak-free and performs at its best from the start.

Next Steps

Once you’ve addressed a refrigerant leak, it’s crucial to shift your attention to keeping your HVAC system in good shape and preventing future problems.

Reach out to a certified HVAC technician to thoroughly inspect your system. They can run leak detection tests using specialized tools. Make sure to hire someone with plenty of experience in both detecting and fixing leaks.

Here’s what a professional inspection typically involves:

Inspection Component Why It Matters
Pressure Testing Pinpoints leaks and helps avoid damage
Component Check Spots wear and tear before it becomes a problem
Refrigerant Level Analysis Keeps your system running efficiently
Safety Assessment Identifies potential hazards and ensures safety

Regular maintenance is key. Set up a schedule for routine inspections and filter replacements. According to the EPA, timely repairs and proper upkeep are critical for the safe and efficient operation of your HVAC system.

FAQs

How do I know if my HVAC is leaking Freon?

Look out for these common warning signs:

Warning Sign What It Means
Poor Cooling Your system isn’t cooling as effectively as it should.
Longer Cycles The unit runs longer than usual to maintain the set temperature.
High Humidity Struggles to remove moisture, leaving indoor air feeling damp.
Frozen Coils Ice buildup on the evaporator coils caused by low refrigerant levels.
Rising Bills Increased energy costs due to reduced efficiency.

If you notice any of these issues:

  • Turn off the system and ensure the area is well-ventilated.
  • Reach out to a certified HVAC technician immediately.

Professionals like those at Hydrodynamics Inc. have the tools and expertise to pinpoint and fix refrigerant leaks safely, following all necessary safety regulations [2][4].

Taking quick action can help maintain your system’s performance and prevent expensive repairs down the line.

Top 6 Plumbing Maintenance Tips for Businesses

Top 6 Plumbing Maintenance Tips for Businesses

Avoid costly plumbing disasters with these six essential maintenance tips for businesses. From regular inspections to installing backflow prevention devices, these strategies can save you money, prevent downtime, and keep your commercial plumbing system running smoothly:

  • Conduct Regular Inspections: Schedule annual or quarterly checks to catch issues early.
  • Fix Leaks Quickly: Address leaks immediately to save water and prevent structural damage.
  • Keep Drainage Systems Clear: Use enzyme treatments and professional cleaning to avoid blockages.
  • Use the Right Tools: Invest in high-quality plumbing tools for effective maintenance.
  • Train Staff on Plumbing Care: Educate employees to spot and report problems early.
  • Install Backflow Prevention Devices: Protect your clean water supply from contamination.

Key takeaway: Preventive maintenance can save businesses up to $2,500 annually while avoiding expensive emergencies. Read on for actionable steps to protect your plumbing system.

Plumbing Maintenance at Commercial Facilities

1. Conduct Regular Inspections

Keeping up with regular plumbing inspections can save you from expensive emergencies and unexpected system failures. These inspections should include both visual checks of accessible parts and the use of camera technology to examine the inside of pipes [6].

For most systems, scheduling inspections once a year is a good rule of thumb. However, older systems or those with heavy usage – like in restaurants, hotels, or manufacturing facilities – may need inspections every quarter [6][3].

Here are the main areas to focus on during inspections:

Component What to Check Why It Matters
Water Supply Pressure, pipe condition Prevent bursts and water waste
Drainage System Flow, blockages Ensure proper waste removal
Plumbing Fixtures Wear, seals Stop leaks before they start
Backflow Devices Functionality Protect water quality

Modern tools have made inspections more effective. Professionals now use advanced equipment to find hidden leaks and map out pipe locations [7].

Always hire licensed plumbers with experience in commercial systems to ensure a thorough job. They’ll not only catch obvious problems but also spot subtle signs of wear that could turn into bigger issues down the line [6].

Inspections are only part of the solution – acting quickly on any identified problems, especially leaks, is essential to preventing further damage.

2. Fix Leaks Quickly

In commercial plumbing, dealing with leaks as soon as they appear is essential. Ignoring leaks can lead to higher water bills, structural damage, and disruptions to your business. Even a small leak can waste up to 20 gallons of water daily, significantly increasing costs [1].

Here are some effective ways to catch leaks early:

Detection Method Key Action & Benefits
Water Usage Monitoring Keep an eye on daily water use to identify sudden spikes that could signal hidden leaks.
Visual Inspections Inspect pipes and fixtures twice a day to find surface-level leaks before they worsen.
Professional Assessment Schedule quarterly plumbing checks to uncover hidden issues using specialized tools.

What to Do When a Leak Occurs:

  1. Find the source of the leak and shut off the water supply to that area.
  2. Call a licensed plumber to handle the necessary repairs.
  3. Document the issue for your maintenance records.

Signs You Might Have a Leak:

  • Damp spots, musty smells, or water stains on walls or ceilings.
  • Unusually high water bills or a sudden drop in water pressure.
  • Hearing water running when no fixtures are in use.

Make sure your staff is trained to report these signs immediately to prevent minor issues from becoming major problems [1]. It’s also a good idea to keep basic repair tools on hand for temporary fixes while waiting for professional help [8].

Important: Temporary solutions can buy you time but often lead to bigger expenses later. Always prioritize professional repairs with the right tools and materials designed for commercial plumbing systems [8].

While fixing leaks is a priority, keeping your drainage systems clear is just as important for maintaining a dependable plumbing system.

3. Keep Drainage Systems Clear

Keeping your drainage system in top condition is key to avoiding expensive disruptions in commercial operations. Industry data shows that businesses practicing regular drain maintenance can cut plumbing-related downtime by up to 75% [6].

Avoid Blockages with Smart Prevention

Grease buildup, paper products, and food waste are the usual culprits behind commercial drain blockages [1]. To tackle this, use a combination of strainers, monthly enzyme treatments, and routine professional cleanings.

Key Maintenance Tasks

Task How Often Why It Helps
Professional Cleaning (Hydro-jetting) Every 6 months Clears tough blockages and buildup
Enzyme Treatment Monthly Stops grease and organic buildup

Top Drain Maintenance Methods

  • Power Rodding: Breaks through stubborn blockages like tree roots.
  • Hydro-jetting: Blasts away debris and buildup with high-pressure water [5].

Spotting Early Warning Signs

Pay attention to slow drainage, gurgling noises, bad smells, or water backing up – these are red flags that your drains might be clogged and need quick action [4].

Regular maintenance not only helps prevent emergencies but also keeps operations running smoothly. For example, enzyme-based cleaners are a safer and more effective option than harsh chemicals for dissolving organic matter without harming your pipes [4]. This is especially crucial in industries like food service and healthcare, where hygiene is non-negotiable.

Using the right tools and maintenance practices ensures your plumbing system stays efficient and durable, saving you from unexpected headaches.

4. Use the Right Tools and Equipment

The tools you use for commercial plumbing maintenance aren’t just about making the job easier – they’re an investment in preventing expensive repairs and system breakdowns. In fact, businesses that consistently use appropriate plumbing tools can save up to $2,500 annually on repairs and emergency services [6].

Key Commercial Plumbing Tools

Tool Type Purpose
Diagnostic Tools Camera inspection systems for internal pipe checks
Repair Tools Pipe wrenches and pliers for accurate repairs
Emergency Kits Quick Seal Pipe Repair kits to manage leaks fast
Maintenance Gear Professional-grade drain snakes for thorough cleaning

Why Quality Tools Matter

Investing in high-quality, certified plumbing tools isn’t just about performance – it ensures safety and long-term reliability. These tools help keep your plumbing system in top shape and protect your overall investment [9].

Choosing the Right Tools

Select tools based on the specific needs of your facility. For example, Quick Seal Pipe Repair kits are a versatile option for handling leaks across various pipe materials, even in underwater situations [9].

Tool Maintenance Tips

Regular inspections are critical. Check your tools every six months to confirm they’re in good working condition, and replace any worn-out parts immediately [3].

Mistakes to Avoid

Using the wrong tools can cause more harm than good, leading to ineffective repairs and even damage to your system [6]. Always prioritize functionality over cost when choosing equipment [1].

Having the right tools is only part of the equation. Make sure your staff knows how to use them effectively to maximize their impact on your plumbing system’s performance and durability.

5. Train Staff on Plumbing Care

Teaching your staff how to handle plumbing care can cut down on downtime, reduce repair costs, and keep your system running smoothly. In fact, businesses with structured plumbing training programs report up to 30% fewer emergency maintenance calls each year [6].

Key Areas to Cover in Training

Training Area Focus Points Frequency
Routine Maintenance Spotting drainage issues, proper fixture use Monthly
Emergency Response Locating shut-off valves, following protocols Quarterly
Documentation Logging and reporting maintenance problems Ongoing

Establish Clear Reporting Procedures

Set up an easy-to-follow system for reporting plumbing issues. Assign specific contacts and outline steps for handling different types of problems [2].

How to Implement the Training

Design training sessions based on staff roles to make sure everyone knows their part in plumbing care. Include hands-on activities that simulate real-life scenarios. Add these sessions to your regular staff development program [1].

Mistakes to Avoid

Train your team to steer clear of common errors that can harm the plumbing system, such as:

  • Putting inappropriate items down drains
  • Ignoring strange noises
  • Attempting fixes without proper approval

Tracking Progress

Measure the success of your training by monitoring metrics like reported issues, response times, water usage, and the number of emergency repairs needed.

Stay Compliant with Regulations

Include local plumbing codes in your training to ensure compliance and avoid penalties. Keep records up-to-date and hold refresher courses to keep staff informed about best practices [3].

While proper training helps maintain your plumbing day-to-day, consider installing advanced systems, like backflow prevention devices, for added protection.

6. Install Backflow Prevention Devices

Installing backflow prevention devices is a key step in protecting your water system. These devices stop contaminated water from flowing back into your clean supply, keeping your operations safe and compliant.

Types of Devices and Installation

Device Type Best Used For Key Features
Double-Check Valve Assembly Low-risk applications Affordable, requires little upkeep
Reduced Pressure Zone (RPZ) High-risk situations Offers top-level protection, monitored continuously
Vacuum Breakers Irrigation systems Easy to set up, dependable function

Maintenance Tips to Keep in Mind

Testing schedules depend on your facility type and local rules, but inspections every six months are generally a good idea [3]. Focus on:

  • Installing devices in accessible areas.
  • Ensuring compliance with professional certifications.
  • Keeping detailed records.
  • Regularly checking performance.

Monitoring and Emergency Planning

Watch for these warning signs:

  • Sudden changes in water pressure.
  • Visible wear or corrosion on devices.
  • Any noticeable drop in performance.

Prepare for emergencies by having:

  • Clear steps to isolate the system.
  • Contact information for emergency services.
  • A plan for documenting incidents.

Consistent maintenance of backflow prevention devices not only protects your plumbing system but also ensures your business runs smoothly without unexpected disruptions. Pair this with other upkeep measures for a reliable water system.

Conclusion

Keeping up with plumbing maintenance helps avoid expensive problems and keeps operations running smoothly. Regular check-ups, fixing leaks quickly, and maintaining clear drainage systems can improve efficiency, cut costs, and prevent interruptions.

By following these six tips, businesses could save as much as $2,500 each year – transforming maintenance into a smart investment for steady operations [6]. Preventive care not only lowers expenses but also extends the life of plumbing systems, ensures compliance, and minimizes downtime.

Licensed plumbers are key to managing complex systems effectively. Their routine assessments catch potential issues early, helping to avoid major disruptions [3].