Electric Boilers vs Gas Boilers: Key Differences

Electric Boilers vs Gas Boilers: Key Differences

Electric and gas boilers serve different needs, and choosing the right one depends on efficiency, cost, safety, and environmental goals. Here’s a quick breakdown:

  • Efficiency: Electric boilers convert nearly 100% of electricity into heat, while modern gas boilers achieve 90–95% efficiency.
  • Costs: Electric boilers cost less to install ($6,469–$11,885) but have higher annual operating costs (~$1,700). Gas boilers are more affordable to run ($620–$1,260 annually) but require more maintenance.
  • Lifespan: Electric boilers last longer (15–25 years) compared to gas boilers (10–15 years).
  • Environmental Impact: Electric boilers produce no direct emissions, especially when powered by renewables, while gas boilers emit 0.215 kg of CO₂ per kWh.
  • Safety: Electric boilers eliminate risks like gas leaks and carbon monoxide, making them safer for facilities.

Quick Comparison

Feature Electric Boilers Gas Boilers
Efficiency 99–100% (point-of-use) 90–95% (modern systems)
Installation Cost $6,469–$11,885 $7,469–$14,885
Annual Operating Cost ~$1,700 $620–$1,260
Lifespan 15–25 years 10–15 years
Emissions Zero (with renewables) 0.215 kg CO₂/kWh
Safety No combustion risks Requires ventilation, risk of leaks

Electric boilers are ideal for precise heating and low-emission goals, while gas boilers excel in high-demand, cost-efficient operations. Choose based on your facility’s needs.

Industrial Boilers: Should You Go Electric or Gas-Fired?

How Electric and Gas Boilers Work

Electric and gas boilers generate heat in distinct ways, and these differences significantly influence their role in industrial applications. Below, we break down how each type operates.

Electric Boilers: Heating with Electrical Resistance

Electric boilers work by converting electricity directly into heat. Inside the system, resistance elements submerged in water heat it to produce steam or hot water for industrial use [5]. This process is highly efficient, with nearly 100% of the electrical energy converted into heat [8]. Because there’s no combustion involved, electric boilers don’t need flues or chimneys to vent exhaust gases. This not only simplifies installation but also eliminates safety risks tied to fuel storage and handling [5].

Gas Boilers: Heat from Combustion

Gas boilers operate by burning natural gas or propane. A burner mixes the gas with air and ignites it within a combustion chamber [6][7]. The resulting flame generates intense heat, which heats water to produce steam or hot water [5][7]. Key components include the burner, combustion chamber, heat exchanger, and a flue system that safely vents by-products like water vapor and carbon monoxide [6][9]. While modern gas boilers are quite efficient – typically achieving 90% to 95% efficiency – some energy is lost during combustion [5]. Unlike electric boilers, gas boilers require proper ventilation and adherence to strict safety standards due to the emissions and risks associated with fuel storage and combustion.

Efficiency Comparison: Electric vs Gas Boilers

When comparing boiler efficiency for industrial use, it’s essential to consider both the point-of-use efficiency and the broader system losses. While point-of-use numbers can look impressive, they don’t tell the whole story. Let’s break down these efficiencies and what they mean for overall performance.

Energy Conversion Efficiency

Electric boilers are highly efficient at converting energy into heat, with an impressive 99% efficiency rate. This is because they bypass the energy losses that occur during combustion [14].

Gas boilers, on the other hand, are efficient by combustion standards, with point-of-use efficiencies typically ranging from 90% to 95% [1]. However, they lose around 5% to 10% of energy through flue gases [1]. Modern condensing gas boilers can push efficiencies above 95% by capturing and using some of the heat that would otherwise escape [11].

The efficiency gap widens when you look at older systems. While modern electric boilers maintain their high efficiency over time, older gas boilers – those in operation for 25 years or more – can drop to around 60% efficiency [12]. These older systems often experience energy losses between 20% and 35%, making them prime candidates for replacement [11].

Boiler Type Point-of-Use Efficiency Overall System Efficiency
Electric 99–100% 30–45%
Gas (Modern) 90–95% 80–90%
Gas (Older) 60–80% 50–70%

System Energy Losses

System-wide efficiency paints a more complete picture, and this is where the differences between electric and gas boilers become clearer.

Electricity transmission comes with its own set of losses. As power travels from generation plants to industrial sites, transmission losses range from 7% to 12% [13]. Additionally, many fossil fuel power plants operate at only 30% to 50% efficiency when generating electricity [1]. These factors significantly impact the overall efficiency of electric boilers.

Gas delivery systems, however, are much more efficient. Natural gas pipelines lose only about 1% to 2% of energy during delivery [13], and the gas retains 90% to 95% of its efficiency when it reaches industrial facilities [1]. This delivery advantage helps gas boilers achieve better overall system efficiency compared to electric boilers, despite lower point-of-use efficiency.

Boilers also experience energy losses due to stack, radiation, and convection, which can account for 10% to 20% of energy loss [10]. Electric boilers avoid flue losses entirely since they don’t rely on combustion or chimneys [13]. Gas boilers, however, inherently lose energy during combustion and through the flue system [13]. That said, modern condensing gas boilers can recover some of this lost energy when exhaust temperatures fall below 176°F, achieving thermal efficiencies above 95% [15].

For applications requiring precise heating or in space-constrained environments, the 99% efficiency of electric boilers can outweigh grid-related losses. On the flip side, for high-demand, continuous operations, the superior overall system efficiency of gas boilers often makes them the more cost-effective option.

Cost Analysis: Installation, Operation, and Maintenance

When evaluating the total cost of ownership for boilers, you need to factor in installation, operation, and maintenance. Each type of boiler – electric or gas – affects long-term costs differently.

Installation Costs and Requirements

Electric boilers are generally simpler and less expensive to install than gas boilers. The cost of installing an electric boiler typically falls between $6,469 and $11,885, covering both labor and materials [16]. On the other hand, gas boiler installations often require additional work, such as installing flues, exhaust lines, drains, and fuel lines, which can add $1,000 to $3,000 to the overall cost [17]. Gas systems may also involve permits, coordination with utility companies, and safety inspections, which can extend the timeline and increase expenses.

Once the installation is complete, the next major cost consideration is the system’s day-to-day operation.

Operating Costs

The ongoing operational costs of electric and gas boilers differ significantly. Based on current U.S. energy rates – $0.2703 per kWh for electricity and $0.0699 per kWh for natural gas – gas boilers are more economical for continuous, high-demand operations. Natural gas is about three times cheaper than electricity per unit of energy [2]. While fuel costs are the primary factor, differences in system efficiency and infrastructure requirements also play a role in determining the overall operating expenses.

Beyond daily operation, maintenance expenses further distinguish these systems.

Maintenance Requirements

Maintenance needs are another key factor separating electric and gas boilers. According to the U.S. Energy Information Administration, the average annual maintenance cost for a natural gas boiler is about 16.2 times higher than that of an electric boiler [4]. Electric boilers, with their simpler designs and lack of combustion processes, require minimal upkeep. Maintenance for electric systems often involves only occasional replacement of heating elements, leading to costs that are up to 50% lower than those for fuel-fired systems [18].

Gas boilers, however, demand more extensive maintenance. Tasks include refractory repairs to address damage from high-temperature combustion, periodic non-destructive testing, burner cleaning and calibration, and regular inspection and maintenance of exhaust systems to ensure proper ventilation. These requirements contribute to higher long-term maintenance costs.

Industrial Applications: Choosing the Right Boiler

When it comes to selecting the right boiler for industrial use, the decision largely depends on aligning the system’s capabilities with the specific demands of your operation. Whether you opt for an electric or gas boiler will often hinge on factors like heating requirements, available space, and the need for temperature precision. Each type has its strengths, making it better suited to certain environments.

High-Demand Industrial Settings

For industries requiring substantial thermal output, gas boilers are often the go-to choice. Their ability to generate large amounts of heat almost instantly through combustion makes them ideal for manufacturing plants, foundries, and large-scale processing facilities. Unlike gas boilers, electric systems heat up more gradually and require a significant electrical supply to achieve similar output levels [3][19]. This makes gas boilers a more cost-effective option for operations that need continuous, high-output heating. However, when precise temperature control is a priority, electric boilers may be the better option.

Precision-Controlled Environments

Electric boilers shine in industries where maintaining exact temperatures is critical. Sectors like pharmaceutical manufacturing, healthcare, and laboratory research benefit from their ability to deliver nearly 99% efficiency by converting almost all electrical energy into heat [5]. Additionally, when powered by renewable energy sources, electric boilers can operate with minimal environmental impact [5]. Their precision and efficiency make them indispensable in applications where even minor temperature fluctuations cannot be tolerated.

Space-Limited Applications

In settings where space is limited, electric boilers offer a distinct advantage. Their compact design eliminates the need for bulky flues, ventilation systems, or extensive gas supply connections [3][20]. This makes them particularly well-suited for urban facilities, retrofitted buildings, or any location where maximizing floor space is crucial. On the other hand, gas boilers require additional infrastructure like ventilation systems and flues, which can significantly increase the overall footprint of the installation [3]. For facilities where space is at a premium, electric boilers provide a practical and space-efficient solution.

Safety and Environmental Impact

When choosing an industrial boiler, it’s essential to weigh both safety profiles and environmental impacts. Each system comes with unique risks and environmental considerations that can shape your operation’s safety measures and sustainability objectives.

Carbon Emissions and Renewable Energy

The environmental footprint of a boiler largely hinges on its energy source. Gas boilers release approximately 0.215 kg of CO₂ per kWh, while grid-powered electricity produces about 0.519 kg of CO₂ per kWh[1]. At first glance, electric boilers might seem to have a higher carbon footprint when relying on traditional grid electricity. However, when paired with renewable energy sources like solar or wind, electric boilers can achieve zero emissions, offering a completely carbon-neutral solution[22]. For instance, an all-electric boiler system has the potential to reduce emissions by about 708 tons of CO₂ annually and up to 17,700 tons over its operational lifetime[4].

Beyond emissions, the safety aspects of these systems are another critical factor to consider.

Safety Risks

The safety risks associated with gas and electric boilers differ significantly. Gas boilers, for instance, pose combustion-related dangers, including the risk of carbon monoxide (CO) poisoning. According to HSE statistics, unsafe gas appliances cause around seven fatalities annually in the UK due to CO poisoning[19]. Since carbon monoxide is both odorless and colorless, consistent monitoring is crucial to ensure safety[1].

Electric boilers, on the other hand, eliminate combustion risks entirely. Their simpler design minimizes the need for frequent safety inspections compared to gas systems. Robert Presser, Vice President of Acme Engineering Products, highlights the safety advantages of electric boilers:

“With gas burning boilers, any gas leak can increase the risk of an explosion wherever there are fuel lines, fumes, flames, or storage tanks. With electrode boilers, there are no combustion hazards because there are no flames, fumes, fuel lines, or storage tanks. Electric boilers – and specifically the electrode units – are inherently the safest boiler design today. These units do not need an operator because if anything goes wrong, a breaker trip automatically halts operations, preventing escalation.” [21]

Gas boilers demand regular servicing to detect leaks and ensure proper combustion. In contrast, electric boilers generally require less maintenance, making them an appealing option for facilities prioritizing worker safety and environmental responsibility. These distinctions are crucial when selecting a boiler system, as they tie directly into operational efficiency, regulatory compliance, and emerging technology trends, which will be addressed in the next section.

Regulatory shifts and energy policies are becoming key factors in determining boiler choices for industrial facilities. These changes emphasize the operational and environmental considerations discussed earlier, influencing the decision between electric and gas boilers.

Emissions Regulations

Gas boilers are under growing scrutiny due to stricter emissions standards across the U.S. Industrial boilers contribute up to 10% of industrial carbon emissions and 6% of industrial NOx pollution[24]. Alarmingly, 66% of the highest-emitting boilers are located in federally designated disadvantaged communities, where NOx levels are nearly double the national average[25].

Under the Clean Air Act, states have the authority to impose emissions limits on industrial boilers, often exceeding federal requirements[24]. A groundbreaking example is the South Coast Air Quality Management District’s (SCAQMD) Rule 1146.2, passed in June 2024. This rule mandates the electrification of industrial boilers and water heaters, aiming to cut NOx pollution by 5.6 tons daily once fully implemented[23].

In this regulatory landscape, electric boilers stand out as a cleaner alternative. Unlike gas boilers, they emit no pollutants such as carbon monoxide or nitrogen oxides during operation[26]. As emissions standards continue to tighten, electric systems are gaining increased governmental support.

Government Incentives for Electric Systems

Federal and state programs are actively promoting the adoption of electric boilers by offering financial incentives to offset their higher upfront costs compared to gas systems[28]. These incentives come in various forms, including tax credits, rebates, and low-interest loans, making the transition to electric systems more accessible.

The Clean Energy Rule, for instance, pushes federal agencies to minimize on-site fossil fuel use in new and significantly renovated facilities[29]. Some utilities are even offering reduced industrial electricity rates, further improving the return on investment for electric boilers[28]. Depending on factors like energy rates, usage, and available incentives, the payback period for these systems can range from 2 to 7 years[28].

Trevor Dolan, senior policy lead at Evergreen Action, highlights the transformative potential of these policies:

“By stepping in with supportive policies, states can correct market failures, drive meaningful emissions reductions, and help manufacturers modernize for a more competitive, low-carbon future – while protecting the communities that have long borne the brunt of industrial pollution.”[25]

These incentives, alongside advancements in technology, are setting the stage for electric boilers to seamlessly integrate with smart grids.

Smart Grid Integration

One of the standout features of electric boilers is their ability to integrate with smart grids. This capability allows them to participate in demand-response programs and adjust operations automatically based on grid conditions. Facilities can reduce energy costs by running boilers during off-peak hours when electricity rates are lower. Smart thermostats and control systems further enhance efficiency and monitoring of electric heating systems[31].

The global commercial electric boiler market is projected to grow at a CAGR of 15.5% between 2024 and 2032, with smart grid integration playing a significant role in this expansion[28]. The Renewable Thermal Collaborative’s Electrification Action Plan outlines ambitious goals for reducing industrial thermal emissions:

“Electrification Action Plan lays out an ambitious, multi-year strategy to address barriers to electrification. It provides a vision for the priority market, policy, and community actions that will drive the RTC towards its goal of a 30% reduction in U.S. industrial thermal emissions by 2030 and full sector decarbonization by 2050.”[27]

Industrial facilities are encouraged to explore local incentives and include them in their cost analyses when considering new equipment purchases[30]. As Kim Orbe from the Sierra Club points out:

“Despite gas industry claims, non-polluting electric equipment is already here and has far more momentum than its gas-powered rivals.”[23]

With regulatory and technological trends favoring electric systems, they are becoming an increasingly appealing choice for forward-thinking industrial operations.

Conclusion: Making the Right Choice

When it comes to selecting the right boiler, factors like efficiency, cost, safety, and compliance with regulations play a major role. The best choice ultimately depends on your facility’s specific needs, the regulatory landscape, and your long-term operational objectives. Each boiler type has its own strengths, tailored to different industrial requirements.

Electric boilers are ideal for settings where precision is key, offering nearly 100% energy conversion and precise temperature control. They also eliminate combustion-related risks and produce zero direct emissions, making them an appealing option as environmental regulations become stricter. On the other hand, gas boilers deliver powerful, rapid heating for high-demand operations. While their efficiency is slightly lower, the lower cost of natural gas often makes them more economical. However, it’s worth noting that, according to the U.S. Energy Information Administration, maintaining a natural gas boiler can cost about 16.2 times more annually than maintaining an electric system[4].

Regulations are also reshaping boiler preferences across industries. While electricity costs are about 2.4 times higher than natural gas in areas like Baltimore (based on 2024 utility rates), government incentives and smart grid technologies can help mitigate these higher expenses.

Given the complexities, a professional assessment is crucial. Every industrial facility has distinct heating requirements, space limitations, and operational goals. Hydrodynamics Inc., with over 30 years of experience, provides in-depth evaluations of energy usage, compliance needs, and long-term costs, helping facilities make informed decisions.

The right boiler choice comes down to aligning your operational needs, infrastructure, and financial priorities with expert guidance to ensure optimal results.

FAQs

What are the long-term costs of using an electric boiler instead of a gas boiler in industrial settings?

Electric Boiler vs. Gas Boiler: Weighing the Costs

Deciding between an electric boiler and a gas boiler for industrial applications means considering several long-term cost factors. While electric boilers typically come with a higher upfront price – about 12% more than gas boilers – they boast efficiency levels of up to 99%, significantly outperforming the 80–90% efficiency range of most gas boilers. They also require less maintenance, which can help cut down on ongoing service expenses.

That said, electricity tends to be more expensive than natural gas, which could lead to higher operating costs, especially for industries with substantial heating demands. Ultimately, the cost-effectiveness of either option hinges on local energy prices and the specific heating requirements of your facility. For businesses that prioritize energy efficiency and lower maintenance needs, electric boilers might still be the better investment, even with the higher energy costs.

What role do government incentives and smart grid technology play in choosing electric boilers over gas boilers?

Government Incentives and Efficiency of Electric Boilers

Government programs can make switching to electric boilers easier on your wallet. In the U.S., federal tax credits for energy-efficient home upgrades can help offset installation costs. For instance, homeowners might be eligible for up to $3,200 annually in tax credits when they invest in qualifying improvements. Combine that with the fact that many electric boilers boast efficiency ratings of over 98%, and you’re looking at significant long-term energy savings – even in areas where electricity prices are higher than gas.

Another benefit lies in smart grid technology. These systems enable buildings to adjust their energy use in response to real-time grid demand. This feature can lower costs during peak times while also enhancing overall efficiency. Plus, electric boilers pair seamlessly with renewable energy sources, making them a forward-thinking choice for a cleaner, more sustainable energy future.

What safety factors should you consider when choosing between electric and gas boilers for industrial use?

Safety Considerations: Electric vs. Gas Boilers in Industrial Settings

When choosing between electric and gas boilers for industrial use, safety is a critical factor to evaluate.

Electric boilers are often considered safer because they don’t rely on combustion. This means there’s no risk of carbon monoxide poisoning, a serious concern with gas systems. Additionally, electric boilers have fewer mechanical components and don’t require a flue system, which minimizes the risks of fires or explosions.

Gas boilers, however, operate through combustion. While effective, this process can release harmful gases or even lead to explosions if the system isn’t properly maintained. Regular inspections and diligent upkeep are absolutely necessary to ensure the safe operation of gas boilers.

In the end, the best choice depends on your specific industrial safety requirements. No matter which type you select, consistent maintenance is key to ensuring a safe and reliable operation.

How to Replace Lead Water Filters

How to Replace Lead Water Filters

Replacing a lead water filter is essential to ensure your water is safe to drink and free from harmful contaminants like lead. Here’s a quick guide to help you get started:

  • Why Replace Filters? Over time, filters lose their effectiveness. Replacing them ensures your water stays clean and meets EPA safety standards for lead levels (below 0.015 mg/L).
  • When to Replace? Typically every 6–12 months, or sooner if water flow slows, taste changes, or the filter shows visible buildup.
  • What You’ll Need:
    • Tools: Adjustable wrench, filter housing wrench, plumber’s tape.
    • Safety Gear: Nitrile gloves, safety goggles.
    • Other Items: Replacement filter (NSF/ANSI 53-certified), cleaning supplies, and a bucket.
  • Steps to Replace:
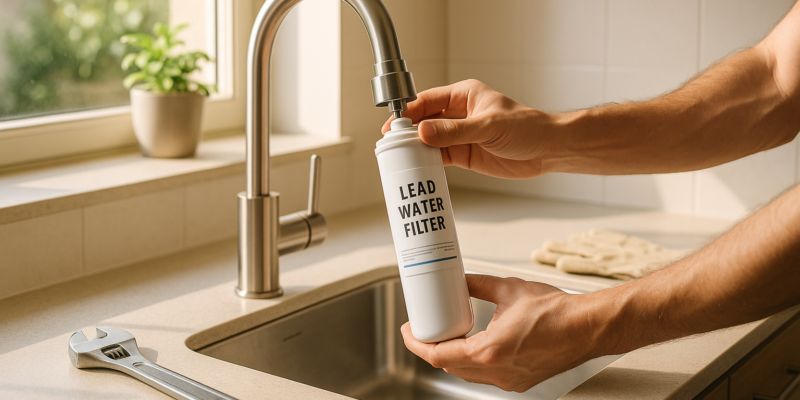
    1. Shut off the water supply and release pressure.
    2. Remove the old filter using a wrench.
    3. Clean the filter housing thoroughly.
    4. Install the new filter, ensuring proper alignment and sealing.
    5. Test the system for leaks and flush with water for 5 minutes.

Pro Tip: Keep a log of replacement dates and test your water regularly to monitor filter performance.

If you encounter issues like damaged pipes or pressure problems, or if you have a complex system, consider hiring a professional like Hydrodynamics Inc. for assistance.

How To Change a Whole House Water Filter – Replace Water …

About Lead Water Filters

Lead water filters are designed to reduce lead levels in drinking water, helping to make it safer for household use. Here’s a closer look at how they work and what you need to know.

How Lead Filters Work

These filters rely on a multi-stage system that typically includes activated carbon and ion exchange resin. As water passes through, these materials trap and hold lead particles, effectively reducing the lead content in the water.

Meeting Safety Standards

To ensure effectiveness, filters should meet NSF/ANSI Standard 53. This certification guarantees that the filter can lower lead levels to below the EPA’s limit of 0.015 mg/L.

When to Replace Filters

Follow the replacement schedule provided by the manufacturer. Factors like heavy water usage, local water conditions, or noticeable changes in water pressure or taste can signal the need for a new filter.

Required Tools and Materials

To replace a lead water filter without interruptions, make sure you have everything ready. Here’s a breakdown of the tools and materials you’ll need.

Basic Tools

These are the essentials for a standard filter replacement:

  • NSF/ANSI 53-certified replacement filter: Ensure it matches your system.
  • Adjustable Wrench: A 12-inch or larger wrench to loosen the filter housing.
  • Safety Gear:
    • Heavy-duty nitrile gloves
    • Safety goggles with side protection
    • N95 dust mask (useful during cleanup)
  • Collection Items:
    • A 2-gallon bucket or basin
    • Clean towels or rags
    • Leak-proof disposal bag for used filters

Additional Tools

These extras can make the job easier and improve results:

  • Filter Housing Wrench: Designed specifically for your filter model.
  • Plumber’s Tape: Use 1/2-inch PTFE tape to seal connections properly.
  • Cleaning Supplies:
    • Food-grade silicone lubricant
    • A 50/50 white vinegar and water solution
    • Soft-bristled brush for scrubbing
  • Testing Materials:
    • Water pressure gauge
    • EPA-certified lead testing kit for post-replacement checks
  • Documentation Tools:
    • Filter replacement log to track changes
    • Permanent marker for labeling dates

Keep these tools organized in a maintenance kit for future use. Store cleaning supplies separately to prevent contamination. Before starting, inspect all tools for any signs of wear or damage.

Safety Steps

Stick to these safety measures to safeguard your health and minimize contamination risks.

Shutting Off Water

  • Find the main water shutoff valve in your home.
  • Turn the valve clockwise to stop the water flow.
  • Open a faucet to release any leftover water in the pipes.
  • Allow about two minutes for the system to fully depressurize.

Protective Gear

Use the right protective equipment to keep yourself safe:

  • Nitrile gloves (heavy-duty)
  • Safety goggles

Proper Filter Disposal

Dispose of used filters in line with local disposal rules. Not sure what to do? Reach out to Hydrodynamics Inc. for expert assistance.

Replacement Instructions

Now that you’ve taken the necessary safety measures, let’s go through the filter replacement process step by step.

Removing the Old Filter

Start by placing a bucket underneath to catch any leftover water. Use a filter wrench to unscrew the filter housing by turning it counterclockwise. If the housing feels stuck, avoid forcing it to prevent damage to the threads. Be cautious – the filter will be heavy due to trapped water, so hold it securely while removing it. If it remains stuck, contact a certified technician for assistance.

Cleaning the Housing

Check the housing for any damage, worn O-rings, mineral deposits, thread issues, or signs of corrosion.

Clean the inside of the housing with a soft cloth, focusing on the sealing areas. Avoid abrasive materials or harsh chemicals that could harm the components. Once cleaned and inspected, you’re ready to move on to installing the new filter.

Installing the New Filter

When setting up the new filter, follow these steps:

  • Ensure the replacement filter matches your system’s specifications.
  • Double-check that the O-rings are seated correctly.
  • Confirm the filter is positioned properly (look for “FLOW” arrows to guide you).
  • Hand-tighten the housing first, then use the filter wrench for final tightening. Be careful not to overtighten.

Testing the System

Once the new filter is installed, slowly turn the water back on at the main valve. Open the nearest faucet to release any trapped air and inspect the filter housing for leaks. Let cold water run for about 5 minutes to flush the system and confirm all connections are sealed properly. If you encounter any problems during installation or testing, reach out to Hydrodynamics Inc. Their certified technicians are ready to help ensure your lead water filter is installed and working correctly.

Filter Care and Longevity

Keeping your lead water filter in good condition is key to ensuring it works properly and keeps your household water safe.

Replacement Schedule

Replace your lead filter according to the manufacturer’s guidelines, usually every six months. This helps maintain its efficiency and extends its lifespan. Here are some signs it’s time for a replacement:

  • Slower water flow: Reduced water pressure might mean the filter is clogged.
  • Visible changes: Discoloration or debris buildup on the filter.
  • Timeframe: You’ve reached the replacement interval suggested by the manufacturer.
  • Water quality issues: Changes in taste, smell, or appearance of your water.

Maintenance Records

Keeping a record of your filter’s performance and maintenance is a simple way to stay on top of replacements. Here’s what to track:

Information to Record Why It Matters
Installation date Helps you know when the next replacement is due
Filter model number Ensures you buy the correct replacement parts
Replacement dates Keeps a history of your maintenance schedule
Water quality test results Tracks how well the filter is working
System pressure readings Can signal potential problems early

Water Testing

Regular water testing ensures your filter is effectively reducing lead and other contaminants. Companies like Hydrodynamics Inc. offer detailed water testing services that can:

  • Measure lead levels before and after filtration.
  • Detect other potential contaminants.
  • Confirm how well your filter is working.
  • Provide comprehensive water quality reports.

Professional Help

While many lead water filter replacements can be done on your own, certain situations require the expertise of a professional to ensure everything is done safely and effectively.

Common Problems

Below are some signs that it’s time to call in a professional:

Warning Sign What It Means Action Required
Pipe damage Cracks or corrosion near the filter housing Get a professional inspection ASAP
System pressure issues Pressure changes after replacing the filter Schedule professional pressure testing
Complex installations Systems with multiple filters or whole-house setups Hire an expert for proper installation
Water line concerns Problems with the main water line Have a professional assess the issue
Unusual water quality Quality problems persist after filter changes Arrange for comprehensive water testing

In these situations, professional help ensures your system operates as it should.

Hydrodynamics Inc. Support

Hydrodynamics Inc., a family-run business established in 1994, provides a full range of water filtration services for homes and businesses. Their team of certified technicians is equipped to handle installations, water quality testing, system maintenance, water line repairs, and even emergency services.

For more complex jobs, their Certified A.S.S.E Backflow Testing technicians can evaluate your system, perform water quality testing, install filters according to local regulations, check pressure and flow rates, and maintain detailed service records.

Professional installation is especially important for whole-house systems, commercial setups, or configurations involving multiple filters. Hydrodynamics Inc. ensures everything is done right the first time.

Summary

To ensure your drinking water stays safe, it’s crucial to maintain and replace your lead water filter regularly. This helps avoid contaminant buildup and keeps the filtration system working as it should.

Here are some key points to help with filter maintenance:

Aspect Key Points What to Do
Timing Filters lose effectiveness over time Replace according to the manufacturer’s timeline (usually every 6–12 months)
Safety Proper disposal and handling are important Wear protective gear and follow local disposal rules
Documentation Track your maintenance activities Log installation and replacement dates for easy reference
Professional Help Some systems may need expert care Hire certified technicians for complex or whole-house systems

FAQs

What are the signs that my lead water filter needs to be replaced earlier than expected?

If your lead water filter isn’t performing as expected, there are a few signs that it might need replacing sooner than the recommended schedule. These include:

  • Reduced water flow: If water pressure drops significantly, it could indicate the filter is clogged.
  • Unusual taste or odor: A metallic taste or unpleasant smell in your water might mean the filter is no longer effectively removing contaminants.
  • Cloudy or discolored water: This can be a sign that the filter is no longer functioning properly.

To ensure your water remains safe and clean, always follow the manufacturer’s guidelines for replacement and monitor for these signs regularly. If you’re unsure or need professional assistance, Hydrodynamics Inc. can help with expert water conditioning services tailored to your needs.

How do I choose a replacement filter that works with my water filtration system?

To ensure compatibility, check the model number or specifications of your current water filtration system. Most systems have this information printed on the unit or included in the user manual. Look for replacement filters specifically designed for your system’s brand and model. Be sure to match the filter type (e.g., sediment, carbon block) to your system’s requirements.

If you’re unsure, consult your system’s manufacturer or a professional service provider like Hydrodynamics Inc., who can guide you in selecting the right filter for your needs.

What should I do if my water quality doesn’t improve after replacing the lead water filter?

If your water quality remains poor even after replacing the lead water filter, it could point to a more complex issue in your water system. In such cases, it’s best to consult a professional to assess the problem and identify the root cause.

For expert assistance, consider reaching out to Hydrodynamics Inc., where professionals specialize in water conditioning services that can help resolve persistent water quality concerns effectively.

How to Install Rainwater Harvesting Systems

How to Install Rainwater Harvesting Systems

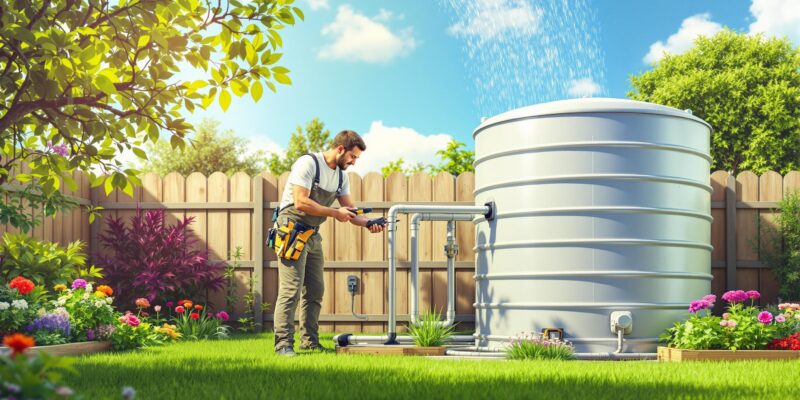
Want to save water and reduce your utility bills? Installing a rainwater harvesting system can help you collect, store, and use rainwater for tasks like irrigation, laundry, and toilet flushing. Here’s how to get started:

  • Plan Your System: Assess your water usage, calculate your roof’s collection potential, and select the right equipment (tanks, filters, and pumps).
  • Prepare the Site: Choose a stable, level location for the tank, close to downspouts, and ensure proper drainage.
  • Set Up the Collection System: Clean and modify gutters, install pipes with filters, and protect components from freezing if needed.
  • Install the Tank and Overflow System: Place the tank securely, align it with plumbing, and add an overflow outlet to prevent flooding.
  • Integrate Plumbing: Connect the pump, pressure tank, and filtration system to supply non-drinking water for household use.
  • Maintain the System: Regularly inspect and clean components like gutters, filters, and pumps to keep everything running smoothly.

Pro Tip: For expert installation and compliance with local codes, consider hiring professionals like Hydrodynamics Inc. Proper planning and regular maintenance can ensure your system operates efficiently year-round.

12 Steps to Creating the Complete Rain Harvesting System

System Planning

Planning is the foundation of an effective system that meets your non-potable water needs. Start by assessing your water usage and designing a system with the right capacity.

Evaluating Water Usage

Take a close look at your water bills from the past year. Break down your consumption into categories like toilet flushing, irrigation, and laundry. This will help you estimate how much water can be replaced with collected rainwater.

Planning Collection Capacity

Your collection potential depends on two main factors: the size of your roof and local rainfall. Here’s how to calculate it:

  • Measure your roof area in square feet (ft²).
  • Multiply this by your area’s annual rainfall in inches.
  • Use a conversion factor to determine the volume of water, and subtract system losses (like evaporation or inefficiencies).

Once you know how much water you can collect and how much you need, you’re ready to choose equipment that fits your home.

Choosing Equipment

The right equipment ensures your system runs smoothly. Here’s what to consider:

  • Storage Tanks: Pick tanks made of materials like polyethylene, fiberglass, or concrete. Decide between above-ground or underground placement based on your available space and capacity needs.
  • Filtration: Install filters like first-flush diverters, leaf screens, and sediment filters to suit your water’s intended use. For expert help with filtration systems, check out services like Hydrodynamics Inc. (https://dynamichvacpa.com).
  • Pumps and Pressure Tanks: Choose submersible or external pumps that match your system’s flow rate. Add a pressure tank to maintain steady water delivery.

When selecting equipment, keep local building codes, available space, budget, and maintenance in mind. If you’re thinking about future upgrades, plan for expansion now. Professional installers can help ensure everything is sized correctly, integrates well, and meets local regulations.

Site Preparation

After planning your system, it’s time to get the installation site ready for the best performance.

Tank Location

Once you’ve chosen your equipment, pick the ideal spot for the tank. Keep these factors in mind:

  • Ground Stability: Use level, stable ground that can handle the tank’s full weight.
  • Proximity to Downspouts: Place the tank close to roof downspouts to keep pipe lengths short and maintain good water flow.
  • Accessibility: Leave enough space around the tank for regular maintenance and inspections.
  • Local Codes: Follow local building codes and setback rules to ensure proper distance from property lines and buildings.
  • Sun Exposure: For above-ground tanks, a shaded spot helps reduce algae growth and can extend the tank’s lifespan.

Foundation Setup

A solid foundation is critical for the system’s safety and long-term reliability. Here’s what to do:

  1. Ground Preparation: Remove any plants and loose soil to expose firm, stable ground.
  2. Base Construction: Use a foundation that suits your setup, such as a concrete pad or compacted gravel. Make sure the surface is level and can support the tank’s weight.
  3. Leveling and Drainage: Ensure the base is level and include drainage, like a French drain, especially in areas with heavy clay soil. Reinforce the foundation to prevent cracking and avoid water pooling.

Collection System Setup

Setting up a rainwater collection system starts with ensuring your gutters can properly channel water and that the connecting pipes allow for smooth flow.

Gutter Preparation

Begin by cleaning your gutters and checking for any leaks or damage. Add a leaf guard or screen to the gutters to filter out large debris before it reaches the storage tank. Modify your downspouts with diverters to direct water into the system while keeping maintenance simple. If you live in a colder area, consider using freeze-resistant parts to protect the system during winter.

Installing Tank Pipes

Once the gutters are ready, focus on connecting the pipes. PVC pipes are a popular choice due to their durability and ease of upkeep. Ensure the pipes are installed with a slight slope to maintain steady water flow. Add filter housings and access points for cleaning, which will help keep debris out and make maintenance easier.

For areas that experience frost, Hydrodynamics (https://dynamichvacpa.com) recommends using heat tape on exposed pipes or placing them underground according to local frost-depth guidelines. These steps help ensure your system operates efficiently, even in colder conditions.

Tank Installation

Tank Placement

Place the tank on a flat, stable surface that can support its weight when full. Make sure it’s level and easy to access for routine maintenance. Align the tank’s inlet and outlet with your plumbing system to simplify the connection process. Proper positioning is key to ensuring the system works smoothly.

Overflow System Setup

To avoid flooding, install an overflow outlet that channels excess water to a designated drainage or stormwater system. This prevents water from pooling around the tank and causing damage to your property. A well-thought-out overflow system works hand-in-hand with the rest of your plumbing setup.

Plumbing Integration

Once your collection system and tank are ready, the next step is to connect your plumbing. This involves setting up a pump, water treatment system, and dedicated lines for non-drinking water use.

Pump System Setup

Choose a pump and pressure tank that can deliver steady water pressure. For most homes, a flow rate of 8–12 gallons per minute (gpm) is ideal. Consider factors like the vertical lift distance and whether you need 120V or 240V power. If you’re unsure, companies like Hydrodynamics Inc. specialize in well pump services and can guide you through the process [1].

Water Treatment Installation

To ensure clean water, start with a 20-micron sediment filter to catch debris. Follow this with a carbon filter to handle organic materials, and finish with a UV sterilizer to eliminate 99.9% of bacteria. If you need help choosing the right setup for your non-drinking water needs, professional water conditioning services are a great resource [1].

Non-Drinking Water Lines

Set up separate lines for non-potable water to avoid mixing with drinking water. Use purple PVC pipes or tape to clearly mark these lines, and install backflow preventers at key points. These lines can be used for tasks like flushing toilets, watering gardens, doing laundry, and outdoor cleaning. For more complex setups, a professional plumber can ensure everything meets local codes and standards.

System Maintenance

Regular maintenance ensures your system runs efficiently and lasts longer. A well-planned routine can help you avoid costly repairs and unexpected breakdowns.

Inspection Schedule

A monthly maintenance checklist is essential for keeping your system in good shape. Pay attention to these critical components:

Component Inspection Frequency Key Tasks
Gutters & Downspouts Monthly Clear debris, check for leaks, and confirm proper slope
First-flush Diverter Monthly Empty sediment and clean the filter screen
Storage Tank Quarterly Inspect for cracks, clean the interior, and check the overflow function
Pump System Quarterly Test pressure, inspect seals, and ensure proper operation
Filters Every 2–3 months Replace or clean filters; check for bypass issues

For more in-depth evaluations, schedule annual professional inspections. Companies like Hydrodynamics Inc. offer detailed services, including pressure testing and filter performance checks. Additionally, take extra precautions during colder months to protect your system.

Winter Protection

Freezing temperatures can damage your system if proper steps aren’t taken. When the temperature drops below 32°F, follow these measures:

  • Insulate exposed pipes: Use outdoor-rated foam insulation and apply heat tape to vulnerable sections.
  • Drain above-ground components: Empty pipes, filters, and pump housings to prevent freezing.
  • Monitor tank temperature: Install a water temperature sensor to avoid freezing inside the tank.

For underground tanks, ensure they are buried below the frost line (typically 36–48 inches in Pennsylvania). If your system includes a pump house, maintain its temperature above 40°F with a thermostat-controlled heater.

Problem Solving

Routine maintenance helps prevent issues, but problems may still arise. Address them promptly with the following solutions:

Problem Likely Cause Solution
Low Water Pressure Clogged filters or a failing pump Clean or replace filters; check pump operation
Overflow Issues Blocked overflow or full tank Clear blockages; verify tank level sensors
Contaminated Water Failed filter or UV system Replace filters; service the UV sterilizer
Pump Cycling Pressure tank issues or leaks Inspect the pressure tank; repair any leaks

Unusual noises, poor water quality, or fluctuating pressure are signs that something may be wrong. Contact a professional, such as Hydrodynamics Inc., for expert assistance.

Finally, maintain detailed records of all maintenance tasks, including dates, actions performed, and parts replaced. These records help you monitor system performance and anticipate future needs.

Next Steps

After completing your installation and initial setup, use the checklist below to inspect all components thoroughly:

Component Verification Steps Critical Checks
System Connections Check all pipe joints and fittings Look for leaks while the system is under full pressure
Overflow System Test with a simulated full tank Ensure drainage directs water away from the foundation
Pump Operation Run a full pump cycle Monitor for consistent pressure and steady flow rate
Water Quality Test the first batch of collected water Confirm the filtration system is working effectively

This checklist helps confirm that your system is functioning correctly before starting routine maintenance.

For homeowners in northeastern Pennsylvania, Hydrodynamics Inc. provides professional system assessments and fine-tuning services [1]. Their certified technicians ensure your setup complies with local codes and operates at its best.

“It was a good choice. They were prompt and knowledgeable and efficient. Very pleased with their work.” – Emma K., Drums, PA [1]

Plan for a professional inspection within the first month to catch and fix minor issues early. Hydrodynamics Inc. can also fine-tune your filtration system and make sure it integrates seamlessly with your plumbing.

Since temperatures in NEPA often drop below 32°F in winter, professional winterization services are highly recommended. A service agreement that includes regular maintenance and seasonal preparations can help protect your system and keep it running smoothly all year.

Make sure to keep detailed maintenance records. These will help you monitor system performance and plan for future needs.

Rainwater Harvesting Plumbing Basics

Rainwater Harvesting Plumbing Basics

Rainwater harvesting is a simple way to collect and use rainwater to save money, reduce water usage, and support conservation efforts. A basic system includes:

  • Catchment Surface: Captures rainwater (like your roof).
  • Conveyance System: Moves water to storage (gutters and pipes).
  • Storage Tank: Holds the collected water.
  • Filtration and Distribution: Cleans and supplies water for use.

Key benefits include cutting municipal water use by up to 30%, lowering costs, and providing water for irrigation, toilets, or cooling systems. Proper setup involves choosing the right tank size, ensuring good filtration, and connecting the system to your existing plumbing. Regular maintenance keeps the system running smoothly.

Quick Tip: A 100m² roof can collect 1,000 liters of water from just 10mm of rain. Calculate your storage needs based on your roof size and local rainfall.

12 Steps to Creating the Complete Rain Harvesting System

System Parts and Equipment

A well-designed rainwater harvesting system depends on several key components working together effectively. Each part is essential for collecting, filtering, and distributing water throughout your property.

Roof and Gutter Setup

The process starts with the roof and gutters, which direct rainwater into the system. The roof serves as the collection surface, so choosing non-toxic and durable materials is important for efficient water gathering.

Roofing Material Collection Efficiency Durability
Reinforced Cement Concrete 70-80% 30+ years
Galvanized Iron 80-85% 15-20 years
Corrugated Sheets 75-80% 10-15 years

Gutters and downspouts, installed with a slight slope (1/16 inch per foot), help direct rainwater smoothly into the storage system [2].

Tanks and Filters

Tanks made from FDA-approved polyester resin are commonly used because they are food-grade and long-lasting [1].

Filtration is critical to ensure clean water. Key filtration elements include:

  • First flush diverters: Remove the initial runoff, which may contain contaminants.
  • Inlet filters: Trap debris before water enters the tank.
  • Mesh screens: Positioned at roof level to block larger particles.

“Rainwater harvesting is a process that intercepts, collects, and stores rainwater for future use.” – Rainwater Management Solutions [4]

Once filtered, water is stored in tanks and delivered through a distribution system.

Pumps and Pipes

To maintain steady water pressure, the system relies on the following components:

  • Submersible or external pumps tailored to the system’s flow needs.
  • PVC or copper piping approved for potable water.
  • Pressure tanks to ensure consistent water delivery.
  • Backup water connections with backflow prevention for safety.

Submersible pumps, combined with pressure tanks, help maintain smooth water distribution [1][3]. Professional installation ensures proper sizing and efficient plumbing.

With these essential components in place, the next step is integrating the system into your property.

Planning and Setup Guide

Before installing a rainwater harvesting system, proper planning is crucial to ensure it works efficiently and meets local regulations. A well-thought-out approach will help you create a reliable and effective setup.

Site and Usage Review

Start by figuring out how much rainwater your property can collect. On average, each square meter of roof space can gather about 1 liter of water for every millimeter of rainfall. For example, a roof area of 100 square meters could collect up to 1,000 liters from just 10mm of rain [1].

When deciding on storage capacity, consider these factors:

Household Size Minimum Tank Size Weekly Usage Estimate
2-3 people (2 bedrooms) 3,000 liters 2,500 liters
4-5 people (3-4 bedrooms) 5,000 liters 4,000 liters
6+ people 7,000+ liters 5,500+ liters

To calculate the tank size you need, multiply your roof area by 0.76 (this accounts for losses during collection and filtration), then multiply that by your area’s annual rainfall. Finally, multiply by 0.05 to account for reserve capacity [3].

Once you’ve assessed your property’s potential and storage needs, it’s time to focus on installing the system components.

Setup Steps

  1. Prepare the Collection Area
    Clean your roof and gutters thoroughly. Check for leaks or damage that might affect water quality. To minimize debris, install coarse mesh screens at the gutter points [2].
  2. Install Key Components
    Place the storage tank in a shaded spot to keep the water cool and discourage bacterial growth. Add a first-flush diverter between the downspout and the tank to improve water quality [3].
  3. Connect the System
    Use FDA-approved piping materials to link the tank to your house plumbing. Install pumps and pressure tanks as needed to maintain steady water pressure throughout your system [1].

Rules and Permits

Before you begin, check your local regulations to ensure your system meets legal requirements and qualifies for any available incentives. Rules differ by state: for instance, Utah requires registration, while Tennessee has no restrictions. Some states even offer tax credits or rebates for rainwater systems [1][3].

“Make sure that your rainwater harvesting trade contractor is aware of and complies with local codes and regulations.” [1]

Reach out to your local building department to confirm any permits or specific requirements. In many areas, professional installation is mandatory, especially if the system will supply drinking water [2]. Knowing these rules ahead of time ensures your system is both safe and compliant.

Connecting to House Plumbing

Linking a rainwater harvesting system to your home’s plumbing ensures smooth operation and dependable water supply.

Plumbing Connections

For the system to function safely and efficiently, you’ll need the following components:

Component Purpose Material Requirements
Bulkhead Fitting Penetrates tank wall Food-grade, UV-resistant
Check Valves Stops backflow Bronze or stainless steel
Gate Valves Isolates the system Brass or stainless steel
Pressure Tank Keeps water flow steady NSF-certified

Make sure to use FDA-approved piping, and set the pump to maintain a pressure of 20-30 PSI for household use [1][3].

Once the main plumbing setup is complete, a backup system can ensure a steady water supply.

Backup Water System

A three-way valve allows you to switch between rainwater and municipal water when needed [2][3].

Key features of backup systems include:

  • Automatic switching valve: Engages when tank levels fall below 10%.
  • Backflow prevention device: Keeps municipal water safe.
  • Water level sensors: Track tank capacity and activate the backup system.

“A well-designed rainwater harvesting system can provide a reliable source of water for non-potable uses, reducing the demand on potable water supplies.” – U.S. Department of Energy, Federal Energy Management Program [3]

Hiring professionals ensures the system is installed correctly and meets all regulations. Companies like Hydrodynamics Inc. specialize in integrating rainwater harvesting systems with existing plumbing.

Upkeep and Fixes

Monthly Maintenance Tasks

Keeping your rainwater harvesting system in good shape means regular attention to its components. Here’s a breakdown of what to check each month:

Component Monthly Tasks Required Tools
Gutters & Downspouts Clear debris, check alignment Ladder, debris scoop
Tank Screens Inspect for damage, clean buildup Brush
First Flush Diverter Empty debris, inspect seals Wrench
Pump System Test pressure, inspect connections Pressure gauge
Tank & Fittings Look for cracks, check for leaks Flashlight

To keep everything running smoothly, aim for water pressure between 20-30 PSI [1][3].

Even with regular care, occasional hiccups can happen. Knowing how to troubleshoot will help you address most issues quickly.

Problem-Solving Guide

When problems arise, a little troubleshooting can go a long way. Here are some common issues and how to handle them:

  • Pump Problems: If the pump isn’t working, check for airlocks or worn parts. Low water pressure might mean a clogged filter or a pump issue [3].
  • Winter Protection: In cold climates, winterizing is a must. Insulate pipes, keep tank temperatures above 40°F with submersible heaters, and bury supply lines at least 12 inches below the frost line to avoid freezing.
  • Algae Prevention: To keep algae at bay, add 1 cup of food-grade hydrogen peroxide for every 1,000 gallons of water. It’s a safe and effective method [1].

For tougher or ongoing problems, consider hiring a professional. Maintenance specialists can perform detailed inspections, fix issues, and ensure your system follows local regulations [2][3].

Next Steps

Main Points Review

Before you finalize your rainwater harvesting system, make sure you’ve covered these key components for a smooth installation:

Component Key Considerations Important Specs
Collection System Roof size and gutter capacity Aligned with local rainfall data
Storage Tank material and capacity At least a 3-month supply
Filtration First flush diverter and filters Replace filters every 3-4 months
Plumbing Integration Backup water connection Maintain 20-30 PSI pressure

If you’re unsure about any of these elements, working with a professional can make the process easier and ensure everything runs efficiently.

Hydrodynamics Inc. Services

Hydrodynamics Inc. Services

Hydrodynamics Inc. offers specialized services for rainwater harvesting systems, handling everything from design to maintenance. They focus on ensuring your system integrates smoothly with your plumbing and complies with local regulations. Here’s what they provide:

  • Custom system designs tailored to your property
  • Full installation with proper plumbing connections
  • Integration with existing water systems
  • Ongoing maintenance and water quality checks
  • Emergency repair services when needed

“We believe a rainwater collection system is defined by the details”, says Hydrodynamics Inc., highlighting their dedication to high-quality materials and craftsmanship [3].

Their expertise in both water conditioning and plumbing ensures your system is not only compliant but also reliable for long-term use. Hydrodynamics Inc. is a great option if you’re looking for a trusted partner to handle the technical aspects of your rainwater harvesting setup.

Health Risks of Lead in Drinking Water

Health Risks of Lead in Drinking Water

Lead in drinking water is a serious health concern, especially for children, pregnant women, and other vulnerable groups. There’s no safe level of lead exposure, and it can cause long-term health problems like developmental delays in children and cardiovascular issues in adults. Homes built before 1986 are at higher risk due to outdated plumbing materials that may leach lead into water.

Key Takeaways:

  • Children: Lead exposure can harm brain development, lower IQ, and cause behavioral issues.
  • Adults: Risks include high blood pressure, fertility problems, and muscle pain.
  • Detection: Lead in water is invisible and tasteless – testing is essential.
  • Solutions: Use NSF-certified filters, flush pipes, and consider replacing old plumbing for long-term safety.

Testing your water regularly and taking immediate action if lead is detected can protect your family’s health. Learn how to detect and remove lead from your water supply effectively.

Health Effects of Lead in Drinking Water

Health Problems from Lead in Water

Lead in drinking water can cause serious health issues for people of all ages. The effects depend on factors like age, how long someone is exposed, and their overall health.

Risks to Children

Children under six are especially at risk when exposed to lead-contaminated water. Their bodies absorb lead much more easily than adults – up to 4-5 times more [1]:

  • Brain Development: Exposure can lower IQ, shorten attention spans, and lead to learning disabilities.
  • Physical Health: Symptoms include appetite loss, weight loss, stomach pain, and hearing problems.
  • Behavioral Changes: Kids may become irritable, sluggish, or, in severe cases, experience seizures.

Risks to Adults

Lead exposure in adults can lead to various long-term health problems [2][5]:

System Affected Health Issues
Cardiovascular/Neurological High blood pressure, memory loss, headaches
Reproductive/Musculoskeletal Fertility issues, muscle and joint pain
Digestive Severe stomach pain, constipation

High-Risk Groups

Some groups are more vulnerable to lead exposure [3][5]. Pregnant women face risks like miscarriage, stillbirth, or developmental problems in their babies. Young children, even with low exposure, may experience growth delays, anemia, and behavioral issues. People with kidney or nervous system problems are also at higher risk because their bodies struggle to process lead.

The CDC considers 3.5 micrograms per deciliter of lead in children’s blood as the threshold for intervention [4].

Knowing these risks is just the beginning – next, we’ll look at how lead gets into your water supply.

How Lead Gets into Water

Knowing how lead finds its way into your drinking water helps you take steps to protect your health. The problem usually starts with your home’s plumbing system.

Old Pipes and Fixtures

Homes built before 1986 often have plumbing components made with lead, such as service lines, solder, and brass fixtures. These materials can leach lead into the water under certain conditions. While public water systems are responsible for addressing contamination at the supply level, homeowners need to maintain and, if necessary, replace any lead-based plumbing within their homes.

Pipe Damage and Wear

The chemistry of your water plays a big role in how lead enters your drinking supply. Here are some factors that can increase contamination:

  • Water with low pH, high chloride, or elevated oxygen levels can speed up pipe corrosion, leading to more lead leaching.
  • Stagnant water that sits in pipes for long periods can absorb more lead.
  • Physical damage to plumbing components can release lead particles.
  • Corrosive water conditions over time wear down pipes and fittings.

The EPA mandates public water systems to act when lead levels exceed safe limits [1]. However, homeowners are responsible for addressing any plumbing issues within their properties.

Now that you understand how lead gets into your water, let’s look at how to check if it’s present in your home.

Finding Lead in Your Water

Detecting lead contamination in water requires testing, as it can’t be identified by sight, smell, or taste. Knowing your testing options and recognizing potential warning signs is key to protecting your household.

Water Testing Options

Testing your water can be done in a few different ways. Each method has its pros and cons, depending on your needs and budget:

  • Laboratory Analysis: This option offers the most precise results. Labs use advanced techniques to detect even the smallest traces of lead. While it costs around $20–$100 per test, the detailed reports make it worth the investment [6].
  • Home Testing Kits: These kits are quick and inexpensive, costing $10–$30, and provide results in as little as 10 minutes. However, they aren’t as reliable as lab tests and may miss low levels of lead [6].
  • Professional Services: Companies like Hydrodynamics offer thorough assessments, including lead testing and personalized treatment plans. These services cost more, typically $150–$300, but they deliver fast results (within 24–48 hours) and expert guidance [6].
Testing Method Accuracy Cost Result Time Best For
Certified Lab Very High $20–$100 1–2 weeks Detailed analysis
Home Test Kit Moderate $10–$30 10–30 minutes Initial screening
Professional Service High $150–$300 24–48 hours Comprehensive results

Warning Signs

While lead contamination is often invisible, there are some clues to watch for. These include unusual water discoloration (like brown or yellow tones), a metallic taste, or an odd smell. However, the absence of these signs doesn’t guarantee your water is safe [6].

The EPA suggests testing your water every 6–12 months if your home has lead pipes or fixtures [6][1]. Keep in mind that the EPA’s action level for lead is 15 µg/L. If your results exceed this limit, you should act immediately to reduce exposure and plan for a permanent fix [6][1].

Once you’ve confirmed lead in your water, the next step is finding ways to remove it effectively.

Ways to Remove Lead from Water

If testing confirms lead contamination in your water, the next step is picking the right method to address the issue. Here’s how you can tackle lead removal to ensure safer drinking water.

Immediate Actions

Using certified water filters is one of the fastest ways to reduce lead exposure. Make sure to choose filters certified by NSF International (NSF 53 or NSF 401) for lead removal [1].

Filter Type Lead Removal Efficiency Maintenance Frequency Ideal Use Case
Activated Carbon Up to 99% Replace every 6 months (or as needed) Faucet or pitcher use
Reverse Osmosis Nearly complete Annual maintenance Whole-house systems
NSF-Certified Units Verified reduction Follow manufacturer instructions Quick, reliable option

Another short-term measure is flushing your pipes. Run cold water for 2-3 minutes before use to clear out stagnant water that may contain lead. While helpful, this is not a permanent fix and should only be used while working on more durable solutions [4].

Long-Term Solutions

For lasting protection, consider these approaches:

  • Replace lead pipes with safer materials like copper, PEX, or PVC.
  • Install a whole-house filtration system to treat water at the source.
  • Invest in a complete water treatment system tailored to your household.

Hydrodynamics: Professional Water Treatment

Hydrodynamics

Hydrodynamics specializes in water treatment services, offering lead testing, certified filtration installations, and ongoing maintenance. Their solutions are customized to fit your home, ensuring effective lead removal and peace of mind.

Conclusion: Steps to Protect Your Water

Lead contamination in drinking water is a serious issue, especially for children and other vulnerable groups. Both the EPA and CDC emphasize that no amount of lead exposure is safe [1][4].

Testing your water regularly is key, particularly if you live in an older home or have recently made plumbing changes. Professional lab tests are the most reliable way to detect even small amounts of lead [3].

Steps to Reduce Lead in Water

Protection Level Action Steps Timeline
Immediate Protection Use NSF-certified filters, flush pipes Within 24 hours
Short-term Safety Install point-of-use filters, use cold water for cooking Within 1 week
Long-term Solution Replace lead service lines, upgrade plumbing Within 3-6 months

For families with infants or pregnant women, the risks are even greater. Contaminated water can account for up to 40-60% of an infant’s lead exposure when formula is mixed with tainted water [4].

Work with certified professionals for both testing and treatment. Providers like Hydrodynamics offer professionally installed systems tailored to your needs.

Maintenance Tips for Safer Water

  • Keep a schedule for regular water testing and note the results.
  • Maintain records for all water treatment systems.
  • Watch for changes in your water’s color, taste, or smell, and stay updated on local water quality reports [3].

FAQs

How long does it take to get lead poisoning from drinking water?

Lead poisoning happens as lead accumulates in the body over time, and the effects depend on the level of exposure. Severe exposure can show symptoms in days, while lower levels may take years to cause noticeable harm [2]. Children and pregnant women are especially vulnerable, so anyone exposed to lead-contaminated water should get tested and treated right away.

How does lead in water affect children?

Lead exposure in children can lead to serious issues like learning difficulties, lower IQ, hyperactivity, and slowed growth. These effects can often persist over time [2][3][5]. Parents should watch for the following:

Warning Signs Recommended Actions Testing Timeline
Behavioral changes Blood test immediately Every 3-6 months
Learning difficulties Water quality test Every 6 months
Physical development problems Medical evaluation As advised by a pediatrician

Families with young children can benefit from working with certified water treatment experts, such as Hydrodynamics, to create tailored solutions for protecting against lead exposure [3].

Regular testing and early intervention are key to keeping your family safe.

Water conditioner installation steps

Water Conditioner Installation Steps

Installing a water conditioner improves water quality, protects plumbing, and extends the life of appliances. This guide breaks down the process into simple steps: preparation, mounting the unit, connecting plumbing, and ensuring safety. Here’s what you need to know:

  • Preparation: Choose a stable, accessible spot near the main water line with adequate clearance. Gather tools like a drill, pipe cutter, and plumber’s tape.
  • Mounting: Secure the unit to a plywood backer board using mounting brackets.
  • Plumbing Connection: Use the right materials (e.g., flux for copper pipes, NSF-certified tape for PVC) and install valves for maintenance.
  • Safety Checks: Test for leaks, confirm proper grounding, and ensure pressure stays between 30-80 PSI.

Regular maintenance, like replacing filters every 6-12 months, keeps the system efficient. For complex setups, hiring professionals ensures compliance with safety codes and avoids costly mistakes.

Key Tip: Use push-to-connect fittings for easier, leak-resistant connections. Proper installation and upkeep save money and deliver clean, high-quality water for years.

How To Install Water Softener System – Complete Installation Guide

Preparation for Installation

Getting everything ready beforehand ensures your water conditioner works efficiently and protects your plumbing and appliances, as discussed earlier.

Selecting an Installation Site

Pick a spot close to the main water line that offers at least 60 inches of vertical clearance and 45 inches of floor space. Make sure it’s easy to access for future maintenance [4]. The area should be stable, well-lit, and away from direct sunlight. If your unit needs electricity, ensure there’s a nearby outlet.

Tools and Materials Needed

Essential Tools Required Materials
Drill, pipe cutter, level, safety gear Mounting brackets, plumber’s tape, pipe fittings, screws/anchors

Ensure the pipe fittings match your plumbing system [1]. Avoid using pipe dope or PVC primer/glue on threaded fittings to prevent damage to plastic components [4].

Checking Water and Power Supply

Make sure the water and power supplies are ready for safe installation. Completely shut off the main water valve [5]. If the unit needs electricity, confirm that an outlet is within reach. For metallic plumbing, install two grounding clamps to avoid electrical risks [4].

“Proper grounding is essential when installing on metallic plumbing. Securely install two grounding clamps to prevent electrical shock and ensure safety.” [4]

If the plumbing setup is complicated, it’s a good idea to consult professionals like Hydrodynamics. They specialize in water conditioner installations and can ensure everything meets local regulations.

Once the site is ready and utilities are secure, you can move on to the installation process.

Installation Steps

Now that everything is prepared, let’s walk through the installation process step by step.

Mounting the Unit

Start by attaching a plywood backer board to the wall studs for added stability. Make sure it’s level before moving forward. Align the mounting brackets with the unit’s mounting points, checking the level again, and then secure them using heavy-duty screws. Once the unit is firmly mounted, you’re ready to connect it to the plumbing system.

Connecting to Plumbing

Carefully measure and cut the pipes to the required length, then clean the ends with sandpaper for smooth connections. If you’re working with copper pipes, apply flux before soldering to ensure a strong bond [1]. Keep the alignment precise to avoid stress on the joints. Install valves and a bypass system to allow for maintenance without interrupting your home’s water supply [3].

Connection Type Materials Needed
Copper Flux, solder, torch
PVC NSF-certified tape
Metallic Grounding clamps, #4 copper wire

“Dry fit all connections before securing them, and use NSF-certified plumber’s tape on threaded fittings. Avoid using pipe dope or PVC primer/glue to prevent damage to plastic fittings” [4].

After securing the pipes and valves, it’s time to install the filter cartridges.

Installing Filter Cartridges

Handle the filter cartridges with clean hands to avoid contamination. Inspect each cartridge for any damage before inserting it into the housing. Turn the cartridges clockwise until they are snug, but don’t overtighten – this could harm the O-rings [6]. Make a note of the installation dates to keep track of replacements and maintain the system’s efficiency [3].

Once everything is installed, check all connections to ensure they are secure, and the system is ready to go.

Safety and Maintenance

Preventing Leaks and Ensuring Functionality

Once installation is complete, it’s time to test for leaks to confirm everything is working as it should. Slowly turn on the water supply and carefully check all connections – especially threaded fittings and joints – for any signs of leakage. A well-installed system will hold steady pressure without dripping or seeping.

Focus on these critical areas:

Testing Area What to Check & Fix
Connections Look for moisture; tighten fittings or replace seals if needed
Pressure Gauge Confirm pressure is within 30-80 PSI; adjust regulator if necessary
Filter Housing Ensure cartridge is seated properly and O-rings are intact; reseat or replace if needed

Once you’re sure the system is leak-free, regular maintenance will keep it running smoothly for years to come.

Maintenance Tips

How often your system needs attention depends on your water usage and quality. Most filter cartridges need replacing every 6-12 months, but this can vary based on your specific conditions [1][3].

“Regular inspections can help identify potential issues early, such as leaks or wear on components” [7][3].

Here are some key maintenance tasks to keep in mind:

  • Check pressure readings and inspect O-rings and seals every three months.
  • Clean the exterior of the system monthly to prevent dust and grime buildup.
  • Test the bypass system every six months to ensure it’s functioning properly.

During your inspections, confirm that the system’s electrical grounding is secure. Keep a log of all maintenance activities, like filter replacements and any repairs, to stay organized and maintain warranty coverage.

If you notice odd noises, reduced water flow, or changes in pressure, address these concerns quickly to avoid further issues. For more advanced repairs or troubleshooting, consider hiring a professional for added peace of mind.

Additional Tips and Professional Help

Using Push-to-Connect Connectors

Push-to-connect connectors make installation easier by providing secure, leak-resistant seals – no special tools required [1][6]. To ensure a proper seal, insert the connector fully until you hear a click. For best results, avoid sharp bends and keep the connector lines in smooth, gentle curves.

These connectors are especially helpful during the plumbing connection phase. However, for more intricate setups or to guarantee everything is installed correctly, hiring a professional can be a smart choice.

Professional Services from Hydrodynamics

Hydrodynamics

While many installations can be done on your own, more advanced water conditioning systems often require expert handling. Hydrodynamics Inc., a family-owned business since 1994, offers specialized water conditioning installation and maintenance services throughout Northeastern Pennsylvania.

Their services include:

  • System sizing and placement advice: Ensuring the system fits your specific needs and space.
  • Post-installation testing: Checking and fine-tuning the system for optimal performance.
  • Expert installation: Handling grounding and backflow prevention correctly.

For setups involving additional features like check valves or specialized grounding, professional installation can help you avoid expensive errors. Hydrodynamics’ team ensures installations meet safety codes and run efficiently.

Safety Tip: Professionals use grounding clamps and #4 copper wire to ensure proper safety measures. They also make sure the system is protected from freezing and direct sunlight [2][3].

Conclusion

Adding a water conditioner can enhance water quality and prolong the life of your plumbing system. Using durable materials and following the manufacturer’s instructions are key to avoiding leaks and inefficiencies [1][4].

Paying close attention to placement, connections, and safety measures ensures the system runs efficiently. While proper installation is essential, ongoing care – like regular maintenance – keeps the system performing well over time. Choosing NSF-certified materials and adhering to manufacturer guidelines can help sidestep common problems [1][4].

For more complex setups or installations requiring code compliance, working with experts like Hydrodynamics is a smart move. Their knowledge is particularly useful for systems with specialized features or those that need to integrate with existing plumbing.

Routine upkeep, such as replacing filters and conducting system checks, helps your water conditioner stay effective and last longer [3]. A properly installed and maintained unit not only delivers clean water but also protects your appliances and lowers overall costs.

Whether you’re tackling the installation yourself or hiring professionals, preparation and safety should remain your top priorities. Investing in a water conditioner pays off with better water quality, longer-lasting appliances, and fewer maintenance expenses over time [3].

Hard Water Solutions: Comparing Water Softener Systems

Hard Water Solutions: Comparing Water Softener Systems

Hard water causes problems like scale buildup, clogged pipes, and reduced appliance efficiency. Water softeners are the solution, and here are four popular options:

  • SpringWell SS1: A salt-based system with smart regeneration, Bluetooth controls, and high flow rates. Best for very hard water. Price: $1,495.
  • SoftPro Elite: Another salt-based option with upflow regeneration, reducing salt use by 75%. Ideal for large households. Price: Varies, with low operating costs.
  • Fleck 5600 STX: A budget-friendly salt-based softener with digital controls and iron removal. Best for homes on a budget. Price: $549.50.
  • SpringWell FutureSoft: A salt-free conditioner using TAC technology. Maintenance-free and eco-friendly. Best for moderate hardness. Price: $1,597.31.

Quick Comparison

System Type Grain Capacity Flow Rate Annual Cost Key Feature Price
SpringWell SS1 Salt-based 32k-80k Up to 20 GPM $108 Smart regeneration, Bluetooth $1,495
SoftPro Elite Salt-based 32k-110k Up to 15 GPM $56 Precision brining, efficient Varies
Fleck 5600 STX Salt-based 32k-80k Up to 20 GPM Varies Affordable, iron removal $549.50
SpringWell FutureSoft Salt-free (TAC) N/A 12-20 GPM $0 Maintenance-free, eco-friendly $1,597.31

Choose based on your water hardness, household size, and maintenance preferences. Salt-based systems are great for very hard water, while the salt-free option is perfect for those seeking low-maintenance and eco-friendly solutions.

Salt VS Salt-Free Water Softeners: What’s the Verdict?

1. SpringWell SS1 Water Softener

SpringWell SS1

The SpringWell SS1 is a top-tier salt-based water softener designed to tackle moderate to severe hard water problems. Using ion exchange technology, it effectively removes hardness minerals from your water, providing a reliable solution for households dealing with these issues.

This system offers grain capacities between 32,000 and 80,000, making it suitable for homes of various sizes. With flow rates reaching up to 20 GPM, it ensures steady water pressure even in larger households with higher water usage.

One standout feature is its smart regeneration system. Instead of running on a fixed schedule like traditional systems, it monitors your water usage patterns and regenerates only when needed. This smart approach can save you money, with estimated annual operating costs of just $108 [1].

The SS1 also includes Bluetooth connectivity, allowing you to manage and monitor the system through your smartphone. This makes it easy to track performance and keep an eye on salt levels.

Key Features

  • Hardness Removal: Eliminates up to 99.6% of hardness minerals
  • High Flow Rates: Supports up to 20 GPM without compromising water pressure
  • Efficient Design: Reduces salt and wastewater usage with precise regeneration

The system is NSF/ANSI 44 certified and comes with a lifetime warranty on both the tank and control head. For the best results, professional installation is recommended, and regular maintenance – like checking salt levels – is essential to keep it running smoothly.

Priced at $1,495, the SS1 includes an installation kit, a lifetime warranty, and a 6-month money-back guarantee. It’s a strong investment for improving your home’s water quality.

While the SpringWell SS1 stands out for its efficiency and smart features, other options, such as the SoftPro Elite, may offer additional functionalities worth considering.

2. SoftPro Elite Water Softener

SoftPro Elite

The SoftPro Elite is a salt-based water softener designed to handle hard water issues efficiently. With grain capacities ranging from 32,000 to 110,000, a 15 GPM flow rate, and annual operating costs as low as $56, it’s a solid choice for homes of various sizes [1].

One key feature of the SoftPro Elite is its upflow regeneration and precision brining technology. This system adjusts salt use based on actual water consumption, cutting salt usage by up to 75% compared to standard models – all while maintaining top performance.

The design includes quick-connect bypass valves, making installation and maintenance straightforward. It’s also backed by a lifetime warranty [1]. The system effectively removes hardness minerals, preventing scale buildup in plumbing and protecting appliances.

Thanks to its precision brining system, the SoftPro Elite uses salt efficiently while delivering consistent performance. This smart regeneration method not only conserves resources but also helps extend the life of appliances that rely on water.

Next, we’ll look at how the Fleck 5600 STX measures up in terms of efficiency and features.

3. Fleck 5600 STX Water Softener

Fleck 5600 STX

The Fleck 5600 STX is a solid pick for medium to large households, offering grain capacities between 32,000 and 80,000 and a flow rate of up to 20 GPM [1]. It features metered regeneration, which adjusts cycles based on water usage, and a digital control panel for easy monitoring and customization [5].

Feature Specification
Type Salt-based ion exchange
Grain Capacity 32k – 80k
Flow Rate Up to 20 GPM
Warranty 5 years
Regeneration Metered (usage-based)

The system’s programmable interface handles varying water hardness levels effectively, removing minerals that cause scale buildup and protecting your plumbing and appliances [5][6]. While its annual operating costs may be slightly higher than some alternatives, the lower initial price makes it appealing for cost-conscious homeowners looking for efficient water treatment [1].

With straightforward maintenance and a strong reputation among users, the Fleck 5600 STX stands out as a reliable choice [5]. It offers similar grain capacities and flow rates as the SpringWell SS1 but comes with a more affordable upfront price and an easy-to-use interface, making it well-suited for larger households on a budget.

Next, we’ll look at the SpringWell FutureSoft Salt-Free Conditioner, which takes a different approach to handling hard water.

sbb-itb-99db659

4. SpringWell FutureSoft Salt-Free Conditioner

SpringWell FutureSoft

The SpringWell FutureSoft uses TAC technology to neutralize calcium ions, helping prevent scale buildup while keeping the minerals in your water that are good for you [1]. It’s a practical choice for anyone looking for a hassle-free water treatment system.

Feature Specification
Type Salt-free TAC conditioner
Flow Rate 12-20 GPM
Max Hardness 81 gpg
Annual Operating Cost $0
Warranty Lifetime

This system is designed to eliminate 99.6% of limescale without needing salt, electricity, or regular maintenance [1]. It works especially well with municipal water and can handle high hardness levels up to 81 grains per gallon [1].

Since it doesn’t use salt or electricity, there’s no wastewater or salt brine discharge [1][6]. You can install it yourself, saving on installation costs, and the lifetime warranty ensures long-term reliability [1].

Another perk? The FutureSoft comes with Bluetooth connectivity, allowing you to monitor it through a mobile app. But the real standout feature is its maintenance-free operation. Its eco-friendly design makes it a great fit for households that prioritize sustainability.

While the FutureSoft shines in convenience and environmental friendliness, it’s important to weigh its features against other systems to decide if it meets your specific needs.

Advantages and Disadvantages of Each System

Here’s a breakdown of the features, pros, and cons of different water systems to help you decide which one fits your needs.

System Advantages Disadvantages Best Suited For
SpringWell SS1 • Chlorine-resistant resin for effective softening
• Bluetooth-enabled controls
• Lifetime warranty
• Works with both well and municipal water
• Requires regular salt refills
• Higher upfront cost
• Needs ongoing maintenance
Homes dealing with high water hardness
SoftPro Elite • Upflow regeneration for efficiency
• Multiple grain size options
• Precision brining reduces salt use
• Ideal for varying water demands
• Installation can be complex and needs more space
• Regular upkeep required
Large households with fluctuating water usage
Fleck 5600 STX • Affordable starting price ($549.50)
• Removes iron, great for well water
• User-friendly digital controls
• Meter-based regeneration saves resources
• Lacks advanced features, requires manual setup
• Needs salt for operation
Budget-conscious buyers needing reliable performance
SpringWell FutureSoft • No salt or electricity needed, eco-friendly
• Prevents 99.6% of scale buildup
• Zero maintenance required
• High initial cost ($1,597.31+)
• Doesn’t remove minerals
• Limited to 81 gpg hardness levels
Households focused on convenience and sustainability

Salt-based systems like the SpringWell SS1, SoftPro Elite, and Fleck 5600 STX are highly effective at removing hardness minerals through ion exchange [2]. They are ideal for homes with very hard water or those using well water. However, they come with the trade-off of regular salt refills and maintenance.

The SpringWell FutureSoft, on the other hand, offers scale prevention without requiring salt or ongoing upkeep. This makes it a convenient and environmentally friendly choice for households with moderately hard water.

When it comes to energy savings, salt-based systems help reduce energy use by preventing scale buildup in appliances and water heaters [2][6]. The FutureSoft achieves similar results without the environmental concerns of brine discharge or added sodium in the water supply.

For businesses or industrial needs, the SoftPro Elite is a strong contender. Its customizable grain capacities and efficient regeneration process make it well-suited for high-volume water demands [1].

The Fleck 5600 STX provides a good mix of affordability and functionality, especially for well water users dealing with iron contamination [3]. Its cost-effective design and iron-removal capabilities make it a practical choice for many homes.

Now that you know the strengths and limitations of each system, it’s time to weigh your priorities and pick the one that fits your lifestyle and water needs.

Final Thoughts and Recommendations

Choosing the right water softener comes down to your water’s hardness, household size, and how much maintenance you’re willing to handle. Here’s a breakdown of the best options based on our analysis:

For very hard water (over 15 gpg), salt-based systems are the way to go. The SpringWell SS1 stands out for larger households and well water users, thanks to its chlorine-resistant resin, Bluetooth controls, and lifetime warranty.

If you’re watching your expenses, the SoftPro Elite is a smart pick. Its upflow regeneration technology cuts annual operating costs by 68% compared to traditional systems [2]. Plus, it uses precision brining to minimize salt waste while keeping performance high.

For budget-conscious buyers dealing with hardness and iron issues, the Fleck 5600 STX ($549.50) is a solid choice. It uses meter-based regeneration to save resources and effectively handles iron-laden well water.

Prefer a salt-free option? The SpringWell FutureSoft ($1,597.31) is perfect for moderate hardness. It’s eco-friendly, requires no maintenance, and doesn’t need electricity [1].

Concern Recommended System Key Benefit
Hardness Removal SpringWell SS1 Best for very hard water
Cost Efficiency SoftPro Elite Cuts operating costs by 68%
Environmental Impact SpringWell FutureSoft No waste, no electricity required
Initial Cost Fleck 5600 STX Best value at $549.50

Things to Keep in Mind Before Buying

  • Calculate your daily water usage.
  • Look for NSF/ANSI 44 certification [3].
  • Measure the available space for installation.
  • Check warranty details and local regulations.

“Different systems cater to different needs, and even households with moderate water hardness can benefit from a water softener system” [2][6].

A good water softener not only protects your plumbing but also helps lower energy costs. By considering these factors, you’ll find a system that solves your water issues and fits your budget and priorities.

FAQs

What are the drawbacks of salt-based water softeners?

Salt-based water softeners are effective at removing hardness minerals, but they come with several downsides. They require consistent maintenance, such as refilling salt and maintaining the resin. These systems also use a lot of water during their regeneration cycles, which can increase utility bills. On top of that, the sodium-rich discharge can pose environmental challenges by impacting local waterways. Space is another consideration – they need room for both the main unit and salt storage, which can be tricky for smaller homes [2][4].

What is the best water softener system?

According to testing and user reviews in 2024, the Fleck 5600SXT stands out for its advanced digital controls and efficient metered regeneration [1][3]. Other highly-rated systems include:

  • SpringWell FutureSoft: Known for its salt-free operation and eco-friendly design.
  • Aquasana Whole House System: Combines excellent filtration with effective water softening.
  • Pelican NaturSoft: A top choice among salt-free systems for its solid performance.

Which company makes the best water softeners?

Aquasana is often highlighted for its SimplySoft® 40,000 Grain Softener (WH-SF40), praised for its reliability and durability [1][3]. GE and Durawater are also well-regarded, offering NSF-certified systems with strong warranties and dependable customer support.

“Different manufacturers offer various features, such as Bluetooth connectivity and compact designs, to suit different needs” [5][1][3].

When choosing a manufacturer, focus on factors like warranty terms, customer service quality, and the availability of replacement parts. NSF certification is a key indicator of a system’s reliability and effectiveness.

These insights can help you decide which water softener best fits your household’s needs and preferences.