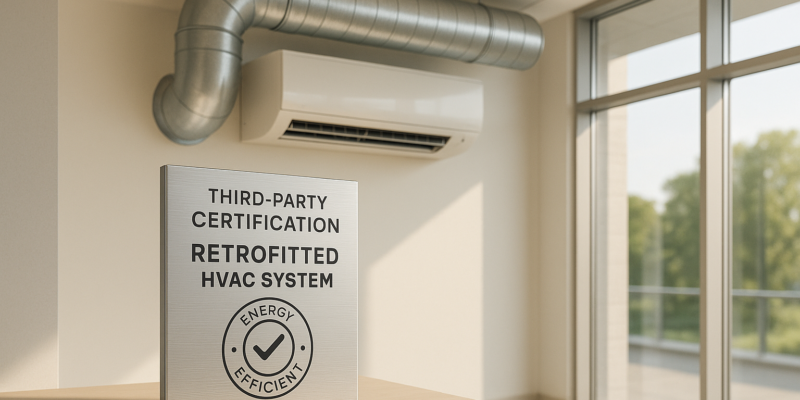
Third-Party Certification for Retrofitted HVAC Systems
Upgrading your HVAC system? Third-party certification ensures your retrofitted system meets energy efficiency, safety, and performance standards. It’s a trusted way to verify compliance with regulations while unlocking financial perks like utility rebates and tax incentives. Plus, certified systems often boost property value and simplify building inspections.
Key Benefits of Certification:
- Energy savings: Certified systems reduce utility costs.
- Regulatory compliance: Meets local codes and avoids project delays.
- Financial incentives: Access to rebates, tax credits, and better financing.
- Property value: Certification increases appeal to buyers and tenants.
- Documented performance: Independent verification builds confidence.
Certification Process:
- Assessment: Energy audits identify system upgrades.
- Installation: Contractors follow best practices for retrofitting.
- Commissioning: Independent agents test system performance.
- Verification: Accredited bodies review data and approve certification.
Programs like ENERGY STAR, LEED, and AHRI set industry benchmarks, while standards like ASHRAE 90.1 ensure efficiency and compliance. Certification involves costs ($1,500–$50,000) but delivers lasting benefits, making it a smart move for building owners.
Achieving Success With Retrofit Heat Pumps (Webinar)
Major Certification Programs and Industry Standards
When retrofitting an HVAC system, certification programs and industry standards serve as essential benchmarks. They provide clear guidelines for assessing performance, efficiency, and safety, ensuring your upgrades align with industry expectations. Here’s how these frameworks connect to different phases of retrofitting.
AHRI, ENERGY STAR, and LEED Programs
The Air-Conditioning, Heating, and Refrigeration Institute (AHRI) certifies HVAC equipment performance ratings, ensuring that both new installations and retrofitted components meet established efficiency benchmarks. Meanwhile, ENERGY STAR certification emphasizes energy efficiency and reduced environmental impact. Achieving this certification can make your project eligible for utility rebates or tax incentives, which is a big plus for commercial retrofits. On the other hand, Leadership in Energy and Environmental Design (LEED) evaluates overall building sustainability. HVAC retrofits often play a major role in improving energy savings and enhancing indoor air quality, both of which contribute to LEED certification.
ASHRAE Standards and Local Building Codes

ASHRAE standards are the backbone of many HVAC certification programs and local building codes. For instance, ASHRAE 90.1 sets the minimum energy efficiency requirements for commercial HVAC systems, addressing areas like equipment efficiency ratios, duct insulation, and control sequences. Similarly, ASHRAE 62.1 focuses on ventilation and indoor air quality, ensuring healthier environments for building occupants.
Local building codes, often based on ASHRAE guidelines, vary by state and municipality. Retrofitting older buildings typically triggers compliance updates, requiring upgrades to meet current codes. This might involve resizing equipment, redesigning ductwork, or improving insulation and sealing to reduce heat loss and air leakage.
Permits and inspections are critical to enforcement. HVAC or mechanical permits are usually required for equipment upgrades, while electrical permits cover control system updates. After installation, city or state officials conduct inspections to ensure compliance. Non-compliance can lead to fines, legal actions, or even the temporary or permanent closure of the facility.
Minimum Energy Performance Standards (MEPS)
The U.S. Department of Energy (DOE) enforces Minimum Energy Performance Standards (MEPS) to establish baseline efficiency levels for HVAC systems. These standards outline minimum efficiency ratios for equipment like air conditioners and heat pumps. MEPS are periodically updated to reflect new technology and environmental priorities, meaning older systems might no longer meet current requirements.
For retrofitted systems, MEPS compliance guarantees that the upgraded equipment meets federal efficiency standards. Many utility rebate and financing programs also require equipment to exceed these minimum benchmarks.
As regulations evolve, MEPS may demand higher standards, such as better MERV ratings, improved ventilation, and more frequent air quality testing. Keeping up with these changes ensures your system remains compliant and efficient.
How to Get Certification for Retrofitted HVAC Systems
Getting a retrofitted HVAC system certified involves a structured, multi-step process that typically takes around 3-6 months. Here’s a breakdown of what to expect at each stage.
System Assessment and Planning Phase
The first step is an energy audit conducted by certified professionals. This audit establishes a baseline for energy performance and identifies specific upgrades needed to meet certification standards.
During this phase, energy auditors review the existing HVAC equipment, ductwork, controls, and the building’s overall structure. For commercial buildings, they may perform blower door tests to check for air leaks and use thermal imaging to locate insulation gaps. These evaluations help pinpoint inefficiencies and potential improvements.
It’s also essential to choose the right certification program based on your building type and goals. Programs like ENERGY STAR and LEED have different requirements, so selecting the one that aligns with your objectives is key. Throughout this phase, detailed documentation is crucial – it sets the foundation for your certification application and establishes pre-retrofit performance benchmarks.
Professional engineers or certified energy managers usually lead this phase. They ensure the retrofit plans comply with standards like ASHRAE 90.1 for energy efficiency and ASHRAE 62.1 for indoor air quality. They’ll also coordinate with local building officials to address permits and inspection schedules.
With a solid plan and proper documentation in place, the project moves forward to installation and commissioning.
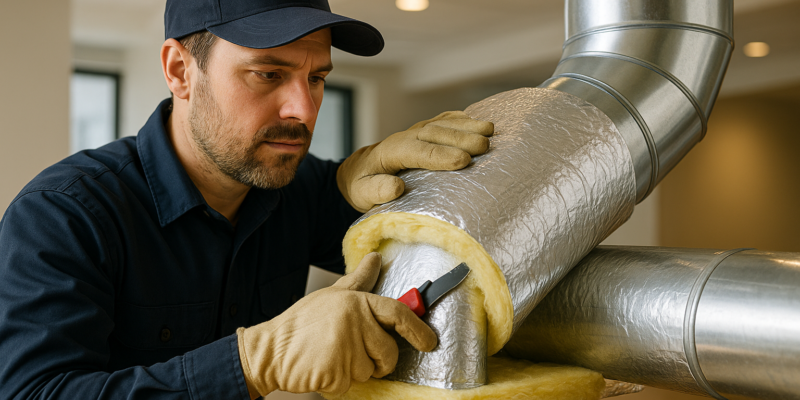
Installation and System Commissioning
Once the retrofit plan is approved and permits are secured, the actual installation begins. Certified HVAC contractors handle the work, adhering to manufacturer guidelines and industry best practices.
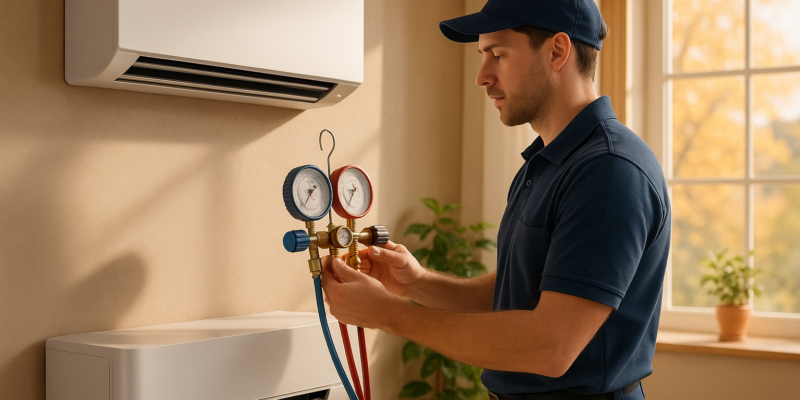
The most critical part of this phase is system commissioning. Independent commissioning agents (not affiliated with the installation team) ensure the system operates as designed. This involves testing equipment performance, calibrating controls, verifying airflow rates, and checking refrigerant levels.
For ENERGY STAR certification, the commissioning process must prove that the system meets the EPA’s minimum efficiency requirements. This includes measuring energy consumption under various conditions and comparing the results to predicted models.
Commissioning agents also perform detailed tests to ensure emergency systems work, backup systems are functional, and the building automation system integrates seamlessly with the new equipment. Operator training is another key aspect, ensuring the system is used correctly for optimal performance. Certification programs typically require performance data collected over weeks or months to confirm the system consistently meets standards in real-world conditions.
Once the system passes commissioning, the next step involves independent verification.
Third-Party Verification and Final Approval
The final phase ensures your upgraded system meets all necessary standards and secures certification. Independent accredited certification bodies review all documentation and conduct on-site inspections to provide an unbiased evaluation.
This step often requires 12 months of post-installation data to confirm the system performs consistently across seasons. Certification bodies analyze energy consumption patterns, maintenance records, and any updates made during the period. They may also conduct surprise inspections to ensure the system continues to function as designed.
For LEED certification, a LEED Accredited Professional submits detailed documentation via the program’s online platform. This includes commissioning reports, energy modeling results, equipment details, and proof of ongoing performance monitoring. The U.S. Green Building Council then reviews the submission, a process that can take 2-4 months.
ENERGY STAR certification, on the other hand, requires annual recertification. Buildings must maintain a top 25% energy performance ranking to keep their certification. This involves implementing continuous monitoring systems and maintaining detailed energy records to demonstrate ongoing compliance.
Local building officials typically conduct final inspections before certification bodies complete their review. These inspections ensure code compliance and confirm all permits are properly closed. Any issues identified must be resolved before certification is granted.
Certification costs vary depending on the program and building size. For ENERGY STAR, fees range between $1,500-$5,000 annually, while LEED certification can cost anywhere from $10,000-$50,000, depending on the complexity and size of the building.
Once certification is achieved, building owners receive official documentation and are often listed in public databases. Certification programs also provide marketing materials and logos to help promote the building’s improved energy performance to tenants, customers, and stakeholders.
To maintain certification, regular reporting and periodic re-commissioning are required. Building operators must keep thorough records and be prepared for random audits to confirm continued compliance with program standards.
sbb-itb-99db659
Pros and Cons of Third-Party Certification
Third-party certification for retrofitted HVAC systems offers a mix of upsides and challenges. This balance allows building owners to carefully consider the benefits alongside the associated costs. Let’s break it down.
Main Benefits of Certification
- Lower energy costs: Certified retrofitted systems often perform more efficiently, cutting down on utility bills over time.
- Increased property appeal: Certification can make properties more attractive to buyers and tenants, boosting marketability and overall asset value.
- Financial perks: Certification can open doors to rebates, tax credits, and other financial incentives.
- Easier compliance: Staying up-to-date with permits and regulations becomes simpler with certification.
- Marketing edge: A certified building can enhance its reputation, especially among environmentally conscious tenants and stakeholders.
Common Challenges and Obstacles
- High upfront costs: The initial fees for certification and retrofitting can be steep.
- Complex paperwork: The process often involves detailed documentation, including energy assessments and performance records.
- Delays in timelines: Certification can stretch project schedules due to inspections, testing, and necessary adjustments.
- Ongoing requirements: Maintaining certification demands periodic recertification and continuous monitoring of system performance.
- Performance risks: If the retrofitted system fails to meet standards during verification, additional modifications or testing may be needed.
- Limited contractor availability: In some regions, finding contractors experienced in certification protocols can be a challenge, potentially leading to delays and higher costs.
Pros vs. Cons Comparison Table
Here’s a quick look at the trade-offs:
| Benefits | Challenges |
|---|---|
| Reduced energy costs | High initial investment |
| Better property marketability | Extensive paperwork and documentation |
| Access to financial incentives | Longer project timelines |
| Easier regulatory compliance | Ongoing monitoring and recertification |
| Stronger branding opportunities | Risk of additional system modifications |
Best Practices for Certification Success
When it comes to certifying retrofitted HVAC systems, keeping detailed and accurate documentation is essential. Proper records can help you avoid unnecessary delays during the certification review process.
Record Keeping and Documentation
Start with pre-retrofit assessments. These should include comprehensive site surveys and equipment audits that document the existing inventory, the condition of equipment, and any identified issues. This baseline data is crucial for confirming that the retrofit meets compliance standards.
Keep these records well-organized. Why? Because it not only makes third-party verification smoother but also simplifies future audits and system evaluations. Streamlined documentation can significantly speed up the independent verification process and ensure quicker final approval.
Working with Certified Professionals
Staying Current with Standards Updates
Conclusion
Third-party certification provides assurance that your retrofitted HVAC system meets strict performance and energy efficiency standards while also qualifying for valuable federal incentives like the 179D Energy Deduction.
Programs such as AHRI and ENERGY STAR offer independent validation of system performance, showcasing a dedication to both quality and energy efficiency. This turns compliance into more than just a regulatory requirement – it becomes a strategic benefit. Incorporating third-party certification into your retrofit approach helps you maintain efficiency and stay aligned with regulatory standards in the long run.
FAQs
What financial incentives are available for retrofitted HVAC systems with third-party certification?
Certified retrofitted HVAC systems come with the added perk of potential financial incentives, such as federal tax credits, utility rebates, and state-level programs. For instance, you could qualify for up to $2,000 in federal tax credits for installing energy-efficient heat pumps. Similarly, air conditioners and gas furnaces may earn you $600 in credits. These federal benefits are available until 2025, encouraging homeowners to make energy-efficient upgrades.
On top of that, many utility companies provide rebates for certified systems that meet energy-saving standards. To find out what’s available, contact your state or local utility provider for specific program details. By upgrading to certified retrofitted systems, you not only reduce your energy bills but also tap into these cost-saving opportunities.
How do certifications like ENERGY STAR and LEED increase a building’s value and appeal?
Certifications like ENERGY STAR and LEED can greatly enhance the appeal and value of buildings. Properties with an ENERGY STAR certification often benefit from lower operating costs, attract tenants more easily, and can even secure higher rental rates, all of which contribute to increased property value. On the other hand, LEED-certified buildings are well-regarded for their eco-friendly design and operational savings, making them especially attractive to both buyers and tenants.
These certifications don’t just boost a property’s day-to-day performance – they also make a difference in the long run. Buildings with these credentials tend to have higher resale values, better occupancy rates, and a stronger competitive edge in the market. For U.S. property owners, pursuing third-party certifications is a smart way to achieve both financial gains and environmental responsibility, while showcasing their properties as forward-thinking, energy-efficient investments.
What is the process for obtaining third-party certification for retrofitted HVAC systems, and how long does it usually take?
The certification process for retrofitted HVAC systems through third-party organizations generally involves a few essential steps. It often starts with an optional pre-assessment to identify any potential issues upfront. After that, an application is submitted, followed by a detailed audit. This audit examines all documentation and verifies that the system meets the necessary standards. Depending on the complexity of the system and the specific certification criteria, the entire process can take anywhere from a few weeks to several months.
Earning certification confirms that the retrofitted system aligns with industry standards, boosting its performance, safety, and energy efficiency. This not only helps in meeting regulatory requirements but also strengthens customer trust in the system’s reliability and quality.