Duct Leakage Testing Methods Explained

Duct Leakage Testing Methods Explained

Duct leakage testing helps identify air loss in HVAC systems, which can waste up to 30% of conditioned air and increase energy bills. Testing also improves air quality, boosts HVAC efficiency, and ensures compliance with building codes.

Here are the three main methods:

  • Duct Pressurization Testing: Uses a calibrated fan to measure precise air leakage in ducts. Cost: $150–$500. Ideal for compliance and detailed audits.
  • Blower Door Testing: Measures overall home airtightness, including duct leaks. Cost: $150–$1,000+. Best for whole-house assessments.
  • Visual Inspections: Involves spotting visible leaks or damage. Low-cost but less accurate. Good for initial checks.

Each method fits different goals and budgets. For accurate results and compliance, duct pressurization is the most reliable. Professional testing is often recommended for precise data and long-term savings.

Residential Duct Leakage Test Demonstration

Duct Leakage Testing Methods

When it comes to detecting duct leakage, professionals rely on three main methods, each tailored to specific needs. These approaches vary in accuracy and purpose, helping to evaluate your HVAC system’s efficiency and compliance.

Duct Pressurization Testing (Duct Blaster)

Duct pressurization testing involves using a calibrated fan to pressurize the duct system to 25 Pascals. The amount of air leakage is measured by determining how much air the fan needs to replace lost air. This method is often used to ensure compliance with standards like the 2015 IECC, which requires no more than 4 CFM of leakage per 100 square feet of conditioned space.

Certified technicians typically perform this test, as the equipment can be costly. Homeowners can expect to pay between $150 and $500 per HVAC system for a professional duct blaster test.

Blower Door Testing

Blower door testing focuses on measuring the overall airtightness of a home. A powerful fan is installed in an exterior door frame to create a 50-Pascal pressure difference. During the test, all windows, doors, and intentional openings are sealed, allowing the fan to be the sole pathway for air movement. An adjustable frame and digital manometer are used to record the results.

This test measures airtightness in ACH50 (air changes per hour at 50 Pascals). Requirements vary based on climate zones and local codes. For instance, the 2015 IECC mandates that homes in Zone 2 achieve 5 ACH50 or less. Blower door tests can also help identify duct leaks in unconditioned spaces like attics or crawlspaces when combined with duct testing. Costs for this method range from $150 to over $1,000, depending on the home’s size and complexity.

Visual Inspection Methods

Visual inspections are the simplest and most affordable way to detect duct leaks, though they lack the precision of pressure-based tests. This method involves examining accessible ductwork for visible leaks, disconnections, or damaged insulation. Tools like smoke pens or video endoscopes can help identify problem areas without measuring exact air loss.

While this approach is excellent for spotting obvious issues, it cannot quantify air leakage and is limited to areas where ducts are accessible. Hidden ductwork in walls or ceilings may harbor small leaks that collectively lead to significant energy loss. Visual inspections are often used as a preliminary step before more detailed testing or to locate specific problem areas after pressure testing confirms leakage.

Testing Method Cost Range Best Used For Limitations
Duct Pressurization (Duct Blaster) Moderate ($150-$500) Code compliance; precise leakage measurement Requires professional equipment
Blower Door Testing Moderate to High ($150-$1,000+) Whole-house airtightness; finding external duct leaks Does not isolate duct-specific issues
Visual Inspection Low Initial checks; identifying obvious problems Limited to accessible areas; no air loss quantification

Together, these methods provide a well-rounded approach to duct leakage assessment. Professionals often begin with visual inspections to address visible issues and then turn to pressure-based tests for precise measurements and verification after repairs.

How to Perform Duct Pressure Testing

This section explains the step-by-step process for duct pressure testing, a crucial method for measuring air leakage in duct systems. Accurate testing requires careful preparation and execution.

Required Tools and Equipment

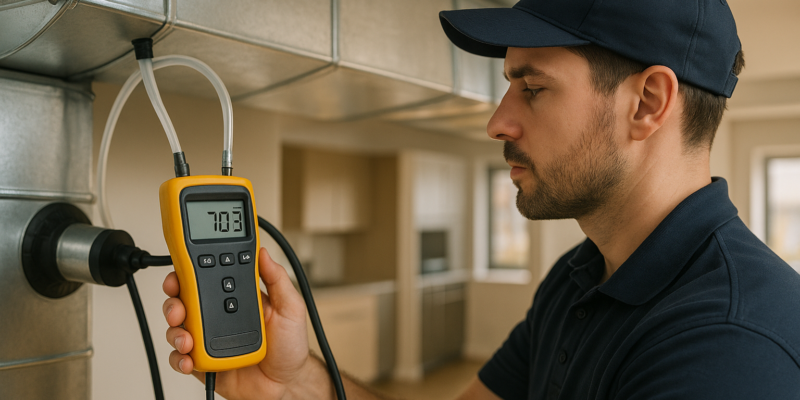
To get started, you’ll need a duct tester, which combines a calibrated fan with a digital manometer. The fan generates the required 25 Pascal pressure in the duct system, and the manometer measures pressure differences and airflow rates.

You’ll also need materials to seal vents and registers temporarily. Common sealing supplies include tape, plastic sheeting, and foam plugs. If the test reveals significant air leakage, a theatrical smoke machine can help pinpoint problem areas. For permanent fixes, have UL-listed foil mastic tape on hand.

Additional tools like a pressure pan are useful for identifying specific trouble spots. Before beginning, ensure all equipment, especially the duct tester, is calibrated according to the manufacturer’s instructions.

Testing Steps

  1. Turn off the HVAC system: This prevents interference with the test and ensures safety for both the equipment and personnel.
  2. Seal the system: Close off all vents, registers, and access points to create an airtight environment. Any unsealed openings will skew the pressure readings.
  3. Set up the duct tester: Attach the tester securely to a return duct grill. Ensure there’s no air leakage around the connection point. Follow the manufacturer’s setup instructions to connect the manometer and prepare the system for pressurization.
  4. Pressurize the ducts: Turn on the fan and increase the pressure to 25 Pascals. This standardized pressure ensures consistent testing and compliance with building codes. Record the airflow rate in cubic feet per minute (CFM) once the pressure stabilizes.
  5. Test supply ducts: Repeat the procedure for the supply ducts and average the readings for a complete assessment.
  6. Document results: Record all data, including pressure differentials and airflow rates. Accurate documentation is essential for code compliance and future reference.

After completing these steps, you’ll have the data needed to evaluate the system’s performance.

Reading Test Results

The results are expressed as CFM25, which measures airflow loss at 25 Pascals. Higher CFM25 values indicate more significant leakage.

Acceptable leakage limits depend on building codes and the stage of construction. For systems under construction, the standard is typically 4 CFM25 per 100 square feet of conditioned floor area. For finished buildings, the limit ranges between 6 to 8 CFM25 per 100 square feet, depending on local regulations.

The 2012 IECC specifies a maximum leakage of 4 CFM25 per 100 square feet of conditioned space. Under ENERGY STAR Version 3, rough-in tests allow up to 4 CFM25 per 100 square feet (or 40 CFM25 total, whichever is greater), while final tests permit up to 8 CFM25 per 100 square feet (or 80 CFM25 total).

To determine compliance, calculate the allowable leakage for your home by multiplying the conditioned floor area by the applicable CFM25 rate. For example, in a 2,000-square-foot home, the maximum leakage under the 2012 IECC would be 80 CFM25.

Proper sealing is essential for HVAC efficiency, as duct leaks can waste up to 30% of conditioned air. If your system exceeds the acceptable limits, use a smoke machine to locate leaks and perform targeted repairs.

Code Standard Construction Stage Maximum Leakage Alternative Minimum
2012 IECC Final 4 CFM25 per 100 ft² N/A
ENERGY STAR V3 Rough-in 4 CFM25 per 100 ft² 40 CFM25 total
ENERGY STAR V3 Final 8 CFM25 per 100 ft² 80 CFM25 total
2009 IECC Final 8 CFM25 per 100 ft² (to outdoors) 12 CFM25 per 100 ft² (total)

Once repairs are complete, conduct a retest to confirm the system meets code requirements and operates efficiently.

Code Requirements and Standards

Building on the testing methods discussed earlier, ensuring compliance hinges on following strict code standards and maintaining detailed documentation. A solid understanding of duct leakage testing codes is essential for creating efficient and compliant HVAC systems.

U.S. Building Codes and Limits

The International Energy Conservation Code (IECC) serves as the foundation for duct leakage standards across the U.S., with many states adopting these guidelines. Over the years, these standards have become more rigorous.

Earlier IECC versions set rough-in limits between 4–6 CFM per 100 ft², but later versions tightened this to 4 CFM per 100 ft². The 2009 IECC introduced post-construction limits of 8 CFM per 100 ft² for outdoor leakage and 12 CFM per 100 ft² for total leakage.

The 2012 IECC went further, establishing a single post-construction limit of 4 CFM per 100 ft² of conditioned floor area for total leakage.

The 2021 International Residential Code (IRC) retains similar standards but adds more detailed testing requirements. For rough-in tests, leakage must not exceed 4.0 CFM per 100 ft² if the air handler is installed, or 3.0 CFM per 100 ft² if it’s not. Post-construction testing allows up to 4.0 CFM per 100 ft², while ducts entirely within the thermal envelope can have up to 8.0 CFM per 100 ft².

The 2021 IECC also introduced mandatory testing for all air-handling ductwork, regardless of its location.

For commercial systems, the standards are even stricter under the updated ASHRAE 90.1 code. The maximum system leakage rate is now 5%, with ductwork alone limited to 3%. Moreover, supply and return ducts leaking to or from outdoors cannot exceed 2%.

“These updates really reflect the industry’s increased understanding of the critical role that duct performance plays in overall building performance. It also highlights the fact that taking a whole-system approach is vital to achieving maximum energy efficiency”.

States like California, Illinois, and Washington are setting even tougher standards. California’s Title 24, for example, focuses heavily on duct system performance. Many experts believe other states will follow California’s lead.

These codes establish the benchmarks that testing documentation must confirm.

Testing Documentation Requirements

Once the limits are set, proper documentation becomes essential to verify compliance and guide any necessary corrections. Both the 2009 and 2012 IECC require duct tightness verification through either rough-in or post-construction testing.

Certified raters must document leakage levels using RESNET-approved protocols, ensuring consistent and reliable testing procedures.

Timing matters when it comes to testing. If duct leakage is tested at the rough-in stage, a HERS rater must confirm and document compliance with the standard of 4 CFM25 per 100 ft² of conditioned floor area or 40 CFM25 (whichever is greater), using approved testing methods. Additionally, they must perform a final visual inspection to ensure duct boots are sealed correctly to finish surfaces.

Documentation should include leakage results, the conditioned area, and test conditions. For ENERGY STAR Version 3 Rev 11 compliance, testing can occur at rough-in or final stages, with specific limits: 4 CFM25 per 100 ft² or 40 CFM25 (whichever is greater) at rough-in, and 8 CFM25 per 100 ft² or 80 CFM25 (whichever is greater) at final.

As Neal Walsh explains:

“With this new standard, getting it right the first time is critical. Having to re-seal and re-test increasingly larger portions of the duct system can easily turn into a time- and labor-intensive proposition”.

Before starting any project, confirm which version of the IECC your jurisdiction uses to ensure compliance with the applicable duct leakage testing requirements. As regulations continue to evolve, expect tighter leakage limits, increased testing coverage, and broader inclusion of various duct types in testing.

sbb-itb-99db659

Pros and Cons of Each Testing Method

Looking at the various testing methods side by side can help clarify how each one fits into different scenarios. Your choice will ultimately depend on factors like your budget, the type of building you’re working with, and your specific goals. Each method has its strengths and weaknesses, which can impact your overall testing strategy.

Method Comparison Chart

Here’s a quick breakdown of the trade-offs for each approach, so you can decide which one aligns best with your needs:

Testing Method Accuracy Best For Main Limitations
Duct Pressurization High Residential & Commercial Requires specialized equipment
Blower Door Testing High Residential buildings Measures entire building, not just ducts
Visual Inspection Lower (~67% accuracy) Initial assessments Labor-intensive; may miss small leaks

The accuracy gap between these methods is worth noting. Pressure-based tests, for example, can achieve up to 97% accuracy, while visual inspections lag behind at about 67% accuracy for detecting and classifying damage. This difference underscores why pressure-based methods are often considered the gold standard.

Duct pressurization testing works by pressurizing the duct system and measuring air leakage rates. This method is particularly effective for identifying areas that need sealing or repair, which directly improves energy efficiency. In fact, the U.S. Department of Energy estimates that air leaks can account for up to 40% of heating and cooling costs, making accurate testing crucial.

Blower door testing evaluates the airtightness of an entire building. It involves sealing all openings except one, where a fan depressurizes the interior to measure overall air leakage. For example, Green Attic offers professional blower door tests starting at $250 for buildings under 3,000 square feet.

“A duct system is an extremely important component of a home’s HVAC (heating, ventilation, air conditioning) system meant to transfer conditioned (heated or cooled) air to various rooms. If it is leaking and not properly sealed, you are paying to heat and cool unconditioned parts of your home… and you may be sacrificing comfort at the same time.” – Knockout Inspections™

Visual inspections, while the easiest to perform, are the least reliable. SMACNA notes that visual checks can suffice for verifying reasonably tight construction, but research shows they often miss smaller leaks and require significant labor.

Which Method to Use When

Selecting the right method depends on the type of building and your specific objectives. Here’s a closer look at when each method works best:

  • Residential systems: Combine duct pressurization with blower door testing for a complete evaluation, as residential systems often suffer from significant air loss.
  • Commercial systems: Use duct pressurization as the primary method. For larger HVAC systems, multiple fans may be necessary. Visual inspections can be used as a secondary measure.
  • Measuring duct efficiency: Duct pressurization is ideal for pinpointing leaks and improving system performance.
  • Assessing overall building airtightness: Blower door testing is the go-to for identifying excess air leakage, which can reduce energy costs and prevent issues like drafts, moisture condensation, and outdoor pollutants.
  • Budget-friendly or initial assessments: Visual inspections can provide a starting point. Improved techniques, such as using colored liquids or tracers, may help, but they lack the precision of pressure-based methods.
  • Industrial applications: A combined approach works well – start with a visual inspection to spot obvious problems, then use duct pressurization for precise measurements. Many codes allow up to 10% leakage and require testing only for high- and medium-pressure ductwork, so thorough evaluation is key.

Professional Testing Services

Trying to test duct leakage on your own often falls short. For accurate results, professional expertise and specialized tools are non-negotiable. With today’s complex HVAC systems and stringent building codes, professional testing plays a key role in ensuring both efficiency and compliance.

When to Call a Professional

Once you’ve familiarized yourself with the basics of duct testing, knowing when to bring in a professional is just as important. These experts use precise methods to meet building code standards and optimize system performance.

For commercial and industrial HVAC systems, professional testing is almost always necessary. These systems involve intricate designs and require advanced equipment to evaluate larger duct networks effectively.

Another critical consideration is building code compliance. Professionals adhere to established national and state standards, ensuring your system meets all regulatory requirements. In some areas, duct testing is required to obtain a Certificate of Occupancy (CO), making professional services a must rather than an option.

You might need professional help if you notice certain red flags, such as uneven temperatures across rooms, rising utility bills, excessive dust near vents, musty odors, or persistent allergy symptoms indoors. These issues often point to duct leaks, which can reduce HVAC efficiency by as much as 20%.

Experts recommend scheduling professional duct testing every 2–3 years to maintain efficiency. It’s also wise to test after any changes to your heating or cooling system.

The cost of ignoring duct issues can be steep. Leaks can waste up to 30% of the air your HVAC system produces, and more than two-thirds of duct systems have leaks. As SITA-TAB, an industry expert, explains:

“You can’t fix what you don’t measure. Duct leakage testing provides the data you need to seal the system and optimize airflow.” – SITA-TAB

On average, professional duct testing costs around $325, with prices ranging from $115 to $450. While it may seem like an upfront expense, this service often pays for itself by improving energy efficiency and avoiding costly repairs down the line.

Hydrodynamics Inc. HVAC Services

Hydrodynamics Inc

For dependable, code-compliant testing, Hydrodynamics Inc. is a trusted choice. This family-owned company has been serving residential, commercial, and industrial clients since 1994, offering nearly three decades of HVAC expertise.

Hydrodynamics’ certified technicians use advanced tools like ultrasonic and infrared testing to pinpoint leaks, even in areas that are hard to access with a visual inspection. Their thorough approach ensures no inefficiency goes unnoticed.

Their services typically include a full HVAC inspection, sealing of supply and return registers, pressurizing the duct system, collecting data, and providing a detailed report with actionable recommendations. Additionally, they offer air production cost analysis, helping clients understand the financial impact of air leaks.

Hydrodynamics’ commitment to excellence is backed by certifications such as A.S.S.E Backflow Testing Certification, EPA 609 Certification, and Trac Pipe & Gas Tite Certification. These credentials highlight their dedication to industry standards and regulatory compliance.

Beyond testing, Hydrodynamics offers complete HVAC solutions. They seal ducts to prevent future leaks, provide ongoing maintenance, and service a wide range of systems, including heating, air conditioning, ductless setups, heat pumps, and specialized industrial applications. Their preventative maintenance programs are designed to keep systems running smoothly and to help clients avoid higher energy bills, code violations, and frequent repairs.

With decades of experience and state-of-the-art diagnostic tools, Hydrodynamics Inc. delivers the precise results and compliance that modern HVAC systems demand. Whether it’s routine testing or a full system overhaul, they’re a one-stop solution for all your HVAC needs.

Conclusion

This guide highlights key methods like duct pressurization, blower door tests, and visual inspections to identify leaks that can waste up to 30% of conditioned air.

Routine testing plays a crucial role in maintaining efficiency. As Joe Ophoff, Certified HERS Rater, explains:

“In new construction home design, there is a great emphasis on air leakage and distribution. New homes are designed for super performance, so really fine-tuning distribution systems are necessary for comfort throughout the house.”

The same principle applies to older systems, where significant air leakage is common. Addressing these issues not only improves energy performance but also reduces utility costs.

While energy efficiency is often the main motivation for duct testing, the advantages go beyond just saving money. Proper testing helps maintain consistent indoor temperatures, improves air quality, and ensures compliance with building codes.

Tests like duct blaster evaluations at 25 Pascals and blower door assessments provide precise data, enabling targeted repairs and system optimization.

For homeowners and facility managers, deciding between DIY inspections and professional testing often depends on the system’s complexity and code compliance needs. Visual inspections might uncover obvious problems, but achieving peak performance usually requires professional expertise and specialized tools. For guaranteed results and compliance, professional testing is indispensable.

Hydrodynamics Inc., with nearly 30 years of experience, offers comprehensive duct testing services. Their approach combines advanced diagnostic tools with certified expertise, ensuring your HVAC system runs efficiently and meets all regulatory standards. From initial inspections to detailed reports and repair recommendations, their services are designed to optimize performance.

Whether you’re installing a new system, addressing comfort concerns, or maintaining an existing setup, regular duct leakage testing is a wise investment. The upfront cost of professional testing pays off through lower energy bills, extended system lifespan, and the confidence of knowing your HVAC system is operating at its best.

FAQs

What’s the difference between duct pressurization testing and blower door testing, and when should you use each?

Duct pressurization testing zeroes in on air leaks within the ductwork itself. This process involves a duct blaster, which pressurizes the ducts – typically to 25 Pascals – and pinpoints leaks, especially in areas like attics or crawl spaces that aren’t climate-controlled. It’s commonly carried out after the ductwork is installed to confirm everything is properly sealed.

Blower door testing, by contrast, evaluates the airtightness of the entire building. A blower door fan is used to either pressurize or depressurize the structure, helping to locate overall air leakage. This test is often conducted during or toward the end of construction to ensure the building meets energy efficiency standards.

In summary, duct testing is focused on the duct system, while blower door testing examines the airtightness of the entire building.

How can I tell if I need professional duct leakage testing or if a visual inspection is enough?

If you’re trying to figure out whether you need professional duct leakage testing or if a simple visual inspection will suffice, start by evaluating the situation. A visual inspection is a straightforward approach where you check your ductwork for visible signs of damage, such as holes, cracks, disconnected sections, or worn-out seals. It’s quick and can help you identify obvious problems.

But here’s the thing: smaller leaks or hidden issues are often impossible to spot without the right tools. If your HVAC system isn’t performing as it should, your energy bills seem unusually high, or you suspect more serious leaks, professional testing is a smart move. Methods like pressure testing or blower door tests can give you accurate measurements of duct leakage. These tests are invaluable if you’re looking to improve energy efficiency or need to meet local energy regulations.

What happens if duct leaks are not fixed, and how can they affect energy efficiency and air quality?

Why You Shouldn’t Ignore Duct Leaks

Letting duct leaks slide can hit you where it hurts – your wallet and your health. When your ducts have leaks, the conditioned air you’re paying for escapes, making your HVAC system work overtime. This not only spikes your energy bills but also shortens the lifespan of your heating and cooling equipment.

But that’s not all. Leaky ducts can draw in dust, allergens, and even harmful gases from areas like attics or crawl spaces. This can lead to poor indoor air quality, which might trigger respiratory issues or other health concerns. Tackling duct leaks quickly ensures your home stays comfortable, your air stays clean, and your energy use stays efficient.

How to Fix Bad Water Taste at Home

How to Fix Bad Water Taste at Home

If your tap water tastes off – like chlorine, metal, or even rotten eggs – you’re not alone. Bad water taste can hint at underlying issues like pipe corrosion, bacterial growth, or excessive chemicals. Ignoring it may lead to dehydration or unnecessary spending on bottled water. Here’s how to fix it:

  • Identify the cause: Check for chlorine, metallic, sulfur, or musty flavors to pinpoint the issue.
  • Test your water: Use simple at-home tests or a water test kit to detect contaminants.
  • Quick fixes: Add citrus slices, chill the water, or let chlorine dissipate by leaving water uncovered.
  • Install filters: Use activated carbon for chlorine, reverse osmosis for metals, or whole-house systems for widespread problems.
  • When to call a pro: Persistent issues like corroded pipes or well contamination may need professional help.

Clean, great-tasting water starts with understanding the problem and choosing the right solution. Whether it’s a quick DIY fix or a professional-grade system, you can enjoy better water without breaking the bank.

How to get rid of tastes and smells in your water

Finding the Source of Bad Water Taste

Pinpointing the cause of an unpleasant water taste is the first step toward solving the problem. Different contaminants produce specific flavors and odors, so recognizing these patterns can help you address the issue more effectively. Identifying the root cause ensures you can apply the right fix.

Types of Bad Water Taste

Water can take on a variety of unpleasant tastes, each hinting at a specific problem.

  • Chlorine taste: This is one of the most common complaints, especially for those using city water. It has a sharp, chemical flavor – much like swimming pool water. Municipal water supplies often have a chlorinated taste due to bacteria treatment processes.
  • Metallic flavors: If your water tastes like you’re sucking on a penny, it may indicate copper, iron, or zinc leaching from your plumbing. This is especially common in homes with older copper pipes or galvanized steel systems.
  • Sulfur or rotten egg taste: This unmistakable odor points to hydrogen sulfide gas in your water. It’s more frequently found in well water but can sometimes affect city water supplies.
  • Musty, earthy, or fishy flavors: These tastes often signal organic matter in your water system, such as algae, bacteria, or decomposing plant material. These flavors tend to intensify during warmer months when organic growth is more active.

Once you’ve identified the type of taste, the next step is to figure out whether the problem originates from your water source or your home’s plumbing.

Check Your Water Source

Start by determining if the issue stems from your water supply or your plumbing system. If you’re on city water, reach out to your local water utility to inquire about recent changes in treatment or any known issues in your area. Many utilities provide annual water quality reports that detail the contents of your water supply.

For private well owners, taste problems often trace back to the well or its storage tank. Wells that aren’t properly maintained can develop bacterial growth. The depth and location of your well also play a role – shallow wells are more prone to surface contaminants that can affect taste.

Your plumbing system might also be the culprit. Older pipes, especially those made of galvanized steel, can corrode over time, releasing iron or zinc into your water. Even newer copper pipes can cause metallic flavors if your water is acidic. If the bad taste only occurs in hot water, your water heater may need maintenance or replacement.

Test Your Water at Home

You can perform simple tests at home to identify common water issues. Start by comparing your tap water to bottled distilled water. Pour each into separate clear glasses and examine their color, smell, and taste side by side. Look for unusual tints – yellow, brown, red, orange, blue, or green – and note any odd odors before tasting.

For hard water, try the soap suds test: Fill a container with 12 oz of tap water, add liquid dish soap 10 drops at a time, and shake. If you get lots of suds quickly, your water is soft. If it takes 40 to 50 drops to produce suds, you likely have hard to very hard water. Another method is the hardness evaporation test: Place tap water in a spoon and let it evaporate over 24 to 48 hours. White spots or sticky residue signal hard water minerals.

A magnifying glass inspection can also help. Fill a clean, clear glass with water, hold it up to bright light, and examine it closely. Look for floating particles, persistent cloudiness, or foam that lingers.

If these basic tests reveal potential issues, consider purchasing a home water test kit from a hardware store or online. These kits can measure chlorine levels, pH, total dissolved solids, and common contaminants like copper or iron. For persistent problems, professional water analysis may be necessary.

Quick Fixes for Immediate Relief

When you’re stuck with bad-tasting water, you don’t always have to wait for a permanent filtration system to swoop in and save the day. There are plenty of quick and simple tricks you can try at home to make your water more palatable while you work on a long-term solution.

Add Flavors and Adjust the Temperature

One of the easiest ways to deal with unpleasant water is to infuse it with natural flavors. Citrus slices – like lemon, lime, or orange – are a great choice for neutralizing metallic or mineral-heavy tastes. Just drop a few slices into a pitcher of water and let it chill in the fridge for a few hours. Voilà, a refreshing upgrade.

If the water has an earthy or musty flavor, try adding cucumber slices or fresh herbs like mint, basil, or rosemary. These not only mask the off-taste but also add a refreshing twist. For a touch of natural sweetness, toss in some berries (strawberries or raspberries) or chunks of watermelon. They can help balance out harsh chemical flavors.

Temperature tweaks are another quick fix. Simply chilling your water or adding ice cubes can make it taste better by muting unpleasant flavors. Cold temperatures naturally dull our ability to detect certain off-notes, making your water more enjoyable without any extra effort.

If chlorine is the culprit, there are a couple of easy tricks to reduce that sharp, pool-like taste. Letting tap water sit uncovered for a few hours allows the chlorine to dissipate naturally. For faster results, boil the water for 5–15 minutes and then let it cool.

Try Carbonation or a Splash of Juice

Flat or stale water? Carbonation to the rescue! If you have a home soda maker, adding bubbles can instantly make your water more appealing. You can even sprinkle in a pinch of salt if the water tastes flat or seems low in minerals.

Another option is to add a small splash of natural fruit juice. Go for sugar-free varieties to avoid unnecessary sweetness while still giving your water a flavor boost.

These quick fixes won’t solve the root problem, but they’ll provide some much-needed relief while you work on installing a more permanent water treatment system. Whether it’s citrus slices, chilling, or a bit of fizz, these hacks can make a big difference in the short term.

Water Filters and Treatment Systems

If you’re tired of quick fixes that only temporarily mask bad water taste, a proper filtration system could be the long-term solution you need. The secret lies in matching the right treatment system to the specific issues in your water. By addressing the root causes, these systems go beyond temporary relief to deliver consistently better-tasting water.

Match Filters to Your Water Problems

Different water problems call for different filtration technologies. Here’s a breakdown of common issues and the systems that can tackle them:

  • Chlorine taste and odor: Activated carbon filters are the best choice here. These filters trap chlorine molecules as water flows through the carbon media, neutralizing both the taste and smell. They also target certain organic compounds that affect flavor. To keep them effective, plan to replace the filters every 3-6 months, depending on your water usage.
  • Metallic tastes: If your water tastes metallic due to iron, copper, or lead, a reverse osmosis (RO) system is often the answer. RO systems force water through a semi-permeable membrane, removing up to 99% of dissolved metals and other contaminants. They’re especially useful for homes with well water or older plumbing systems that can leach metals into your water.
  • Sulfur odors: That unmistakable “rotten egg” smell from hydrogen sulfide requires a specialized approach. Whole-house oxidation systems convert the gas into filterable particles. For more severe cases, combining oxidation with activated carbon filtration can completely eliminate both the smell and taste of sulfur.
  • Hard water: If your water has a bitter taste or leaves a chalky residue, ion exchange systems can help. These systems replace calcium and magnesium ions with sodium or potassium, softening the water and improving its flavor.

Once you’ve identified the right filter, the next step is determining the best location for installation.

Pick the Right Installation Location

Where you install your filtration system can make a big difference in its effectiveness. Here’s how to choose:

  • Point-of-use systems: These are ideal for addressing taste issues in specific areas, like drinking water from your kitchen faucet. Options like faucet-mounted filters or countertop units are budget-friendly, typically ranging from $30 to $300, and are easy to install.
  • Under-sink systems: If you want a more discreet option with higher filtration capacity, under-sink systems are a great middle ground. They treat all the water from your kitchen sink and provide better flow rates.
  • Whole-house systems: When your water issues affect the entire home – such as sulfur odors noticeable in showers or laundry – a whole-house system is the way to go. These systems treat all incoming water before it reaches any faucet or appliance. While they require a larger upfront investment (around $1,000 to $5,000 installed), they offer comprehensive treatment and even protect your plumbing and appliances from damage.

If you have a larger household, make sure to choose a system that can handle peak water usage. For example, a family of four typically needs a system capable of processing 10-15 gallons per minute to avoid water pressure drops.

Keep Your System Working Properly

To keep your water filtration system delivering clean, great-tasting water, regular maintenance is a must. Neglecting maintenance can lead to expired filters, which may even worsen water quality as trapped contaminants start to break down.

Here’s what you need to stay on top of:

  • Filter replacement: Replace activated carbon filters every 3-6 months, depending on water quality and usage.
  • RO membrane care: Change the membrane every 2-3 years, and replace pre-filters every 6-12 months to protect the system.
  • System sanitization: Clean the system annually with a mild bleach solution to prevent bacterial growth.
  • Water pressure checks: Ensure your system maintains at least 40 psi. If pressure drops, consider installing a booster pump.

For RO systems, replacing pre-filters on schedule is crucial to extending the life of the membrane. Many modern systems make maintenance easier with features like indicator lights or smartphone apps that track filter life and send reminders for replacements. Keeping records and setting calendar alerts can also help you stay organized and ensure your system runs smoothly.

sbb-itb-99db659

When to Call Water Treatment Professionals

After trying DIY fixes and maintaining your filtration system, there comes a point when some water issues demand professional attention. While many taste and odor problems can be addressed at home, certain situations are too complex for DIY solutions. Knowing when to bring in experts can save you time, money, and ensure your water is safe for your family.

When the Problem Goes Beyond DIY Fixes

Some water quality problems are simply beyond the scope of home filtration systems. If you’ve tried multiple filters and still notice persistent bad tastes or odors, it’s time to call in professionals. Expert water testing can identify the root cause and point to solutions that go beyond what household systems can handle.

For example, if your water tastes metallic, sulfurous, or chemically treated despite proper filtration, the issue could stem from corroded pipes, failing well components, or even systemic contamination. These are not problems you can solve with a new filter – they require professional diagnosis and treatment.

Corroded plumbing systems are another red flag. Discolored water, especially reddish-brown or greenish hues, paired with metallic tastes, often indicates deteriorating pipes. Corrosion doesn’t just affect taste; it can also damage your plumbing. A professional can assess whether you need pipe replacements, water chemistry adjustments, or specialized treatments to resolve the issue.

Well water problems are particularly tricky. Issues like bacterial contamination or mineral imbalances often require more than a DIY approach. Professionals can test for harmful bacteria, adjust your well pump system, and install advanced treatment solutions that go far beyond standard filtration.

Sometimes, water pressure problems accompany taste issues, especially in homes with well systems. These could point to issues with your pump or pressure tank rather than the water itself. In such cases, a professional evaluation is essential to get to the root of the problem.

Hydrodynamics Water Treatment Services

When home remedies aren’t enough, professional water treatment services step in to tackle the tough challenges. Hydrodynamics, a family-owned company since 1994, specializes in addressing complex water quality issues for both residential and commercial properties.

Their water conditioning services include installing and maintaining water softeners and UV sterilization systems. These solutions are ideal for addressing hard water, bad tastes, and bacterial contamination – problems that standard filters just can’t fix. This is especially important for homes relying on well water or dealing with challenging municipal water conditions.

Hydrodynamics also offers well pump and grinder pump services. If your water taste issues stem from failing pumps or contaminated well components, their team can diagnose and replace faulty equipment, ensuring your well system consistently delivers clean, great-tasting water.

For water quality problems linked to plumbing, they provide comprehensive plumbing services. Corroded pipes or failing plumbing components can significantly impact water taste and system reliability. Hydrodynamics technicians can inspect your entire plumbing system and recommend repairs or replacements to improve both water quality and performance.

For businesses or homes requiring industrial-grade solutions, they offer advanced heating and cooling systems alongside water treatment options. This integrated approach is particularly beneficial for commercial properties where water quality affects not just drinking water but also operational equipment.

Hydrodynamics also provides maintenance programs to help prevent gradual declines in water quality. Regular upkeep ensures small issues are caught early, avoiding severe taste or contamination problems down the line.

If water testing reveals harmful contaminants like bacteria or heavy metals, it’s critical to act quickly. Professional-grade treatment systems and ongoing monitoring are key to protecting your family’s health and ensuring safe, clean water.

Water Treatment Method Comparison

Once you’ve identified the source of your water’s taste issues, the next step is finding the right treatment method to address them. The choice will depend on your water’s specific challenges, your home’s setup, and your budget. Here’s a breakdown of popular water treatment options to help you decide.

Activated Carbon Filters
These filters are excellent for tackling chlorine taste and odors. They work by adsorbing chemicals and organic compounds that affect water’s flavor. However, they won’t resolve mineral-related tastes, so they’re best suited for municipal water supplies with chlorine issues.

Reverse Osmosis Systems
If your water has multiple taste problems, reverse osmosis systems are a solid choice. They remove a wide range of dissolved contaminants, providing comprehensive filtration. While these systems require a higher upfront cost, they deliver reliable, long-term results for improving water quality and taste.

Whole-House Systems
For households that want better-tasting water at every tap, whole-house systems are the way to go. These systems treat all incoming water, addressing overall water quality. Though they come with higher installation costs and added complexity, they’re designed to enhance water taste and quality throughout your entire home.

When deciding between these options, think about factors like installation difficulty, ongoing maintenance, and the specific issues with your water supply. For example, if you’re on municipal water, a focus on chlorine removal might suffice. On the other hand, well water users may need a solution that also tackles minerals and other contaminants.

Conclusion: Enjoy Clean, Great-Tasting Water

Improving the taste of your water starts with understanding the root cause of the problem. Once you identify the issue, you can choose the right solution to address it effectively.

Begin by testing your water to pinpoint specific contaminants. For chlorine taste, an activated carbon filter works well. If your water has a mix of impurities, a reverse osmosis system might be the answer. For a more thorough approach, consider a whole-house filtration system.

Don’t forget regular maintenance – cleaning components and replacing filters as recommended is key to keeping your system running smoothly. Even the most advanced filtration system won’t deliver consistently great-tasting water if it’s not well-maintained.

Some water issues, like bacterial contamination or persistent off-flavors, may require professional help. For these more complex problems, experts like Hydrodynamics offer specialized solutions, including UV systems and water softeners, to ensure your water is safe and enjoyable.

FAQs

How can I tell if the bad taste in my water is caused by my plumbing or the water source?

If your water has an unpleasant taste, the first step is figuring out whether the issue stems from your home’s plumbing or the water source. Check all the faucets in your house. If the bad taste shows up everywhere, the water source is likely the culprit. But if it’s only happening at specific faucets, your plumbing might be to blame. Common causes include bacteria buildup on rubber fittings or stagnant water sitting in the pipes.

For plumbing-related problems, start by running the affected taps for a few minutes to flush out any stagnant water. If the odd taste doesn’t go away or you think the issue might be more serious, it’s a good idea to call in a professional for a detailed inspection and possible solutions.

What are the long-term advantages of installing a whole-house water filtration system over point-of-use filters?

Why Consider a Whole-House Water Filtration System?

Installing a whole-house water filtration system can bring a range of long-term benefits that go beyond what point-of-use filters can offer. These systems filter water at the source, ensuring that every faucet and appliance in your home provides clean, safe water. Whether it’s for drinking, cooking, bathing, or cleaning, the improved water quality can make a noticeable difference in your daily life.

Whole-house systems are designed to tackle contaminants like sediment, chlorine, heavy metals, and volatile organic compounds (VOCs). This not only enhances the taste of your water but can also be kinder to your skin and hair, especially if you’ve struggled with dryness or irritation caused by untreated water.

Another perk? These systems help protect your plumbing and appliances. By reducing impurities and preventing hard water buildup, they can extend the life of your pipes, water heater, and other appliances, potentially saving you money on maintenance and repairs down the line. While the upfront cost might seem steep, the combination of convenience, improved health, and long-term savings makes it a worthwhile investment for your home.

When should I call a professional to fix bad-tasting water, and what can they do that I can’t?

If your water still tastes off even after trying easy fixes like flushing the pipes or using basic filters, it might be time to bring in a professional. Persistent problems – especially if accompanied by discoloration, odd smells, or concerns about contamination – could point to bigger issues in your plumbing, well system, or water supply.

Experts can conduct comprehensive water quality tests, set up advanced filtration systems, and tackle underlying plumbing or well problems that DIY solutions often can’t handle. Their knowledge ensures your water is not only safe and clean but also tastes better, all while helping to prevent long-term damage to your home’s water system.

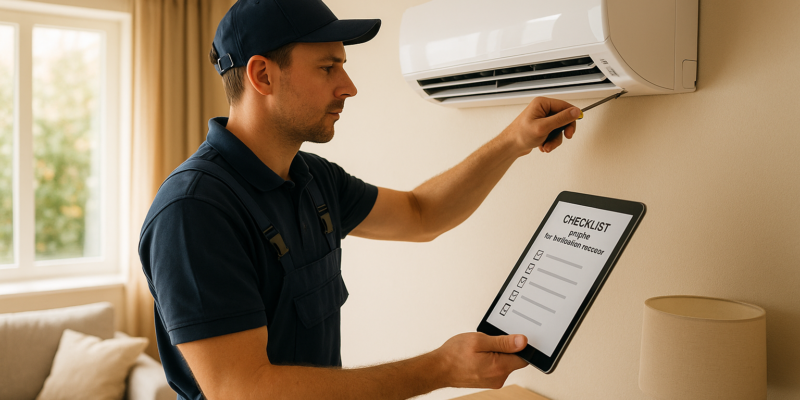
Checklist for HVAC Installation Success

Checklist for HVAC Installation Success

Getting HVAC installation right boils down to thorough preparation, precise execution, and detailed follow-up. Here’s what you need to know:

  • Preparation: Assess the site, check equipment, and secure permits to avoid delays and ensure compliance.
  • Installation: Safely remove old systems, install new components accurately, and focus on proper electrical and refrigerant connections.
  • Post-Installation: Test system performance, inspect for issues, and ensure everything meets safety and code standards.
  • Customer Handover: Educate the customer on usage, maintenance schedules, and warranty details while providing complete documentation.

HVAC Install Checklist: Your Essential Installation Guide

Pre-Installation Preparation

Getting everything ready before starting an HVAC installation is essential. Proper preparation helps avoid delays and costly mistakes, ensuring the process goes smoothly.

Site Assessment

Start with a detailed review of the site. This includes examining the layout, dimensions, and ventilation needs. Take a close look at the building’s structure to figure out the best spots for placing units, planning ventilation, and ensuring accessibility for installation. Don’t forget to account for any existing HVAC systems and obstacles that might get in the way.

Plan for where electrical connections and ductwork will go, including vents on exterior walls or the roof. Perform load calculations to choose the right HVAC unit size. These calculations should factor in the size of the home, the number of windows and doors, insulation quality, room count, ceiling height, orientation, and the number of occupants.

Inspect accessible components like ductwork, vents, filters, and coils for wear, damage, or blockages. Use tools to measure airflow velocity and pressure drop to detect any obstructions or imbalances. Once the site is fully assessed, confirm that all equipment aligns with the project’s requirements.

Equipment and Materials Check

Make sure all necessary equipment and materials are in good working order. Check filters and systems to see if replacements or upgrades are needed. Consider the filter’s pressure drop when designing the system to prevent performance issues. Use tools like thermal imaging cameras, gauges, and testing equipment to evaluate temperature control, humidity levels, and energy efficiency.

Permits and Code Compliance

Before starting the installation, secure any required permits from local authorities. This is especially important for replacing furnaces or air conditioning systems. Assess the existing infrastructure and account for any spatial limitations or unique challenges that could pose risks. Review all project specifications and requirements carefully to ensure compliance and avoid setbacks.

HVAC Installation Steps

Once preparations are complete, it’s time to move on to the actual installation process. Following each step carefully ensures the system operates safely, efficiently, and lasts for years to come.

Removing Old Equipment

Start by turning off the power supply at the electrical panel to avoid any accidents. This simple but essential step protects both the technicians and the property from electrical hazards.

Next, disconnect and label all electrical components, such as disconnect boxes and conduits. Labeling helps streamline the installation of the new system.

When it comes to refrigerant evacuation, this step must adhere strictly to regulatory guidelines. Certified professionals should handle this process to avoid environmental damage and ensure safety.

If the system includes gas lines, proceed with extreme caution. Test for leaks both before and after disconnecting the lines to prevent dangerous gas leaks.

Carefully remove old components in the proper order: upper ductwork, indoor evaporator coils, refrigerant lines, and condensation lines. Use appropriate tools or equipment when handling heavy parts like motors and ductwork to prevent injuries.

Good ventilation is critical, especially in confined spaces, to avoid the buildup of dust, fumes, or hazardous gases. Keep the work area clean and free of debris to improve safety and efficiency.

Installing New HVAC Components

Begin by placing major components – like condensers, air handlers, and ductwork – based on the site assessment completed earlier. Follow manufacturer specifications and local codes to ensure proper installation. Secure mounting is essential to reduce vibration and extend the equipment’s lifespan.

When installing ductwork, pay close attention to airflow design. Properly sized ducts are crucial for optimal performance and energy efficiency. Seal all joints and connections to eliminate air leaks, which can reduce effectiveness and increase energy costs.

Thermostat placement also plays a key role in system performance. Install thermostats in locations free from direct sunlight, heat sources, or drafts to ensure accurate readings. Protect thermostat wires by running them through safe pathways to prevent damage.

Position both indoor and outdoor units with adequate clearance for maintenance access and proper airflow. Follow manufacturer guidelines for minimum distances from walls, vegetation, or other obstructions. Double-check each step before moving on to ensure the system is set up for long-term reliability.

Electrical and Refrigerant Connections

With the components in place, focus on the electrical and refrigerant connections – both of which are critical for the system’s functionality.

Electrical safety cannot be overstated. Electrical incidents result in approximately 1,000 deaths and 30,000 injuries annually in the U.S.. Faulty wiring can lead to fires, power surges, and severe damage to both the HVAC system and the property.

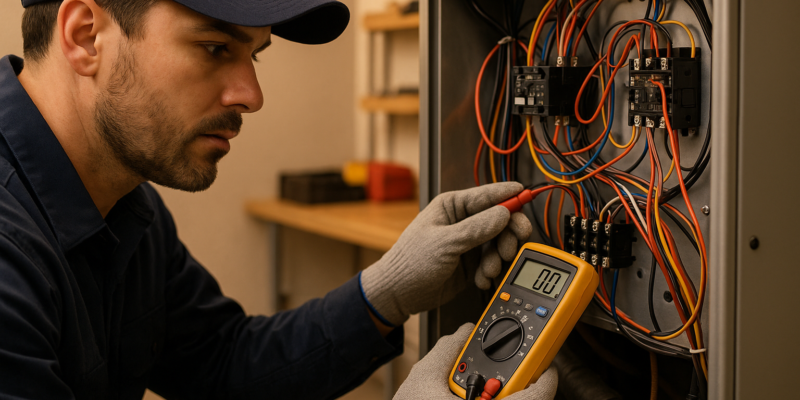
Before starting, de-energize the system completely. Use proper lockout/tagout (LOTO) procedures and verify circuits are off with testing equipment. Always wear insulated personal protective equipment (PPE) and use insulated tools to reduce electrical risks.

Ensure proper grounding of the system to prevent electrical issues and maintain safety. Choose the correct wire sizes to avoid overheating and other potential problems.

Keep cables organized to maintain airflow and reduce risks. Bundle wires neatly in raceways and use protective sleeves to minimize the chance of electric shocks. Inspect all components during installation to catch any damage or faults early.

For refrigerant lines, precision is key. Use the correct fittings and follow the manufacturer’s torque specifications. Leak testing is an absolute must to ensure the system is sealed properly, preventing refrigerant loss and costly repairs down the line. This step also helps avoid environmental harm caused by leaks.

Post-Installation Quality Checks

Once the installation and connections are complete, the next step is testing the system to ensure it’s safe, efficient, and ready for use. These checks help identify any potential issues before handing the system over to the customer, ensuring everything works as intended.

System Testing and Performance Check

Start by powering up the system gradually. Turn on the electrical supply at the main panel, then activate the system through the thermostat. Test both heating and cooling modes while listening for any unusual startup sounds, which could indicate installation issues.

Check the temperature differential to confirm the system’s performance. Use calibrated digital thermometers to measure the difference between the supply and return air. For cooling systems, the differential should fall between 15°F and 20°F, while heating systems should show a range of 30°F to 40°F. Deviations from these ranges may point to airflow problems or refrigerant issues.

Evaluate airflow at each register using tools like an anemometer or flow hood. Weak airflow could signal ductwork issues, while excessive airflow might indicate undersized return ducts. Ideally, each room should receive airflow within 10% of the calculated design values.

Verify refrigerant pressures using manifold gauges. The pressures should match the manufacturer’s specifications exactly. Incorrect readings could suggest refrigerant leaks, overcharging, or undercharging, all of which can reduce system efficiency and lifespan.

Ensure the system responds promptly to thermostat settings and that all programmed schedules work as expected. For smart thermostats, confirm they connect to Wi-Fi and respond to app commands.

Use a clamp meter to check motor and compressor electrical draws against the nameplate values. Significant deviations could indicate problems with motors, capacitors, or electrical connections. Once all these parameters are verified, move on to the final safety and visual inspections.

Final Inspections

Perform a visual inspection of the system components. Look for loose connections, missing screws, or improperly secured panels. Ensure all electrical boxes are covered properly, with no exposed or pinched wires.

Pay close attention to gas line connections when applicable. Use a leak detection solution on all joints and connections – any bubbles indicate a leak that must be addressed immediately. Gas leaks, no matter how small, are dangerous and cannot be ignored.

Inspect the condensate drainage system by pouring water into the drain pan to ensure proper flow. Blocked drains can lead to water damage and promote mold growth. Verify that drain lines have the correct slope and that condensate pumps, if present, are functioning properly.

Check ductwork sealing to ensure all joints are secured with appropriate sealants or tape, leaving no air leaks. Poorly sealed ducts waste energy and can significantly impact system performance.

Test safety controls, including limit switches, pressure switches, and emergency shutoffs. These mechanisms are critical for protecting the system and property in case of malfunctions.

Finally, confirm code compliance. Check that the installation meets local regulations, including equipment clearances, proper venting for gas appliances, and adherence to National Electrical Code standards for electrical work.

Customer Handover and Documentation

After completing the inspections, wrap up the process by educating the customer and providing thorough documentation. This ensures they understand how to operate and maintain their new system.

Conduct a system demonstration, walking the customer through thermostat programming, filter replacement, and basic troubleshooting. Show them how to locate the main electrical disconnect and safely reset circuit breakers.

Explain filter replacement schedules – monthly for standard 1-inch filters, and every 3-6 months for higher-efficiency filters. Homes with pets or smokers may require more frequent changes. Also, provide warranty details, which typically range from 5-10 years for major components, with some extending up to 20 years for heat exchangers. Register the warranties immediately to ensure coverage starts on the installation date.

Offer maintenance scheduling recommendations to help the customer protect their investment. Advise scheduling professional maintenance twice a year – once in the spring for cooling systems and again in the fall for heating systems. Provide your contact information for service appointments and emergency repairs.

Document the system’s specifications, including model numbers, serial numbers, refrigerant types, and electrical requirements. Leave a copy with the customer and keep the original in your company files for future reference.

Start a service history record beginning with the installation date. This record will track all maintenance, repairs, and modifications, making it easier for technicians to diagnose and resolve issues efficiently during future service visits.

sbb-itb-99db659

Documentation and Maintenance Planning

After completing final inspections and handing over the system to the customer, it’s essential to prioritize thorough documentation and a well-defined maintenance schedule. These steps not only protect the system’s long-term performance but also safeguard the contractor’s reputation and the customer’s investment. A well-maintained system ensures efficiency and reliability for years to come.

Installation Record Keeping

Detailed installation records are the foundation for future service and warranty claims. Start by documenting every piece of equipment, including model numbers, serial numbers, manufacture dates, and installation dates. This information becomes invaluable when ordering parts or verifying warranty coverage down the road.

Include system specifications and create a layout diagram that maps out equipment locations, electrical connections, gas lines, and thermostat wiring. For example, document a 3.5-ton Carrier heat pump charged with 8.2 pounds of R-410A refrigerant. Record details like refrigerant type, electrical specs, duct sizing, and any adjustments made during installation.

Take photographs of critical installation points before sealing components. Capture images of electrical connections, refrigerant lines, ductwork, and any custom mounting solutions. These visual references are incredibly helpful for troubleshooting or planning upgrades later.

Keep permits and certificates organized. Many jurisdictions require these documents to stay with the property, and they’re often needed for insurance claims or property sales. Store digital copies securely while also providing physical copies to the customer.

These records form the backbone of an effective maintenance strategy.

Creating a Maintenance Schedule

A clear maintenance schedule not only helps customers protect their system but also creates opportunities for ongoing service. Maintenance timing should align with seasonal system use – schedule cooling system checks in early spring and heating system checks in early fall to ensure peak performance during high-demand periods.

Tailor the frequency of maintenance to the system’s type and usage. Residential systems generally need professional servicing twice a year. However, homes with pets, smokers, or high levels of dust might require more frequent filter changes and inspections. Commercial systems, which often run longer hours, may need monthly attention.

Provide customers with simple maintenance tasks they can handle between professional visits. Monthly tasks might include replacing filters, clearing debris around outdoor units, and ensuring the thermostat is functioning properly. Quarterly tasks could involve inspecting ductwork for visible damage, checking for clogged drain lines, and testing safety shutoffs.

Track maintenance costs to help customers budget effectively. Professional maintenance visits typically cost between $150 and $300, depending on the system’s complexity and local labor rates. Offering preventive maintenance contracts can reduce these costs by 15-20% while providing benefits like priority scheduling and discounted repairs.

Set performance benchmarks during installation to monitor system health over time. Record initial measurements for temperature differentials, airflow rates, electrical loads, and refrigerant pressures. Comparing these benchmarks annually can help identify issues before they lead to system failures.

Use scheduling tools to simplify service tracking. Platforms like ServiceTitan or FieldEdge can send automated service reminders to customers and optimize technician scheduling.

Highlight warranty requirements to ensure customers maintain their coverage. Many manufacturers, like Carrier and Trane, require proof of annual professional maintenance to honor extended warranties. Provide customers with maintenance record cards to track service visits and explain these requirements clearly.

Finally, include emergency contact procedures in the maintenance plan. Share after-hours contact information and outline situations that require immediate attention, such as gas leaks, electrical sparking, or complete system failures during extreme weather. This ensures customers know when to act quickly and when issues can wait for regular business hours.

Conclusion: HVAC Installation Success

Achieving success in HVAC installation hinges on thoughtful preparation, precise execution, and thorough follow-up. Each phase of the process plays a crucial role in ensuring the system’s reliability and customer satisfaction.

It all starts with solid preparation. Conducting detailed site assessments helps uncover potential challenges early, while verifying equipment prevents unnecessary delays. Securing permits and adhering to local codes not only protects contractors and homeowners but also avoids compliance issues that could arise later. This groundwork sets the stage for a smooth installation process.

During installation, precision is everything. From removing outdated equipment to installing new components, every detail matters. Properly securing electrical connections, sizing refrigerant lines, and sealing ductwork according to manufacturer guidelines directly influence energy efficiency and system performance. These steps ensure the system operates as intended for years to come.

Post-installation checks are what separate good work from great work. Rigorous system testing identifies any issues while they’re still manageable, and meticulous inspections catch potential problems that could lead to warranty disputes or safety concerns. A thorough customer handover not only ensures they understand how to operate the system but also builds trust and confidence in the installation.

Finally, proper documentation and a clear maintenance plan protect the investment over the long term. Detailed records make warranty claims and future service easier, while a well-communicated maintenance schedule helps homeowners take an active role in system upkeep.

By following these steps, even the most complex HVAC projects can become seamless and professional. Consistently applying these best practices enhances contractor reputation, ensures homeowner comfort, and extends the life of the system.

The key to HVAC success is getting each step right the first time. This checklist serves as a reliable guide to achieving that goal, every single time.

FAQs

What are the key mistakes to avoid during an HVAC installation?

Common HVAC Installation Mistakes to Avoid

Getting your HVAC system installed correctly can save you a lot of headaches down the road. Here are some frequent mistakes to watch out for:

  • Picking the wrong unit size: If your HVAC system is too big or too small for your space, it can lead to uneven temperatures, higher energy costs, and reduced efficiency. Size matters here – get it right!
  • Poor ductwork design: Ducts that aren’t planned well can choke airflow, making your system work harder than it should.
  • Ignoring ventilation needs: Proper ventilation isn’t just a nice-to-have – it’s crucial for good air quality and keeping your system running smoothly.
  • Skipping leak tests: Refrigerant or duct leaks can waste energy and shorten your system’s lifespan. Testing for leaks is a step you don’t want to skip.
  • Crowding outdoor units: Outdoor units need space to breathe. Placing them too close to walls or other obstructions can block airflow and cause overheating.
  • Using the wrong filters: If you use high MERV-rated filters on a duct system that isn’t designed for them, you might strain your system and hurt its efficiency.

By avoiding these pitfalls during installation, you’ll not only boost your system’s performance but also help it last longer – saving you money and hassle in the long run.

What steps can I take to keep my HVAC system energy-efficient and reliable over time?

To keep your HVAC system running smoothly and efficiently, regular maintenance is a must. Start with the basics: replace or clean your air filters every 1–3 months to maintain good airflow. Check for leaks in your ductwork and seal them up to avoid wasting energy. It’s also smart to schedule professional check-ups twice a year. During these visits, a technician can handle tasks like inspecting refrigerant levels, cleaning coils, and lubricating moving parts.

Staying on top of maintenance not only cuts down on energy use but also minimizes wear and tear, helping your system last longer. These straightforward steps ensure your HVAC keeps your home comfortable no matter the season.

How should I prepare my home for an HVAC installation?

Tips for a Smooth HVAC Installation

Preparing for an HVAC installation? Start by clearing the area around the installation site. Both indoor and outdoor spaces should be free of clutter to ensure technicians can easily access the site and bring in equipment without any hiccups.

Another important step: secure pets and valuables. This precaution not only avoids disruptions but also minimizes the risk of accidental damage while the work is being done.

Lastly, take a moment to inspect your electrical connections to confirm they’re in good condition. Also, make sure all pathways are clear to allow technicians to move around safely. A little preparation goes a long way in making the entire process smooth and stress-free for everyone involved.

Common Pump Failures Predictive Tech Solves

Common Pump Failures Predictive Tech Solves

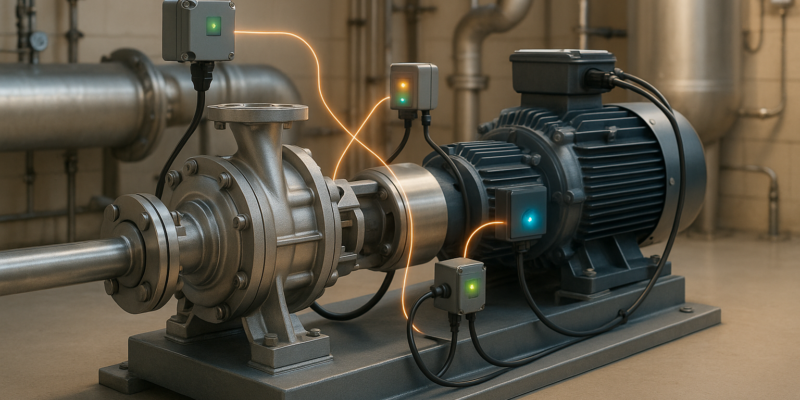
Predictive maintenance is transforming how pumps are managed by identifying potential failures before they occur. Using IoT sensors, real-time data, and AI, this approach monitors critical factors like vibration, temperature, and pressure to prevent costly breakdowns. Key benefits include:

  • Cost Savings: Reduces maintenance expenses by up to 30% and downtime by 45%.
  • Improved Reliability: Detects issues like bearing wear, seal leaks, cavitation, motor overheating, and blockages early.
  • Better Performance: Extends pump lifespan and minimizes disruptions.

For example, a chemical plant reduced pump failures by 40%, while vibration monitoring saved an oil plant over $100,000 by catching a faulty bearing early. Predictive maintenance is reshaping pump care, offering smarter, data-driven solutions for long-term efficiency.

#NIWeek2016: IoT enables smart pump conditioned monitoring

Common Pump Failures That Predictive Technology Prevents

When it comes to pump systems, understanding their most frequent failures is key to appreciating the impact of predictive maintenance. These failures aren’t just inconvenient – they can lead to performance issues, increased costs, and even safety risks. Here’s a closer look at the most common pump failures and how predictive technology helps tackle them head-on.

Bearing Wear and Failure

Bearing issues are the leading cause of pump breakdowns, responsible for 40–50% of failures. Worn bearings often result in increased vibration and noise, clear indicators of impending failure. The main culprit? Loss of lubrication, which leads to damaging metal-on-metal contact.

Predictive maintenance addresses this by using vibration and temperature sensors. These sensors monitor vibration patterns and detect heat increases that signal lubrication problems or contamination in the bearings. By focusing on frequencies in the 20–500 Hz range and measuring vibrations across all three axes, predictive systems can also catch misalignment issues early – another factor that accelerates bearing wear.

Seal Leakage Problems

Seal failures rank as the second most common pump issue, causing 20–25% of failures. These problems lead to fluid loss and often point to deeper issues within the pump.

“Seal failure is often a symptom of an underlying problem within the pump.” – Bob Goodenberger, John Crane

Predictive technology identifies seal issues by monitoring vibrations and pressure changes that indicate internal leaks. Temperature sensors can pick up heat buildup near seals, while pressure monitoring reveals instability affecting sealing surfaces. For instance, cavitation – a condition where vapor bubbles collapse violently – can produce pressure pulsations that damage seals. Catching these issues early not only prevents costly repairs but also avoids environmental and regulatory consequences.

Cavitation and Impeller Damage

Cavitation is another common issue, causing 10–15% of pump breakdowns. This occurs when pressure drops create vapor bubbles that collapse, producing shock waves that erode impellers and other components. Predictive systems detect cavitation by analyzing vibration data (1,000–1,500 Hz), along with temperature and pressure readings. These systems can also monitor for shaft imbalances and pressure drops that signal impeller damage.

Impeller damage itself accounts for 5–10% of pump failures. By catching early warning signs like unusual noises, reduced efficiency, or increased vibration, maintenance teams can address problems before they require a full impeller replacement.

Motor Overheating

Motor overheating contributes to 5–10% of pump failures. When motors overheat, they can seize up, leading to expensive repairs or complete replacements. Predictive maintenance combats this with thermal monitoring and electrical signature analysis (ESA). Temperature sensors detect rising heat levels before they become critical, while ESA monitors voltage and current to spot electrical or mechanical issues. These tools also track the motor’s current draw, which increases when pumps face resistance from blockages or other issues, ensuring problems are resolved before they escalate.

Blockages and Flow Problems

Blockages are a serious concern, as they disrupt performance and can trigger a cascade of failures across the pump system. They force motors to work harder, strain seals, and can even lead to dry running conditions that destroy components in minutes.

Predictive maintenance systems are equipped to detect blockages by monitoring changes in vibration, pressure, temperature, and electrical current. Electrical signature analysis is particularly effective, as it identifies how a motor’s electrical signals shift when pumps encounter resistance. For example, in England, nearly 20% of combined sewer overflow incidents occur at pumping stations, underscoring the importance of blockage prevention.

How Predictive Maintenance Solves Pump Problems

Predictive maintenance uses advanced monitoring systems to identify potential pump issues before they lead to expensive breakdowns. Let’s dive into the key methods it employs and how each tackles specific pump problems.

Vibration Analysis for Mechanical Problems

Vibration monitoring is a cornerstone of predictive maintenance, as it identifies mechanical issues well before they escalate. By tracking vibrations against predefined baselines, this method can pinpoint problems like bearing wear, misalignment, cavitation, and impeller imbalance. For instance, an imbalanced impeller often results in increased vibration at the machine’s running speed (1X vibration), while misalignment might reduce vibration amplitude due to added structural stiffness. Placing sensors along the shaft centerline ensures multi-directional vibration data is captured. Advanced techniques like shock pulse analysis can even detect early signs of bearing wear.

Temperature monitoring adds another layer of protection by identifying overheating risks.

Temperature and Thermal Monitoring

Thermal sensors play a critical role in spotting overheating before it causes irreversible damage. They can detect lubrication breakdown or contamination – two factors that often lead to bearing failure. In fact, more than 50% of motor failures stem from bearing problems caused by lubrication loss or contamination. To ensure accuracy, sensors should be placed on components where temperature changes are likely to occur first. Over-temperature relays and sensors provide additional safeguards, alerting operators to overheating or heat generated by seal leaks during seal failure.

Flow and pressure monitoring complement thermal data by highlighting operational irregularities.

Flow Rate and Pressure Monitoring

Monitoring flow rate and pressure is essential for detecting blockages and maintaining pump efficiency. These parameters provide real-time insights into the pump’s condition. Flow rate monitoring measures the volume of liquid or gas moving through the system over time. Any deviations in flow or pressure trigger alarms, allowing operators to address blockages or other issues before they worsen. As the PumpWorks Engineering Team explains:

“Predictive monitoring involves using analytic technology to check pump performance in real time.”

Pressure monitoring works hand-in-hand with flow data, identifying issues like blockages, seal failures, or cavitation.

Machine learning takes these monitoring methods to the next level by analyzing data for deeper insights.

Machine Learning and Predictive Algorithms

The real strength of predictive maintenance lies in machine learning. These algorithms analyze historical data to improve prediction accuracy and detect subtle anomalies that might escape human observation. By distinguishing between normal operational variations and genuine warning signs, machine learning helps prevent unexpected downtime. For example, one manufacturing plant reduced maintenance costs by up to 25% by using these algorithms to optimize scheduling and resource allocation. With IoT sensors continuously feeding data into these systems, maintenance teams can act at the perfect time to avoid failures.

Comparing Different Maintenance Approaches

When it comes to maintenance strategies, facility managers face the challenge of balancing timing, cost, and performance. Each approach offers distinct methods and financial implications.

Reactive vs. Preventive vs. Predictive Maintenance

Reactive maintenance is all about fixing equipment after it breaks, which often leads to steep costs. Preventive maintenance, on the other hand, involves scheduled servicing to avoid potential problems. Predictive maintenance takes it a step further by using real-time data to determine the best time for interventions.

The financial impact of these strategies is worth noting. Preventive maintenance can save businesses between 12% and 18% compared to reactive methods, while predictive maintenance offers even greater savings – up to 40%. For facilities in the U.S., where unplanned equipment downtime can cost an average of $260,000 per hour, these savings are critical.

Maintenance Strategy Cost Impact Downtime Risk
Reactive Low upfront, but costly long-term due to emergency repairs Very high
Preventive Moderate upfront with solid ROI, based on scheduled servicing Medium
Predictive Higher upfront but delivers the best ROI, leveraging data for precise timing Low

The advantages of predictive maintenance go beyond cost savings. As Oriental Motor explains:

“The idea behind predictive maintenance is that you can make more informed data-driven decisions to replace components at exactly the right time.”

Preventive maintenance often relies on manufacturer-provided lifespan estimates, which can result in replacing parts prematurely. Predictive maintenance, however, uses real-time sensor data to focus solely on components that are actually nearing failure.

Modern monitoring systems boast up to 95% accuracy, with the ability to predict failures up to a year in advance. This approach not only extends equipment lifespan by 20% but also reduces risks related to safety, health, environment, and quality by 14%.

The adoption of predictive maintenance is growing rapidly. In North America alone, it accounts for an estimated 31.67% of the market share. Predictive analytics delivers a tenfold return on investment and cuts costs by 30% to 40%.

For pump systems specifically, predictive maintenance reduces both downtime and unnecessary part replacements. Unlike preventive maintenance – which can involve labor-intensive disassembly of complex systems – predictive methods target only the components that require attention. This precision lowers labor costs, minimizes disruptions, and supports the integration of IoT solutions while aligning with U.S. pump maintenance standards.

sbb-itb-99db659

How to Implement Predictive Maintenance

Implementing predictive maintenance for pump systems involves careful planning and the integration of advanced technology. This includes upgrading existing equipment with smart sensors, adhering to industry standards, and working with skilled professionals to ensure systems run efficiently and reliably.

Adding IoT Sensors to Existing Systems

The process of retrofitting IoT sensors begins with identifying operational priorities. Choosing the right hardware for the environment is key, factoring in installation simplicity, power availability, and reliable communication options.

Vibration sensors play a critical role in predictive maintenance by detecting even the smallest changes in vibration patterns. These sensors should be installed following established protocols – such as Zigbee, LoRaWAN, or Wi-Fi – and mounted with vendor-approved kits to guarantee consistent performance.

Once installed, sensors are typically connected to a cloud-based system that collects and analyzes real-time data. Machine learning algorithms process this data to identify unusual patterns, triggering alerts when maintenance is required. Using open-source middleware and robust APIs ensures smooth data sharing between IoT devices and existing maintenance management systems.

The benefits of IoT platforms in predictive maintenance are clear. For example, facilities have seen unplanned downtime drop by 27% and annual maintenance costs decrease by nearly 19%. Additionally, API-driven IoT solutions have led to a 15% increase in component lifespan and a 22-hour reduction in the average time needed for repairs.

To minimize disruptions, it’s best to coordinate sensor installations during scheduled facility shutdowns. Training maintenance teams on installation techniques and safety protocols helps ensure sensors are accurately positioned and data quality remains high. Once installed, testing the system to confirm proper data flow to cloud or edge platforms is essential. Any issues should be documented and resolved promptly. Finally, verifying compliance with US standards ensures the system meets regulatory requirements.

Meeting US Standards and Regulations

Predictive maintenance must align with both US and international standards. For vibration analysis, ISO 20816 provides guidelines for measurement and evaluation, ensuring consistent monitoring across pump systems. In thermal monitoring, technicians certified under ASNT TC-1A are recognized for their expertise in infrared thermography. Similarly, oil analysis often follows ISO 4406 standards for particle counting, ensuring accurate contamination tracking.

Organizations are encouraged to start with a pilot project, which includes evaluating current practices, selecting suitable technologies, and building the necessary data infrastructure. This approach lays the groundwork for long-term compliance and operational success. Partnering with professional service providers can further ensure these standards are met and systems perform as intended.

Working with Professional Service Providers

Once the technology and regulatory framework are in place, collaborating with experienced service providers can enhance the effectiveness of predictive maintenance systems. Companies like Hydrodynamics specialize in pump maintenance for residential, commercial, and industrial clients, offering services that include installations, repairs, and energy-efficient solutions.

“Predictive maintenance isn’t just about monitoring – it’s about preventing failures before they occur. With IoT-predictive insights, businesses can anticipate equipment issues, schedule maintenance proactively, and maximize uptime.”
– Greg Tankersley, President of Becker Engineered Systems

Professional providers bring valuable expertise to the table, especially when retrofitting sensors into various pump configurations. They manage technical challenges like ensuring compatibility with legacy systems, using tools such as Modbus-to-MQTT bridges to avoid data silos. By prioritizing open standards and proven technologies, these experts help future-proof investments and maintain the effectiveness of predictive maintenance systems.

Working with knowledgeable professionals ensures minimal disruption during sensor installations while delivering measurable improvements in system performance and reliability.

The Future of Pump Maintenance

The way we approach pump maintenance is undergoing a major transformation, thanks to predictive technologies that shift the focus from fixing problems after they occur to preventing them in the first place. Predictive maintenance has proven to be a game-changer, reducing machine downtime by 30–50%, extending equipment lifespan by 20–40%, cutting labor costs by 25–30%, and improving energy efficiency by 5–15% by keeping machinery running at peak performance. For instance, a leading oil refinery used machine learning to prevent equipment failures, saving up to $1 million annually. And this is just the beginning – new technologies are poised to take pump maintenance to the next level.

Emerging Technologies Driving Change

Digital twins are one of the most exciting developments in this space. These virtual replicas of physical assets simulate wear and tear in real time, helping predict issues before they happen. Edge computing is also making waves, enabling real-time data analysis even in remote areas with limited connectivity. Meanwhile, deep learning algorithms are improving the ability to detect patterns in sensor data, and autonomous drones are simplifying inspections in hard-to-reach locations.

The Internet of Things (IoT) is another driving force behind these advancements. By 2025, edge computing is expected to process nearly half of enterprise data, enabling faster decision-making. Companies already leveraging AI-powered predictive maintenance are seeing maintenance costs drop by 10–20%.

Industry Success Stories

Some of the biggest names in the industry are showcasing just how impactful these technologies can be. Rolls-Royce has cut engine maintenance costs by 30% using IoT sensors and digital twins. ThyssenKrupp has boosted service reliability by 50% with IoT-connected predictive maintenance. And Shell has managed to decrease equipment downtime by 20% by employing sensor-driven predictive analytics. These successes highlight the potential for organizations willing to embrace these advanced methodologies.

Getting Started with Predictive Maintenance

For companies looking to make the leap, the first step is to focus on critical assets and set clear goals and performance benchmarks. Training maintenance teams and establishing strong communication between maintenance, operations, and management are also essential for long-term success.

Specialized companies like Hydrodynamics can help organizations implement these systems effectively. Their expertise in installations, repairs, and energy-efficient solutions ensures that businesses not only maximize the benefits of predictive maintenance but also meet US standards and regulations.

“Predictive maintenance empowered by IoT data is no longer optional – it’s essential for companies aiming to remain competitive and cost-effective.”

  • Kevin Ashton, technology pioneer who coined the term “Internet of Things”

This shift toward predictive maintenance is more than just adopting new tools – it’s a strategic decision that sets organizations up for long-term success in a demanding and competitive industrial world. By investing in these technologies, companies can stay ahead of the curve and achieve operational excellence.

FAQs

How do IoT sensors and AI-powered predictive maintenance help prevent common pump issues like bearing wear and seal leaks?

IoT sensors combined with AI-driven predictive maintenance systems tackle common pump problems like bearing wear and seal leaks by keeping a close eye on equipment performance in real time. These systems gather detailed data on critical factors such as vibrations, temperature, and noise levels, spotting even the smallest changes that could hint at potential issues.

AI steps in with advanced algorithms to analyze both historical and live data, uncovering patterns that might indicate a failure before it happens. This proactive approach means maintenance can be scheduled at the right time, helping to avoid sudden breakdowns, cut down on repair expenses, and extend the working life of your pumps. By catching problems early, these technologies help ensure your equipment runs smoothly and efficiently.

What are the key steps to start using predictive maintenance for existing pump systems?

How to Implement Predictive Maintenance for Pump Systems

Getting started with predictive maintenance for your pump systems begins with a thorough review of your equipment. Document everything – model numbers, age, maintenance history, and current condition. This process helps you pinpoint potential failure points and sets a benchmark for tracking performance over time.

The next step is installing sensors to gather real-time data. Common options include vibration sensors to monitor mechanical health, thermal sensors to track temperature changes, and ultrasonic detectors for detecting early signs of wear or leaks.

Once the data starts flowing, make sure it becomes a seamless part of your maintenance operations. Integrate it into your workflows so you can spot issues early and act before they escalate. To make the most of this approach, focus on three key areas:

  • System Compatibility: Ensure the sensors and software work with your existing setup.
  • Team Training: Equip your staff with the knowledge they need to use and interpret the new technology.
  • Clear Protocols: Establish guidelines for analyzing data and taking action when irregularities are detected.

By following these steps, you can improve system performance and cut down on costly downtime. Predictive maintenance not only keeps your pumps running smoothly but also saves time and resources in the long run.

What are the cost and downtime benefits of predictive maintenance compared to reactive and preventive approaches?

Predictive maintenance offers a smarter, more effective alternative to reactive and preventive methods. By spotting potential problems before they happen, it can slash unplanned downtime by 50-75% and cut maintenance expenses by 18-30%. On top of that, it can extend the lifespan of equipment by 20-40%, making it a savvy choice for businesses looking to optimize long-term performance.

What sets predictive maintenance apart is its use of advanced algorithms to keep tabs on equipment in real time. Unlike reactive maintenance, which only kicks in after something breaks, or preventive maintenance, which follows a fixed schedule, predictive maintenance takes a proactive approach. This means fewer disruptions and smoother operations, ultimately saving businesses both time and money.

How to Test HVAC Electrical Components

How to Test HVAC Electrical Components

If your HVAC system isn’t working as it should, electrical components might be to blame. Testing these parts can help identify problems early, saving money and improving safety. Here’s the gist:

  • Why Test?
    Regular testing prevents breakdowns, extends system life by up to 40%, and reduces repair costs. Faulty components can also hike energy bills and pose safety risks like fires or gas leaks.
  • Safety First:
    Always turn off power at the circuit breaker, use lockout/tagout procedures, and wear protective gear like insulated gloves and goggles.
  • Essential Tools:
    Equip yourself with a multimeter, clamp meter, and non-contact voltage tester. Advanced tools like insulation resistance testers and carbon monoxide meters can also help.
  • What to Test:
    Key components include capacitors, contactors, relays, fan motors, thermostats, pressure switches, transformers, and control boards. Check for common failure signs like bulging capacitors, corroded contactors, or blown fuses.
  • When to Call a Pro:
    Issues like gas leaks, frequent circuit breaker trips, or refrigerant problems require expert help. DIY fixes can void warranties and lead to safety hazards.

Testing HVAC electrical components isn’t just about fixing problems – it’s about maintaining efficiency, cutting costs, and keeping your home safe. Follow proper procedures, use the right tools, and don’t hesitate to contact a professional if needed.

Electrical Troubleshooting! Finding 8 Electrical Faults!

Safety Precautions and Required Tools

Working with HVAC electrical systems comes with inherent risks. In the U.S., electrical accidents result in approximately 1,000 deaths and 30,000 injuries annually, while HVAC systems alone contribute to over 40,000 injuries each year. These numbers highlight the importance of following strict safety protocols and using the proper tools – not just for your own safety but for the well-being of everyone around you.

Basic Safety Guidelines

The first rule of safe HVAC electrical work is to completely shut off the power. Don’t just rely on equipment switches – turn off the power at the circuit breaker and confirm that the circuits are de-energized using a properly calibrated multimeter or voltage tester. Always verify your meter’s accuracy on a live circuit both before and after testing the work area.

Lockout/tagout procedures are a must for added protection. Secure the switch in the OFF position with a padlock, attach a tag with clear details, and post a sign warning others to keep the power off.

Personal protective equipment (PPE) serves as your last line of defense. Wear nonconductive gloves, insulated blankets, hoods, and a helmet when handling electrical components. Use only insulated tools, avoid standing in water, and ensure all electrical components are properly grounded before beginning any work. Regularly inspect wiring for damage, keep components dry, and adhere to NFPA 70E standards as well as local electrical codes to maintain safe working conditions.

Once these safety measures are in place, you’ll need the right tools to carry out accurate and effective HVAC electrical testing.

Tools for HVAC Electrical Testing

Having the right tools is essential for precise HVAC electrical diagnostics. Here are some of the key instruments every technician should have:

  • Digital multimeters: These are the cornerstone of electrical testing. For example, the Fluke 116 Digital HVAC Multimeter ($274.99) measures voltage, current, and resistance, and includes features like temperature and microamp functions for flame sensor testing.
  • Clamp meters: These allow you to measure current safely without breaking the circuit. The Fluke 902 FC True-RMS HVAC Clamp Meter ($389.99) offers wireless connectivity and specialized HVAC functions. Look for models with built-in test lead holders for added convenience.
  • Insulation resistance testers: These devices detect deteriorating wire insulation before it causes failures. The Fluke 1587 FC Insulation Multimeter ($1,038.99) combines insulation testing with standard multimeter capabilities, making it a versatile tool for comprehensive diagnostics.
  • Non-contact voltage testers: These provide a quick and safe way to check if a circuit is live by detecting electrical fields without direct contact. For extra safety, use test leads with finger barriers.
  • Residual Current Devices (RCDs): These devices add an extra layer of protection by automatically cutting power when a ground fault occurs.

In addition to these tools, safety devices play a crucial role during testing:

Safety Device Function Action Required
Circuit Breaker Trips automatically during overcurrent Resettable
Fuse Melts to interrupt overcurrent Replaceable
GFCI Trips when a ground fault is detected Resettable

For more advanced diagnostics, consider tools like the Fluke 971 Temperature Humidity Meter ($503.99), which helps assess environmental factors affecting electrical components, and the Fluke CO-220 Carbon Monoxide Meter ($712.99), which ensures safe conditions around combustion equipment.

Always use factory-approved parts to maintain safety standards and ensure reliable performance. Additionally, keep your tools calibrated and in good working order – faulty equipment can lead to inaccurate readings and dangerous situations.

Common HVAC Electrical Components to Test

Knowing the electrical components in your HVAC system is essential for proper testing and maintenance. These parts work together to keep your system running smoothly, and identifying issues early can save you from costly repairs. Below, we’ll break down the key components you should be testing and the signs they might be failing.

Overview of Standard Components

Capacitors are vital for powering motors by storing and releasing energy as needed. However, they can fail due to heat, age, or voltage spikes. Signs of a failing capacitor include a bulging case, oil leakage, or a motor that “growls” but won’t start.

Contactors act as heavy-duty switches, controlling the power flow to your system’s compressor and fan motors. When contactors develop pitting or corrosion on their contact points, they can disrupt electrical flow, leading to system malfunctions.

Relays handle the timing of electrical circuits, ensuring everything runs in sync. A failing relay might cause cooling issues, unusual odors, or odd noises from the system.

Fan motors are responsible for circulating air throughout your home to maintain comfort. They depend on capacitors to function correctly. If a fan motor struggles or fails to start, it could signal capacitor problems or internal motor issues that need immediate attention.

Thermostats monitor and regulate indoor temperatures. If your thermostat is giving incorrect readings or causing frequent cycling, it may be malfunctioning.

Pressure switches are critical safety devices that monitor refrigeration pressure and protect the compressor. They shut down the system when pressure exceeds safe limits, preventing expensive compressor damage.

Transformers adjust the voltage of your electrical supply to meet the needs of various components. Most HVAC systems use transformers to step down household voltage from 240V to 24V for control circuits. A failed transformer can cause the entire control system to stop working.

The control board acts as the command center, coordinating all electrical components. As Topline Heating & Air explains:

“The HVAC Control board coordinates the activity of the electrical components of your heating and air conditioning systems. It receives signals from the thermostat and turns the furnace and air conditioning on at appropriate times to keep the interior air at the temperature you want.”

Other key elements include fuses, switches, and sensors. Fuses protect circuits from overcurrent and will shut down the system if they blow. Sensors monitor system conditions and send data to the control board.

Component Primary Function Common Failure Signs
Capacitors Start and run motors Bulging case, oil leakage, motor won’t start
Contactors Control power flow Pitting, corrosion, system won’t turn on
Relays Circuit timing control Compressor issues, inconsistent cooling
Thermostats Temperature control Incorrect readings, frequent cycling
Transformers Voltage conversion No power to control circuits

Understanding these components and their typical failure signs can make diagnosing HVAC issues more efficient. By pinpointing the likely problem areas, you can streamline your testing process and address issues before they escalate.

Step-by-Step Testing Guide

After setting up safety protocols and tools, it’s time to dive into the hands-on steps for testing electrical components. Always ensure the power is disconnected and locked out at the main source. Before starting, verify the circuit is de-energized using a voltmeter for added safety.

Testing Switches and Relays

When it comes to switches and contactors, continuity testing is your go-to method. A closed switch or contactor should show very low resistance – typically under 1 ohm – indicating a complete circuit. For multi-pole devices, all legs should provide consistent readings.

Here’s how to test switches and contactors:

  • Manually activate the component.
  • Set your multimeter to ohms or resistance mode.
  • Place the meter leads on the appropriate terminals and test each pole.
  • Record the readings. Low, consistent values suggest proper operation, while high or irregular readings may point to pitted contacts, loose connections, mechanical issues, or oxidation.

“Continuity testing is a crucial diagnostic skill that can save you hours of troubleshooting and prevent recurring system failures.”

For relays, especially electronic ones like those in Trane AC units, follow these additional steps:

  • Consult the service manual and relay datasheet for specific instructions.
  • Inspect for physical damage, corrosion, or signs of overheating.
  • Measure the coil resistance and compare it to the datasheet specifications.
  • Test contact continuity in the de-energized state.
  • Apply the correct control voltage to the coil and recheck contact continuity.
  • Check insulation resistance between the coil and contact circuitry.

For coil relays, verify that normally open (NO) contacts show infinite resistance and normally closed (NC) contacts show 0 ohms when de-energized, following manufacturer specifications. After energizing the relay with an independent voltage source, NO contacts should read near 0 ohms, while NC contacts should show infinite resistance.

Once switches and relays are tested, move on to motors and compressors, where physical inspections and winding tests are essential.

Testing Motors and Compressors

Before testing motor or compressor components, ensure the unit’s power is off and all capacitors are fully discharged.

Safety Tip: Always wear protective gear, such as gloves and goggles, during motor testing.

Start with a visual inspection. Look for signs of wear, rust, or damage, and clean the terminals to ensure accurate winding resistance measurements. Melted lugs or damaged plugs might indicate high current, loose connections, or moisture issues.

For winding resistance tests:

  • Use a multimeter to measure motor winding resistance. In healthy three-phase motors, all wire pairs should have matching resistance values. Uneven readings could signal winding problems.
  • Perform insulation resistance testing (IRT) by applying DC voltage to the windings. This helps detect leakage currents and assess motor health. Adjust readings for temperature variations.

For instance, in 2022, a scroll compressor showed 2.7 ohms resistance from windings to ground and about 2.6 kilo-ohms between winding pairs – indicating it was close to failure. Always check for shorts to ground; an “infinite” reading means the resistance exceeds the meter’s range.

Testing Capacitors

Capacitors require both capacitance and resistance tests. Always discharge the capacitor completely by shorting its terminals with an insulated tool before testing.

  • Switch your multimeter to capacitance mode, connect the leads to the capacitor terminals, and check if the value is within 10% of the rated capacitance.
  • Alternatively, use resistance mode. A functioning capacitor will initially show low resistance, which gradually increases as it charges. If the resistance remains low, the capacitor may be shorted; if it jumps to infinite resistance right away, the circuit could be open.
  • Inspect for physical damage, such as bulging, oil leaks, or burn marks.

After confirming the capacitor’s condition, move on to test fuses and transformers to ensure the circuit is safe.

Testing Fuses and Transformers

For fuses:

  • Set your multimeter to continuity or low-resistance mode and test across the fuse terminals.
  • A working fuse will show near-zero resistance, while a blown fuse will display infinite resistance or no continuity.
  • Check for visible signs of damage, such as darkened glass or burn marks, and replace with a fuse of the same amperage rating.

For transformers:

  • Disconnect power and measure the resistance of the primary and secondary windings. HVAC transformers typically step down from 240V to 24V.
  • Perform insulation testing between windings and between windings and ground, using the highest resistance range to check for potential shorts.

Regular testing during maintenance, service calls, or after electrical storms can identify problems early, preventing system failures or safety hazards.

sbb-itb-99db659

Reading Test Results and Troubleshooting

Understanding test results is just as important as performing the tests themselves. Once you’ve mastered the testing process, analyzing the data ensures your HVAC system operates both safely and efficiently. The ability to distinguish between normal and faulty readings can mean the difference between smooth operation and unexpected breakdowns.

Normal vs. Faulty Readings

Continuity and resistance readings are key indicators of a component’s health. For switches and contactors, properly functioning components should have low resistance readings – typically under 1 ohm. This shows there’s a complete electrical path with minimal resistance, allowing current to flow freely.

When testing fuses, a healthy fuse will show continuity across its terminals. A blown fuse, on the other hand, will display infinite resistance or no continuity at all.

High or inconsistent resistance readings often point to issues like pitted contacts, loose connections, mechanical failures, or contamination on contact surfaces.

Capacitance readings are another critical metric. These should stay within 10% of the rated value printed on the component. Any deviation beyond this range is a red flag.

It’s also important to account for temperature’s impact on readings, especially when performing insulation resistance tests on motors. Ambient conditions can skew results, so adjusting for temperature ensures accurate evaluations of component health. These benchmarks are essential for pinpointing faults during troubleshooting.

Common HVAC Component Failures

Once you’ve gathered your test results, they can help identify common failure patterns across HVAC components. Familiarity with these signs can streamline the troubleshooting process and lead to quicker diagnoses.

Component Common Signs of Failure
Capacitors Bulging, leakage, capacitance out of spec
Contactors Pitting, corrosion, inconsistent continuity
Relays No continuity, abnormal coil resistance

Capacitor failures are often easy to spot. Look for physical damage like bulging, oil leaks, or capacitance values that fall outside the acceptable 10% range.

Contactors and switches tend to fail due to contact degradation. For example, on May 8, 2025, a technician identified a rooftop unit issue caused by inconsistent resistance readings across a disconnect switch. This problem was blowing fuses repeatedly. By checking continuity, the technician discovered the switch wasn’t making proper contact on all phases. Replacing both the damaged motor and the faulty switch permanently resolved the issue.

Motor and compressor failures can be identified by uneven winding resistance in three-phase units. In a healthy motor, all wire pairs should have matching resistance values. Uneven readings often signal winding problems, which, if left unchecked, can lead to complete failure.

Transformer failures typically involve problems with the windings. Open windings will show infinite resistance, while shorted windings will have abnormally low resistance. Insulation breakdown – whether between windings or from windings to ground – poses a serious safety risk and requires immediate replacement.

Circuit breaker issues are another common problem. Frequent tripping can indicate system overloads or downstream component failures. A breaker that won’t reset or shows signs of burning needs to be addressed right away.

For accurate troubleshooting, always compare your readings to manufacturer specifications rather than relying on general benchmarks. Each component has specific tolerances, and staying within these ensures dependable performance. Documenting your findings can also help monitor wear and anticipate future maintenance needs.

Finally, don’t overlook the obvious. Unusual noises, burning smells, or visible damage often accompany electrical failures. Relying on all your senses during troubleshooting can reveal problems that might not show up in your electrical tests.

When to Contact Professional HVAC Services

After conducting your initial troubleshooting, it’s essential to recognize the signs that indicate the need for professional HVAC assistance. While DIY efforts can help you understand your system and potentially save money, some problems require expert attention to ensure safety and protect your investment. Here’s when it’s time to call in the pros.

Situations Requiring Professional Help

Gas Leaks
The smell of rotten eggs is a telltale sign of a gas leak. If you notice this, shut off your system immediately and contact a professional. Gas leaks pose serious safety risks, including fire hazards and exposure to carbon monoxide.

Frequent Circuit Breaker Trips
If your circuit breaker keeps tripping, it’s likely more than a simple reset issue. This could indicate deeper electrical problems that require professional diagnosis and repair.

Major Electrical Failures
For gas-powered HVAC systems, attempting DIY electrical repairs can be dangerous. Not only could it void your warranty, but it also increases the risk of injury.

Persistent Malfunctions or Strange Noises
If your HVAC system continues to malfunction or makes unusual noises – even after you’ve checked the thermostat, air filters, circuit breakers, and vents, and tried resetting the system – it’s time to call an expert.

Refrigerant Leaks, Faulty Compressors, or Damaged Heating Elements
These issues demand specialized tools and expertise to handle safely. Professional technicians are equipped to diagnose and repair these complex components.

DIY electrical repairs can be particularly hazardous. According to OSHA, around 187 electrical-related fatalities occur annually. Attempting to fix HVAC issues on your own could lead to electrical shocks, electrocution, fire risks, or carbon monoxide exposure. Additionally, improper repairs might damage costly components and void your system’s warranty.

“Your heating, ventilation, and air conditioning system is a complex network of electrical components, chemicals, and mechanical parts that requires specialized knowledge and tools for safe handling.”

Hydrodynamics: Your Trusted HVAC Partner

When faced with these challenges, professional expertise is essential. Hydrodynamics Inc., a family-owned business with over 30 years of experience, specializes in HVAC diagnostics, repairs, and maintenance for residential, commercial, and industrial clients across Pennsylvania.

Hydrodynamics’ certified technicians bring the expertise needed for safe and effective electrical work. They are trained in refrigeration principles, heating systems, and electrical diagnostics. Their focus on safety is evident in their adherence to strict protocols, use of Personal Protective Equipment (PPE), and compliance with manufacturer recommendations.

Beyond repairs, Hydrodynamics offers preventive maintenance programs designed to reduce costly breakdowns and extend the life of your HVAC system. These programs include detailed service logs and follow manufacturer guidelines to ensure optimal performance.

“Professional technicians are equipped with the knowledge and tools to safely manage these risks.”

  • Efficient Systems Heating & Air Conditioning

Using advanced diagnostic tools and following strict manufacturer guidelines, Hydrodynamics ensures your system remains under warranty and operates safely. If your troubleshooting efforts don’t resolve the issue, or if you encounter serious electrical problems, their team is ready to restore your system efficiently and safely.

Conclusion

Testing isn’t just a technical step – it’s a critical one. It saves time, cuts costs, and keeps systems running smoothly. Skipping it can lead to inefficiencies and even dangerous situations.

Always prioritize safety. Before testing, ensure the power is off at the source, use lockout/tagout procedures, and double-check that the system is de-energized. Electrical accidents are no small matter, with around 1,000 fatalities and 30,000 injuries reported annually in the U.S.. These precautions aren’t optional – they’re lifesaving.

Regular maintenance and testing also go a long way in preventing small issues from snowballing into expensive repairs. For instance, something as simple as cleaning air filters can cut energy consumption by up to 15%. Similarly, routine checks on electrical components can catch problems early, avoiding costly system failures.

Know your limits, though. While a multimeter can help troubleshoot many basic issues, complex electrical problems demand professional expertise. If you’re not fully qualified, don’t attempt repairs – leave it to the experts.

For those in Pennsylvania, Hydrodynamics Inc. is a trusted name in electrical diagnostics. Since 1994, this family-owned business has been offering certified technicians, strict safety standards, and preventive maintenance programs to keep systems running safely and efficiently.

FAQs

What are the warning signs that my HVAC system’s electrical components need testing?

If your HVAC system starts making odd sounds – like buzzing, humming, or clicking – it might be pointing to electrical issues. You might also notice other red flags, such as the system failing to turn on, struggling to keep performance steady, or shutting down unexpectedly. These problems often trace back to faulty parts like capacitors, relays, or contactors.

To avoid bigger headaches down the road, it’s smart to include testing your system’s electrical components in your annual maintenance routine. And if you notice anything unusual, don’t wait – addressing these issues promptly helps keep your HVAC system running smoothly and safely.

What steps should I take to safely test HVAC electrical components?

To test HVAC electrical components safely, the first step is to turn off the power to the system. Always follow lockout/tagout procedures to avoid accidental re-energization. This is crucial for preventing unexpected electrical hazards.

Make sure to use insulated tools and wear appropriate protective gear, including insulated gloves, safety goggles, and protective clothing. These measures greatly reduce the chances of electrical shock or injury.

Before testing, take a moment to inspect the components for any visible damage and confirm proper grounding. When you’re ready to test, use a multimeter and carefully follow the manufacturer’s instructions for each component. These steps are essential for maintaining safety while working with electrical systems.

When is it best to call a professional for HVAC electrical issues instead of fixing them yourself?

If you’re dealing with safety concerns like sparking, burning smells, strange noises, or visible damage to electrical parts, it’s best to leave it to a professional. Trying to fix these issues without the right skills can be risky.

Signs like frequent circuit trips, inconsistent performance, or odd odors often point to deeper problems that require expert attention. Trained technicians have the equipment and expertise to handle these situations safely, ensuring the problem is resolved without causing further damage or creating additional risks.