How Electrostatic Air Filters Work

How Electrostatic Air Filters Work

Electrostatic air filters clean indoor air by using static electricity to trap particles like dust, pollen, and pet dander. Here’s why they stand out:

  • Reusable and Cost-Effective: Washable filters save money over time by reducing replacement costs.
  • Eco-Friendly: Less waste compared to disposable filters.
  • Efficient Filtration: Captures allergens without blocking airflow, keeping HVAC systems running smoothly.
  • Low Maintenance: Regular cleaning keeps them effective for years.
Feature Electrostatic Filter Disposable Filter
Lifespan Long-lasting with cleaning Frequent replacements
Cost One-time purchase Ongoing expenses
Environmental Impact Low waste High waste
Maintenance Requires cleaning Regular disposal

These filters are a smart choice for improving air quality while saving money and reducing waste.

How do Electrostatic Air Filters work?

How Electrostatic Filtration Works

Electrostatic air filters rely on static electricity to trap airborne particles.

How Particles Are Captured

When air flows through the filter, particles like dust, pet dander, and pollen pick up an electric charge. These charged particles stick to surfaces within the filter that have an opposite charge, effectively removing them from the air. The airflow itself keeps this process going.

Generating Static Electricity

The movement of air through the filter creates static electricity as it rubs against the filter’s layers. This natural friction keeps the filter working efficiently, charging and trapping particles – all without needing an external power source.

Main Advantages of Electrostatic Filters

Electrostatic filters offer practical benefits that improve performance and help cut costs over time, thanks to their efficient filtration system.

Washable and Budget-Friendly

One standout feature of electrostatic filters is that they’re washable and reusable. While the upfront cost might be higher than traditional filters, you’ll save money in the long run by avoiding constant replacements.

Effective Filtration Without Compromising Airflow

These filters use static charge to trap tiny particles while maintaining strong airflow. This balance keeps HVAC systems running efficiently, ensures stable indoor temperatures, and reduces wear on your equipment.

Lower Energy Use and Less Waste

Because they’re reusable, electrostatic filters significantly cut down on waste. Plus, their ability to maintain airflow can help reduce energy consumption, which is better for both your wallet and the environment.

Feature Electrostatic Filter Traditional Disposable Filter
Lifespan Lasts for years with proper cleaning Needs frequent replacement
Replacement Costs One-time purchase, minimal upkeep Ongoing expenses
Environmental Impact Minimal waste High waste generation
Maintenance Requires regular cleaning Regular disposal and repurchasing

These advantages highlight why electrostatic filters are a practical investment. Next, we’ll explore how to maintain them for optimal performance.

Filter Maintenance Guide

Keeping your filter in good shape is simple and ensures it works efficiently. Regular care helps it perform better, last longer, and maintain proper airflow in your HVAC system.

Cleaning Schedule

Check your filter often for dust buildup. How frequently you need to clean it depends on your environment and usage. Follow the manufacturer’s guidelines and clean it when you notice significant dust accumulation.

Cleaning Instructions

  1. Turn off your HVAC system before starting.
  2. How to Clean
    Use a vacuum to gently remove loose debris. Then wash the filter with warm water and mild soap. Avoid using harsh chemicals, as they can damage the filter’s electrostatic properties.

Performance Checks

After cleaning, take a moment to ensure everything is working as it should:

  • Visual Inspection: Look for even dust collection and make sure there’s no heavy buildup.
  • Air Quality Monitoring: Pay attention to any signs like increased dust in the air or strange odors.

If cleaning doesn’t bring the filter back to full performance or you notice any damage, it’s time to replace it.

Conclusion

Why Choose Electrostatic Filters?

Electrostatic filters use static electricity to trap particles, helping maintain clean indoor air. Their washable feature not only saves money but also reduces waste, all while supporting efficient HVAC performance.

Here’s what they offer:

  • Long-term savings
  • Reliable particle removal
  • Less waste and more eco-friendly
  • Steady airflow
  • Low upkeep needs

Get in Touch with Hydrodynamics

Looking to improve your indoor air quality? Hydrodynamics Inc. is here to help.

With over 29 years of experience, their EPA 609 Certified Technicians specialize in installing and maintaining electrostatic filters across Northeastern Pennsylvania. Whether for homes, businesses, or industrial spaces, they ensure your HVAC system runs at its best.

Visit dynamichvacpa.com to book a service and boost your HVAC efficiency today.

FAQs

How often should I clean my electrostatic air filter to keep it working effectively?

To maintain the effectiveness of your electrostatic air filter, it’s recommended to clean it every 1 to 3 months, depending on factors like indoor air quality, the presence of pets, or the frequency of HVAC system use. Regular cleaning helps ensure the filter continues to trap allergens, dust, and other particulates efficiently.

To clean the filter, simply rinse it with water and let it dry completely before reinstalling it. If your household has higher levels of dust or allergens, you may need to clean the filter more frequently. Always refer to the manufacturer’s guidelines for specific cleaning instructions.

Are electrostatic air filters compatible with all HVAC systems?

Electrostatic air filters are generally compatible with most HVAC systems, but it’s important to confirm their suitability for your specific system. These filters work by using static electricity to trap dust, allergens, and other particles, which can improve indoor air quality. However, compatibility may depend on factors like the size of the filter and your HVAC system’s airflow requirements.

To ensure proper fit and performance, consult your HVAC system’s manual or reach out to a professional service provider, such as Hydrodynamics Inc., for guidance. Regular maintenance and cleaning of electrostatic filters are also essential to keep them functioning effectively.

How can I tell if my electrostatic air filter needs to be replaced instead of just cleaned?

Electrostatic air filters are designed to be reusable and typically only need cleaning, but there are a few signs that may indicate it’s time for a replacement:

  • Physical damage: If the filter has tears, cracks, or warped frames, it may no longer function effectively.
  • Reduced performance: If cleaning no longer improves airflow or the filter struggles to trap dust and allergens, it could be worn out.
  • Age of the filter: While these filters are long-lasting, excessive wear over many years may reduce their efficiency.

If you’re unsure, a professional inspection can help determine whether cleaning or replacement is the best option to maintain your indoor air quality.

Ultimate Guide to Sump Pump Sizing and Selection

Ultimate Guide to Sump Pump Sizing and Selection

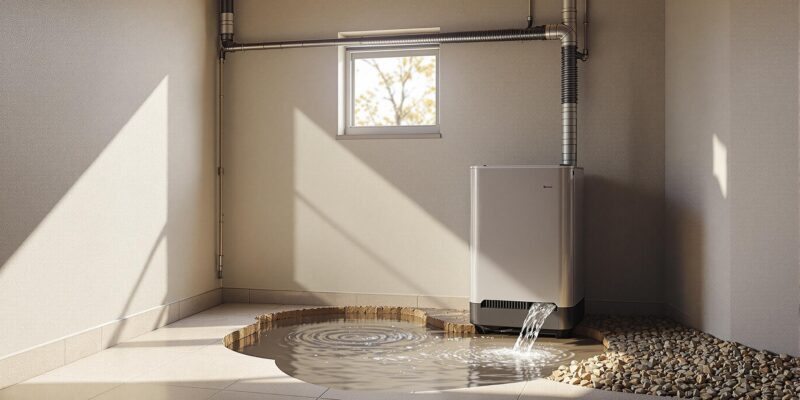
Choosing the right sump pump is essential to prevent basement flooding and avoid costly water damage. Here’s what you need to know:

  • Pump Types:
    • Submersible: Quiet, handles high water volume, fits deep pits.
    • Pedestal: Affordable, easier to maintain, ideal for narrow pits.
    • Battery Backup: Activates during power outages for added protection.
  • Sizing Your Pump:
    • Measure vertical lift (height from sump pit to discharge point) and horizontal distance.
    • Match flow rate (GPM) with pump power (HP).
    • Use proper pipe size to minimize friction loss.
  • Key Features:
    • High-water alarm, check valve, and battery backup ensure reliability.
  • Professional Installation: Certified technicians ensure proper setup, extending pump lifespan and reducing risks.

Follow this guide to select, size, and install a sump pump that fits your needs, ensuring long-term protection for your home.

Sump Pump Types

Main Pump Types: Submersible, Pedestal, and Battery Backup

Submersible Pumps
These pumps combine the motor and pump into a single waterproof unit, allowing them to operate fully submerged in the sump pit. They are quiet, compact, and handle larger volumes of water and debris effectively.

Pedestal Pumps
A pedestal pump has its motor positioned above the sump pit, with only the pump section submerged. While they are louder than submersible pumps, they are more affordable and easier to maintain. Their slim design makes them ideal for narrow or shallow sump pits.

Battery Backup Systems
Battery backup pumps act as a secondary layer of protection, automatically activating during power outages or when the primary pump fails. They help prevent flooding until power is restored or the main pump is repaired.

Selecting Your Pump Type

Choosing the right pump depends on your specific needs and the conditions of your space.

Site and Flow Requirements

  • For finished basements with expensive flooring or stored items, a quiet submersible pump paired with a battery backup offers reliable protection.
  • If water seepage is light to moderate, a pedestal pump can handle the job efficiently.
  • For areas prone to heavy water flow or frequent flooding, a submersible pump provides the necessary capacity to manage the load.

Installation Space
Check the dimensions of your sump pit to ensure the pump fits properly. Submersible pumps require a deeper pit, while pedestal pumps need enough vertical space above the pit for the motor.

Once you’ve determined the type of pump you need, it’s time to focus on sizing it correctly.

How to Choose a Sump Pump? (Complete Sizing Guide …

How to Size Your Sump Pump

Choosing the right sump pump depends on two main factors: total dynamic head (which includes vertical lift, horizontal distance, and friction losses) and the required flow rate. Once you know the pump style you need, it’s time to calculate these variables to ensure the pump fits your setup.

Measuring Lift and Distance

To determine the total dynamic head, start by measuring the vertical lift – the height from the bottom of your sump pit to the discharge point. Then, add the length of the horizontal pipe and account for any elevation changes along the way.

For example, if you have an 8-foot pit and a 20-foot horizontal pipe, you’ll need a pump rated for at least 28 feet of head to handle the lift and friction.

Flow Rate and Power Requirements

Your pump should be able to handle the maximum amount of water your site might experience. Here’s a breakdown of flow rates and the corresponding pump power you’ll need:

Water Flow Total Head (ft) Minimum HP
Light (15–25 GPM) Up to 15 1/3 HP
Moderate (25–45 GPM) 15–25 1/2 HP
Heavy (45–60+ GPM) 25+ 3/4 HP

Pipe Size and Friction Loss

The diameter of your discharge pipe directly impacts friction loss. Here’s a quick guide:

  • Use 1.25-inch pipes for flows up to 30 GPM.
  • Use 1.5-inch pipes for flows between 30 and 45 GPM.
  • Use 2-inch pipes for flows above 45 GPM.

Keep in mind that every 90-degree elbow in the piping adds around 2 feet of head. To reduce friction and maintain efficiency, minimize bends or consider upsizing the pipe or selecting a pump with a higher head rating for longer or more complex runs.

What to Look for When Buying

Once you’ve calculated pump capacity and head, it’s time to ensure your chosen model is equipped with the right safety features.

Double-Check Your Sizing Calculations

Match your total dynamic head and flow-rate measurements to the pump specifications to ensure compatibility.

Key Safety Features to Consider

Make sure your pump includes these essential safety features:

  • High-water alarm: Alerts you when water reaches critical levels.
  • Check valve: Stops water from flowing back into the pump.
  • Battery backup: Keeps the pump running during power outages.

Pump Features Compared

Once you’ve determined the right size and safety features, it’s time to compare pump models side by side. With your pump type selected and sizing calculations complete, focus on the key features and power ratings to make your final choice.

Pump Types and Their Applications

  • Submersible: Operates quietly, handles high water volumes, and is ideal for deep pits due to its sealed motor.
  • Pedestal: More affordable and easier to service, though it’s noisier and best suited for narrow pits.
  • Battery Backup: Automatically activates during power outages, but offers limited flow and is best for emergencies.

Consider how these features align with your calculated head and flow rate to ensure the pump performs reliably.

Power and Flow Rate Considerations

Check that the motor power aligns with your flow-and-head calculations. Match the pump’s horsepower (HP) and gallons per minute (GPM) ratings to the head and flow you measured. Use the manufacturer’s performance curve to confirm the pump will operate effectively under your specific conditions.

Choose a pump with a capacity that matches your usual water volume, leaving some extra room for heavy rainfall or unexpected water inflows. This ensures your system can handle peak demands without fail.

Expert Installation and Support

Once you’ve selected the right pump, proper installation and support are essential for optimal performance.

Why Opt for Professional Installation

Professional installation ensures your system operates reliably. Certified technicians handle everything: confirming lift and flow calculations, positioning the pump correctly, making safe electrical connections, adhering to local regulations, and testing the system under real-world conditions. This process helps avoid costly installation mistakes.

Hydrodynamics’ Services

Hydrodynamics Inc., a family-run business since 1994, specializes in sump pump installation and support. Their team of certified technicians carries qualifications like A.S.S.E. Backflow Testing, EPA 609, and Trac Pipe & Gas Tite certifications. Key services include:

  • Sump Pump Installation: Expert setup by experienced professionals
  • Preventative Maintenance: Routine inspections and performance tests to keep your system running smoothly

Emma K. from Drums, PA, had this to say about her experience:

“They were prompt and knowledgeable and efficient. Very pleased with their work.”[1]

Choosing certified professionals not only ensures your pump performs at its best but also extends its lifespan and reduces the chance of unexpected repairs.

Conclusion

Choosing the right sump pump size is key to preventing basement flooding and expensive water damage. Consider the pump type, lift-and-flow requirements, and professional installation to ensure it works effectively. Hydrodynamics Inc. offers certified technicians who specialize in sizing, installation, and maintenance, providing reliable protection for the long haul. Protect your home and avoid costly repairs by opting for expert pump selection and installation.

How to Fix Uneven Airflow in Ducts

How to Fix Uneven Airflow in Ducts

Uneven airflow in your home can make rooms uncomfortable, overwork your HVAC system, and increase energy bills. Here’s how you can address the problem:

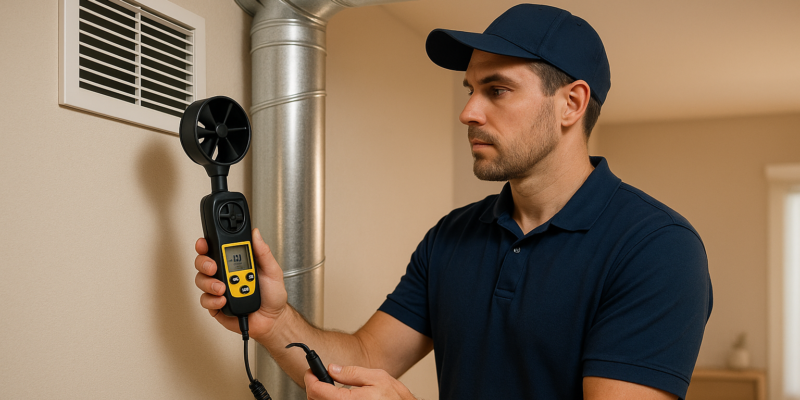
  • Test airflow: Check vents and returns for blockages or weak airflow.
  • Adjust dampers: Fine-tune damper settings to balance air distribution.
  • Seal duct leaks: Inspect and seal gaps or disconnections in ductwork.
  • Check duct size: Ensure ducts are properly sized for your system.
  • Add booster fans: Improve airflow in hard-to-reach areas.

If DIY fixes don’t work or the issue persists, it’s best to call an HVAC professional for a thorough evaluation. Hydrodynamics Inc., for example, specializes in diagnosing and solving airflow problems to restore comfort and efficiency.

Finding the Source of Uneven Airflow

Signs of Airflow Problems

Uneven airflow often appears as temperature differences between rooms or weak output from vents. Start by checking for blockages in your vents and returns. To narrow down the issue, focus on these key areas:

Common Problem Spots

Problem Area Common Issues What to Check
Supply Vents Blocked dampers or obstructions Ensure vents are clear and properly adjusted
Return Vents Obstructions or wrong sizing Check for steady airflow and clear obstructions
Duct Connections Loose joints or disconnections Look for leaks and secure any loose fittings

Start your inspection here. Fixing problems in these areas is crucial to restoring balanced airflow throughout your home.

How to Balance a Forced Hot-Air System | This Old House

This Old House

Using Dampers to Fix Airflow

Duct dampers help regulate how air is distributed throughout your home. They come in different designs, and the best settings depend on how your system is set up. Standard settings often don’t work for every home, which is why fine-tuning may be necessary.

There’s no universal damper setting that works for all systems. Adjusting them properly is essential to ensure your home gets balanced airflow and stays comfortable.

If you’re unsure about making these adjustments yourself, an HVAC professional can evaluate your system and make the necessary changes to improve airflow. For expert help, consider reaching out to Hydrodynamics Inc., a reliable name in HVAC services.

Fixing Duct Leaks

Leaky ductwork can hurt your HVAC system’s efficiency, leading to uneven airflow and higher energy costs. Sealing these leaks ensures better air distribution and system performance.

Finding Duct Leaks

Start by visually inspecting accessible ducts. Pay close attention to:

  • Connection points: Where ducts connect to vents, registers, or the HVAC unit.
  • Seams and joints: Where duct sections meet.
  • Flexible duct connections: Where flexible ducts attach to rigid ones.

Turn on your HVAC fan and feel for escaping air around these areas. A smoke pencil can also help – watch how the smoke moves to pinpoint leaks. Once identified, you can seal these problem spots with the right materials.

Best Materials for Sealing

Choose materials specifically made for HVAC systems to ensure durability. Here are some common options:

Material Type Best Used For
Mastic Sealant Sealing larger gaps
UL-181 Foil Tape Fixing small holes
Butyl Tape Securing metal-to-metal joints

Important: Regular duct tape is not suitable for HVAC repairs as it breaks down quickly and isn’t approved for these applications.

Key Areas to Seal

Focus on sealing these areas for the best results:

  1. Supply plenum connections: Where air exits the HVAC unit.
  2. Return air connections: Where air is pulled back into the system.
  3. Branch duct takeoffs: Where smaller ducts split from main trunk lines.

Clean all surfaces before sealing to ensure proper adhesion, and apply the sealant evenly. For larger systems or areas that are hard to reach, consider hiring a professional. HVAC technicians have tools to detect hidden leaks and can ensure thorough repairs. If needed, experts like Hydrodynamics can help keep your system running efficiently.

Other Ways to Fix Poor Airflow

If you’ve already tackled dampers and sealed leaks but airflow still isn’t right, additional steps might be necessary.

Duct Size Problems

Incorrectly sized ductwork can lead to uneven airflow. Common signs include:

  • Whistling sounds coming from vents
  • High static pressure in the system

If your ductwork is too small or too large, it may need to be replaced. This is especially true if you’ve upgraded your system or made additions that don’t match the original duct sizes.

Adding Booster Fans

Booster fans can help improve airflow in areas where it’s weak or inconsistent, such as:

  • Rooms far from the main HVAC unit
  • Second-floor spaces
  • Finished basements

Here’s a quick guide to different types of booster fans:

Booster Fan Type Best Application Installation Location
In-line Duct Fan Long duct runs Inside the ductwork
Register Booster Single room fixes At the vent opening
Zone Booster Multiple room improvement Branch duct connection

If these solutions don’t resolve the problem, it’s time to bring in a professional.

Professional Help

When adjustments and basic fixes aren’t enough, it’s smart to call in HVAC professionals. You should consider expert help if:

  1. Multiple fixes have failed
  2. The system’s performance is getting worse
  3. Complex ductwork changes are required

Persistent airflow problems often require a thorough evaluation. Companies like Hydrodynamics offer certified technicians who specialize in diagnosing and solving these kinds of issues.

Conclusion

To tackle uneven airflow, take a step-by-step approach. Adjust damper settings, seal any leaks, and confirm that your ductwork is correctly sized to enhance your HVAC system’s performance and efficiency.

Routine maintenance can help you avoid:

  • Increased energy costs
  • Inconsistent temperatures in your home
  • Excessive wear on HVAC equipment
  • Expensive emergency repairs

By staying on top of maintenance, you reduce the risk of these problems and limit the need for major repairs. Aim to schedule professional HVAC maintenance at least once a year. During these checkups, technicians can spot potential problems early and handle important tasks like replacing air filters and inspecting vents to keep your system running smoothly.

If you’ve already tried DIY fixes – such as adjusting dampers or sealing leaks – but still experience airflow problems, it’s time to call in a professional. At Hydrodynamics, our certified technicians are ready to conduct thorough system evaluations and provide effective solutions to restore balanced airflow in your home.

FAQs

What are the signs of uneven airflow in my home, and how can I check for them?

Uneven airflow in your home can make some rooms feel too hot or too cold, even when your HVAC system is running. Common signs include noticeable temperature differences between rooms, weak airflow from certain vents, or higher energy bills due to your system working harder to maintain comfort.

To confirm uneven airflow, check each vent for consistent air pressure and temperature. You can use your hand to feel the airflow or a thermometer to measure temperature differences between rooms. If you notice significant discrepancies, it may indicate issues like blocked vents, duct leaks, or improper damper settings that need attention.

How can I tell if my ductwork is the wrong size for my HVAC system?

If your ductwork is the wrong size, you may notice uneven airflow, inconsistent temperatures, or higher energy bills. Oversized or undersized ducts can restrict airflow, causing your HVAC system to work harder than it should.

To determine if your ductwork is improperly sized, look for these signs:

  • Hot or cold spots in different areas of your home
  • Weak airflow from vents
  • Noisy operation when the HVAC system is running
  • Frequent cycling of the system

If you suspect your ductwork is the wrong size, a professional HVAC technician can perform an evaluation and recommend adjustments or replacements. Hydrodynamics Inc. specializes in diagnosing and resolving ductwork issues to ensure your system operates efficiently and effectively.

Should I try fixing uneven airflow in my ducts myself or hire a professional?

Deciding whether to tackle uneven airflow in your ducts yourself or hire a professional depends on the complexity of the issue. Simple adjustments, like opening or closing dampers, may be manageable for most homeowners. However, more involved problems, such as sealing duct leaks or addressing significant airflow imbalances, often require professional expertise.

Hiring a professional, like Hydrodynamics Inc., ensures the issue is diagnosed and resolved efficiently. Professionals have the tools and training to restore your system’s performance, saving you time and potentially avoiding costly mistakes.

Geothermal Heat Pump Electrical Issues: Common Fixes

Geothermal Heat Pump Electrical Issues: Common Fixes

Geothermal heat pumps rely on electrical systems to function effectively, but problems like frequent cycling, strange noises, or uneven heating can signal issues. Here’s how to address them:

  • Key Components to Monitor:
    • Control Board: Manages system operations; issues include sensor failures or programming errors.
    • Capacitors: Essential for motor function; look for weak starts or failures.
    • Wiring & Relays: Loose connections or damaged wires can cause erratic behavior.
    • Pump Motors: Problems like burned windings or vibrations can disrupt fluid circulation.
  • Common Signs of Trouble:
    • Tripped breakers, blown fuses, or voltage drops.
    • Clicking sounds, burning odors, or inconsistent operation.
    • Motor overheating, buzzing noises, or delayed starts.
  • Quick Fixes:
    • Tighten loose connections, replace blown fuses, or clean relay contacts.
    • Inspect wiring for damage and replace faulty capacitors.

Regular Maintenance Tips:

  • Monthly: Check for unusual sounds or performance drops.
  • Quarterly: Test safety switches and clear debris from vents.
  • Annually: Full system inspection and calibration.

For complex issues like motor replacements or persistent electrical failures, consult a certified HVAC technician. Hydrodynamics Inc. specializes in diagnosing and repairing geothermal systems to keep them running efficiently.

How to Troubleshoot a Run Capacitor on a Modine Geothermal Heat Pump

Modine

Main Electrical Parts

Understanding the main electrical components of your geothermal heat pump can help you spot potential issues early and keep the system running smoothly. These parts work together to ensure consistent performance.

Basic Component Guide

The control board acts as the system’s brain, coordinating sensors and managing operational timing.

Geothermal systems rely on two types of capacitors:

  • Start capacitors: Deliver the initial energy needed to start the motor.
  • Run capacitors: Maintain steady motor operation over time.

Key electrical components for the compressor include:

  • Contactor: Regulates power flow to the compressor.
  • Start relay: Oversees the startup process.
  • Overload protector: Shields the system from excessive current.

Circulation pump motors are made up of:

  • Motor windings
  • Terminal connections
  • Speed controllers
  • Thermal protection switches

The thermostat wiring system includes:

  • Low-voltage control circuits
  • Terminal connections
  • Safety switches
  • Zone control relays

Common Components and Issues

Component Primary Function Common Issues
Control Board Manages system operation Programming errors, sensor failures
Capacitors Powers the motor Weak starting power, complete failure
Compressor Electronics Directs power flow Worn contacts, relay malfunctions
Pump Motors Circulates system fluid Burned windings, bearing issues
Thermostat Wiring Regulates temperature Loose connections, wire damage

Regular inspections of these components are crucial for maintaining system efficiency. Professional technicians use specialized tools to test and repair these parts, so always rely on a qualified technician for electrical repairs. For expert service, reach out to Hydrodynamics Inc.

Up next: Learn how to recognize common warning signs.

Common Problems and Warning Signs

Spotting issues early can save you from expensive repairs and system breakdowns. Here are some key areas to keep an eye on.

Power Problems

Power-related issues can disrupt your system’s performance. Watch out for:

  • Tripped circuit breakers: Frequent trips might mean an overloaded circuit or a short.
  • Blown fuses: Repeated fuse failures often point to electrical issues.
  • Voltage fluctuations: If lights dim or the system loses power during operation, there may be a problem with the power supply.

Your geothermal system should use power consistently. Sudden changes in electrical behavior should be checked by a qualified technician.

Relay and Wiring Issues

Problems with relays and wiring can lead to inconsistent operation or even complete system failure. Here’s what to look for:

Warning Sign Likely Cause Impact
Clicking sounds Faulty relay contacts Irregular cycling of the system
Burning odors Damaged wire insulation Potential safety hazard, system shutdown
Erratic operation Loose connections Reduced efficiency, possible damage
Control board errors Corroded wiring System malfunction

Inspect wiring for discoloration, loose terminals, or corrosion – these are clear signs of trouble.

Motor and Pump Failures

Electrical issues with motors and pumps can lead to various warning signs. Pay attention to the following:

Blower Motor Problems:

  • Strange humming or buzzing noises
  • Motor feels hot to the touch
  • Delayed startup or failure to start
  • Uneven airflow

Circulation Pump Issues:

  • Noticeable vibrations during operation
  • Irregular cycling patterns
  • Reduced heating or cooling performance
  • Electrical overload warnings

If you spot any of these signs, get your system checked by a certified technician right away. Hydrodynamics Inc. offers expert diagnosis and repair for geothermal heat pump electrical problems, ensuring your system runs safely and effectively.

Even minor signs can indicate bigger issues. Professional evaluation is crucial.

Next, find out how to identify these problems using safety checks and testing equipment.

Problem Detection Steps

Identifying electrical problems in geothermal heat pumps requires careful safety measures and accurate diagnostics. Follow these steps to locate issues and determine the best course of action.

Safety and Visual Checks

  1. Power Disconnection
    Turn off the power at both the circuit breaker and the disconnect switch. Use a voltage tester to confirm the power is off.
  2. Visual Inspection
    Examine all accessible components for potential issues. Here’s what to check:
Component What to Look For Warning Signs
Wire Insulation Color and texture Browning or brittleness
Terminal Connections Tightness and corrosion Loose screws or green deposits
Relay Contacts Surface condition Black spots or pitting
Capacitors Physical appearance Swelling or oil leakage

Using Test Equipment

Once you’ve completed the visual inspection, move on to testing the system using the right tools.

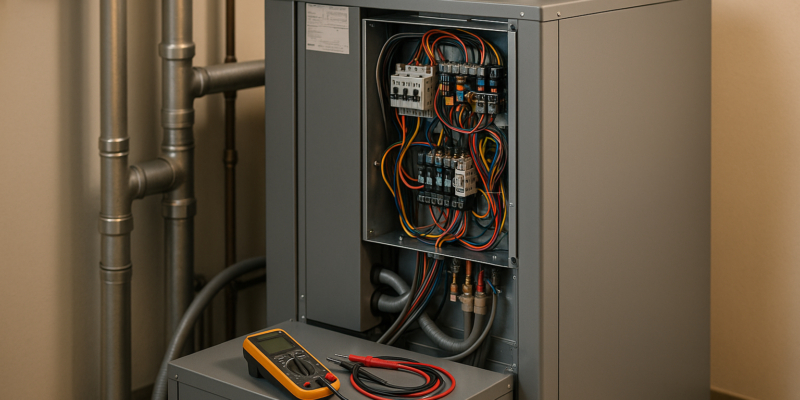
  • Voltage Testing:
    • Set your digital multimeter to the AC voltage range (usually 240V).
    • Test the incoming power at the disconnect switch.
    • Measure voltage at terminal connections.
  • Resistance Testing:
    • Switch the multimeter to ohms (Ω) to check wire continuity and connections.
    • Test motor windings for proper resistance levels.
    • Measure relay contact resistance to ensure functionality.

Component Reset and Replacement

Sometimes, a simple reset can resolve minor faults. After resetting, inspect all connections before turning the power back on.

If the reset doesn’t work or if you find damaged components (e.g., bulging or leaking capacitors), replacement may be necessary. For parts like relays or components with stored electrical charge, consider consulting a professional technician.

For expert diagnostics and repairs, reach out to Hydrodynamics Inc. Their certified technicians have the skills and tools to handle your geothermal heat pump system.

Fixes and Maintenance

Basic Repairs

Here are some key fixes to ensure your system runs smoothly:

Connection Tightening
Make sure all connections at terminal blocks, contactors, and breakers are secure. Loose connections can cause system malfunctions and safety risks.

Fuse Replacement
Replace any blown fuses with ones that match the original ratings exactly. Using the wrong type can lead to further issues.

Component Repair Task Tools Needed
Terminal Blocks Torque to specifications Calibrated torque screwdriver
Contactors Clean contact surfaces Contact cleaner, fine-grit sandpaper
Ground Connections Check and tighten Wire strippers, crimping tool
Control Board Inspect for damage Multimeter, thermal camera

Sticking to regular maintenance alongside these repairs can help prevent recurring problems.

Regular Upkeep

Keep your system in top shape by following these routine checks:

Monthly Checks

  • Monitor overall system performance and listen for unusual sounds.
  • Inspect circuit breakers for any signs of wear or damage.
  • Look over wiring for signs of fraying or deterioration.

Quarterly Maintenance

  • Test all safety switches and control mechanisms.
  • Clear out any dust or debris from electrical cabinet vents.
  • Measure and record operating temperatures.

Annual Service

  • Perform a full inspection of the electrical system.
  • Test all safety controls to ensure proper function.
  • Update maintenance logs with detailed records.
  • Calibrate thermostats and sensors for accuracy.

Professional Service Guide

Some issues require expert attention. Reach out to Hydrodynamics Inc. for assistance with:

  • Faulty circuit boards
  • Motor replacements
  • Persistent electrical odors
  • Frequent circuit breaker trips
  • Complicated control system problems

Hydrodynamics Inc. has over 29 years of experience in geothermal system repairs. Their certified technicians offer advanced diagnostic services, replacement of factory-authorized parts, system adjustments, safety checks, and performance verification.

To keep your system running efficiently and avoid costly breakdowns, schedule professional maintenance at least once a year. Regular checkups can catch potential problems early, saving you time and money in the long run.

Conclusion

The steps and tips shared above are essential for keeping geothermal heat pumps running smoothly. Addressing electrical issues requires a careful, safety-first approach. By understanding the main components, using the right testing tools, and sticking to a regular maintenance routine, you can stop small problems from turning into big ones.

While simple issues might be handled with a quick visual check or tightening loose connections, more advanced problems should always be left to certified HVAC technicians. These professionals bring the tools and expertise needed to accurately diagnose and fix complex faults in these systems.

Staying on top of scheduled maintenance helps your system last longer and run more efficiently. A thorough maintenance plan not only keeps your system in top shape but also lowers repair costs and ensures safe operation.

Because electrical work on geothermal systems can be tricky and requires strict safety measures, it’s always best to consult a certified HVAC professional if you’re unsure. Hydrodynamics Inc. provides skilled, certified technicians who are experts in diagnosing and fixing electrical issues in geothermal heat pumps, helping to keep your system reliable and efficient.

FAQs

What are the common electrical problems in geothermal heat pumps, and how can you spot them early?

Geothermal heat pumps can occasionally face electrical issues that impact their performance. Frequent problems include tripped circuit breakers, faulty capacitors, or loose wiring connections. These issues can cause the system to stop running or operate inefficiently.

To identify problems early, watch for signs like unusual noises, frequent system shutdowns, or inconsistent heating and cooling. Regular maintenance and inspections can help catch these issues before they lead to costly repairs. If you’re unsure, consider reaching out to a professional HVAC service like Hydrodynamics Inc. for expert diagnosis and repair.

How does regular maintenance help prevent electrical issues in geothermal heat pumps?

Regular maintenance plays a crucial role in preventing electrical problems in geothermal heat pumps. By scheduling routine inspections, technicians can identify and address potential issues like loose connections, faulty wiring, or worn-out components before they escalate into costly repairs.

Maintenance tasks such as cleaning electrical contacts, checking voltage levels, and ensuring proper system grounding help keep the heat pump operating efficiently and safely. This proactive approach not only extends the lifespan of your system but also reduces the risk of unexpected breakdowns and improves energy efficiency, saving you money on utility bills over time.

How do I know when to call a certified HVAC technician for electrical problems with my geothermal heat pump?

If your geothermal heat pump is experiencing persistent electrical problems, such as frequent tripped breakers, unusual noises, or inconsistent operation, it’s a good idea to call a certified HVAC technician. These issues can indicate underlying electrical faults that require professional expertise to diagnose and repair safely.

Additionally, if you notice burning smells, your system won’t start, or it shuts down unexpectedly, don’t attempt to fix it yourself. Electrical components in geothermal systems are complex and best handled by trained professionals to avoid further damage or safety risks.

How to Replace Lead Water Filters

How to Replace Lead Water Filters

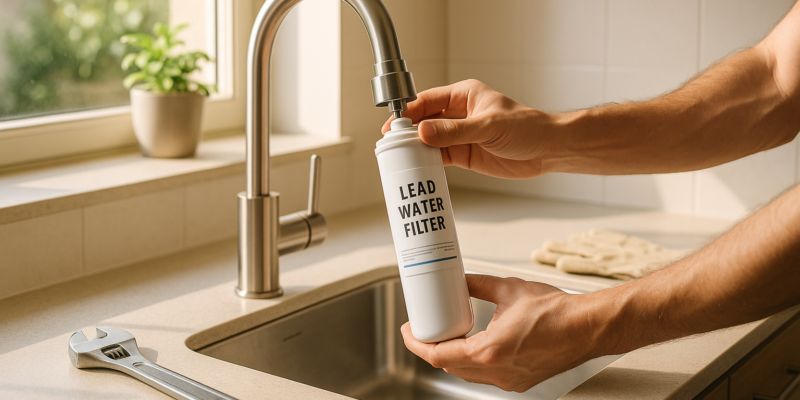
Replacing a lead water filter is essential to ensure your water is safe to drink and free from harmful contaminants like lead. Here’s a quick guide to help you get started:

  • Why Replace Filters? Over time, filters lose their effectiveness. Replacing them ensures your water stays clean and meets EPA safety standards for lead levels (below 0.015 mg/L).
  • When to Replace? Typically every 6–12 months, or sooner if water flow slows, taste changes, or the filter shows visible buildup.
  • What You’ll Need:
    • Tools: Adjustable wrench, filter housing wrench, plumber’s tape.
    • Safety Gear: Nitrile gloves, safety goggles.
    • Other Items: Replacement filter (NSF/ANSI 53-certified), cleaning supplies, and a bucket.
  • Steps to Replace:
    1. Shut off the water supply and release pressure.
    2. Remove the old filter using a wrench.
    3. Clean the filter housing thoroughly.
    4. Install the new filter, ensuring proper alignment and sealing.
    5. Test the system for leaks and flush with water for 5 minutes.

Pro Tip: Keep a log of replacement dates and test your water regularly to monitor filter performance.

If you encounter issues like damaged pipes or pressure problems, or if you have a complex system, consider hiring a professional like Hydrodynamics Inc. for assistance.

How To Change a Whole House Water Filter – Replace Water …

About Lead Water Filters

Lead water filters are designed to reduce lead levels in drinking water, helping to make it safer for household use. Here’s a closer look at how they work and what you need to know.

How Lead Filters Work

These filters rely on a multi-stage system that typically includes activated carbon and ion exchange resin. As water passes through, these materials trap and hold lead particles, effectively reducing the lead content in the water.

Meeting Safety Standards

To ensure effectiveness, filters should meet NSF/ANSI Standard 53. This certification guarantees that the filter can lower lead levels to below the EPA’s limit of 0.015 mg/L.

When to Replace Filters

Follow the replacement schedule provided by the manufacturer. Factors like heavy water usage, local water conditions, or noticeable changes in water pressure or taste can signal the need for a new filter.

Required Tools and Materials

To replace a lead water filter without interruptions, make sure you have everything ready. Here’s a breakdown of the tools and materials you’ll need.

Basic Tools

These are the essentials for a standard filter replacement:

  • NSF/ANSI 53-certified replacement filter: Ensure it matches your system.
  • Adjustable Wrench: A 12-inch or larger wrench to loosen the filter housing.
  • Safety Gear:
    • Heavy-duty nitrile gloves
    • Safety goggles with side protection
    • N95 dust mask (useful during cleanup)
  • Collection Items:
    • A 2-gallon bucket or basin
    • Clean towels or rags
    • Leak-proof disposal bag for used filters

Additional Tools

These extras can make the job easier and improve results:

  • Filter Housing Wrench: Designed specifically for your filter model.
  • Plumber’s Tape: Use 1/2-inch PTFE tape to seal connections properly.
  • Cleaning Supplies:
    • Food-grade silicone lubricant
    • A 50/50 white vinegar and water solution
    • Soft-bristled brush for scrubbing
  • Testing Materials:
    • Water pressure gauge
    • EPA-certified lead testing kit for post-replacement checks
  • Documentation Tools:
    • Filter replacement log to track changes
    • Permanent marker for labeling dates

Keep these tools organized in a maintenance kit for future use. Store cleaning supplies separately to prevent contamination. Before starting, inspect all tools for any signs of wear or damage.

Safety Steps

Stick to these safety measures to safeguard your health and minimize contamination risks.

Shutting Off Water

  • Find the main water shutoff valve in your home.
  • Turn the valve clockwise to stop the water flow.
  • Open a faucet to release any leftover water in the pipes.
  • Allow about two minutes for the system to fully depressurize.

Protective Gear

Use the right protective equipment to keep yourself safe:

  • Nitrile gloves (heavy-duty)
  • Safety goggles

Proper Filter Disposal

Dispose of used filters in line with local disposal rules. Not sure what to do? Reach out to Hydrodynamics Inc. for expert assistance.

Replacement Instructions

Now that you’ve taken the necessary safety measures, let’s go through the filter replacement process step by step.

Removing the Old Filter

Start by placing a bucket underneath to catch any leftover water. Use a filter wrench to unscrew the filter housing by turning it counterclockwise. If the housing feels stuck, avoid forcing it to prevent damage to the threads. Be cautious – the filter will be heavy due to trapped water, so hold it securely while removing it. If it remains stuck, contact a certified technician for assistance.

Cleaning the Housing

Check the housing for any damage, worn O-rings, mineral deposits, thread issues, or signs of corrosion.

Clean the inside of the housing with a soft cloth, focusing on the sealing areas. Avoid abrasive materials or harsh chemicals that could harm the components. Once cleaned and inspected, you’re ready to move on to installing the new filter.

Installing the New Filter

When setting up the new filter, follow these steps:

  • Ensure the replacement filter matches your system’s specifications.
  • Double-check that the O-rings are seated correctly.
  • Confirm the filter is positioned properly (look for “FLOW” arrows to guide you).
  • Hand-tighten the housing first, then use the filter wrench for final tightening. Be careful not to overtighten.

Testing the System

Once the new filter is installed, slowly turn the water back on at the main valve. Open the nearest faucet to release any trapped air and inspect the filter housing for leaks. Let cold water run for about 5 minutes to flush the system and confirm all connections are sealed properly. If you encounter any problems during installation or testing, reach out to Hydrodynamics Inc. Their certified technicians are ready to help ensure your lead water filter is installed and working correctly.

Filter Care and Longevity

Keeping your lead water filter in good condition is key to ensuring it works properly and keeps your household water safe.

Replacement Schedule

Replace your lead filter according to the manufacturer’s guidelines, usually every six months. This helps maintain its efficiency and extends its lifespan. Here are some signs it’s time for a replacement:

  • Slower water flow: Reduced water pressure might mean the filter is clogged.
  • Visible changes: Discoloration or debris buildup on the filter.
  • Timeframe: You’ve reached the replacement interval suggested by the manufacturer.
  • Water quality issues: Changes in taste, smell, or appearance of your water.

Maintenance Records

Keeping a record of your filter’s performance and maintenance is a simple way to stay on top of replacements. Here’s what to track:

Information to Record Why It Matters
Installation date Helps you know when the next replacement is due
Filter model number Ensures you buy the correct replacement parts
Replacement dates Keeps a history of your maintenance schedule
Water quality test results Tracks how well the filter is working
System pressure readings Can signal potential problems early

Water Testing

Regular water testing ensures your filter is effectively reducing lead and other contaminants. Companies like Hydrodynamics Inc. offer detailed water testing services that can:

  • Measure lead levels before and after filtration.
  • Detect other potential contaminants.
  • Confirm how well your filter is working.
  • Provide comprehensive water quality reports.

Professional Help

While many lead water filter replacements can be done on your own, certain situations require the expertise of a professional to ensure everything is done safely and effectively.

Common Problems

Below are some signs that it’s time to call in a professional:

Warning Sign What It Means Action Required
Pipe damage Cracks or corrosion near the filter housing Get a professional inspection ASAP
System pressure issues Pressure changes after replacing the filter Schedule professional pressure testing
Complex installations Systems with multiple filters or whole-house setups Hire an expert for proper installation
Water line concerns Problems with the main water line Have a professional assess the issue
Unusual water quality Quality problems persist after filter changes Arrange for comprehensive water testing

In these situations, professional help ensures your system operates as it should.

Hydrodynamics Inc. Support

Hydrodynamics Inc., a family-run business established in 1994, provides a full range of water filtration services for homes and businesses. Their team of certified technicians is equipped to handle installations, water quality testing, system maintenance, water line repairs, and even emergency services.

For more complex jobs, their Certified A.S.S.E Backflow Testing technicians can evaluate your system, perform water quality testing, install filters according to local regulations, check pressure and flow rates, and maintain detailed service records.

Professional installation is especially important for whole-house systems, commercial setups, or configurations involving multiple filters. Hydrodynamics Inc. ensures everything is done right the first time.

Summary

To ensure your drinking water stays safe, it’s crucial to maintain and replace your lead water filter regularly. This helps avoid contaminant buildup and keeps the filtration system working as it should.

Here are some key points to help with filter maintenance:

Aspect Key Points What to Do
Timing Filters lose effectiveness over time Replace according to the manufacturer’s timeline (usually every 6–12 months)
Safety Proper disposal and handling are important Wear protective gear and follow local disposal rules
Documentation Track your maintenance activities Log installation and replacement dates for easy reference
Professional Help Some systems may need expert care Hire certified technicians for complex or whole-house systems

FAQs

What are the signs that my lead water filter needs to be replaced earlier than expected?

If your lead water filter isn’t performing as expected, there are a few signs that it might need replacing sooner than the recommended schedule. These include:

  • Reduced water flow: If water pressure drops significantly, it could indicate the filter is clogged.
  • Unusual taste or odor: A metallic taste or unpleasant smell in your water might mean the filter is no longer effectively removing contaminants.
  • Cloudy or discolored water: This can be a sign that the filter is no longer functioning properly.

To ensure your water remains safe and clean, always follow the manufacturer’s guidelines for replacement and monitor for these signs regularly. If you’re unsure or need professional assistance, Hydrodynamics Inc. can help with expert water conditioning services tailored to your needs.

How do I choose a replacement filter that works with my water filtration system?

To ensure compatibility, check the model number or specifications of your current water filtration system. Most systems have this information printed on the unit or included in the user manual. Look for replacement filters specifically designed for your system’s brand and model. Be sure to match the filter type (e.g., sediment, carbon block) to your system’s requirements.

If you’re unsure, consult your system’s manufacturer or a professional service provider like Hydrodynamics Inc., who can guide you in selecting the right filter for your needs.

What should I do if my water quality doesn’t improve after replacing the lead water filter?

If your water quality remains poor even after replacing the lead water filter, it could point to a more complex issue in your water system. In such cases, it’s best to consult a professional to assess the problem and identify the root cause.

For expert assistance, consider reaching out to Hydrodynamics Inc., where professionals specialize in water conditioning services that can help resolve persistent water quality concerns effectively.