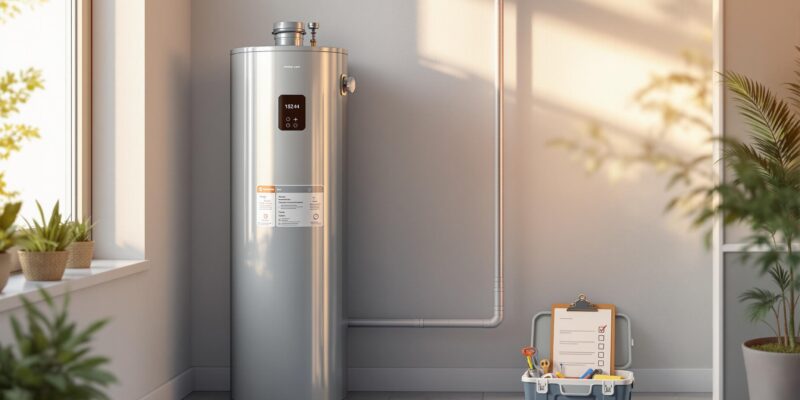
When Should You Replace Your Water Heater?
Replacing your water heater before it fails can save you money, prevent water damage, and ensure consistent hot water. Most traditional water heaters last 8-12 years, while tankless models can last 20+ years with proper maintenance. Here’s what to watch for:
- Age: Check the manufacturing date on the unit.
- Signs of Failure: Leaks, rusty water, strange noises, or rising energy bills.
- Repair Costs: If repairs exceed 50% of the replacement cost, it’s time for a new unit.
- Energy Efficiency: Upgrading to an ENERGY STAR-certified model can cut energy use by 10%.
Quick Comparison:
| Water Heater Type | Lifespan | Cost & Efficiency |
|---|---|---|
| Traditional Tank | 8-12 years | Lower upfront cost, higher energy use |
| Tankless | 20+ years | Higher upfront cost, lower energy use |
Pro Tip: Regular maintenance, like flushing the tank annually, can extend the lifespan of your water heater. If you’re unsure whether to repair or replace, consult a professional for guidance.
When to Replace a Water Heater: 5 Signs That It’s Time
1. How to Determine the Age and Lifespan of Your Water Heater
Knowing how old your water heater is can help you plan for its replacement and avoid unexpected breakdowns. You can usually find the manufacturing date in the serial number on the sticker or metal plate located near the top of the tank. Brands like Bradford White and A.O. Smith often encode the production year in the first two digits of the serial number. If decoding it seems tricky, check the manufacturer’s website or use the Building Intelligence Center‘s database for guidance.
Lifespan of Common Water Heater Types
The lifespan of a water heater depends on its type, water quality, and how well it’s maintained. Here’s a quick comparison:
| Water Heater Type | Average Lifespan | Factors That Impact Lifespan |
|---|---|---|
| Traditional Tank | 8-12 years | Water quality, maintenance, usage |
| Tankless | 20+ years | Installation, annual servicing, water hardness |
| Commercial Tank | 10-15 years | Usage intensity, maintenance, water chemistry |
To keep your water heater running smoothly, regular upkeep is essential. This includes flushing the tank annually, replacing the anode rod, checking for leaks, and testing the pressure relief valve.
“Regular maintenance can help prevent premature failure and ensure optimal performance”, according to industry experts [2][4].
2. Signs Your Water Heater May Need Replacement
Leaks and Rust on the Tank
If you notice puddles or moisture around your water heater, it could mean trouble. A small leak might just need a valve tightened, but rust around the pressure relief valve or pipe connections often points to serious tank damage. In these cases, a replacement is usually necessary.
Hot Water Problems
Is your water lukewarm or running out too quickly? These are often signs that your water heater isn’t working properly. A functional unit should provide consistent hot water. If you’re dealing with fluctuating temperatures or longer heating times, it could mean the heating elements are failing or sediment has built up inside the tank.
Discolored or Metallic-Tasting Water
Water that looks rusty, has a metallic taste, or contains sediment is a red flag. This often points to internal corrosion or sediment buildup inside the tank [1][4]. If flushing the tank doesn’t solve the problem, it’s likely time for a new water heater.
Strange Noises or Rising Energy Bills
Sediment buildup not only causes popping or rumbling sounds but also reduces efficiency and increases energy costs [2][4]. Here’s how these issues affect your water heater:
| Problem | Impact | Solution |
|---|---|---|
| Sediment Buildup | Low efficiency, higher energy use | Annual flushing or replacement if severe |
| Higher Energy Bills | Up to 10% more energy consumption | Upgrade to an ENERGY STAR model |
| Strange Noises | Indicates damage or sediment issues | Professional inspection needed |
Switching to an ENERGY STAR certified model can cut energy use by about 10% compared to standard units [1].
These warning signs usually mean your water heater is nearing the end of its life. Spotting these problems early can help you decide whether to repair or replace it. We’ll dive into that decision in the next section.
sbb-itb-99db659
3. Deciding Between Repairing or Replacing Your Water Heater
After identifying problems with your water heater, the next step is figuring out whether to fix it or invest in a new one.
Comparing Costs: Repairs vs. Replacement
The choice often boils down to expenses. Here’s a quick breakdown:
| Cost Factor | Repair | Replacement |
|---|---|---|
| Upfront and Ongoing Costs | $90-$1,700 per repair; may require multiple fixes | One-time cost starting at $1,300 |
| Long-term Value | Limited returns for older units | Improved performance and warranty coverage |
| Energy Costs | Higher with older models | Lower with energy-efficient options |
Energy Savings with a New Water Heater
Modern water heaters are designed to reduce utility costs thanks to better efficiency. For example, Washington Gas offers rebates for energy-efficient water heaters installed by contractors in their Home Energy Savings Network [1]. These rebates not only lower upfront costs but also contribute to long-term savings.
When Replacement Is the Better Option
In some cases, replacing your water heater is more practical. Consider these scenarios:
| Scenario | Why Replace | Cost Impact |
|---|---|---|
| Repair Costs > 50% of New Unit | Repairs aren’t worth the investment | Replacing saves money in the long run |
| Multiple Issues Present | Indicates overall system failure | Prevents ongoing repair expenses |
Experts recommend replacing your unit if repair costs exceed half the price of a new one [2][3]. Addressing multiple issues at once is often more economical than tackling repeated repairs.
Knowing when to replace your water heater helps you prepare for the next step: choosing the right model – covered in the following section.
4. How to Choose the Right Replacement Water Heater
If you’re replacing your water heater, picking the right model is crucial to meet your household’s needs while keeping energy use in check.
Tank vs. Tankless Water Heaters
Here’s a quick comparison to help you decide between tank and tankless models:
| Feature | Tank Water Heater | Tankless Water Heater |
|---|---|---|
| Cost & Efficiency | Lower upfront cost but higher ongoing energy use | Costs more initially but saves energy over time |
| Space Needs | Requires dedicated floor space | Compact, mounts on a wall |
| Hot Water Availability | Limited to tank capacity | Provides hot water on demand, no limit |
| Installation | Easier to install | More complex and may require upgrades to gas or electrical systems |
Picking the Right Size and Features
The right size depends on how much hot water your household uses. For instance, a family of 3-4 usually needs a 40-50 gallon tank, while bigger households might need something larger.
Check for models with high energy ratings and a first-hour rating that matches your busiest times (like mornings). This ensures you’ll have enough hot water when you need it most.
Why You Should Go with a Pro for Installation
Hiring a professional installer isn’t just about convenience – it’s about safety and getting the job done right. Pros make sure your water heater is installed to meet local codes, with proper venting and connections. Plus, many manufacturers require professional installation to keep the warranty valid.
You might also find rebates or incentives in your area to help offset the cost of installation, so it’s worth checking.
Once you’ve got your new water heater set up, let’s talk about keeping it running smoothly for years to come.
5. Conclusion: Keeping Your Water Heater Efficient and Reliable
Key Takeaways
Replacing your water heater before it fails can save you money and prevent unnecessary hassle.
Here’s a quick overview of when to consider a replacement:
| Factor | Recommendation | Impact |
|---|---|---|
| Age | Replace after 8-12 years for standard tanks, 20+ years for tankless models | Prevents unexpected breakdowns |
| Repair Costs | Replace if repair costs exceed $600 | Average repair cost is $603 [5] |
| Energy Use | Upgrade to ENERGY STAR certified models | Lowers energy bills |
While regular maintenance can help your water heater last longer, frequent repairs or multiple warning signs often mean replacement is the smarter choice.
Once you’ve evaluated your water heater’s condition, working with a professional can make the replacement process seamless and effective.
Why Hire a Professional?
Getting expert help ensures you make the right call for your water heater needs. Certified technicians can:
- Inspect your current system and its performance
- Suggest the most suitable replacement options
- Handle installation to optimize efficiency and warranty benefits
- Offer ongoing maintenance to keep your new unit running smoothly
If your water heater shows signs of wear or declining performance, don’t wait for it to fail completely. Reach out to a professional to determine whether repair or replacement is the better option.
FAQs
What is the most common cause of water heater failure?
The leading cause of water heater failure is sediment buildup [4]. As water passes through the tank, minerals settle at the bottom, forming a harmful layer. This layer can weaken the tank, lower heating efficiency, and drive up energy costs.
| Problem | Solution |
|---|---|
| Tank damage and reduced efficiency | Flush the tank annually |
| Poor performance | Use a water softener |
| Increased energy bills | Schedule regular maintenance |
Flushing the tank once a year helps prevent sediment buildup and prolongs the life of your water heater. In areas with hard water, installing a water softener can significantly minimize mineral deposits.
“Regular maintenance, such as checking for leaks and ensuring proper installation, can help extend the lifespan of your water heater. Additionally, consider factors such as water quality and usage patterns to optimize the performance and longevity of your water heater” [4][2].
If sediment damage becomes too severe, replacing the water heater may be more economical than frequent repairs. Upgrading to a more energy-efficient model can save money in the long run. Addressing sediment issues early ensures your water heater stays reliable and efficient for years.