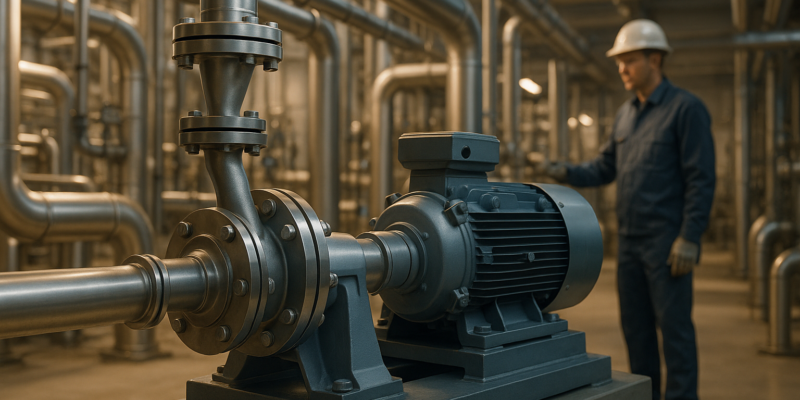
Industrial Pump Troubleshooting: Best Practices
Industrial pumps are critical for manufacturing, but when they fail, downtime and repair costs can skyrocket. To minimize disruptions, follow these steps:
- Start with diagnostics: Inspect for leaks, unusual noises, and performance drops (like reduced flow or higher power consumption).
- Prioritize safety: Use Lockout/Tagout (LOTO) procedures, isolate pressure, and wear proper protective gear.
- Address common issues: Fix seal leaks, cavitation, misalignment, and vibration. Regularly monitor flow rates and ensure proper lubrication.
- Document everything: Keep detailed logs of inspections, repairs, and performance metrics for future reference.
- Preventive maintenance saves money: Routine checks, lubrication, and alignment reduce the risk of major failures.
Centrifugal Pump START-UP Checklist & Troubleshooting Guide (SOP for Reliability Engineers)
Initial Diagnostics: Checking System Condition
Before diving into repairs, start with a systematic evaluation to identify the root cause of any issues. This initial assessment combines visual inspections, sound analysis, performance data review, and thorough documentation. These steps lay the groundwork for deeper diagnostics and effective troubleshooting.
Visual and Sound Inspections
Begin with a visual check while the pump is off. Look for fluid seepage around the shaft or connections, as this could indicate seal leakage that might lead to efficiency drops or environmental risks. Examine the pump casing and impeller for signs of corrosion, cracks, or wear – these are clues that components may need replacement. Discoloration or buildup near the bearings often points to lubrication problems or overheating.
Check for debris blocking the inlet or impeller, as this can reduce flow rates. Inspect bolts for tightness, verify coupling alignment, and examine seals and gaskets for wear. These observations help determine whether the pump requires immediate repairs or can continue operating under close monitoring.
After completing the visual inspection, turn on the pump and listen for unusual sounds. Rattling could mean loose internal parts or bearing play, while whining often signals cavitation or air entrainment. Grinding or scraping noises suggest the impeller might be rubbing against the casing or there’s an obstruction inside. High-pitched squealing typically points to bearing lubrication issues. Record the frequency, intensity, and location of these sounds for a more precise diagnosis. Using vibration monitoring tools can provide additional, quantifiable insights.
Performance Data Review
Once physical signs are noted, back them up with performance metrics. Evaluate operational history and compare current performance data to expected specifications. For instance, check the flow rate (measured in gallons per minute, or GPM) to identify deviations. A drop in flow rate might indicate clogged inlets, impeller wear, or insufficient suction pressure.
Simultaneously review discharge pressure, suction pressure, motor temperature, and power consumption. High power consumption often means the pump is operating inefficiently, possibly due to cavitation, misalignment, or excessive system resistance. Elevated motor temperatures could point to lubrication issues, cooling problems, or an incorrect power supply.
Bearings are another critical area to monitor. Documenting temperature spikes over time can reveal gradual degradation. For example, if a pump’s baseline flow rate was 500 GPM but has dropped to 450 GPM, this 10% reduction might indicate impeller wear or blockage. Similarly, ensure that the Net Positive Suction Head Available (NPSHa) exceeds the pump’s Net Positive Suction Head Required (NPSHr) to avoid cavitation. Deviations greater than 10-15% from manufacturer specifications usually call for further investigation and potential repairs.
It’s essential to differentiate between issues caused by the pump itself and those stemming from the system. To isolate the source, temporarily adjust system conditions and observe whether the symptoms change.
Recording Your Findings
Detailed documentation is key to uncovering underlying problems and making informed repair decisions. Record the inspection date and time, observed symptoms (like leaks, vibrations, or noises), visible damage, and key operational parameters. This information not only guides immediate repairs but also strengthens future maintenance strategies.
Maintenance logs should include past repairs, component replacements, lubrication schedules, and recurring issues. For example, if seals consistently need replacement every six months, this suggests a systemic problem rather than isolated failures. Such records help identify patterns and prevent redundant troubleshooting.
Baseline metrics are particularly valuable. When a pump is new or recently serviced, document its operational parameters under normal conditions to establish reference points. Over time, compare periodic measurements to these baselines to spot degradation trends. For instance, if initial vibration levels were 0.15 inches per second and have now risen to 0.28 inches per second, this indicates a developing misalignment that should be addressed before it escalates.
Without baseline data, it’s harder to distinguish normal wear and tear from emerging problems. Early detection of subtle changes – like slight fluid seepage, faint grinding noises, or increased power usage without a corresponding flow increase – allows for proactive maintenance. This approach helps schedule repairs during planned maintenance windows, avoiding costly emergency breakdowns.
Safety Procedures and System Isolation
Before diving into pump repairs, it’s crucial to prioritize safety. Once diagnostics are complete, the next step is isolating the system to protect both personnel and equipment. Proper isolation and strict adherence to safety protocols are non-negotiable – they help prevent injuries, regulatory issues, and expensive system failures.
Power and Pressure Isolation
Start by cutting off the pump’s power supply. Follow OSHA’s Lockout/Tagout (LOTO) procedures: disconnect the power, padlock the switch, and attach a tag labeled “DO NOT OPERATE” with the date, time, and your initials. If multiple technicians are involved, use a lockout hasp so each person can secure their own padlock until their work is finished.
Next, close all isolation valves on the suction and discharge lines to stop fluid flow. The suction isolation valve prevents backflow from the source tank, while the discharge isolation valve blocks fluid from reaching downstream equipment. If the system includes a bypass valve, ensure it is closed or set to a safe position.
Refer to the pump’s manual to locate the pressure relief valve. Slowly open it and monitor the pressure until it reaches zero. For systems operating above 500 psi or containing stored energy, use a pressure gauge to confirm full depressurization. Place a drain pan under the vent to catch any fluid that might be hazardous or hot.
Allow the pump and motor to cool down completely before beginning any work. Residual heat can cause burns or even ignite flammable fluids. Once the pump has cooled, verify that the system is fully isolated. Try manually rotating the pump shaft – it should not move if isolation has been done correctly. Additionally, check that both the suction and discharge lines show zero pressure on their gauges. Listen for any unusual noises, like hissing or dripping, which might signal incomplete isolation. Only proceed to disassembly after confirming these steps.
For accountability, document every isolation step in your maintenance log. This ensures consistency and provides a clear record for the team.
Safety Equipment and Compliance
Always wear the necessary personal protective equipment (PPE) to meet OSHA guidelines and manufacturer recommendations. This typically includes safety glasses or face shields, chemical-resistant gloves, steel-toed boots, hearing and respiratory protection, and hard hats when required.
Compliance with OSHA standards is more than just a legal requirement – it safeguards workers and reduces liability risks. Adhere to LOTO procedures under OSHA 1910.147, and ensure rotating equipment has proper guards and safety devices in line with OSHA 1910.212. Additionally, follow industry standards from organizations like the Hydraulic Institute (ANSI/HI), the National Fire Protection Association (NFPA), and the American Petroleum Institute (API) for safe pump operation and maintenance.
If the pump is located in a confined space, such as a basement or an enclosed room with poor ventilation, follow OSHA 1910.146 regulations for permit-required confined spaces. Before entering, test the atmosphere for oxygen levels (safe range: 19.5–23.5%), combustible gases (below 10% of the lower explosive limit), and toxic substances. Maintain continuous ventilation during the work and assign a trained attendant outside the confined space to monitor safety and maintain communication.
Before starting any repair work, complete thorough documentation. Fill out a work permit or maintenance request form that includes the pump’s identification number, location, and system details. Record each isolation step – such as disconnecting power, relieving pressure, and closing valves – and note who verified each step. Take photographs of the pump’s condition, capturing any visible damage, leaks, or wear. Have each technician sign off on a checklist confirming all isolation and safety verification steps. These preparations ensure a safe and effective troubleshooting and repair process.
Common Industrial Pump Problems and Fixes
Once you’ve secured the system and confirmed all safety measures, it’s time to pinpoint the issues affecting your pump. Knowing the most frequent problems can help you act swiftly and keep downtime to a minimum.
Seal Failures and Leaks
Leaks, worn-out seals, or the need for frequent replacements are clear signs of trouble. These issues shouldn’t be ignored – small leaks can turn into major system failures or even pose environmental risks.
Begin by examining seals and O-rings for signs of wear, such as hardening, cracking, or other damage. Seals often deteriorate due to exposure to chemicals, extreme temperatures, or prolonged use. Misaligned casing can also prevent seals from seating properly, leading to premature failure. Double-check that operating pressure stays within the manufacturer’s guidelines; sudden pressure spikes can compromise seal integrity.
When replacing seals, always use the exact material and size specified by the manufacturer. Using the wrong type can lead to repeated failures. Keep a record of seal replacements to identify any recurring problems. Before reassembly, inspect the seal area for debris or foreign particles, clean all surfaces thoroughly, and ensure the shaft is smooth and free from scoring or pitting.
With seals addressed, turn your attention to cavitation and suction issues.
Cavitation and Suction Problems
Cavitation happens when suction pressure drops below the fluid’s vapor pressure, causing vapor bubbles to form and collapse violently. These bubbles can damage the impeller and casing surfaces. If you hear rattling or grinding sounds, cavitation may be the culprit.
To diagnose cavitation, confirm that the Net Positive Suction Head Available (NPSHa) exceeds the Net Positive Suction Head Required (NPSHr). If NPSHa falls short, consider increasing suction pressure, lowering suction line temperature, or both. Also, ensure the pump is fully primed and check for suction-side leaks that could introduce air into the system.
Air entrainment is another issue that can hurt pump performance. Look out for gurgling, hissing, or visible air bubbles in the discharge flow. Common causes include leaks on the suction side, poor priming, or low fluid levels in the source tank. Ensure the suction pipe is fully submerged and that the tank maintains an adequate fluid level. Use soapy water or dye penetrants to detect leaks in the suction line. If air is entering the system, install air release valves to prevent further entrainment.
For persistent cavitation, consider upgrading to erosion-resistant materials for impellers and casings, following ANSI/HI guidelines. Additionally, ensure suction line velocity stays within the manufacturer’s recommendations to avoid drawing air into the system.
After resolving these fluid flow issues, focus on vibrations and alignment.
Vibration and Misalignment
Excessive vibration – defined as levels exceeding 0.3 inches per second – indicates serious mechanical problems that need immediate attention. You might notice rattling, whining, or grinding noises, or feel unusual vibrations in the pump housing. Ignoring these signs can lead to bearing failure and severe damage.
Start by measuring baseline vibration levels during normal operation. Inspect the pump-motor coupling for alignment issues, use a dial indicator to check for shaft runout, and examine the impeller for imbalance or damage. These checks can help assess the pump’s overall health. Tools like laser alignment systems and vibration monitors can detect misalignment early, preventing bigger issues down the line.
Common causes of vibration include worn bearings, imbalanced impellers, or improperly installed couplings. Regularly inspect bearings for wear and ensure the pump operates near its Best Efficiency Point (BEP) to reduce stress on rotating parts. Overheated bearings, unusual noises, visible shaft movement, or rising vibration levels often signal bearing failure. A temperature increase of 20–30°F may indicate a problem. Replace bearings proactively if they show signs of wear.
Motor and Electrical Failures
Finally, evaluate the motor and electrical systems for potential issues. Start by checking that the electrical supply stays within ±10% of the motor’s rated voltage and that the amperage draw matches the specifications. Inspect connections for corrosion, loose terminals, or incorrect wire gauge.
Common motor problems include overheating due to poor cooling or insufficient lubrication of motor bearings, as well as electrical faults like phase imbalances or ground faults. To diagnose overheating, monitor the motor’s surface temperature – excessive heat could point to lubrication or airflow issues. Also, verify that the motor is correctly sized for the pump’s power needs. An undersized motor running at full load can overheat and fail prematurely.
Use tools like a multimeter or insulation tester to identify electrical faults. Address these issues promptly to avoid further damage. If the pump is consuming too much power, it may be operating far from its Best Efficiency Point (BEP). Adjust the operating parameters, and consider options like impeller trimming or speed control to improve efficiency and cut energy costs.
sbb-itb-99db659
Repair and Component Replacement
After conducting a thorough diagnostic and ensuring all safety measures are in place, the next step is careful disassembly and replacement of components to restore the pump to peak performance. Precision is key here – rushed repairs often lead to recurring issues and more downtime.
Pump Disassembly and Inspection
Start by isolating the pump system following proper lockout/tagout (LOTO) procedures. Gather all necessary tools, including wrenches, bearing pullers, gaskets, seals, and containers for organizing small parts. Take photos and detailed notes to document the position of components for a smoother reassembly process.
Begin by removing external parts such as the motor coupling and any attached piping. Loosen casing bolts in a cross-pattern to avoid uneven stress. As each component is removed, conduct a detailed inspection. Look for cracks, corrosion, or erosion in the casing and impeller. For the impeller, check for pitting – small cavities that often indicate cavitation damage – and measure blade thickness. Examine bearing surfaces for signs of wear, such as scoring, discoloration, or spalling. Roll the shaft on a flat surface to check for wobbling, which might suggest bending. Use a dial indicator to measure shaft runout, ensuring it falls within the typical tolerance range of 0.002 to 0.005 inches.
Inspect the inside of the casing for erosion patterns, particularly in areas prone to cavitation. Document all findings with photographs and measurements to guide the selection of replacement parts and identify the root causes of failure.
Keep the workspace organized by storing bolts, nuts, and washers in clearly labeled containers corresponding to their original positions. Pay close attention to the orientation of mechanical seals, noting the position of seal faces and springs before removal. Incorrect reassembly of these components can lead to immediate leaks. Use the appropriate tools, like bearing pullers, to remove bearings without causing damage.
Once inspections and documentation are complete, proceed to replace any faulty components and begin reassembly.
Component Replacement and Reassembly
Refer to the pump’s original equipment manufacturer (OEM) specifications, which can usually be found on the nameplate or in the equipment manual. Always use OEM-specified parts to ensure compatibility and performance.
When replacing seals, ensure the material composition, size, and pressure rating match the original specifications. Using incorrect seals can result in repeated failures. For bearings, confirm the type (ball, roller, or tapered), size, and load rating. Bearings should comply with ANSI/HI guidelines to guarantee proper operation. If cavitation has been a recurring issue, consider using erosion-resistant materials for impellers or casing components, as recommended by ANSI/HI lining standards.
Ensure the replacement impeller matches the OEM’s specifications for material, size, and blade configuration. Purchase parts from reliable suppliers who can provide documentation of material specs and quality certifications.
Before reassembly, clean all components thoroughly and ensure mating surfaces are flat and free of debris. When installing seals and O-rings, inspect the seal area for foreign particles, corrosion, or damage that could compromise the seal. Clean and dry the seal cavity completely. For mechanical seals, align the seal head properly so the primary seal face (typically ceramic or tungsten carbide) faces the pumped fluid, while the secondary seal face contacts the shaft. Applying a thin layer of the pumped fluid to the seal faces can help with initial sealing. For O-rings, use a compatible lubricant to ease installation and prevent twisting, ensuring they are seated correctly without over-stretching.
Install bearings using the correct tools to ensure they are seated fully and aligned properly. When mounting the impeller, align keyways precisely and tighten set screws to the specified torque value, which typically ranges from 50 to 200 foot-pounds depending on the pump’s size and material.
Reassemble the pump casing by tightening bolts in a cross-pattern, gradually increasing torque to apply even pressure. Use a calibrated torque wrench and follow the manufacturer’s specifications. Once the casing is secured, verify that the shaft rotates freely by hand, ensuring there’s no binding.
Alignment is critical for proper operation. Shaft runout should remain within 0.002 to 0.005 inches total indicated runout (TIR), measured with a dial indicator at the impeller or coupling. Mechanical seal faces must be parallel within 0.001 inches and perpendicular to the shaft within 0.002 inches. Use laser alignment tools to check the coupling alignment – angular misalignment should not exceed 0.05 degrees, and parallel misalignment should stay within 0.05 inches.
Before completing the assembly, double-check that all components are correctly positioned. Rotate the shaft manually one last time to ensure smooth movement without resistance.
Finally, record all torque values and alignment measurements in your repair log. This documentation will be a valuable resource for future maintenance and troubleshooting efforts.
Testing and Post-Repair Checks
Once the pump has been reassembled, the next step is to conduct a controlled test to ensure the repairs have been successful. This process confirms that the pump is functioning safely and within its design limits. Gradually starting the pump and monitoring key parameters during this phase is essential.
Running Tests and Monitoring
Start the pump slowly to allow seals and bearings to warm up properly. This cautious approach helps identify any hidden issues before they escalate.
Before initiating the test, install precise pressure gauges on both the suction and discharge lines. For low-pressure systems, gauges with a range of 0–100 psi are suitable, while high-pressure systems may require gauges up to 500 psi or more. Ensure all personnel remain at a safe distance from potential leak points and rotating equipment. Assign one operator to manage the startup while others monitor the readings.
During the test run, keep a close eye on these critical parameters:
- Pressure and Flow: Confirm that pressure (measured in psi) and flow rates (measured in gpm) match the specifications. Take readings at different stages – during ramp-up and steady-state operation. Stable readings indicate proper functioning, while fluctuations might signal deeper issues. Use calibrated flow meters or calculate flow by measuring the discharge volume over time and comparing it to the pump curve.
- Temperature: Track the temperature (in °F) of critical components like bearing housings. Use infrared thermometers or sensors to establish baseline readings within the first few minutes. If any component exceeds safe temperature limits, shut the pump down immediately.
- Vibration: Ensure vibration levels remain below 0.3 inches per second. Excessive vibration may point to problems like shaft misalignment, impeller imbalance, or worn bearings. If vibration exceeds this threshold, stop the pump and check for alignment issues.
- Auditory Cues: Pay attention to unusual sounds such as grinding, whining, or rattling. These noises could indicate incomplete repairs, misalignment, or even cavitation. Persistent grinding might suggest impeller damage.
- Visual Inspection: Observe the pump during operation to check for leaks at seals, gaskets, and connection points. Leaks around the shaft often suggest seal issues, while leaks at connection points may indicate improper tightening or gasket failure. If leaks are detected, shut the pump down immediately to prevent further damage or safety risks.
Record all observations and measurements on a standardized test form. Include timestamps and multiple readings taken over time to confirm stability. Compare the results to pre-repair baselines and design specifications. For instance, if electricity usage is higher than expected, the pump might be operating outside its Best Efficiency Point, which could require further adjustments or impeller trimming. If persistent issues like leaks, reduced flow, high temperatures, or sporadic flow with air bubbles occur, stop the pump and re-inspect the repaired components.
Recording Repair Details
After confirming the pump is operating correctly, document all repair details. Keeping accurate records is vital for tracking the pump’s history, identifying recurring problems, and planning future maintenance. Include the following in your documentation:
- The date and time of repair completion.
- A list of components repaired or replaced, including part numbers and specifications.
- The names of the technicians involved.
- A detailed account of the identified problems and the corrective actions taken.
Record test results precisely, noting pressure (in psi), flow rates (in gpm), temperature (in °F), and vibration levels (in inches per second). Document any unusual noises or leaks observed during testing. Photographs of damaged components before replacement and the reassembled pump can be valuable references. Any deviations from the manufacturer’s specifications should be clearly noted.
Store these records in a centralized maintenance management system that all maintenance personnel can access. Over time, this data helps identify patterns. For example, recurring seal failures every 18 months might indicate the need for upgraded seals or adjustments to operating conditions. Additionally, document the Best Efficiency Point from the pump curve, as this allows you to compare actual operating conditions to optimal performance. Significant deviations may require further investigation before the pump is returned to full operation.
Include detailed notes like torque values applied during reassembly and alignment measurements taken. This level of precision ensures consistency across maintenance cycles and simplifies troubleshooting in the future.
At Hydrodynamics, these rigorous testing and documentation practices play a key role in maintaining the safety, reliability, and efficiency of industrial pump systems over the long term.
Preventive Maintenance for Long-Term Performance
Once repairs and testing are complete, keeping pumps in top condition requires consistent preventive maintenance.
Unplanned downtime can be a major expense. A well-structured maintenance plan not only reduces emergency repairs and production disruptions but also extends the lifespan of your equipment. By building on earlier diagnostics and repair efforts, preventive maintenance helps tackle recurring pump issues before they escalate.
For instance, scheduling bearing replacements is far less expensive than dealing with emergency repairs that might damage multiple components. Similarly, regular seal inspections and timely replacements prevent fluid leaks, reduce safety risks, and maintain operational efficiency. These practices emphasize the importance of scheduled inspections, proper component care, and staff training.
Routine Inspection Schedules
Inspection schedules should be based on factors like pump criticality, operating hours, and historical failure patterns.
During inspections, maintenance teams need to focus on key components. Mechanical seals and O-rings should be checked for signs of wear, such as hardening or cracking. Shaft and coupling alignment must be verified using laser tools, as even slight misalignments can lead to bearing failure and excessive vibration. Bearings should be assessed for unusual noises or inadequate lubrication. Additionally, casing alignment and operating pressure should be reviewed to ensure they meet design specifications.
Inlet strainers or filters should be cleaned regularly to prevent solids from building up, which can restrict flow and cause cavitation. Installing these components upstream can reduce cleaning frequency and minimize blockages.
Monitoring performance metrics during inspections can reveal early signs of degradation. For example:
- High temperatures may point to lubrication or friction problems.
- Vibration levels exceeding 0.3 inches per second could indicate misalignment, imbalanced impellers, or worn bearings.
- Deviations in flow rate or pressure might signal blockages, cavitation, or impeller wear.
- Rising power consumption often suggests the pump is straying from its optimal efficiency point.
Routine inspections and timely action can prevent minor issues from growing into costly repairs. Keeping a record of these metrics over time provides a baseline, making it easier to identify when components are nearing failure.
Lubrication and Component Care
Proper lubrication is crucial for avoiding heat buildup, vibration, and bearing failure. Maintenance teams should follow manufacturer guidelines for lubrication, using the correct type of grease or oil at specified intervals. The frequency and type of lubricant depend on factors like bearing size, speed, and operating temperature.
Bearings can fail due to overload, misalignment, or insufficient lubrication, leading to higher energy use and unexpected downtime. When replacing bearings, ensure they are installed and aligned correctly to avoid future issues.
Mechanical seals and O-rings should be inspected regularly and replaced at the first signs of wear, such as cracking or hardening. Waiting for seals to fail completely can lead to fluid loss, contamination, and damage to other components. Always use replacement parts that match the original specifications and follow installation guidelines.
Maintaining adequate fluid levels in source tanks or reservoirs is critical to avoid cavitation and air entrainment, which can damage pump components. A 10–20 percent NPSH (Net Positive Suction Head) margin should be maintained to prevent these issues.
Training and Record-Keeping
Preventive maintenance also relies on well-trained personnel and meticulous record-keeping.
Training should cover pump operation, troubleshooting, and safety. Staff should be adept at identifying visible damage, unusual noises, and abnormal vibration levels. They should also be familiar with the entire troubleshooting process – from initial assessments and operational data reviews to safe disassembly, repairs, and post-repair inspections.
Technicians need to understand how operating conditions impact pump performance. For example, they should know how insufficient suction pressure causes cavitation or how misalignment leads to bearing failure. Training should also include lubrication practices, seal inspection and replacement, and the use of diagnostic tools like laser alignment systems and vibration monitors. Facilities that prioritize training often experience fewer repair errors, longer equipment life, and reduced downtime.
Detailed records are essential for spotting recurring problems. Keep track of inspections, repairs, and operational history. This includes dates, replaced components (with part numbers), technician names, and descriptions of issues and fixes. Regularly document key metrics like flow rate, pressure, motor current, bearing temperature (°F), vibration levels (inches per second), and seal conditions. These records establish baseline performance data, helping identify trends like increasing vibration or rising motor current that may signal developing issues.
Using digital maintenance management systems can streamline record-keeping and enable predictive maintenance by identifying potential failures early. Reviewing these records during inspections allows for better decision-making about component replacements and system upgrades. Identifying recurring issues through documentation can lead to permanent solutions.
At Hydrodynamics, a thorough preventive maintenance approach – including routine checks, proactive care, and detailed documentation – ensures industrial pump systems remain reliable for years to come.
Conclusion
Effective troubleshooting is the backbone of keeping industrial pumps running smoothly. By combining visual checks, sound assessments, and performance data analysis, you can pinpoint root causes, reduce equipment failures, and avoid costly, unplanned downtime.
Once issues are identified, safety must come first. Isolating equipment and following proper disassembly procedures ensures that repairs address the underlying problems without creating new ones. Using high-quality replacement parts during reassembly helps prevent repeat failures and extends the pump’s operational life.
To cut costs and improve reliability, pair emergency troubleshooting with regular maintenance. Routine checks, proper lubrication, and bearing care can prevent common problems like cavitation, seal leaks, and vibration. For best results, maintain vibration levels under 0.3 inches per second and ensure NPSH margins are 10–20% above requirements.
Finally, accurate record-keeping plays a vital role in long-term pump reliability. Detailed logs provide a baseline to spot wear and tear before it leads to major failures. Training maintenance teams to recognize warning signs – like grinding noises, overheating, or sudden drops in flow rate – enables quicker responses and more precise troubleshooting. This proactive approach ensures pumps remain efficient and dependable over time.
FAQs
What are the main signs of cavitation in industrial pumps, and how can it be avoided?
Cavitation in industrial pumps can lead to serious damage if not addressed quickly. Some key indicators to keep an eye on include strange noises (often described as a rattling or grinding sound), excessive vibrations, lower-than-expected flow or pressure, and visible pitting or wear on pump components.
To minimize the risk of cavitation, make sure the pump operates within its recommended parameters. Confirm that the Net Positive Suction Head Available (NPSHa) is greater than the Net Positive Suction Head Required (NPSHr). Regular maintenance is also essential – inspect filters and valves frequently to prevent blockages or restrictions. Additionally, keeping fluid levels and temperatures within the proper range can go a long way in protecting your system from cavitation-related issues.
Why is it important to document pump performance and maintenance regularly for effective troubleshooting and prevention of future problems?
Keeping detailed records of pump performance and maintenance is a smart way to catch issues early, identify trends, and streamline troubleshooting. By tracking key metrics like flow rate, pressure, or energy use, you can spot signs of wear or potential malfunctions before they turn into bigger problems.
A well-documented history of repairs, inspections, and performance data helps you make better decisions about preventive maintenance. This approach can save you from expensive downtime, extend the life of your pump systems, and boost overall efficiency in your operations.
What safety steps should you take before starting any industrial pump repairs?
Before starting any industrial pump repair, safety should always come first to safeguard both workers and equipment. Begin by shutting off and isolating the power supply to the pump. This step ensures there’s no chance of accidental activation. Double-check that all moving parts have completely stopped before proceeding.
Next, depressurize the system and carefully drain any remaining fluids to avoid leaks or spills that could pose hazards. Always wear the right personal protective equipment (PPE) – this includes gloves, safety goggles, and steel-toe boots – to reduce the risk of injuries during the repair process.
Lastly, make sure the workspace is clean, well-lit, and free from clutter. Taking these precautions helps establish a safer and more efficient environment for repair and maintenance tasks.