Maria is the Office Manager at Hydro Dynamics, ensuring seamless day-to-day operations and providing exceptional support to the team. With her organizational skills and attention to detail, Maria plays a key role in maintaining efficiency and a positive workplace environment.

Heating vs. Cooling Maintenance: Key Differences

Heating vs. Cooling Maintenance: Key Differences

Want to keep your HVAC systems running efficiently and avoid costly breakdowns? Here’s what you need to know:

  • Heating systems use 4x more energy than cooling systems, so they require regular checks for burners, heat exchangers, and gas lines.
  • Cooling systems focus on removing heat and need attention to refrigerant levels, coil cleanliness, and condensate drains.
  • Shared tasks include changing filters, thermostat calibration, and system inspections.

Quick Comparison

Aspect Heating Maintenance Cooling Maintenance
Energy Usage Higher energy consumption More efficient but heavy in summer
Key Components Heat exchangers, burners, gas lines Evaporator coils, refrigerant lines
Seasonal Timing Early fall Early spring
Safety Concerns Gas leaks, carbon monoxide Refrigerant levels, electrical risks

Pro Tip: Schedule professional heating maintenance in fall and cooling check-ups in spring to ensure optimal performance year-round.

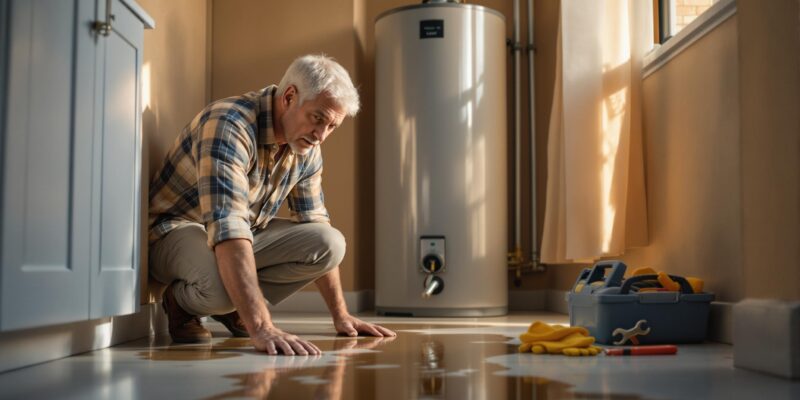
Yearly HVAC Maintenance Checks

Heating System Maintenance: Requirements

Maintaining your heating system is crucial for keeping it running efficiently during the colder months. Let’s break down the key components, tasks, and schedules involved.

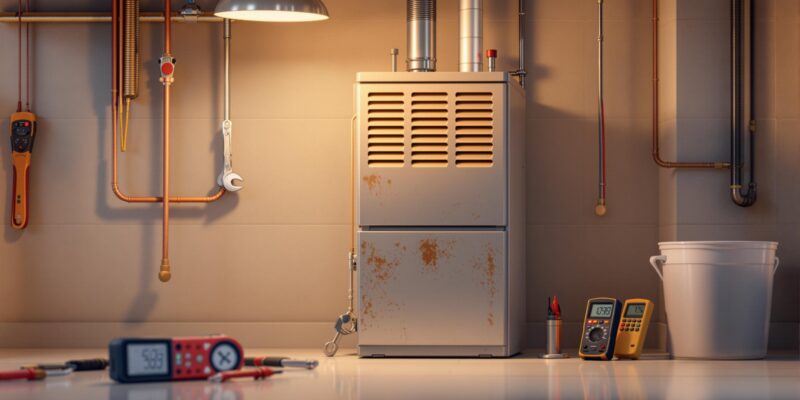
Components in Heating Systems

Heating systems are made up of several essential parts, including furnaces, boilers, heat pumps, heat exchangers, burners, fuel lines, and air filters. Each of these requires specific attention to ensure everything works smoothly.

Maintenance Tasks for Heating

A major focus is on inspecting and replacing filters. Dirty filters can lead to up to a 15% increase in energy use [3]. Here’s a quick guide for filter replacement:

  • 1-inch filters: Replace every 2-3 months.
  • Media filters: Replace every 6-12 months [5].

Other important tasks include:

  • Checking the heat exchanger for cracks or other damage.
  • Cleaning burners to ensure proper combustion.
  • Inspecting fuel lines for leaks.
  • Lubricating moving parts to minimize wear and tear.

Heating Maintenance Schedule

Sticking to a regular maintenance schedule helps prevent issues and keeps your system running efficiently. Here’s a helpful timeline:

Frequency Tasks Purpose
Monthly Check filters, perform visual inspections Avoid airflow restrictions
Semi-annually Clean burners, inspect fuel lines Ensure safe and efficient operation
Annually Conduct full system inspection, service heat exchanger Catch and prevent major problems

By following this schedule, you’ll reduce the risk of breakdowns and improve your system’s performance.

Heating systems require specific care, but cooling systems come with their own set of maintenance needs, which we’ll cover next.

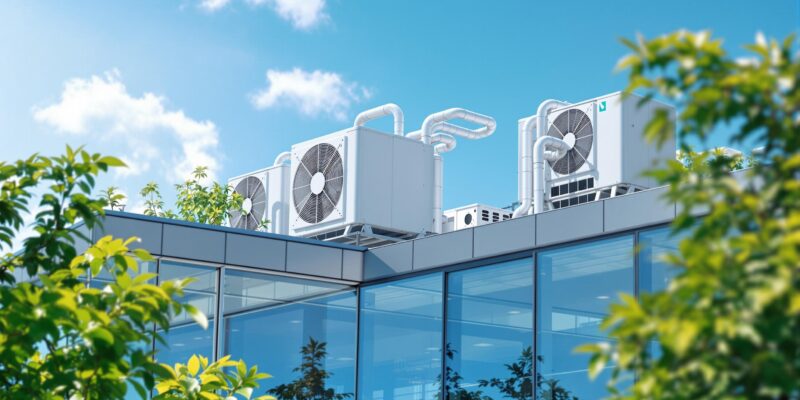
Cooling System Maintenance: Considerations

Cooling systems work differently from heating systems. Instead of producing warmth, they remove heat, which means they require specific upkeep and care.

Key Components of Cooling Systems

Cooling systems are made up of several parts that work together to keep your space comfortable:

  • Evaporator coils: Absorb heat from indoor air.
  • Condenser units: Release heat outside.
  • Refrigerant lines: Move coolant through the system.
  • Electrical connections: Power the system and keep everything running.

Essential Cooling Maintenance Tasks

According to the U.S. Department of Energy, keeping up with maintenance can cut energy costs by up to 30% [2]. Here’s what you need to do:

Task Frequency & Purpose
Clean or replace air filters Every 1-3 months to maintain airflow and efficiency
Clean evaporator and condenser coils Annually to ensure the system cools effectively
Check refrigerant levels Annually to maintain optimal performance
Inspect electrical connections Twice a year to avoid breakdowns
Clear the condensate drain Every three months to prevent water damage

Tips for Effective Cooling Maintenance

Timing and attention to detail are key when it comes to maintaining cooling systems. Here’s how you can stay ahead:

  • Schedule professional inspections in early spring, before summer demand kicks in.
  • Keep outdoor units free from debris, leaves, and overgrown plants.
  • Address strange noises or reduced cooling performance as soon as they arise.

Professional services are especially important for tasks like refrigerant handling and electrical inspections. These ensure your system runs efficiently, avoids costly breakdowns, and lasts longer. With regular care, your cooling system will deliver consistent comfort throughout the hottest months.

Next, we’ll look at how some maintenance practices overlap with heating systems.

Comparing Heating and Cooling Maintenance

Understanding the specific needs of heating and cooling systems ensures they run safely and perform at their best.

Shared Maintenance Practices

Both systems benefit from regular upkeep like filter changes, system inspections, and thermostat calibration. Clean filters prevent energy waste and help systems operate as they should.

Differences in Maintenance Needs

Heating and cooling systems have distinct components, which means their maintenance needs differ.

  • Heating systems: Require checks for gas lines, burners, and heat exchangers to ensure safety and efficiency.
  • Cooling systems: Need attention to refrigerant levels, coil cleanliness, and condensate drains to maintain proper function.

Timing matters too. Heating systems are best serviced in early fall, while cooling systems should be checked in early spring.

Heating and Cooling Maintenance Comparison Table

Aspect Heating Maintenance Cooling Maintenance
Energy Usage Uses 4x more energy than cooling More efficient but heavier use in hot climates
Critical Components Heat exchangers, burners, gas lines Evaporator coils, condensers, refrigerant lines
Safety Concerns Gas leak detection, carbon monoxide testing Refrigerant level monitoring
Seasonal Timing Early fall before cold weather Early spring before summer heat
System-Specific Tasks Combustion analysis, heat exchanger inspection Coil cleaning, refrigerant pressure check

For example, variable-speed air conditioners can save up to 30% on energy costs [4]. Meanwhile, high-efficiency furnaces require extra care, like ensuring condensate lines don’t freeze during cold weather [3]. Knowing these differences helps you provide the right care for each system.

Up next: weighing the pros and cons of professional versus DIY maintenance.

Professional vs. DIY Maintenance: Choosing

Taking the right approach to HVAC maintenance can help you save money and avoid system breakdowns. Knowing which tasks you can handle on your own and when to call in a professional is key to keeping your system running smoothly.

DIY Maintenance Tasks

Homeowners can safely tackle a few basic maintenance tasks:

  • Basic Upkeep: Clear debris from outdoor units and check for visible issues like strange noises, blocked vents, or changes in system performance.
  • Filter Replacement: Changing filters regularly boosts efficiency and improves air quality, keeping your system in good shape [5].
  • Visual Checks: Look out for signs of wear or unusual operation that may need professional attention.

When to Hire Professional HVAC Services

Some tasks are best left to certified professionals. These include more complex maintenance that requires specialized skills and tools:

Task Type Why Professional Help is Needed
Refrigerant Handling Requires EPA certification and proper equipment
Electrical Components Risk of electrical shock and potential damage
Gas Line Issues Involves safety risks and legal regulations
Complex Diagnostics Needs advanced testing tools and expertise
Annual Tune-ups Provides a thorough system evaluation

Benefits of Professional Maintenance

Hiring a professional comes with several advantages:

  • Safety and System Life: Trained technicians handle intricate components safely and catch issues early to extend your system’s lifespan [5].
  • Lower Costs Over Time: Routine professional care prevents costly emergency repairs and improves energy efficiency, cutting down your bills [1].

“A professional eye can also detect problems you might not notice and make the necessary repairs before they become major concerns.” [6]

  • Warranty Protection: Many warranties require professional maintenance. DIY fixes could void your warranty and lead to denied claims [5].

For the best results, combine simple DIY tasks with professional check-ups twice a year – once in the spring for cooling systems and again in the fall for heating systems [1].

Conclusion: Key Points on Heating and Cooling Maintenance

Keeping heating and cooling systems in good shape means understanding their unique requirements while sticking to some shared upkeep practices. Regular care plays a big role in how well these systems perform and how efficiently they use energy.

As mentioned earlier, while there are overlapping maintenance tasks, each system has parts that need special care. Heating systems focus on components like heat exchangers and burners, while cooling systems require attention to evaporator coils and condensers. Both systems also benefit from regular filter replacements and routine inspections to keep them running smoothly.

To get the best performance, combine simple do-it-yourself tasks with scheduled professional services. For heating systems, plan professional maintenance in the fall. For cooling systems, spring is the best time for check-ups. This seasonal approach ensures both systems are ready when you need them most.

Professional HVAC services are crucial for keeping systems efficient and extending their lifespan. Companies like Hydrodynamics provide expert care, offering detailed inspections and addressing potential problems before they escalate [5].

Common HVAC Issues During Seasonal Transitions

Common HVAC Issues During Seasonal Transitions

Seasonal changes can strain HVAC systems, causing common problems like clogged filters, short cycling, and humidity issues. Regular maintenance and timely upgrades can reduce energy costs by up to 20% and extend system lifespan by 10 years.

Key Points:

  • Frequent Issues: Short cycling, blocked vents, refrigerant leaks, and thermostat malfunctions.
  • Causes: Temperature swings, dust buildup, and fluctuating humidity levels.
  • Solutions:
    • Schedule maintenance twice a year (spring and fall).
    • Replace filters every 1-3 months.
    • Upgrade to energy-efficient systems or smart thermostats.
    • Manage humidity with dehumidifiers or humidifiers.

Pro Tip: Preventive care can cut HVAC failures by 70% and lower energy bills significantly. Keep your system ready for seasonal transitions with professional inspections and proactive maintenance.

Common HVAC Problems in Seasonal Changes

1. Temperature Swings and System Overload

Frequent temperature shifts during seasonal changes can put a lot of pressure on HVAC systems. Switching back and forth between heating and cooling – especially in spring and fall – can lead to short cycling. This constant on-and-off cycling wears down critical parts like compressors and reduces overall efficiency [4].

2. Filter Clogs from Dust and Allergens

Seasonal transitions bring an uptick in airborne particles like pollen, dust, and debris. These particles easily clog HVAC filters, restricting airflow and lowering system performance. According to the U.S. Department of Energy, clogged filters can cut HVAC efficiency by as much as 15%, while also negatively affecting indoor air quality [3].

3. Humidity Challenges

In warmer months, high humidity levels make HVAC systems work harder. They not only cool the air but also remove moisture, which increases energy use and can lead to mold growth in ducts [4]. During seasonal shifts, fluctuating humidity levels can disrupt indoor comfort and strain system performance.

4. Increased Energy Use

Seasonal changes often lead to higher energy bills as HVAC systems work harder to maintain stable indoor temperatures. This is especially true for older units that lack modern energy-saving features.

“Regular maintenance and timely repairs can significantly extend the lifespan of HVAC systems and reduce operational costs. The U.S. Department of Energy notes that regular maintenance can help reduce energy consumption and extend the life of HVAC equipment.” [2]

Solutions for Seasonal HVAC Problems

1. Regular Maintenance and Inspections

Scheduling professional maintenance twice a year – once in spring and once in fall – can boost your HVAC system’s efficiency by as much as 20% [2]. These appointments typically involve checking electrical connections, lubricating key parts, and monitoring refrigerant levels to catch problems early. If your system is older, even regular upkeep might not be enough, and upgrading could be a wise move.

2. Upgrading to Modern Systems

Switching to smart thermostats can cut energy costs by up to $150 annually by adjusting temperatures based on your daily routine [2]. Today’s HVAC systems are designed to use less energy while delivering better performance. Upgrading to a more efficient system can lower energy use by up to 25% and extend the lifespan of your equipment – especially valuable for systems over a decade old.

3. Replacing Filters and Cleaning Ducts

Replacing air filters every 1-3 months, cleaning ducts every 1-2 years, and checking evaporator coils twice a year are simple steps that can keep your system running efficiently. These tasks help maintain proper airflow and prevent performance issues. Professional duct cleaning is especially helpful during seasonal changes when allergens like pollen and dust tend to build up.

4. Controlling Humidity

Keeping indoor humidity between 30-50% can improve comfort and reduce energy use by 10% [4]. Tools like whole-home humidifiers or dehumidifiers make it easier to manage moisture levels year-round. Setting thermostat fans to AUTO and ensuring good ventilation also help maintain the right balance.

“Maintaining the proper levels of temperature and humidity is essential for home comfort. Regular maintenance ensures your system is operating efficiently and at the correct capacity.” – Steve Huff, HVAC Expert [3]

For professional help, services like Hydrodynamics specialize in tackling seasonal HVAC challenges. From clogged filters to humidity issues and system wear, these solutions ensure your system works efficiently no matter the season.

15 Air Conditioner Maintenance Tips

Hydrodynamics: HVAC Service Provider

Hydrodynamics

Since 1994, Hydrodynamics Inc. has been delivering HVAC solutions to residential, commercial, and industrial clients in Northeastern Pennsylvania, focusing on the challenges of seasonal transitions.

HVAC Services Offered

Hydrodynamics provides a range of services tailored to meet different needs. These include improving home comfort, maintaining commercial rooftop systems, and addressing industrial heating requirements. Their technicians are skilled in working with a variety of systems, from standard heating and cooling units to modern ductless setups and heat pumps.

Energy-Efficient Options

To help clients save on energy costs, Hydrodynamics offers options like geothermal systems that perform reliably during extreme seasonal shifts. These systems are designed to maintain steady operation, no matter the external conditions.

“Regular maintenance can reduce HVAC system failures by up to 70% while cutting energy costs by up to 20%. Our maintenance plans are specifically designed to achieve these benefits through consistent and thorough system care”, explains a Hydrodynamics technical specialist.

Maintenance Plans

Hydrodynamics’ maintenance plans focus on proactive care, such as pre-season inspections and system adjustments, to ensure HVAC systems are ready for seasonal changes. These plans are customized to fit the specific needs and usage patterns of each property, helping to keep systems running smoothly year-round.

With Hydrodynamics’ expertise, property owners can trust their HVAC systems will handle any seasonal shift with ease.

Conclusion: Preparing for Seasonal Changes

1. Key Points

Seasonal changes can put a lot of strain on HVAC systems, leading to wear, failures, and reduced efficiency due to shifts in temperature, humidity, and air quality concerns [4]. Research indicates that preventive maintenance can cut system breakdowns by up to 70% while also saving energy [2]. This highlights why it’s so important to get your HVAC system ready before the seasons change to avoid expensive repairs later.

2. Next Steps

Taking proactive steps ensures your HVAC system runs smoothly during seasonal transitions. A professional inspection should cover these key areas to keep your system in top shape:

Component Seasonal Check Requirements Impact on Performance
Air Filters Inspect and replace monthly Boosts air quality and system efficiency
Ductwork Clean and seal before the season Improves airflow and reduces energy loss
Humidity Controls Test and calibrate Keeps indoor comfort at ideal levels
System Components Full performance check Helps avoid unexpected breakdowns

For those in Northeastern Pennsylvania, working with experts like Hydrodynamics can provide thorough system care. Their maintenance plans focus on addressing seasonal challenges early, ensuring your HVAC system stays reliable [2].

If your current system struggles with seasonal changes, consider upgrading to energy-efficient options. Modern solutions like geothermal systems or smart thermostats offer more consistent performance and help cut energy use during transitional periods [4].

Adding proper humidity controls can also prevent issues like excess moisture or overly dry air, which are common during seasonal shifts [4][1]. By taking these steps and working with skilled professionals, you can keep your HVAC system running efficiently no matter the season.

FAQs

Here are answers to some common questions about seasonal HVAC maintenance.

What is seasonal HVAC maintenance?

Seasonal HVAC maintenance involves tasks like checking condensate drains, inspecting heat exchangers, maintaining blowers, and cleaning the system to keep it running efficiently and avoid breakdowns [2].

Maintenance Task Purpose Frequency
Condensate Drain Check Prevent water damage and mold Every season
Heat Exchanger Inspection Identify cracks and monitor CO levels Twice yearly
Blower Maintenance Ensure proper airflow Every season
System Cleaning Eliminate dirt, soot, and corrosion Every season

When should I schedule maintenance?

Plan maintenance for early spring and fall to avoid system strain during high-demand periods [4]. Working with a professional service like Hydrodynamics ensures your system gets a thorough check before the busy seasons.

How can I manage humidity during seasonal changes?

“Regular system cleaning supports optimal humidity levels. Use dehumidifiers in humid seasons and humidifiers in dry seasons for consistent comfort.” [1]

What are the signs my system needs professional attention?

Watch for rising energy bills, uneven temperatures, unusual noises or smells, and poor air quality [5]. Regular professional inspections can catch these issues early, helping you avoid expensive repairs and keep your system running smoothly through seasonal changes.

For expert advice and customized care, reach out to a trusted HVAC provider like Hydrodynamics.

Best Practices for Industrial Heating Controls

Best Practices for Industrial Heating Controls

Want precise temperature control, lower energy costs, and reliable heating systems? Industrial heating controls are essential for maintaining efficiency and product quality in industries like food processing, manufacturing, and more. Here’s a quick guide to the best practices:

  • Digital Controls: Achieve ±1% temperature accuracy, reducing waste and improving consistency.
  • Regular Maintenance: Routine inspections and calibration extend equipment life and prevent breakdowns.
  • Proper Heater Sizing: Match heater size to the space and requirements to avoid inefficiencies.
  • IoT Integration: Real-time monitoring and predictive maintenance streamline operations.
  • Building Management Systems (BMS): Automate energy use and optimize performance.

Key Technologies: Tools like PID controllers, solid-state relays, and thermal cameras enhance precision, safety, and reliability. Regular maintenance and safety protocols, including overheating protection, are critical for long-term performance.

Ready to optimize your heating systems? Keep reading to learn how to implement these practices effectively.

PID vs. Other Control Methods: What’s the Best Choice

Best Practices for Effective Heating Control

Following proven strategies can help industrial heating systems work efficiently, stay reliable, and minimize energy use.

Use Digital Temperature Control Systems

Modern digital controls offer precise temperature management, maintaining accuracy within +/- 1% even at high temperatures. This helps reduce energy waste and ensures consistent product quality, which is crucial for smooth operations and meeting production standards [1].

Regularly Calibrate and Inspect Sensors

The performance of temperature sensors directly affects the entire system. Routine professional checks help maintain sensor accuracy and ensure everything runs smoothly [4]. Aim for regular calibration, quarterly inspections, and bi-annual testing of key components to keep the system dependable.

Ensure Proper Heater Sizing and Placement

The size and positioning of heaters play a big role in system performance. Consider the size of the area, temperature requirements, and any obstacles. Undersized heaters may struggle to reach the desired temperature, while oversized ones can lead to energy waste from rapid cycling [3].

Leverage IoT for Smarter Heating Systems

Smart heating systems powered by IoT provide real-time monitoring, allow for remote adjustments, and offer tools for predictive maintenance and performance analysis.

Connect Heating Controls to Building Management Systems

Integrating heating systems with a Building Management System (BMS) helps optimize performance by factoring in variables like occupancy and weather. This enables automated adjustments that can significantly cut down on energy use [2].

These practical steps lay the groundwork for improving heating control and making the most of cutting-edge technologies.

Advanced Technologies in Industrial Heating

Modern industrial heating systems use cutting-edge tools to achieve impressive precision and efficiency. These advancements in heating controls directly improve how systems operate, the quality of products, and overall reliability.

Solid-State Relays and PID Controls

Solid-state relays are a step up from mechanical switches. They switch faster, last longer, and work seamlessly with PID (Proportional-Integral-Derivative) controls for precise temperature management. Together, they adjust heating power with speed and accuracy, ensuring steady performance, reducing energy waste, and extending the system’s lifespan [1].

Infrared Thermometers and Thermal Cameras

Non-contact tools like infrared thermometers and thermal cameras make it easier to detect and resolve heating issues early. Infrared thermometers allow quick temperature readings without contact, while thermal cameras give a detailed view of system performance. These tools help teams identify hotspots and avoid potential failures.

The benefits of these advanced technologies include:

  • Longer equipment lifespan
  • Reduced maintenance requirements
  • Improved energy use
  • Consistent product quality
  • Reliable system operation

Maintenance and Safety Guidelines

Keeping heating systems well-maintained is key to running them efficiently, avoiding breakdowns, and ensuring safety. Maintenance and safety protocols are especially important for advanced systems using technologies like PID controls and IoT, helping them perform at their best.

Install Overheating Protection Systems

Overheating protection systems play a major role in preventing equipment failures – studies show they can reduce failures by up to 70% [3]. These systems include features like automatic shut-offs, real-time monitoring, and smart alerts, all designed to safeguard equipment and improve safety. When integrated with Building Management Systems (BMS), they allow centralized monitoring and quick action to address potential problems [3].

Schedule Routine Maintenance Checks

Maintenance Task Frequency Key Focus Areas
Routine Inspections Monthly-Quarterly Sensors, heating elements, control valves
Deep Cleaning Semi-annually Ducts, vents, filters
Component Testing Annually Control systems, safety mechanisms

During maintenance, it’s important to focus on:

  • Unusual temperature changes, which might signal sensor or system issues.
  • Energy usage patterns to identify inefficiencies.
  • Physical wear, such as corrosion, leaks, or damage to components.
  • Testing the functionality of control systems and safety features.

“Regular maintenance can reduce energy consumption by up to 30% and extend the lifespan of heating equipment by up to 50%. Additionally, overheating protection systems can prevent up to 70% of equipment failures” [3][1].

Training staff in system operations, safety protocols, and troubleshooting is also essential for effective maintenance. IoT sensors further simplify the process by providing real-time data and predictive insights [3].

Examples and Case Studies

These examples highlight how advanced industrial heating controls can boost efficiency and reliability across various industries.

Hydrodynamics’ Role in Industrial Heating

Hydrodynamics Inc., a trusted name in industrial heating since 1994, introduced an IoT-enabled heating control system for a pharmaceutical facility. The results? A 20% reduction in energy use, temperature precision within ±1°C, and 35% lower maintenance costs. This project showcases the impact of integrating smart control systems.

Efficiency Gains Across Industries

Industries of all kinds have seen measurable benefits from modern heating controls. For instance, a food processing plant using solid-state relays and PID controls achieved temperature accuracy within ±1% at 300°C, leading to better product quality and less waste [1].

“By controlling the voltage supplied to the heating element, operators can increase or decrease the kilowatt output, directly impacting the heat output.” – Secomak [1]

In the automotive sector, a manufacturing facility integrated heating controls with its Building Management System, resulting in:

  • 15% lower energy costs
  • Consistent temperature control, improving production quality
  • Enhanced reliability through predictive maintenance

These examples highlight how advanced heating controls can cut energy use, improve product outcomes, and ensure system reliability. However, achieving these results requires proper system integration and regular maintenance, as outlined in earlier discussions.

Conclusion and Key Points

Technologies like PID controls, which can achieve ±1% accuracy at 300°C, and IoT-enabled integration with Building Management Systems (BMS) are transforming industrial heating systems. These advancements automate energy use, regulate temperatures, and ensure consistent performance, all while improving precision and efficiency [1][3].

Routine maintenance – such as inspections, replacing filters, and cleaning ducts – is essential to prevent failures and maintain optimal performance [4]. This upkeep supports the continued effectiveness of advanced systems like PID controls and IoT technologies.

“Regular maintenance can help stave off corrosion on the system, such as cleaning and changing filters” [4]

Overheating protection systems play a critical role by identifying issues early, preventing damage, and enhancing safety [3]. With modern thermal monitoring tools, temperature problems can be spotted and addressed quickly, reducing risks. Together, these elements form a solid approach to achieving efficient, reliable, and safe heating operations.

Key Factors for Industrial Heating Control

Factor Impact Benefit
Digital Controls ±1% precision at 300°C Better quality, less waste
Regular Maintenance Extended equipment life Lower costs, higher output
Safety Systems Early anomaly detection Prevents damage, reduces downtime
BMS Integration Automated energy regulation Optimized energy efficiency

Water conditioner installation steps

Water Conditioner Installation Steps

Installing a water conditioner improves water quality, protects plumbing, and extends the life of appliances. This guide breaks down the process into simple steps: preparation, mounting the unit, connecting plumbing, and ensuring safety. Here’s what you need to know:

  • Preparation: Choose a stable, accessible spot near the main water line with adequate clearance. Gather tools like a drill, pipe cutter, and plumber’s tape.
  • Mounting: Secure the unit to a plywood backer board using mounting brackets.
  • Plumbing Connection: Use the right materials (e.g., flux for copper pipes, NSF-certified tape for PVC) and install valves for maintenance.
  • Safety Checks: Test for leaks, confirm proper grounding, and ensure pressure stays between 30-80 PSI.

Regular maintenance, like replacing filters every 6-12 months, keeps the system efficient. For complex setups, hiring professionals ensures compliance with safety codes and avoids costly mistakes.

Key Tip: Use push-to-connect fittings for easier, leak-resistant connections. Proper installation and upkeep save money and deliver clean, high-quality water for years.

How To Install Water Softener System – Complete Installation Guide

Preparation for Installation

Getting everything ready beforehand ensures your water conditioner works efficiently and protects your plumbing and appliances, as discussed earlier.

Selecting an Installation Site

Pick a spot close to the main water line that offers at least 60 inches of vertical clearance and 45 inches of floor space. Make sure it’s easy to access for future maintenance [4]. The area should be stable, well-lit, and away from direct sunlight. If your unit needs electricity, ensure there’s a nearby outlet.

Tools and Materials Needed

Essential Tools Required Materials
Drill, pipe cutter, level, safety gear Mounting brackets, plumber’s tape, pipe fittings, screws/anchors

Ensure the pipe fittings match your plumbing system [1]. Avoid using pipe dope or PVC primer/glue on threaded fittings to prevent damage to plastic components [4].

Checking Water and Power Supply

Make sure the water and power supplies are ready for safe installation. Completely shut off the main water valve [5]. If the unit needs electricity, confirm that an outlet is within reach. For metallic plumbing, install two grounding clamps to avoid electrical risks [4].

“Proper grounding is essential when installing on metallic plumbing. Securely install two grounding clamps to prevent electrical shock and ensure safety.” [4]

If the plumbing setup is complicated, it’s a good idea to consult professionals like Hydrodynamics. They specialize in water conditioner installations and can ensure everything meets local regulations.

Once the site is ready and utilities are secure, you can move on to the installation process.

Installation Steps

Now that everything is prepared, let’s walk through the installation process step by step.

Mounting the Unit

Start by attaching a plywood backer board to the wall studs for added stability. Make sure it’s level before moving forward. Align the mounting brackets with the unit’s mounting points, checking the level again, and then secure them using heavy-duty screws. Once the unit is firmly mounted, you’re ready to connect it to the plumbing system.

Connecting to Plumbing

Carefully measure and cut the pipes to the required length, then clean the ends with sandpaper for smooth connections. If you’re working with copper pipes, apply flux before soldering to ensure a strong bond [1]. Keep the alignment precise to avoid stress on the joints. Install valves and a bypass system to allow for maintenance without interrupting your home’s water supply [3].

Connection Type Materials Needed
Copper Flux, solder, torch
PVC NSF-certified tape
Metallic Grounding clamps, #4 copper wire

“Dry fit all connections before securing them, and use NSF-certified plumber’s tape on threaded fittings. Avoid using pipe dope or PVC primer/glue to prevent damage to plastic fittings” [4].

After securing the pipes and valves, it’s time to install the filter cartridges.

Installing Filter Cartridges

Handle the filter cartridges with clean hands to avoid contamination. Inspect each cartridge for any damage before inserting it into the housing. Turn the cartridges clockwise until they are snug, but don’t overtighten – this could harm the O-rings [6]. Make a note of the installation dates to keep track of replacements and maintain the system’s efficiency [3].

Once everything is installed, check all connections to ensure they are secure, and the system is ready to go.

Safety and Maintenance

Preventing Leaks and Ensuring Functionality

Once installation is complete, it’s time to test for leaks to confirm everything is working as it should. Slowly turn on the water supply and carefully check all connections – especially threaded fittings and joints – for any signs of leakage. A well-installed system will hold steady pressure without dripping or seeping.

Focus on these critical areas:

Testing Area What to Check & Fix
Connections Look for moisture; tighten fittings or replace seals if needed
Pressure Gauge Confirm pressure is within 30-80 PSI; adjust regulator if necessary
Filter Housing Ensure cartridge is seated properly and O-rings are intact; reseat or replace if needed

Once you’re sure the system is leak-free, regular maintenance will keep it running smoothly for years to come.

Maintenance Tips

How often your system needs attention depends on your water usage and quality. Most filter cartridges need replacing every 6-12 months, but this can vary based on your specific conditions [1][3].

“Regular inspections can help identify potential issues early, such as leaks or wear on components” [7][3].

Here are some key maintenance tasks to keep in mind:

  • Check pressure readings and inspect O-rings and seals every three months.
  • Clean the exterior of the system monthly to prevent dust and grime buildup.
  • Test the bypass system every six months to ensure it’s functioning properly.

During your inspections, confirm that the system’s electrical grounding is secure. Keep a log of all maintenance activities, like filter replacements and any repairs, to stay organized and maintain warranty coverage.

If you notice odd noises, reduced water flow, or changes in pressure, address these concerns quickly to avoid further issues. For more advanced repairs or troubleshooting, consider hiring a professional for added peace of mind.

Additional Tips and Professional Help

Using Push-to-Connect Connectors

Push-to-connect connectors make installation easier by providing secure, leak-resistant seals – no special tools required [1][6]. To ensure a proper seal, insert the connector fully until you hear a click. For best results, avoid sharp bends and keep the connector lines in smooth, gentle curves.

These connectors are especially helpful during the plumbing connection phase. However, for more intricate setups or to guarantee everything is installed correctly, hiring a professional can be a smart choice.

Professional Services from Hydrodynamics

Hydrodynamics

While many installations can be done on your own, more advanced water conditioning systems often require expert handling. Hydrodynamics Inc., a family-owned business since 1994, offers specialized water conditioning installation and maintenance services throughout Northeastern Pennsylvania.

Their services include:

  • System sizing and placement advice: Ensuring the system fits your specific needs and space.
  • Post-installation testing: Checking and fine-tuning the system for optimal performance.
  • Expert installation: Handling grounding and backflow prevention correctly.

For setups involving additional features like check valves or specialized grounding, professional installation can help you avoid expensive errors. Hydrodynamics’ team ensures installations meet safety codes and run efficiently.

Safety Tip: Professionals use grounding clamps and #4 copper wire to ensure proper safety measures. They also make sure the system is protected from freezing and direct sunlight [2][3].

Conclusion

Adding a water conditioner can enhance water quality and prolong the life of your plumbing system. Using durable materials and following the manufacturer’s instructions are key to avoiding leaks and inefficiencies [1][4].

Paying close attention to placement, connections, and safety measures ensures the system runs efficiently. While proper installation is essential, ongoing care – like regular maintenance – keeps the system performing well over time. Choosing NSF-certified materials and adhering to manufacturer guidelines can help sidestep common problems [1][4].

For more complex setups or installations requiring code compliance, working with experts like Hydrodynamics is a smart move. Their knowledge is particularly useful for systems with specialized features or those that need to integrate with existing plumbing.

Routine upkeep, such as replacing filters and conducting system checks, helps your water conditioner stay effective and last longer [3]. A properly installed and maintained unit not only delivers clean water but also protects your appliances and lowers overall costs.

Whether you’re tackling the installation yourself or hiring professionals, preparation and safety should remain your top priorities. Investing in a water conditioner pays off with better water quality, longer-lasting appliances, and fewer maintenance expenses over time [3].

Ultimate Guide to Emergency Water Heater Repairs

Ultimate Guide to Emergency Water Heater Repairs

When your water heater fails, quick action can save your home from damage and keep your routine intact. Here’s what you need to know:

  • Common Signs of Failure: Water leaks, no hot water, strange noises, or discolored water.
  • Immediate Steps: Turn off the power (electric) or gas supply, shut off the water, and relieve pressure.
  • Safety First: Evacuate if there’s a gas smell and call emergency services.
  • Professional Help: Choose licensed, 24/7 repair services with clear pricing and warranties.

Regular maintenance, like flushing the tank and checking the anode rod, can prevent future emergencies. Upgrading to energy-efficient or tankless water heaters can also save costs and reduce breakdowns. Always prioritize safety and act fast to minimize damage.

No Hot Water: Water Heater Troubleshooting

Recognizing Water Heater Emergencies

Water heater problems can happen unexpectedly, disrupting your daily routine and potentially causing damage to your home. Spotting the signs early helps you act quickly and avoid expensive repairs.

Signs of Water Heater Failure

Your water heater often shows warning signs before it stops working completely:

Visible Leaks and Water Damage
If you see water pooling around the base of your heater, it’s a serious issue that needs attention right away.

Other Common Warning Signs

  • No hot water or unpredictable temperature changes
  • Odd noises like banging, clanking, or hissing, which might mean sediment buildup or pressure problems
  • Discolored water, such as rusty or brown hues
  • Strange smells coming from hot water taps
  • Water taking longer to heat than usual

Safety Measures

If you notice any of these signs, take these steps immediately to stay safe:

Power Supply Precautions

  • For electric water heaters: Switch off the circuit breaker in your electrical panel.
  • For gas water heaters: Turn off the gas supply valve completely. If you detect a gas smell, leave your home immediately and call emergency services.

Water Supply Shutoff

  • Close the cold water supply valve located above the heater.
  • Open a hot water tap to relieve pressure in the system.
Emergency Sign Immediate Action Required
Gas Smell Evacuate and contact emergency services
Water Leaking Turn off the water supply and power
Strange Noises Shut off power and arrange for an inspection
No Hot Water Check power supply and thermostat settings

Always use safety gear like gloves and goggles when checking for issues. Keep a safe distance from leaking water, as it could be scalding hot.

Take note of any leaks, noises, or performance changes. This information can help technicians, such as those at Hydrodynamics Inc., quickly identify and fix the problem.

Once you’ve taken these steps to ensure safety, you’ll be ready to manage the situation until professional help arrives.

Actions Before Professional Help Arrives

When dealing with a water heater emergency, taking the right steps while waiting for professional help can minimize damage and keep things safe. After following the initial safety measures mentioned earlier, here’s what you can do to manage the situation.

Troubleshooting Basics

A few simple checks can help pinpoint the problem and provide useful details for the technician:

Check Temperature Settings
Look at your water heater’s thermostat. Sometimes, the problem could be as simple as an accidental adjustment. The recommended temperature range is usually between 120°F and 140°F for both safety and efficiency.

Inspect the Power Supply
Make sure the thermostat is set correctly and check if the circuit breaker has tripped. For gas water heaters, confirm the pilot light is lit, and ensure there’s no smell of gas.

What to Check Possible Issues
Thermostat Wrong temperature setting, visible damage
Circuit Breaker Tripped or showing signs of damage
Pilot Light (Gas) Not lit or irregular flame
Pressure Relief Valve Signs of leakage or corrosion

Safe Shutdown Procedures

If the problem seems serious, shutting down the water heater can prevent further risks. Here’s how:

For Electric Water Heaters
Switch off the dedicated circuit breaker in your electrical panel. This eliminates the risk of electrical hazards.

For Gas Water Heaters
Find the gas supply valve and turn it clockwise to shut off the gas completely. The valve is usually located on the gas line leading to the heater.

Also, turn off the cold water supply valve located above the heater. This stops water flow and helps limit potential damage.

Once these steps are done, focus on contacting a trusted repair professional to address the issue.

Selecting an Emergency Repair Service

When your water heater breaks down, finding the right repair service quickly is essential to avoid unnecessary delays and inconvenience. Knowing what to prioritize can help you make the best choice under pressure.

What to Look For in a Service

Several factors should guide your decision when choosing an emergency water heater repair service:

Licensed and Certified Professionals
Verify that the service provider is licensed and certified to work with gas and electrical components safely.

24/7 Availability
Choose a company that offers round-the-clock emergency service. Water heater problems can happen at any time, and immediate help is often necessary to prevent further damage or disruption.

Service Warranties
A reliable repair service will back their work with warranties on both parts and labor. This ensures you’re covered in case of any issues after the repair.

Feature to Check Why It’s Important
Licensed Technicians Ensures safety and compliance
Around-the-Clock Service Quick response when you need it
Clear Pricing Avoids unexpected costs

Why Hydrodynamics Inc. Stands Out

If you’re in Northeastern Pennsylvania, Hydrodynamics Inc. is a dependable option for emergency water heater repairs [1]. They specialize in diagnostics, urgent repairs, energy-efficient upgrades, and maintenance, with a strong focus on handling emergencies [2].

Their team is equipped to manage both residential and commercial water heater issues, no matter how complex the system may be. They emphasize accurate diagnosis and effective repair, ensuring you get the help you need without unnecessary delays.

When choosing a service provider, prioritize experience and quality over price to ensure the repairs are done safely and effectively. After resolving the immediate problem, consider taking preventive measures to avoid future breakdowns.

Preventing Future Emergencies

Why Regular Maintenance Matters

Taking care of your water heater with regular maintenance can help you avoid unexpected breakdowns and keep it running longer. For instance, scheduling a yearly professional inspection can catch issues early. Key components like thermostats (costing between $20 and $400) and heating elements ($15 to $60) should be checked regularly. Flushing the tank annually clears out sediment buildup, a common reason for failures. Don’t forget to inspect the anode rod every 3-5 years and replace it if needed (typically $25-$75).

Maintenance Task How Often Cost Range
Annual Maintenance (Flushing + Inspection) Annually $150-$450
Anode Rod Replacement Every 3-5 years $25-$75

While routine maintenance reduces the risk of emergencies, upgrading to newer systems can provide even more reliability and efficiency.

Considering Energy-Efficient Upgrades

Switching to energy-efficient water heaters can cut down on utility bills and require less upkeep. Models with a High Energy Factor (EF) of 0.82 or higher deliver better performance and reliability. Although the upfront cost, including installation, ranges from $800 to $2,000, these models often last longer and need less frequent maintenance.

Tankless water heaters are another option worth considering. They eliminate common problems like leaks and corrosion, making them a dependable choice. Some of their benefits include:

  • Lower maintenance needs
  • Fewer emergency repairs
  • Extended lifespan
  • Consistent performance over time

“Regular maintenance is key to extending the life of your water heater and preventing costly repairs.” – The Spruce [3]

If you’re in Northeastern Pennsylvania, Hydrodynamics Inc. offers professional installation and maintenance programs for energy-efficient water heaters [1]. Their expertise can help maximize the lifespan of your system, adding an extra 5-10 years of reliable service.

Conclusion and Key Points

Final Advice

Handling water heater emergencies requires quick and decisive action to minimize damage and maintain safety. Once immediate concerns are addressed, focus on long-term solutions to avoid future problems.

Here are some key steps to consider:

Action Why It Matters When to Do It
Turn Off the System Stops flooding and reduces safety risks Immediately
Get a Professional Check Ensures proper diagnosis and fixes Within 24 hours
Schedule Maintenance Helps your system last longer (5-10 years) Annually

Steer clear of attempting complicated fixes on your own. Hiring licensed professionals, like Hydrodynamics Inc., ensures the job is done right the first time. Their experience not only resolves the current issue but also helps prevent similar emergencies in the future [1].

How to Handle a Water Heater Emergency

How to Handle a Water Heater Emergency

If your water heater is leaking, making strange noises, or overheating, quick action is essential to prevent damage or safety risks. Here’s what to do immediately:

  • Turn off power: For electric heaters, switch off the circuit breaker. For gas heaters, rotate the gas valve to “off.”
  • Shut off water supply: Locate the cold water inlet valve and turn it clockwise to stop water flow.
  • Check for hazards: If you smell gas or see sparks, evacuate immediately and call emergency services.
  • Limit damage: Use towels or buckets to manage leaks, and document damage for insurance.

Routine maintenance, like testing safety valves annually, can help prevent emergencies. For serious issues, call a professional service promptly. Stay safe and act fast to minimize risks.

How To Turn Off a Leaking Water Heater

Step 1: Prioritizing Safety

Act quickly during a water heater emergency to reduce potential dangers.

1.1: Shutting Off the Power

Start by disconnecting the power supply to your water heater:

Heater Type Steps to Shut Down Important Note
Electric Heater Turn off the dedicated circuit breaker Ensure your hands are dry before touching electrical panels.
Gas Heater Rotate the gas valve to the “off” position Be alert for any hissing sounds.
Dual-Fuel Systems Disconnect both gas and electricity (gas first)

1.2: Checking for Hazards

Once the power is off, carefully inspect for any safety risks:

Gas Safety
If you detect a gas smell or hear a hissing sound, take these steps:

  • Leave the building immediately.
  • Call emergency services from a safe location.
  • Avoid using electrical switches or phones inside.
  • Wait for professionals to handle the situation.

Electrical and Water Hazards
Be on the lookout for:

  • A burnt smell near electrical connections.
  • Visible sparks or smoke.
  • Water near electrical components.

If there’s a leak, address it quickly to avoid further damage to your property. For immediate help, professional services like Hydrodynamics Inc. are equipped to handle water heater emergencies.

Once you’ve addressed safety concerns, focus on preventing additional damage caused by the issue.

Step 2: Limiting the Damage

2.1: Turning Off the Water

Stopping the water flow quickly is key to reducing damage. Look for the valve connected to the cold water supply line, typically located on or near the water heater. It will either be a gate valve (wheel-shaped) or a ball valve (lever-style handle).

To shut off the water supply:

  • Find the valve: Locate the cold water inlet valve on or near the heater.
  • Turn and confirm: Rotate the valve clockwise until it stops, then check to ensure the water has stopped flowing.

If you can’t access this valve or the leak persists, shut off your home’s main water valve. This will cut off water to the entire house until the issue can be addressed.

2.2: Handling Leaks and Water

While waiting for professional help, take steps to manage the water and contain further damage:

Action Method Safety Tip
Block Water Spread Use towels or plastic sheets Keep electrical items away from water
Remove Standing Water Use a wet/dry vacuum or mops
Document the Damage Take photos for insurance purposes Avoid touching electrical components

For larger leaks, consider these extra precautions:

  • Place buckets under active leaks to catch water.
  • Redirect water away from walls, outlets, and other sensitive areas.
  • Improve air circulation by opening windows and doors.

These steps help reduce immediate risks and make the repair process easier once professionals arrive. Companies like Hydrodynamics Inc. specialize in water heater emergencies and have the tools and expertise to handle the situation efficiently.

After containing the immediate damage, reach out to professionals to assess and fix the issue properly.

Step 3: Calling for Professional Help

3.1: Sharing Clear Details

When reaching out to a professional, it’s important to provide as much relevant information as possible. This helps technicians assess the situation and prepare before they arrive. Be sure to:

  • Let them know if you’ve turned off the power and water supply.
  • Describe any visible problems, like leaks, strange noises, or discoloration.
  • Mention any steps you’ve taken to limit the damage.
  • Provide the water heater’s make, model, and age.

The more accurate and detailed you are, the easier it will be for the technician to diagnose the issue and arrive with the right tools and parts.

3.2: Choosing the Right Service Provider

Picking a dependable service provider is just as important as providing clear details. Consider companies like Hydrodynamics Inc., which offers 24/7 emergency services and employs certified technicians with expertise in water heater repairs. They’re equipped to handle complex and potentially hazardous situations involving electricity, gas, or high-pressure systems.

While waiting for the technician, keep your phone handy for updates or to answer any follow-up questions. Their expertise and tools will ensure the issue is resolved safely and efficiently.

Preventing Future Emergencies

4.1: Scheduling Regular Checks

Getting your water heater inspected annually by a professional can help catch problems before they turn into expensive repairs. During these inspections, technicians focus on critical parts like safety valves, temperature controls, and the tank’s overall condition [2][3].

Hydrodynamics provides thorough inspections that include:

  • Testing safety features, such as pressure relief valves and temperature controls
  • Reviewing electrical connections and ensuring proper grounding
  • Assessing the condition of the anode rod
  • Checking the tank for any signs of wear or damage

For optimal performance and safety, set your water heater to 140°F [2].

In addition to routine inspections, installing modern safety devices can add another layer of protection against potential water heater issues.

4.2: Adding Safety Devices

Safety devices are an effective way to minimize risks associated with water heaters. For instance, smart leak detectors can notify you of leaks before they cause significant damage [2].

Here are some key upgrades to consider:

  • Automatic shutoff and pressure relief valves: These help prevent leaks and control pressure buildup.
  • Anti-scald devices: These can be installed on faucets and showerheads to regulate water temperature and prevent burns [2].

For electric water heaters, using the correct circuit breaker size is essential. Always follow the manufacturer’s recommendations to avoid electrical hazards [2]. Additionally, keep the area around your water heater clear to maintain a safe environment.

Conclusion: Quick and Reliable Action

Taking steps to prevent water damage is crucial, but knowing how to act quickly and seek professional help can save you from bigger problems. According to the Insurance Information Institute, the average water damage claim is around $11,000 – a hefty price for delayed action.

Shutting off power and water immediately can help you avoid dangers like electrical shorts or scalding water. Professional services, such as Hydrodynamics, bring the expertise needed to handle these situations effectively. Their offerings include:

  • 24/7 emergency response
  • Licensed and insured technicians
  • Thorough diagnostic services
  • Expert repairs and maintenance

Water heaters typically last 10-15 years, so regular maintenance is key to keeping them running smoothly. Hydrodynamics doesn’t just handle emergencies – they also provide preventative services to help you avoid future issues. Using tools like smart leak detectors and scheduling routine maintenance can extend the life of your water heater and reduce the risk of unexpected breakdowns.

“Professional services like Hydrodynamics are not only essential for emergency repairs but also for regular maintenance and preventative measures. By identifying issues such as faulty thermostats, corroded pipes, and malfunctioning pressure relief valves during routine checks, we can prevent major emergencies before they occur.” [5]

FAQs

How to turn off a water heater in an emergency?

If you need to turn off a water heater during an emergency, here’s what to do:

  • Disconnect the power:
    • For gas heaters: Turn the thermostat dial to OFF.
    • For electric heaters: Flip the circuit breaker to the OFF position.
  • Shut off the water supply by turning the valve clockwise.
  • Relieve pressure by opening the hot water taps.

For more details on shutting off the water, refer to Step 2 in the emergency guidelines [1][4].

When is a broken water heater an emergency?

A water heater becomes an emergency when there are immediate safety concerns. Here are some examples of serious situations and the actions to take:

Emergency Situation What to Do
Major leaks or flooding Call a professional immediately.
Excessive heat or scalding Contact emergency services.
Gas smell or hissing Evacuate and call emergency services.

Minor issues, such as small drips or no hot water, can usually wait for service within 24-48 hours [1][2].

“Water heaters can become dangerous if improperly installed or neglected, leading to risks such as carbon monoxide poisoning, explosions, gas leaks, and scalding” [2].

In emergencies, quick action is crucial. Knowing these steps can help you reduce risks and get professional assistance faster.

Top 6 Plumbing Maintenance Tips for Businesses

Top 6 Plumbing Maintenance Tips for Businesses

Avoid costly plumbing disasters with these six essential maintenance tips for businesses. From regular inspections to installing backflow prevention devices, these strategies can save you money, prevent downtime, and keep your commercial plumbing system running smoothly:

  • Conduct Regular Inspections: Schedule annual or quarterly checks to catch issues early.
  • Fix Leaks Quickly: Address leaks immediately to save water and prevent structural damage.
  • Keep Drainage Systems Clear: Use enzyme treatments and professional cleaning to avoid blockages.
  • Use the Right Tools: Invest in high-quality plumbing tools for effective maintenance.
  • Train Staff on Plumbing Care: Educate employees to spot and report problems early.
  • Install Backflow Prevention Devices: Protect your clean water supply from contamination.

Key takeaway: Preventive maintenance can save businesses up to $2,500 annually while avoiding expensive emergencies. Read on for actionable steps to protect your plumbing system.

Plumbing Maintenance at Commercial Facilities

1. Conduct Regular Inspections

Keeping up with regular plumbing inspections can save you from expensive emergencies and unexpected system failures. These inspections should include both visual checks of accessible parts and the use of camera technology to examine the inside of pipes [6].

For most systems, scheduling inspections once a year is a good rule of thumb. However, older systems or those with heavy usage – like in restaurants, hotels, or manufacturing facilities – may need inspections every quarter [6][3].

Here are the main areas to focus on during inspections:

Component What to Check Why It Matters
Water Supply Pressure, pipe condition Prevent bursts and water waste
Drainage System Flow, blockages Ensure proper waste removal
Plumbing Fixtures Wear, seals Stop leaks before they start
Backflow Devices Functionality Protect water quality

Modern tools have made inspections more effective. Professionals now use advanced equipment to find hidden leaks and map out pipe locations [7].

Always hire licensed plumbers with experience in commercial systems to ensure a thorough job. They’ll not only catch obvious problems but also spot subtle signs of wear that could turn into bigger issues down the line [6].

Inspections are only part of the solution – acting quickly on any identified problems, especially leaks, is essential to preventing further damage.

2. Fix Leaks Quickly

In commercial plumbing, dealing with leaks as soon as they appear is essential. Ignoring leaks can lead to higher water bills, structural damage, and disruptions to your business. Even a small leak can waste up to 20 gallons of water daily, significantly increasing costs [1].

Here are some effective ways to catch leaks early:

Detection Method Key Action & Benefits
Water Usage Monitoring Keep an eye on daily water use to identify sudden spikes that could signal hidden leaks.
Visual Inspections Inspect pipes and fixtures twice a day to find surface-level leaks before they worsen.
Professional Assessment Schedule quarterly plumbing checks to uncover hidden issues using specialized tools.

What to Do When a Leak Occurs:

  1. Find the source of the leak and shut off the water supply to that area.
  2. Call a licensed plumber to handle the necessary repairs.
  3. Document the issue for your maintenance records.

Signs You Might Have a Leak:

  • Damp spots, musty smells, or water stains on walls or ceilings.
  • Unusually high water bills or a sudden drop in water pressure.
  • Hearing water running when no fixtures are in use.

Make sure your staff is trained to report these signs immediately to prevent minor issues from becoming major problems [1]. It’s also a good idea to keep basic repair tools on hand for temporary fixes while waiting for professional help [8].

Important: Temporary solutions can buy you time but often lead to bigger expenses later. Always prioritize professional repairs with the right tools and materials designed for commercial plumbing systems [8].

While fixing leaks is a priority, keeping your drainage systems clear is just as important for maintaining a dependable plumbing system.

3. Keep Drainage Systems Clear

Keeping your drainage system in top condition is key to avoiding expensive disruptions in commercial operations. Industry data shows that businesses practicing regular drain maintenance can cut plumbing-related downtime by up to 75% [6].

Avoid Blockages with Smart Prevention

Grease buildup, paper products, and food waste are the usual culprits behind commercial drain blockages [1]. To tackle this, use a combination of strainers, monthly enzyme treatments, and routine professional cleanings.

Key Maintenance Tasks

Task How Often Why It Helps
Professional Cleaning (Hydro-jetting) Every 6 months Clears tough blockages and buildup
Enzyme Treatment Monthly Stops grease and organic buildup

Top Drain Maintenance Methods

  • Power Rodding: Breaks through stubborn blockages like tree roots.
  • Hydro-jetting: Blasts away debris and buildup with high-pressure water [5].

Spotting Early Warning Signs

Pay attention to slow drainage, gurgling noises, bad smells, or water backing up – these are red flags that your drains might be clogged and need quick action [4].

Regular maintenance not only helps prevent emergencies but also keeps operations running smoothly. For example, enzyme-based cleaners are a safer and more effective option than harsh chemicals for dissolving organic matter without harming your pipes [4]. This is especially crucial in industries like food service and healthcare, where hygiene is non-negotiable.

Using the right tools and maintenance practices ensures your plumbing system stays efficient and durable, saving you from unexpected headaches.

4. Use the Right Tools and Equipment

The tools you use for commercial plumbing maintenance aren’t just about making the job easier – they’re an investment in preventing expensive repairs and system breakdowns. In fact, businesses that consistently use appropriate plumbing tools can save up to $2,500 annually on repairs and emergency services [6].

Key Commercial Plumbing Tools

Tool Type Purpose
Diagnostic Tools Camera inspection systems for internal pipe checks
Repair Tools Pipe wrenches and pliers for accurate repairs
Emergency Kits Quick Seal Pipe Repair kits to manage leaks fast
Maintenance Gear Professional-grade drain snakes for thorough cleaning

Why Quality Tools Matter

Investing in high-quality, certified plumbing tools isn’t just about performance – it ensures safety and long-term reliability. These tools help keep your plumbing system in top shape and protect your overall investment [9].

Choosing the Right Tools

Select tools based on the specific needs of your facility. For example, Quick Seal Pipe Repair kits are a versatile option for handling leaks across various pipe materials, even in underwater situations [9].

Tool Maintenance Tips

Regular inspections are critical. Check your tools every six months to confirm they’re in good working condition, and replace any worn-out parts immediately [3].

Mistakes to Avoid

Using the wrong tools can cause more harm than good, leading to ineffective repairs and even damage to your system [6]. Always prioritize functionality over cost when choosing equipment [1].

Having the right tools is only part of the equation. Make sure your staff knows how to use them effectively to maximize their impact on your plumbing system’s performance and durability.

5. Train Staff on Plumbing Care

Teaching your staff how to handle plumbing care can cut down on downtime, reduce repair costs, and keep your system running smoothly. In fact, businesses with structured plumbing training programs report up to 30% fewer emergency maintenance calls each year [6].

Key Areas to Cover in Training

Training Area Focus Points Frequency
Routine Maintenance Spotting drainage issues, proper fixture use Monthly
Emergency Response Locating shut-off valves, following protocols Quarterly
Documentation Logging and reporting maintenance problems Ongoing

Establish Clear Reporting Procedures

Set up an easy-to-follow system for reporting plumbing issues. Assign specific contacts and outline steps for handling different types of problems [2].

How to Implement the Training

Design training sessions based on staff roles to make sure everyone knows their part in plumbing care. Include hands-on activities that simulate real-life scenarios. Add these sessions to your regular staff development program [1].

Mistakes to Avoid

Train your team to steer clear of common errors that can harm the plumbing system, such as:

  • Putting inappropriate items down drains
  • Ignoring strange noises
  • Attempting fixes without proper approval

Tracking Progress

Measure the success of your training by monitoring metrics like reported issues, response times, water usage, and the number of emergency repairs needed.

Stay Compliant with Regulations

Include local plumbing codes in your training to ensure compliance and avoid penalties. Keep records up-to-date and hold refresher courses to keep staff informed about best practices [3].

While proper training helps maintain your plumbing day-to-day, consider installing advanced systems, like backflow prevention devices, for added protection.

6. Install Backflow Prevention Devices

Installing backflow prevention devices is a key step in protecting your water system. These devices stop contaminated water from flowing back into your clean supply, keeping your operations safe and compliant.

Types of Devices and Installation

Device Type Best Used For Key Features
Double-Check Valve Assembly Low-risk applications Affordable, requires little upkeep
Reduced Pressure Zone (RPZ) High-risk situations Offers top-level protection, monitored continuously
Vacuum Breakers Irrigation systems Easy to set up, dependable function

Maintenance Tips to Keep in Mind

Testing schedules depend on your facility type and local rules, but inspections every six months are generally a good idea [3]. Focus on:

  • Installing devices in accessible areas.
  • Ensuring compliance with professional certifications.
  • Keeping detailed records.
  • Regularly checking performance.

Monitoring and Emergency Planning

Watch for these warning signs:

  • Sudden changes in water pressure.
  • Visible wear or corrosion on devices.
  • Any noticeable drop in performance.

Prepare for emergencies by having:

  • Clear steps to isolate the system.
  • Contact information for emergency services.
  • A plan for documenting incidents.

Consistent maintenance of backflow prevention devices not only protects your plumbing system but also ensures your business runs smoothly without unexpected disruptions. Pair this with other upkeep measures for a reliable water system.

Conclusion

Keeping up with plumbing maintenance helps avoid expensive problems and keeps operations running smoothly. Regular check-ups, fixing leaks quickly, and maintaining clear drainage systems can improve efficiency, cut costs, and prevent interruptions.

By following these six tips, businesses could save as much as $2,500 each year – transforming maintenance into a smart investment for steady operations [6]. Preventive care not only lowers expenses but also extends the life of plumbing systems, ensures compliance, and minimizes downtime.

Licensed plumbers are key to managing complex systems effectively. Their routine assessments catch potential issues early, helping to avoid major disruptions [3].

Guide to Energy-Efficient Commercial HVAC Systems

Guide to Energy-Efficient Commercial HVAC Systems

Heating, ventilation, and air conditioning (HVAC) systems consume 44% of energy in commercial buildings. Upgrading to energy-efficient systems can slash energy use, reduce costs, and even improve indoor air quality. Here’s what you’ll find in this guide:

  • Top HVAC options: Learn about Variable Refrigerant Flow (VRF) systems, heat pumps, geothermal setups, and smart systems.
  • Efficiency features: Explore components like variable-speed compressors, energy recovery ventilators, and high-SEER systems.
  • Control technologies: Discover how building automation systems (BAS) optimize energy use with real-time data.
  • Eco-friendly solutions: Understand the role of low-GWP refrigerants and renewable energy integration.
  • Maintenance tips: Regular upkeep ensures long-term savings and better performance.

Quick Comparison of HVAC Systems

System Type Efficiency Features Installation Cost Best Applications Key Benefits Limitations
Variable Refrigerant Flow (VRF) High SEER (18-25) ratings $15-30/sq ft Offices, hotels, retail centers Zone-specific heating & cooling Requires specialized technicians
Heat Pumps Up to 4x more efficient than traditional systems $10-25/sq ft Moderate climates, mid-size spaces Dual heating and cooling functionality Struggles in extreme weather
Geothermal Systems Uses stable underground temperatures $20-40/sq ft Large buildings with land access Long-term savings, eco-friendly High upfront costs, land requirements
Smart HVAC Systems IoT-enabled real-time monitoring $15-30/sq ft Modern buildings Automated adjustments, energy savings Needs IT support and regular updates

Start saving energy today by upgrading your HVAC system, integrating smart controls, and following a regular maintenance schedule. Dive into the guide for actionable tips and detailed comparisons.

Energy Efficient and Cost Effective Heat Pump Operation: Commercial Buildings

Features of Energy-Efficient HVAC Systems

Modern commercial HVAC systems are designed to reduce energy use while keeping indoor spaces comfortable. Here’s a closer look at the key features and technologies that make these systems effective.

Efficient Components

  • Variable speed compressors adjust their output based on real-time demand, minimizing energy waste during low-use periods [3].
  • Energy recovery ventilators (ERVs) transfer heat between incoming and outgoing air streams, cutting energy use while maintaining proper ventilation [3].
  • High-SEER systems go beyond standard efficiency levels, helping to maximize energy savings.

While these components are essential, their full potential is unlocked through advanced control systems that manage energy use intelligently.

Control Technologies

Building automation systems (BAS) connect various building functions, using real-time data to optimize system performance [2]. These systems monitor key factors such as:

Factor Impact on Efficiency
Occupancy Patterns Adjusts HVAC output based on actual building use
Weather Conditions Adapts settings to match external temperatures
Energy Demand Reduces operation during peak load times
Zone Requirements Tailors comfort levels for different areas independently

Smart thermostats and zoning systems enhance this by ensuring energy isn’t wasted in unused areas [3].

In addition to efficiency, modern HVAC systems are designed with sustainability in mind.

Eco-Friendly Solutions

  • Low-GWP refrigerants meet environmental standards while maintaining system performance [2].
  • Renewable energy integration reduces dependence on grid electricity, lowering costs and supporting long-term energy reliability [2][4].

Types of Energy-Efficient HVAC Systems for Commercial Use

Commercial buildings need HVAC systems that combine strong performance with lower energy use. Modern systems provide tailored solutions to maintain ideal indoor conditions while cutting down on energy costs.

Variable Refrigerant Flow (VRF) Systems

VRF systems adjust refrigerant flow to simultaneously heat and cool different zones as needed. This makes them highly effective for certain types of buildings:

Building Type Advantages
Office Buildings Zone-specific temperature control
Hotels Custom comfort for each room
Retail Centers Adaptable to changing occupancy
Medical Facilities Precise climate requirements

Compared to traditional HVAC systems, VRF systems can lower energy use by up to 30% [1]. Their ability to cater to diverse temperature needs within a single building makes them a strong choice for complex layouts. However, if you’re looking for a simpler energy-efficient option, heat pumps are another popular solution.

Heat Pump Systems

Heat pumps are known for their efficiency, delivering up to four units of heating or cooling for every unit of electricity used [1]. These systems perform especially well in moderate climates and can integrate seamlessly with existing setups. Their dual heating and cooling functionality eliminates the need for separate systems, helping reduce both upfront and maintenance costs.

Geothermal Systems

Geothermal HVAC systems use stable underground temperatures to provide efficient heating and cooling. While the initial installation costs are higher, they come with several advantages:

  • Lower operational costs: 30–60% savings compared to traditional systems.
  • Longevity: Indoor components last 20–25 years.
  • Eco-friendly: Minimal environmental impact.
  • All-weather performance: Consistent results regardless of external conditions.

Companies like Hydrodynamics Inc., which has been providing geothermal solutions since 1994, demonstrate the long-term value of these systems [2]. They are a great fit for businesses aiming to lower energy use and meet sustainability goals.

Smart Systems

IoT-enabled smart HVAC systems bring advanced features like real-time monitoring, predictive maintenance, and remote operation. These systems integrate smoothly with building automation systems and offer benefits such as:

  • Automatic adjustments based on occupancy.
  • Weather-responsive functionality.
  • Energy demand optimization.
  • Extended system lifespan through proactive maintenance.

Strategies for Energy Efficiency

Improving energy efficiency in commercial HVAC systems involves a mix of regular upkeep, modern technology, and smart management tools. These methods can help cut down the 40% of energy that HVAC systems typically consume in commercial buildings [2].

Maintenance Practices

Keeping HVAC systems in good shape is key to maximizing efficiency. A well-maintained system not only works better but also lasts longer. Proper installation and consistent care directly affect energy use and costs.

Maintenance Task Frequency Impact on Efficiency
Airflow Optimization Monthly/Semi-annual Reduces resistance and prevents leakage
Thermostat Calibration Quarterly Ensures accurate temperature control
System Tune-up Annually Improves overall performance

While maintenance is essential, adding advanced technologies can take energy efficiency to the next level.

Use of Advanced Technologies

New HVAC technologies can significantly cut energy use. Tools like energy recovery systems and variable-speed drives adjust system output to match real-time needs, reducing unnecessary work [3].

Smart sensors play a big role in improving HVAC performance by:

  • Monitoring environmental conditions
  • Adjusting airflow as needed
  • Predicting when maintenance is required
  • Integrating with automated building systems

Building Automation Systems

Building Automation Systems (BAS) combine HVAC with other building operations to optimize energy use while keeping spaces comfortable. Examples of BAS benefits include:

  • Intelligent scheduling: Automatically adjusts HVAC settings based on when and how spaces are used.
  • Weather-based adjustments: Changes system parameters to respond to outdoor conditions.
  • Load balancing: Distributes energy use efficiently across different areas.
  • Predictive maintenance: Spots potential problems early to prevent efficiency losses.

Implementation and Maintenance

HVAC systems are responsible for 44% of the energy used on-site in commercial buildings [1]. To get the most out of these systems, proper installation and upkeep are essential.

Installation Considerations

Factors like building size, climate, and operational needs directly affect how well an HVAC system performs. For larger buildings with high ventilation demands, systems with SEER ratings between 18-25 are recommended for better energy use [1].

Installation Factor Key Considerations Impact on Efficiency
System Sizing Building size, occupancy patterns Prevents unnecessary energy use
Climate Assessment Local weather and seasonal changes Matches system capacity to needs
Operational Needs Hours of use, zoning requirements Improves airflow distribution

Preventative Maintenance Benefits

Regular maintenance is key to avoiding problems like restricted airflow or mechanical breakdowns. Essential tasks include:

  • Filter cleaning or replacement: Keeps air moving efficiently.
  • Inspection of components: Ensures mechanical and electrical parts are functioning properly.
  • System performance checks: Verifies that efficiency metrics are on track.

Monthly filter checks, quarterly inspections, and bi-annual performance tests are practical schedules to keep everything running smoothly.

Professional Service Partnerships

Teaming up with skilled HVAC service providers can help meet performance and efficiency goals. These professionals typically offer:

  • Diagnostic evaluations
  • Efficiency tuning
  • Comprehensive maintenance plans

Experienced technicians can also set up building automation systems (BAS) that work with HVAC controls. These systems monitor conditions in real time, adjusting settings to keep spaces comfortable while reducing energy use [2]. This smart approach minimizes downtime and enhances overall performance.

Conclusion and Action Steps

Let’s focus on practical steps to implement and maintain energy-efficient HVAC systems, building on the strategies discussed earlier.

Key Points

Energy-efficient HVAC systems are a smart investment for commercial building operators. They combine advanced technology with planned maintenance to deliver better performance and cost savings.

Modern HVAC systems provide benefits like:

  • Advanced control systems that adjust automatically to occupancy patterns
  • Integration with building automation systems (BAS) for real-time monitoring
  • High-efficiency components with SEER ratings ranging from 18-25 [1]
  • Eco-friendly options that help lower costs and reduce environmental impact

Steps for Upgrading

Here’s how to upgrade to an energy-efficient HVAC system:

  1. Assessment and PlanningStart by analyzing your current system’s performance and energy use. Identify areas for improvement and consider these factors:
    Criteria Key Considerations
    Building Requirements Size, layout, and occupancy to determine the right system capacity
    Climate Conditions Local weather and seasonal changes to guide system selection
    Operational Schedule Hours and peak usage times to decide control needs
    Budget Parameters Upfront costs, savings, and long-term ROI
  2. Implementation StrategyWork with experienced professionals to:
    • Plan phased installations to avoid major disruptions
    • Install advanced control technologies
    • Integrate BAS for improved monitoring and efficiency
  3. Maintenance ProtocolCreate a regular maintenance schedule that includes:
    • Changing filters consistently
    • Inspecting key components
    • Performing system calibrations

Regular maintenance and monitoring are essential. Combining modern technologies with consistent upkeep ensures long-term energy savings while meeting sustainability goals.

Comparison Tables

Here’s a breakdown of key features, costs, and uses for energy-efficient HVAC systems. These tables aim to help you choose the best option for reducing energy consumption and managing operational expenses.

HVAC System Types Comparison

System Type Efficiency Features Installation Cost Best Applications Key Benefits Limitations
VRF Systems High SEER ratings (18-25) $15-30/sq ft Large office buildings, hotels Allows heating and cooling at the same time Needs specialized technicians and precise calibration
Heat Pumps Up to 4x more efficient than traditional systems $10-25/sq ft Mid-size commercial spaces Works for both heating and cooling Struggles in extreme weather conditions
Geothermal Top efficiency ratings $20-40/sq ft Buildings with land availability Reliable performance all year Requires significant land and complex preparation
Smart Systems Efficiency varies with usage patterns $15-30/sq ft Modern commercial facilities Automated controls for better management Needs IT support and regular updates

Energy Efficiency Ratings

Efficiency ratings are essential for understanding potential energy savings:

Rating Type Description Typical Range Impact on Operations
SEER Measures seasonal cooling efficiency 18-25 for high-efficiency units Systems with SEER 20+ can reduce energy use by up to 50%
EER Indicates steady-state cooling efficiency 11-14 for commercial systems Helps optimize energy during peak demand
AFUE Shows heating system efficiency 90-98% for modern systems Reduces energy waste in heating

High-efficiency systems can significantly lower operational costs. For instance, large commercial buildings could save $50,000-$100,000 annually by upgrading to advanced systems [1]. Comparing these ratings and features helps facility managers find the most cost-effective solution tailored to their building’s needs [2].

These insights are designed to support your planning for both installation and maintenance of an energy-efficient HVAC system.

7 Warning Signs Your Furnace Needs Repair

7 Warning Signs Your Furnace Needs Repair

Is your furnace acting up? Don’t ignore the signs – it could lead to costly repairs, safety risks, or even a total breakdown. Here’s what to look out for:

  1. Strange Noises: Rattling, booming, or grinding sounds could mean loose parts, gas buildup, or motor issues.
  2. Inconsistent Heating: Uneven room temperatures might be caused by clogged filters, thermostat issues, or blocked vents.
  3. Unpleasant Smells: Odors like gas, burning, or mustiness may indicate leaks, faulty wiring, or mold.
  4. Frequent Cycling: If your furnace turns on and off too often, it could be due to a dirty filter, thermostat problems, or an oversized unit.
  5. High Energy Bills: A sudden spike in costs often signals worn components or efficiency issues.
  6. Pilot Light Changes: A yellow or flickering flame might mean combustion problems or carbon monoxide risks.
  7. Humidity Problems: Dry air or excess moisture could stem from ventilation or furnace sizing issues.

Why It Matters

Ignoring these warning signs can lead to unsafe conditions, higher energy bills, or a full system failure. Regular maintenance and prompt repairs keep your furnace efficient, safe, and reliable.

What to Do Next:

  • Inspect your furnace for these signs.
  • Replace filters and check vents.
  • Call an HVAC technician for professional help if issues persist.

Stay warm and safe by addressing furnace problems early!

Furnace Troubleshooting – Common Problems

1. Strange Noises Coming from the Furnace

Strange noises are often the first sign that something might be wrong with your furnace. While some sounds during operation are normal, certain noises can point to issues that need attention right away to avoid expensive repairs or safety risks.

Here’s a quick breakdown of common furnace sounds and what they might mean:

Sound Type Likely Cause What You Should Do
Rattling/Vibrating Loose parts, panels, or screws Tighten or secure components
Whistling/Hissing Blocked airflow, dirty filter Replace the filter, check vents
Booming Delayed ignition or gas buildup Shut down immediately, call a pro
Grinding/Squealing Worn belts or motor problems Get professional repairs
Excessive Clicking Faulty ignition system Schedule an inspection

A furnace in good condition should run quietly. Ignoring these sounds can lead to:

  • Lower heating performance
  • Increased energy bills
  • Safety risks
  • Full system breakdown

Some noises, like booming, could even signal dangerous issues like gas leaks or improper combustion [2][3].

What to Do If You Hear Strange Noises

  1. Note when the noise happens and describe it (e.g., rattling, booming).
  2. Turn off the furnace if you hear booming or grinding.
  3. Check for and tighten any loose panels.
  4. Call a certified HVAC technician for help.

Regular maintenance can help spot these issues early [2][3]. Avoid trying to fix complex problems yourself – DIY repairs can be risky and may void your warranty [1][4].

Addressing these noises quickly keeps your furnace running smoothly and safely, saving you from bigger headaches down the line.

2. Uneven or Inconsistent Heating

When some rooms in your home feel like an icebox while others are warm and cozy, it could mean your furnace is having trouble. Uneven heating isn’t just annoying – it often points to deeper issues that need professional attention.

Common Signs and Possible Causes

Issue Impact Symptoms
Clogged Air Filters Limits airflow Cold spots in rooms farther from the furnace
Burner Assembly Issues Reduces heat output Persistent cold areas even after adjustments
Faulty Thermostat Poor temperature control Room comfort doesn’t match thermostat settings
Blocked Vents Impairs air distribution Noticeable temperature differences between rooms

Uneven heating makes your furnace work harder than it should, leading to higher energy bills and extra wear on the system. Over time, this can shorten the lifespan of your furnace.

Quick Fixes You Can Try

  • Replace dirty air filters to restore proper airflow.
  • Make sure all vents are open and not blocked by furniture or other obstacles.
  • Test your thermostat to ensure it’s working properly.

If these steps don’t solve the problem, it’s time to call an HVAC technician. They can check for more complex issues, like problems with the burner assembly or heat exchanger, which require professional expertise.

To keep your furnace running smoothly, schedule yearly inspections with a qualified technician. Avoid attempting DIY repairs on complicated components – this can be dangerous and might even void your warranty.

Also, keep an eye (or nose) out for unusual odors from your furnace. These can indicate more serious problems that need immediate attention.

3. Odd or Unpleasant Smells

Strange smells coming from your furnace can point to serious safety concerns that need immediate action. Knowing what these odors mean can help you address problems before they escalate.

What Furnace Odors Could Indicate

Odor Type Possible Cause What to Do
Rotten Eggs/Gas Gas leak Leave the house immediately and call your gas company.
Burning Electrical Faulty wiring or overheating parts Turn off the furnace and call an HVAC technician.
Metallic Cracked heat exchanger Shut down the system and arrange urgent repairs.
Musty/Damp Mold or condensation problems Get a professional inspection.

If you detect any of these odors, turn off your furnace right away, ventilate the area, and reach out to an HVAC expert. A properly maintained furnace should not release strong or unusual smells.

How to Prevent Furnace Odors

Regular upkeep can help avoid odor issues and ensure your furnace operates safely. Here’s how:

  • Schedule yearly professional inspections.
  • Keep the area around your furnace well-ventilated.
  • Install carbon monoxide and smoke detectors nearby.
  • Remove any flammable materials from the furnace area. [2]

Catching these issues early not only keeps your home safe but also helps you avoid expensive repairs down the line. Keep in mind, other signs like frequent cycling or higher energy bills might also indicate your furnace needs attention. [3]

4. Furnace Turns On and Off Too Often

If your furnace keeps starting and stopping in short bursts, it’s a red flag. Typically, a furnace should run for 10-15 minutes per cycle before shutting off. Short cycles mean there’s an issue that needs attention.

Common Causes and Their Effects

Issue What Happens Signs to Watch For
Clogged Air Filter Causes overheating Furnace shuts off too soon
Malfunctioning Thermostat Misreads temperatures Irregular cycling patterns
Dirty Flame Sensor Fails to detect the flame System shuts down prematurely
Oversized Furnace Heats too quickly Frequent starts and stops

Short cycling puts extra strain on furnace components, wearing them out faster. This reduces efficiency and can lead to costly repairs or even system failure.

What You Can Do Right Now

Before calling in a pro, try these quick fixes:

  • Inspect your air filter: A dirty filter can block airflow. Replace it if needed.
  • Check your setup: Make sure vents are open and the thermostat is placed in a suitable spot.

If these steps don’t help, it’s time to bring in a certified HVAC technician. They can check more complex parts like the heat exchanger or ignition system, which might be causing the problem [2].

Stay Safe

Frequent cycling isn’t just inefficient; it can also pose safety risks, like potential combustion gas leaks [3]. Install carbon monoxide detectors near your furnace for extra protection, and schedule regular inspections to keep your system running smoothly [4].

Ignoring this issue can lead to inconsistent heating or other complications, so don’t delay professional assessment. It’s key to ensuring your furnace operates safely and efficiently.

sbb-itb-99db659

5. Higher Energy Bills Without Explanation

Noticing a sudden increase in your energy bills without a clear reason? This could mean your furnace isn’t running as efficiently as it should. The U.S. Department of Energy states that a well-maintained furnace can lower heating costs by up to 30% [2]. Since heating accounts for about 45% of a home’s energy use [5], addressing these issues quickly can make a big difference.

What Could Be Causing Higher Energy Costs?

Issue Effects and Warning Signs
Faulty Heat Exchanger Leads to a 15-25% increase in costs, uneven heating, and unusual odors
Worn Components Causes higher energy usage, strange noises, and longer heating cycles
Malfunctioning Thermostat Results in inconsistent temperatures and irregular system operation

While clogged filters and blocked vents (mentioned earlier) can reduce efficiency, unexplained spikes in energy costs often point to more complex problems that need professional evaluation.

How to Spot and Fix Efficiency Issues

Several factors can lower your furnace’s performance. Aging parts tend to work less effectively, and neglecting regular maintenance can worsen the situation. Routine system inspections can help catch these problems early, preventing expensive repairs down the line.

Steps You Can Take

Start by monitoring your energy usage for unexpected increases. Replace air filters monthly during high-use periods and make sure vents are free from obstructions. If these steps don’t solve the problem, it’s time to call an HVAC technician for a detailed inspection. Regular maintenance not only helps cut down energy costs but also prolongs your furnace’s life and keeps your home safe.

Keep an eye out for other warning signs, like changes in the color of your furnace’s flame, which could indicate more serious issues needing immediate attention.

6. Pilot Light or Flame Color Changes

Keeping an eye on your furnace’s flame color is an important way to catch potential problems that could affect both safety and performance. A healthy furnace typically has a steady, bright blue flame, which shows that combustion is efficient and gas flow is working as it should.

What Different Flame Colors Mean

Flame Color What It Means Risk Level
Blue Normal operation with complete combustion Safe
Yellow/Orange/Red Indicates combustion problems – safety risks High
Flickering Blue Issues like unstable gas flow or dirty burners Moderate

Why Paying Attention to Flame Color Is Important

If your furnace’s flame changes to yellow or orange, it could mean incomplete combustion. This is a serious problem because it may produce carbon monoxide, a dangerous gas that’s both colorless and odorless and poses major health risks.

What Causes Flame Color Changes?

Several issues can lead to changes in flame color, such as:

  • Burners clogged with dirt
  • Malfunctioning gas valves
  • Poor airflow
  • A damaged heat exchanger

What to Do If You Notice Changes

If the flame color looks off, take these steps:

  1. Turn off your furnace right away and contact a certified HVAC technician for an inspection.
  2. Confirm that your carbon monoxide detectors are functioning correctly.

Avoid attempting any repairs on your own. DIY fixes can be dangerous and might void your furnace’s warranty. Scheduling regular professional maintenance is the best way to prevent these problems and keep your furnace running safely during the colder months.

Flame color isn’t the only thing to watch – your furnace’s performance can also affect your home’s air quality, sometimes causing humidity problems or making the air too dry.

7. Humidity Problems or Dry Air in Your Home

Your furnace isn’t just about heating – it also helps keep indoor air comfortable and balanced. If your home’s humidity feels off, it might point to furnace issues. Ideally, indoor humidity should stay between 30% and 50%, and your furnace plays a big role in maintaining that range.

Humidity Issue Warning Signs Potential Furnace Problems
Excessive Moisture Condensation on windows, musty odors, mold growth Poor moisture removal, faulty heat exchanger
Too Dry Static shocks, dry skin, nosebleeds Over-drying air, incorrect furnace sizing
Inconsistent Levels Uneven comfort between rooms Ventilation issues

Why Humidity Problems Matter

When your furnace can’t manage humidity properly, it affects both comfort and energy use. Dry air can drive up heating costs, while high humidity encourages mold and can pose health risks [2].

Several furnace problems can throw off your home’s humidity levels:

  • A clogged heat exchanger that disrupts air conditioning
  • A faulty humidistat that struggles to regulate moisture
  • Improper furnace sizing that doesn’t fit your home’s needs
  • Restricted airflow that limits system performance

Taking Action

If you’re dealing with humidity issues, try these steps first:

  • Replace air filters if they’re dirty.
  • Ensure your furnace area has proper ventilation.
  • Use a hygrometer to track humidity levels.
  • Call a professional for an inspection if problems persist.

A qualified HVAC technician can pinpoint whether your furnace is causing the issue and suggest fixes to restore balance. Tackling humidity problems not only makes your home more comfortable but also helps your furnace work more efficiently. Regular maintenance is key to keeping everything running smoothly.

Conclusion

Spotting furnace issues early helps keep your home warm and safe while avoiding costly breakdowns. Taking quick action ensures your furnace stays reliable and your home comfortable throughout the winter.

Key Points to Keep in Mind

Postponing furnace repairs can lead to expensive problems and potential dangers, such as carbon monoxide leaks or even fires. Scheduling regular checkups with certified HVAC technicians ensures your furnace runs safely and keeps your home cozy.

Checking your furnace regularly to see if there are any visible signs of maintenance needed is a great way to keep your furnace safe [2]

What to Do Next

If you notice any of the warning signs mentioned earlier:

  • Write down the issues or symptoms you observe.
  • Book an inspection with a certified HVAC technician.
  • Stick to a regular maintenance schedule.

Taking care of your furnace is a smart way to protect your home’s comfort and safety. A properly maintained furnace not only works more efficiently but also delivers dependable heating during the coldest months. Routine professional checkups can help you avoid breakdowns and extend the life of your system for years to come.

FAQs

How do you know when your furnace needs to be replaced?

Sometimes a repair is enough to fix furnace problems, but there are clear signs that a complete replacement might be necessary.

When to Consider Replacing Your Furnace:

  • Age: If your furnace is over 15-20 years old and not performing well.
  • Frequent Repairs: Constant breakdowns or expensive fixes.
  • Physical Damage: Cracks, rust, or leaks in the unit.
  • Heating Issues: A noticeable decline in how well it heats your home.
  • Corrosion: Visible rust or damage on components.

When to Call a Professional

Warning Sign What It Means Action Required
Inconsistent Performance Issues with components or heat flow Schedule an inspection immediately
Higher Energy Bills Efficiency has dropped significantly Compare repair costs to replacement

If your furnace shows these symptoms and repairs aren’t cutting it, it’s probably time for a replacement. An HVAC technician can help you decide whether repairs can extend its life or if a new system is the smarter choice [1][4].

Why Upgrade to a New Furnace?

A new furnace can bring several advantages, including:

  • Better Heating: More reliable and effective performance.
  • Lower Energy Bills: Improved efficiency saves money over time.
  • Enhanced Safety: Modern systems come with updated safety features.
  • Consistent Comfort: Even heating throughout your home [2].

Upgrading to a new furnace not only improves comfort and efficiency but also ensures your home stays safe and warm for years to come. Don’t forget – routine maintenance on your new system can help it last even longer!

Common Well Pump Problems and Solutions

Common Well Pump Problems and Solutions

Well pumps are essential for over 15 million American households, but issues like low water pressure, frequent cycling, or loss of prime can disrupt daily life. Regular maintenance every 3-4 years and early troubleshooting can prevent costly repairs. Here’s how to identify and fix common well pump problems:

  • Low Water Pressure: Check for clogged filters, blocked pipes, or a faulty pressure tank.
  • Frequent Cycling: Inspect the pressure switch, air pressure in the tank, or waterlogged components.
  • Loss of Prime: Look for air in the system, spitting faucets, or a pump running continuously.

Quick Fixes:

  • Reset tripped breakers or replace blown fuses.
  • Clean or tighten pressure switch connections.
  • Test air pressure in the pressure tank and adjust if needed.

When to Call a Professional:

  • Pump won’t turn on or makes unusual noises.
  • Sudden drops in water pressure or changes in water quality.
  • Visible rust or corrosion on components.

With proper care, well pumps can last 8-15 years. Regular inspections and addressing minor issues early can save you time, money, and stress.

Common Pressure Tank and Well System Problems

Recognizing Well Pump Issues

Spotting well pump problems early can save you from expensive repairs and potential system failures. Knowing the common warning signs allows you to address issues before they escalate.

Causes of Low Water Pressure

Low water pressure is a common indicator that your well pump might need attention. A healthy system should deliver steady pressure throughout your home. If you’re noticing weak water flow from multiple fixtures, the problem could be:

Issue Description
Clogged Filters Sediment or mineral buildup causing a gradual drop in pressure
Blocked Pipes Scale or debris restricting water flow, leading to inconsistent pressure
Faulty Pressure Tank Pressure swings due to bladder failure or excess water in the tank

Why Pumps Cycle Too Often

If your pump turns on and off rapidly, it’s a sign of stress on the system, which can wear out the pump prematurely. Common signs of this issue include:

  • Rapid clicking sounds from the pressure switch
  • Noticeable shifts in water pressure during use
  • Higher-than-usual electricity bills

Scheduling inspections twice a year can help avoid these problems, often caused by wear or environmental factors.

What Causes Loss of Prime

When air gets into the pump system, it can disrupt water flow, leading to a loss of prime. Ignoring this issue may damage your pump. Watch for these signs:

  • Faucets spitting air
  • Pump running continuously without building pressure
  • Sudden loss of water supply

Even seemingly minor issues can signal deeper problems. For example, frequent pump cycling might indicate a failing pressure switch or waterlogged pressure tank [1][3].

Regular checks of your well cover, pipes, and pressure tank can help identify problems early. Once you’ve pinpointed the issue, it’s time to tackle it with proper troubleshooting steps.

Fixing Common Well Pump Problems

Simple Troubleshooting Steps

Start by checking the basics of your electrical system – this often resolves many well pump issues. A steady power supply is crucial for your pump to work properly. Look at your circuit breaker panel for any tripped switches, as this is a common and quick fix for pumps that have stopped working.

Basic Check What to Look For Action Required
Power Supply Tripped breakers, blown fuses Reset the breaker or replace fuse
Pressure Switch Wear, loose connections Clean contacts, tighten connections
Control Panel Burnt components, loose wires Secure connections, replace parts

To quickly test your pressure switch, tap it lightly with a screwdriver handle. If the pump starts running, the switch likely needs replacing [3].

Advanced Troubleshooting Methods

For pressure-related problems, try these diagnostic steps:

  • Ensure the voltage remains within 10% of the motor’s rated value.
  • Check all connections for signs of corrosion.
  • Test the air pressure in your pressure tank by draining it and measuring the levels.

If you have a submersible pump, it’s a good idea to schedule professional inspections every three years [4]. Between inspections, keep an eye out for warning signs like:

  • Sudden drops or surges in water pressure
  • Strange noises while the pump is running
  • Visible rust or corrosion on accessible parts
  • Higher-than-usual electricity bills

If your pump is cycling on and off too often, try draining the tank and adjusting the air pressure to the correct level. Regular maintenance and addressing these issues early can help you avoid bigger, costlier problems. However, some situations call for professional help to ensure your system stays reliable.

Maintaining Your Well Pump

Taking care of your well pump regularly helps it run smoothly and can save you from expensive repairs. A pump that’s properly looked after not only lasts longer but also ensures consistent water service for your home.

Tips for Routine Maintenance

Perform visual checks every 3-6 months. If you live in a humid area, you may need to inspect more often to keep an eye on potential corrosion risks [2].

Here’s a handy maintenance schedule to follow:

Timeframe Maintenance Task Purpose
Monthly/Every 3-6 months Check pipes, connections, pressure tank, and switch Spot leaks or cycling problems
Annually Clean cooling fans and components Avoid motor overheating
Every 3 years Hire a professional for a full inspection Ensure the entire system is in good shape

When checking your system, focus on these key areas:

  • Pressure Tank: Make sure it’s not waterlogged and that air pressure levels are correct.
  • Corrosion Control: Use anti-corrosion products on metal parts to help them last longer.
  • Cleaning Components: Keep cooling fans clean to prevent overheating and maintain efficiency.

“Regular maintenance can significantly extend the lifespan of a well pump by preventing wear and tear, addressing minor issues before they become major problems, and ensuring the pump operates efficiently” [2][4].

Keeping a record of your maintenance activities is a smart move. It helps you track performance, spot patterns, and address recurring issues before they escalate. If you notice anything unusual, like fluctuating water pressure or odd noises, reach out to a professional for a closer look [2][4].

While routine care handles most issues, some situations will need expert attention.

When to Call a Professional

Knowing when to bring in a professional can save you from expensive repairs and prevent further damage. While regular upkeep and simple fixes can solve many issues, some problems need a trained expert to ensure your well pump stays reliable for years to come.

Signs You Need Expert Help

Certain well pump problems are clear indicators that it’s time to call a professional. Here are some common warning signs and what they might mean:

Warning Sign Possible Cause Risk Level
Pump Won’t Turn On Electrical or mechanical failure High – Requires immediate action
Unusual Noises Damage to internal components Medium to High – Service needed soon
Sudden Drop in Pressure Malfunction in the system or well issues High – Needs professional diagnosis
Water Quality Changes Potential contamination or pump issues High – Health and safety risk

With proper care, well pumps can last up to 15 years. Neglected systems, however, often fail within 5-8 years [4]. If these signs appear, contacting a reliable professional is crucial.

Hydrodynamics Inc.: Your Local Well Pump Experts

Hydrodynamics Inc., a family-run company founded in 1994, has been providing top-notch well pump services in the NEPA area for decades. Our offerings include diagnostics, repairs, system upgrades, preventative maintenance, and energy-efficient solutions.

Our team of certified technicians can handle a wide range of complex problems, such as:

  • Faulty pressure switches
  • Waterlogged pressure tanks
  • Well casing issues
  • Electrical system failures

For the best performance, it’s recommended to schedule a professional inspection every 3-5 years for submersible pumps [4]. Hydrodynamics Inc. adheres to NGWA standards, ensuring repairs are safe and dependable.

Keeping Your Well Pump Working

Taking care of your well pump can help you avoid unexpected issues. Most well pumps last between 8 to 15 years, but proper maintenance and quick action when problems arise can make a big difference [4].

Key Takeaways

  • Maintenance is crucial: Regular upkeep can prevent up to 90% of common problems [1]. Inspections and servicing are essential, especially in humid areas where moisture can cause damage. If you live in such an environment, consider scheduling inspections twice a year [2].
  • Catch issues early: Pay attention to unusual sounds or shifts in water pressure. These are often early signs of trouble. Addressing them quickly can help maintain your pump’s efficiency and avoid costly repairs [3].
  • Know when to call a pro: While some basic maintenance can be done yourself, more complex problems require a certified technician. Our expertise ensures proper diagnosis and solutions [1].