Commercial Leak Response: Best Practices
Leaks in commercial spaces can lead to expensive damage if not addressed promptly. Here’s what you need to know:
- Two main options: Businesses can rely on professional services or in-house maintenance teams.
- Key factors to consider: Response speed, expertise, cost, and minimizing disruptions.
- Best approach: A mix of in-house teams for quick action and professionals for complex repairs often works best.
Professional services like Hydrodynamics Inc. are equipped for advanced diagnostics and permanent solutions, while in-house teams excel at immediate response and routine maintenance. Preparation – like training staff, maintaining equipment, and building partnerships with repair companies – is critical to reducing risks and costs.
Takeaway: Combine quick on-site action with expert assistance to protect your property and operations.
Commercial Water Loss & Emergency Response Plan
1. Hydrodynamics
Hydrodynamics Inc., a family-run business since 1994, specializes in addressing a wide range of leak-related issues throughout Pennsylvania. From fixing small faucet drips to tackling major water line failures, they provide dedicated plumbing services tailored to commercial clients.
Response Speed
In a water emergency, every second matters. A fast response can be the difference between a quick fix and extensive, costly damage. Hydrodynamics prioritizes rapid action as a cornerstone of their service, fully aware of the urgency required when water is actively damaging a commercial property.
“We are dedicated to provide prompt repairs, expert installation services, and satisfaction to our valued customers.” – Hydrodynamics Inc.
Customers frequently commend their swift emergency response. Establishing a relationship with Hydrodynamics ahead of time ensures an even faster turnaround, eliminating the stress of scrambling to find a reliable contractor during a crisis.
Damage Mitigation Effectiveness
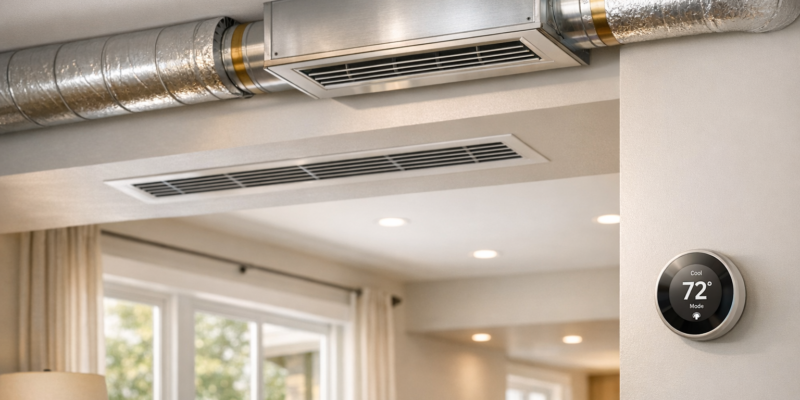
Handling water damage effectively requires more than just plumbing know-how – it calls for a broad skill set and a thorough approach. Hydrodynamics combines expertise in plumbing, HVAC, refrigeration, and water conditioning to tackle leaks that may stem from various systems. Leaks can originate from unexpected sources, such as HVAC condensate lines or refrigeration units, making accurate diagnosis essential. Their technicians are equipped to locate and resolve the issue quickly, no matter the source. Additionally, their preventive maintenance services help identify potential weak points before they escalate into major problems, saving clients from future headaches.
Expertise and Scalability
Commercial leak response isn’t a one-size-fits-all job. It demands specialized knowledge and the ability to adapt to different types of buildings and systems. Hydrodynamics brings a wealth of experience across residential, commercial, and industrial settings, allowing them to scale their services to fit the unique needs of each client. Whether it’s managing complex HVAC systems or addressing specialized plumbing setups, their team understands how interconnected systems function and where vulnerabilities may arise. For businesses operating multiple locations or with intricate infrastructures, this integrated expertise is invaluable. Their water conditioning services, including softeners and UV systems, also play a crucial role in reducing wear and tear on plumbing systems, helping to prevent corrosion and extend the lifespan of essential infrastructure.
Cost Efficiency
The financial impact of a leak goes beyond repair bills. Business interruptions, equipment damage, and escalating water exposure costs can quickly add up. Hydrodynamics’ focus on prompt repairs helps minimize these hidden expenses, as studies show that prolonged water exposure significantly increases both damage and repair costs. For businesses managing multiple properties, working with a single service provider for plumbing, HVAC, and related systems simplifies billing and reduces administrative complexity. Their familiarity with modern plumbing technologies, such as corrosion-resistant PEX piping, allows them to recommend cost-effective upgrades that reduce maintenance needs and lower the risk of future leaks. Over time, these proactive measures often save clients money, with many seeing returns on their investment within the first year through reduced emergency calls and avoided damage.
2. In-House Maintenance Teams
Many commercial properties depend on their own maintenance staff to address water leaks and other facility issues. These teams offer distinct advantages, particularly in terms of their availability and familiarity with the building’s systems. However, their success hinges on proper training, the right tools, and well-established protocols.
Response Speed
One of the biggest strengths of in-house maintenance teams is their ability to act quickly. Since they’re already on-site or can be mobilized without delay, they can respond faster than external contractors. This rapid action is crucial when water is actively leaking, as every minute of delay increases the risk of damage.
To make the most of this advantage, building managers should set up clear communication protocols. For example, maintenance staff should know exactly where the main water shut-off valves are located and be trained to act immediately. When occupants report leaks through a designated system, these teams can often respond in minutes rather than hours. This quick reaction is especially helpful during nights or weekends when external contractors might take longer to arrive or charge higher rates. Regular training – at least once a year – on emergency procedures, valve locations, and water detection systems ensures teams stay prepared, even when building infrastructure changes.
This readiness lays the groundwork for effective damage control, which is explored further in the next section.
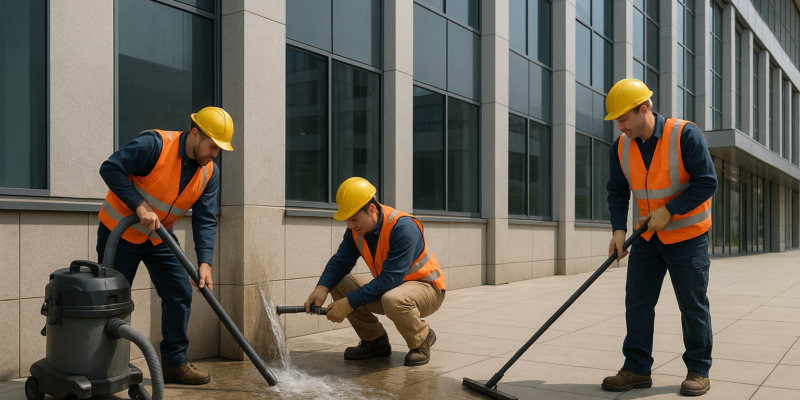
Damage Mitigation Effectiveness
In-house teams are well-suited for immediate damage control. They can quickly shut off water, deploy absorbent materials, and start drying surfaces before mold has a chance to develop. To support these efforts, buildings should have spill control kits readily available. These kits, stocked with absorbent materials, barriers, and basic tools, allow teams to act swiftly.
The key to effective damage mitigation lies in the team’s understanding of the building’s systems. Regular inspections help staff identify vulnerabilities before they become major issues. For instance, monthly checks of boiler rooms and sprinkler systems, quarterly reviews of HVAC drain lines, and bi-annual inspections of water storage tanks can catch problems early.
Water detection sensors placed near high-risk areas like water heaters, HVAC units, and plumbing connections provide real-time alerts. Some advanced systems even feature sensor-activated shut-off valves that can stop water flow automatically when a leak is detected, reducing damage before maintenance staff even arrive.
Additionally, teams can monitor water usage patterns to flag unusual activity that might signal hidden leaks. After a water incident, it’s important to measure moisture levels in affected areas using tools like moisture meters. If materials are wet, industrial fans and dehumidifiers should be deployed immediately to prevent further damage.
Expertise and Scalability
While in-house teams excel at quick responses and routine maintenance, they may face challenges with more complex issues. For example, diagnosing hidden leaks, handling advanced HVAC systems, or addressing structural water damage often requires specialized skills that general maintenance staff might not have.
For larger properties with extensive infrastructure, scalability can also be a concern. A single team may struggle to cover multiple buildings or expansive systems effectively. Appointing a water damage coordinator to oversee response efforts can improve coordination during incidents.
To bridge these gaps, building managers should establish relationships with reliable external contractors. These experts can handle complex repairs and restoration, addressing not just the leak but also any structural or cosmetic damage caused by water. In this setup, in-house teams focus on prevention and immediate action, while external partners tackle more advanced challenges.
Cost Efficiency
A well-trained in-house maintenance team can save money in the long run by preventing damage and minimizing repair costs. Routine maintenance – like replacing plumbing hoses every five years or water heaters every ten years – helps avoid costly failures.
However, maintaining an in-house team comes with its own expenses, including salaries, training, equipment, and system upgrades. For smaller buildings, these costs might outweigh the benefits, making outsourcing a more affordable option. On the other hand, larger facilities with complex systems typically benefit from dedicated in-house teams that provide consistent monitoring and upkeep. To manage costs, building managers can start by focusing on high-risk areas and gradually expanding coverage.
Keeping detailed records of leak incidents also contributes to cost efficiency. Maintenance teams should document each incident with notes and photos, which not only support insurance claims but also help identify recurring issues or seasonal patterns. By analyzing this data, teams can refine inspection schedules and prioritize maintenance tasks based on actual experience, ensuring resources are used effectively.
sbb-itb-99db659
Advantages and Disadvantages
Expanding on earlier discussions about individual strategies, this section dives into a comparison of the strengths and challenges associated with professional services, like Hydrodynamics, and in-house maintenance teams. Each brings distinct advantages and faces unique limitations, making them suited to different situations.
Comparing Core Capabilities
The primary difference lies in immediate local response versus specialized diagnostic expertise. In-house teams can act almost instantly since they’re already on-site, a critical advantage when dealing with active leaks. On the other hand, professional services excel in advanced diagnostics, addressing the root cause rather than just the immediate issue.
Professional leak response providers work to minimize disruptions to daily operations by adhering to efficient timelines and offering complete remediation solutions. Meanwhile, in-house teams boast intimate knowledge of their building’s quirks and history. They know which pipes are prone to issues, how various systems interact, and can navigate the facility with ease. This kind of institutional knowledge is hard for external providers to replicate, even with detailed documentation.
Technology and Equipment Differences
Professional services often utilize real-time monitoring systems that track water usage and detect unusual patterns signaling leaks. These systems have proven to save businesses significant amounts of money by preventing leaks before they escalate. Whether a company chooses in-house or outsourced solutions, investing in this technology is a smart move.
Additionally, professional services provide detailed documentation, including photographic evidence of repairs and preventive measures. This documentation is invaluable for insurance claims and tracking recurring issues. While in-house teams may also document incidents, the consistency and quality of their records can vary, depending on staff training and available time.
Cost Structures and Financial Considerations
Maintaining an in-house team involves ongoing costs, including salaries (ranging from $35,000 to $65,000 annually per employee), benefits, training, equipment upkeep, and technology investments. These expenses are fixed, regardless of how often leaks occur. In contrast, professional services like Hydrodynamics charge $150–$300+ per hour for emergency response, along with additional fees for specialized repairs and water damage remediation. While these per-incident costs may seem high, they only apply when services are needed.
The financial advantage of professional services lies in their ability to prevent exponentially greater damage costs. For example, a leak left unaddressed for 24 hours can result in damages costing $10,000–$50,000 or more. In this context, the cost of a professional response becomes minor compared to potential losses. Their comprehensive remediation services also help reduce long-term expenses by addressing structural and aesthetic damage, preventing recurrence.
Scalability and Resource Constraints
In-house teams may struggle to handle multiple buildings or large-scale incidents requiring significant resources. During widespread weather events, for instance, they can quickly become overwhelmed.
Professional services, however, are equipped to scale efficiently. They can deploy additional personnel as needed and manage multiple properties simultaneously. For businesses with properties spread across different locations, professional services ensure consistent quality and availability, which would be costly to replicate with in-house teams alone.
That said, relying on external vendors has its challenges. Availability during peak seasons can become an issue, especially when many clients need assistance at the same time. Establishing relationships with professional providers before emergencies arise can help mitigate this risk.
Training and Expertise Requirements
In-house teams require regular training on emergency procedures, valve locations, shut-off protocols, and incident response. This training demands ongoing time and financial investment. Additionally, staff turnover can result in the loss of institutional knowledge, necessitating repeated training for new hires.
Professional services maintain their expertise through certifications and frequent exposure to a wide range of leak scenarios. Their experience with diverse and complex situations allows them to identify issues that less experienced in-house staff might overlook. However, external providers need time to familiarize themselves with the unique characteristics of each building. In contrast, in-house teams already know the trouble spots, such as a problematic bathroom on the third floor or an HVAC unit prone to condensate line issues.
Performance Comparison
| Aspect | Professional Services (Hydrodynamics) | In-House Maintenance Teams |
|---|---|---|
| Response Time | Scheduled (varies by location/availability) | Immediate (on-site staff) |
| Specialized Expertise | Advanced diagnostics and root cause analysis | Basic troubleshooting, building-specific knowledge |
| Technology Access | Advanced detection tools, 24/7 monitoring | Limited to installed systems, manual monitoring |
| Cost Structure | Per-incident fees ($150–$300+ per hour) | Fixed salaries, benefits, training, equipment |
| Documentation Quality | Detailed with photographic evidence | Varies based on staff training |
| Remediation Scope | Complete structural and aesthetic repairs | Immediate stoppage, basic mitigation |
| Scalability | Efficiently handles multiple properties | Limited by team size and availability |
| Preventative Approach | Proactive recommendations based on experience | Reactive focus on known issues |
| Training Requirements | Certifications maintained internally | Annual updates required |
| Business Disruption | Minimized through efficient timelines | Varies with team capability |
Making the Right Choice
A hybrid solution – combining in-house teams for quick responses with professional services for complex repairs – often provides the best balance. In-house teams can handle routine inspections, immediate damage control, and minor repairs. Professional services, meanwhile, bring specialized expertise and comprehensive remediation capabilities for larger or more complex issues.
Building managers should establish relationships with dependable professional providers well in advance of emergencies. This ensures rapid deployment when incidents exceed the capabilities of in-house teams. The ideal approach depends on factors like building size, infrastructure complexity, budget constraints, and risk tolerance. Larger facilities with extensive systems may benefit from dedicated in-house teams supported by professional services, while smaller properties might find outsourcing most leak management needs more cost-effective.
Conclusion
Choosing the right leak response strategy hinges on your facility’s specific needs and budget. For smaller businesses with straightforward, modern plumbing systems, a trained in-house team supported by annual professional inspections strikes a good balance between cost control and effective protection.
As businesses grow, their plumbing needs become more complex. Mid-sized companies often benefit from a hybrid approach – combining in-house responsiveness with periodic professional evaluations. This setup ensures proper oversight and access to specialized expertise without incurring excessive costs.
For larger facilities, especially those in high-risk industries like food service or manufacturing, professional services with continuous monitoring become a necessity. For example, restaurants need fast response systems to meet health regulations and avoid operational downtime, making real-time alert systems critical. Similarly, manufacturing facilities can save significant costs by employing continuous sensor-based monitoring to detect and prevent leaks before they escalate.
The age and complexity of your building also play a major role in determining the right strategy. Older buildings with aging infrastructure often require more frequent professional inspections and advanced detection tools like tracer gas detection or moisture mapping. On the other hand, newer buildings with modern plumbing can often rely more heavily on in-house monitoring, supplemented by occasional professional assessments.
Regardless of the strategy, proactive maintenance and quick response are non-negotiable. All commercial buildings should have clearly labeled shut-off valves, accessible spill control kits, sensor-activated shut-off systems in high-risk areas, and documented emergency protocols. Regular staff training on emergency procedures, valve locations, and response measures ensures everyone is prepared.
The best approach combines proactive upkeep, staff preparedness, and a tailored response plan that aligns with your building’s specific features and operational demands. Establishing partnerships with professional service providers ahead of time is also crucial, particularly during peak seasons when their availability may be limited.
Financially, investing in professional services can save you from exponentially higher costs down the line. By accurately pinpointing leaks and addressing them comprehensively, professional responses help prevent extensive damage and costly repairs.
Ultimately, your decision should consider four key factors: the building’s age, plumbing system complexity, history of leaks, and budget constraints. By carefully evaluating these elements and understanding your risk tolerance, you can adopt a strategy that protects your property, minimizes disruptions, and delivers measurable savings through reduced water waste and lower utility bills.
FAQs
What are the benefits of combining your in-house maintenance team with professional services for managing commercial water leaks?
Combining the strengths of your in-house maintenance team with professional services can greatly improve how you handle commercial water leaks. Your internal team offers quick, on-site support and an in-depth understanding of your facility. Meanwhile, professional services contribute specialized skills, advanced equipment, and customized solutions for more challenging problems.
This collaboration allows for quicker leak detection, reduces downtime, and helps avoid expensive damage. Additionally, professional services can offer advice on long-term prevention, like energy-efficient upgrades or routine system maintenance, ensuring your operations remain steady and efficient.
What are the best ways to train in-house maintenance teams to handle water leaks and reduce potential damage?
Effectively preparing your in-house maintenance team to handle water leaks requires a mix of preparation, education, and consistent practice. Start by establishing clear, step-by-step protocols for identifying and addressing leaks quickly. This includes instructions on shutting off water sources and assessing the situation to minimize damage. Providing hands-on training with essential tools like moisture detectors and pipe repair kits can also boost confidence and ensure your team feels ready to act.
It’s equally important to tailor training to the specific needs of your business or industry, as response strategies can differ depending on the environment. Regularly scheduled drills and workshops are a great way to reinforce these skills and keep the team sharp for emergencies. For added expertise, consider reaching out to professionals, such as Hydrodynamics Inc., to deliver specialized training on leak prevention and repair methods designed for your facility.
What should businesses consider when choosing between in-house teams and professional services for managing water leaks?
When deciding whether to rely on in-house teams or bring in professional services for water leak management, businesses need to weigh several important factors.
Expertise plays a major role. While an in-house team might be able to tackle smaller issues, professional services often come with specialized knowledge and advanced tools that can handle more complicated leaks with greater efficiency.
Cost-efficiency is another key factor. Although in-house teams might seem like the cheaper option upfront, professional services can often save money in the long run by preventing extensive damage and reducing downtime through quicker, more accurate solutions.
The scope and urgency of the problem should also guide your decision. When dealing with large-scale leaks or situations that require immediate attention, professional services are typically better prepared to act quickly and keep disruptions to a minimum.
Finally, think about long-term maintenance. Professional providers can offer ongoing support and energy-efficient strategies to help avoid future issues, which can ultimately save both time and money over the years.