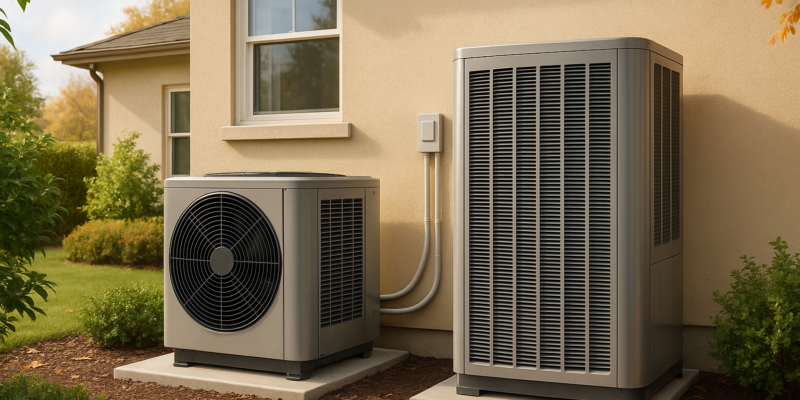
How to Ensure Ductwork Meets Retrofit Standards
Poor ductwork can waste up to 30% of your HVAC energy. This drives up bills and reduces comfort. To fix this, retrofitting ductwork to meet standards ensures safety, efficiency, and code compliance. Here’s what matters most:
- Seal and Insulate: Proper sealing cuts energy loss by up to 20%. Insulate ducts in unconditioned spaces to at least R-8.
- Follow Codes: Meet requirements like IMC and ASHRAE 90.1. Leakage must stay under 10% of air handler flow.
- Use the Right Materials: Avoid cloth tape; use mastic, UL 181A/B tape, or aerosol sealants.
- Test and Document: Perform air leakage tests, airflow checks, and keep detailed records for inspections.
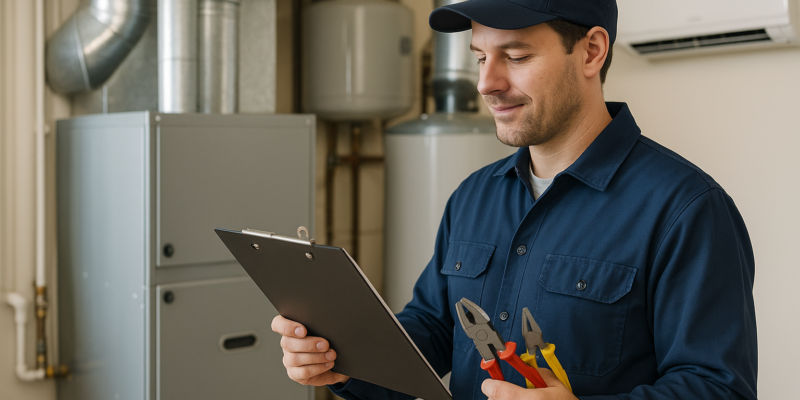
Hiring licensed HVAC professionals ensures everything is done correctly and legally. Skipping these steps risks higher costs, failed inspections, and safety hazards.
Duct Sealing, Leakage Testing, and Ventilation – Code Requirements are Changing
Understanding U.S. Ductwork Retrofit Standards
Navigating U.S. ductwork retrofit standards involves understanding how federal guidelines interact with local regulations to create a unified framework for HVAC installations and upgrades. These standards dictate everything from material selection to testing protocols and climate-specific methods for retrofitting. Below, we break down the key federal codes shaping these requirements.
Main U.S. Code Requirements
Two major federal standards govern ductwork retrofits nationwide: the International Mechanical Code (IMC) and ASHRAE Standard 90.1. The IMC addresses mechanical systems, including ventilation, duct design, and combustion safety, and is widely adopted across the U.S. for both new construction and retrofits. Meanwhile, ASHRAE Standard 90.1 focuses on energy efficiency in commercial buildings. It outlines minimum insulation R-values and maximum allowable duct leakage rates, ensuring energy conservation. By 2026, the Department of Energy mandates that state building codes align with or surpass the ASHRAE 90.1-2022 requirements.
Both standards require ducts located outside conditioned spaces to have insulation rated at least R-8. Additionally, air leakage must stay below 10% of the air handler’s flow, though best practices aim for leakage as low as 5%. Regarding materials, standard cloth tapes are discouraged due to durability issues. Instead, approved sealing materials include mastic, UL 181A or 181B tape, and aerosol-based sealants.
Climate Zone Requirements
Ductwork retrofit standards vary significantly depending on the climate zone, as temperature extremes and humidity levels directly impact insulation and sealing needs. For example, colder regions like Chicago require higher insulation values and tighter seals to minimize heat loss during harsh winters. On the other hand, warmer areas such as Orlando prioritize reducing cooling losses and preventing moisture infiltration. In these hot, humid climates, vapor barriers and sealing materials capable of withstanding high temperatures and humidity are essential.
Local regulations often specify different R-values or sealing standards based on regional climate data. Consulting local building departments before starting a project is crucial, as what works in one area may not comply with codes in another. This understanding helps avoid costly compliance issues.
Required Documentation and Permits
Documentation and permits are critical for ensuring code-compliant ductwork retrofits. Most projects begin with obtaining local HVAC/mechanical permits, and additional permits may be needed depending on the scope of work. For example, when upgrades involve control systems, new thermostats, or electrical connections, electrical permits are required to meet safety standards and ensure proper integration with existing systems.
Thorough documentation is equally important. Inspection reports should detail the work performed, materials used, and verification steps. Duct leakage test results are essential to confirm that air sealing meets code requirements, typically showing leakage rates below the 10% threshold. For commercial projects, additional documentation – such as commissioning reports and third-party verification records – may be required, especially for healthcare facilities or LEED-certified buildings. A 2025 publication by Hydrodynamics Inc. emphasized that third-party certification is vital for verifying energy efficiency and safety compliance.
Final inspections by local or state officials are standard for most projects, and some may also require commissioning by certified engineers. For example, a 2005 retrofit project in Concord, California, successfully reduced duct leakage from 12% to below 10% of air handler flow.
Permit requirements can vary widely by location. Some jurisdictions streamline processes for minor repairs, while others demand full engineering reviews for any ductwork changes. Consulting local building departments ahead of time ensures smooth inspections and prevents delays.
Pre-Retrofit Assessment Steps
A solid pre-retrofit assessment sets the stage for identifying existing problems, evaluating system performance, and gathering the data needed for upgrades that meet code requirements. Let’s dive into the tools, calculations, and documentation techniques that are key to this process.
Inspection Tools and Equipment
The right tools make all the difference when evaluating ductwork. For example, duct blasters pressurize or depressurize ducts to measure air leakage through joints and gaps. Infrared cameras are excellent for spotting temperature differences, revealing insulation gaps, air leaks, or areas where conditioned air escapes into unconditioned spaces like attics or crawlspaces. Airflow meters measure the volume of air moving through supply and return ducts, which helps confirm whether each room is receiving the airflow it needs and highlights ducts that are improperly sized. Additional tools such as smoke pencils, pressure gauges, and digital manometers can further pinpoint leaks and measure pressure differences.
Load Calculations and Duct Sizing
Accurate load calculations and proper duct sizing ensure the retrofit system meets the building’s requirements. Using ACCA Manual J, you can calculate heating and cooling loads based on factors like building size, insulation levels, window types, and local climate. These calculations determine the exact capacity needed and account for any upgrades made to the building over time. For ductwork, Manual D offers guidance on design and sizing to ensure ducts deliver the right amount of conditioned air without causing noise or pressure issues. Together, these methods prevent energy waste, improve comfort, and ensure compliance with building codes, forming the foundation for effective retrofit solutions.
Recording Inspection Results
Thorough documentation is essential for meeting code requirements and securing permits. Use standardized forms or digital tools to log all measurements, observations, and diagnostic test results. Include details like the date, location, tools used, and findings. Photos are especially valuable for capturing existing conditions – damaged duct sections, poor connections, or insufficient insulation – which help define the scope of work and may support insurance or warranty claims.
Key measurements to document include duct leakage tests, airflow data, and insulation R-values. Most retrofit standards require duct leakage to be less than 10% of the air handler’s flow, with best practices aiming for 5% or less. Record airflow readings for each supply and return register, along with static pressure measurements, to confirm that the retrofit has improved system performance. Insulation R-values are crucial for ducts located outside conditioned spaces, where codes often require an R-value of 8.
Maintaining detailed and accurate records is critical, as this documentation becomes part of the official project file reviewed during final approval. It also demonstrates quality workmanship and supports warranty claims or future maintenance. For projects requiring third-party certification, these records are indispensable for verifying that the retrofit meets energy efficiency and safety standards. This thorough documentation lays the groundwork for the retrofit strategies covered in the next section.
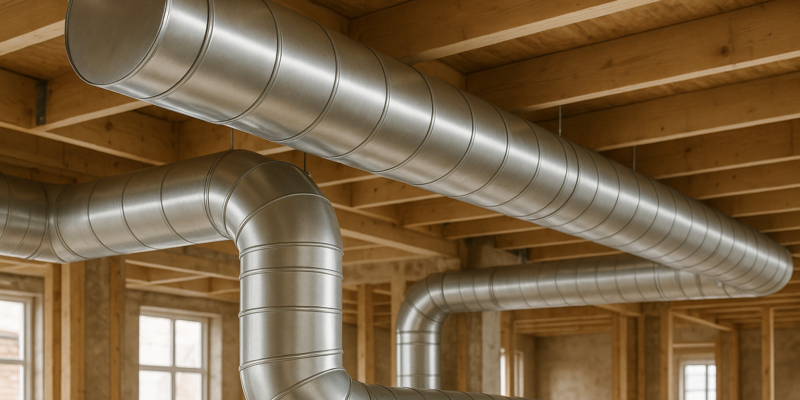
Ductwork Retrofit Process
Using the insights from your pre-retrofit assessment, you can now dive into transforming your ductwork. The process involves sealing leaks, adding insulation, and testing the system to ensure it meets code requirements and operates efficiently.
Duct Sealing Methods
To seal ducts effectively, use mastic sealant for a strong, flexible bond. Apply it evenly across all joints and seams, ensuring complete coverage of each connection.
For metal or flexible ducts, UL 181A/B foil tape works well – make sure to press it down firmly and avoid bubbles for a secure seal. For areas that are hard to reach, aerosol-based sealants can be applied from the inside to address leaks.
Before sealing, inspect all joints for leaks and clean them thoroughly. Follow the sealant manufacturer’s instructions, particularly at connections and register boots. Allow the sealant to cure fully before operating the system.
Duct Insulation Requirements
Ducts located in unconditioned spaces like attics, crawlspaces, or garages should be insulated to at least an R-8 value. This can cut energy loss by as much as 30%.
Wrap the insulation snugly around the ducts, ensuring there are no gaps or compression. Use tape or mastic to seal all seams securely. Be mindful of common mistakes, such as leaving gaps at connections, skipping short duct runs, or compressing the insulation when using straps or ties. These errors can reduce performance and may cause condensation issues in humid climates.
When insulating flexible ducts, take extra care to maintain their shape. Avoid kinks or bends that restrict airflow. If relocating ducts to conditioned spaces isn’t an option, consider using insulation with higher R-values for added energy savings. Proper insulation not only meets code requirements but also helps your HVAC system maintain efficiency by minimizing the temperature difference between the conditioned air and the surrounding environment.
System Testing and Commissioning
Once the retrofit is complete, test the system to ensure everything is functioning properly. Start by balancing airflow through dampers and registers, and look for areas that may need additional sealing or duct adjustments.
Use a duct blower test to measure leakage, aiming to keep it under 10% of the air handler’s airflow. Document these results for reference.
If the home has gas appliances, perform combustion safety checks to prevent backdrafting. Confirm system performance by measuring airflow, static pressure, and temperature consistency. These steps ensure your retrofit meets both regulatory standards and performance goals.
In one California project, sealing ducts to reduce leakage below 10% and insulating to an R-8 value led to noticeable improvements in comfort – especially in rooms that were previously under-conditioned. Energy bills dropped, and the system operated more efficiently. However, improper installation of flexible ducts, such as excessive bends and poor layout, increased airflow resistance, underscoring the importance of following best practices during retrofits.
Finally, keep thorough documentation of all test results. This record is essential for permit approvals, utility rebate applications, and any potential warranty claims in the future. Proper documentation ensures your retrofit work is both accountable and verifiable.
sbb-itb-99db659
Testing and Compliance Verification
Once a ductwork retrofit is completed, testing the system is essential to confirm performance and ensure compliance with energy codes. This step guarantees both energy efficiency and consistent indoor comfort.
Air Leakage Testing Procedures
The go-to method for measuring air leakage in retrofitted ductwork is duct blaster testing. This technique uses a calibrated fan to pressurize the duct system, allowing technicians to identify and measure air escaping through leaks.
To start, all supply and return registers are sealed using temporary covers or plastic sheeting. The duct blaster fan is then attached – usually through the air handler or a large return duct – and the system is pressurized to 25 Pascals. Technicians measure the airflow needed to maintain this pressure, which reveals the extent of leakage.
For a system to pass, leakage must be under 10% of the air handler’s capacity. For example, if the air handler delivers 2,000 cubic feet per minute (CFM), leakage should not exceed 200 CFM at 25 Pascals.
Essential tools for this test include a duct blaster, digital pressure gauges, and temporary sealants for securing registers. It’s crucial to ensure all registers remain sealed during the process.
“In one California retrofit project, initial testing showed duct leakage rates of 12% for supply ducts and 33% for return ducts. After sealing with mastic and UL 181A/B tape, post-retrofit testing confirmed leakage had dropped below the 10% threshold, meeting EPA Energy Star program standards”.
Once leakage is under control, the next step is to evaluate the overall performance of the system.
System Performance Testing
Performance testing goes beyond checking for leaks, focusing on how effectively the retrofitted system delivers conditioned air throughout the home. This includes assessing airflow rates, temperature differences, and pressure balance.
Technicians measure airflow at each supply and return register using calibrated tools, recording results in cubic feet per minute (CFM). They also monitor the temperature difference between supply and return air – measured in degrees Fahrenheit – to ensure the system is heating or cooling as expected.
Pressure balance testing is another key step. It ensures air is evenly distributed, preventing negative pressure that could pull in unconditioned air and lead to comfort issues. If problems like weak airflow, excessive noise, or uneven temperatures arise, adjustments to dampers or ducts may be necessary.
Documentation and Record Keeping
After testing, thorough documentation is critical. This not only proves compliance with codes but also serves as a valuable resource for future maintenance.
Key records include test results, inspection reports, and commissioning certificates. Make sure to label documents with details like test date, location, technician name, and specifics about the retrofit. Digital backups with clear file names (e.g., “Air Leakage Test – 11/12/2025”) are advisable, and records should be kept for at least seven years.
Typical documentation includes before-and-after test results showing leakage rates, airflow measurements, temperature differential readings, and photos of sealing and insulation work. These records are often reviewed by local inspectors, code officials, or third-party commissioning agents, particularly for commercial projects or LEED-certified buildings.
Third-party certification can enhance the credibility of your documentation. As noted by industry experts in October 2025, “third-party certification for retrofitted HVAC systems ensures upgrades meet energy efficiency and safety standards, providing essential documentation for compliance verification”.
Additionally, retain copies of permits, material specifications, and utility rebate applications. Comprehensive records not only safeguard you against potential legal or financial risks but also ensure the retrofit achieves its intended goals. Poor or incomplete documentation could lead to failed inspections, fines, or costly rework.
Organized records also benefit HVAC technicians by offering a clear history of the system’s performance and configuration, simplifying routine maintenance and troubleshooting.
Working with HVAC Professionals
Getting ductwork up to retrofit standards isn’t just about following instructions – it requires precision, expertise, and a solid understanding of current codes. While some homeowners might toy with the idea of handling retrofits on their own, the reality is that today’s standards are far too complex for a DIY approach. That’s where licensed HVAC contractors come in. They bring the know-how and tools needed to ensure retrofits are not only successful but also meet all necessary codes. Let’s explore why professional contractors are essential for achieving compliance.
When Professional Help Is Essential
There are specific situations where relying on professional HVAC contractors isn’t just a good idea – it’s non-negotiable. For instance, large-scale commercial and industrial projects often involve sprawling duct systems, multiple zones, and intricate equipment setups. These projects require professionals who are well-versed in standards like ASHRAE 90.1 and the International Mechanical Code. They also need to handle specialized testing and commissioning, which demand calibrated tools and certified skills.
Another scenario where professionals shine is when projects need to minimize downtime. In commercial or industrial settings, where shutting down operations for extended periods isn’t an option, experienced contractors can schedule work in phases, set up temporary systems, and ensure safety protocols are in place – all while keeping things running smoothly.
For homeowners, attempting a DIY retrofit can lead to energy losses of up to 30% and might even void equipment warranties. On the other hand, professional contractors can help cut energy costs by up to 20% and deliver systems that are both reliable and efficient over the long haul. If you’re wondering how to tackle these challenges, keep reading to see how Hydrodynamics Inc. can be your trusted partner for retrofit projects.
Hydrodynamics Inc. Retrofit Services

For decades, Hydrodynamics Inc. has been a trusted name in HVAC retrofit services across Pennsylvania. Their team includes certified technicians with specialized credentials, such as EPA 609 and A.S.S.E Backflow Testing certifications, ensuring every project meets the highest industry standards.
Their retrofit process is thorough and leaves no detail unchecked. It starts with a comprehensive system assessment, where certified technicians evaluate existing ductwork to identify problem areas. They also conduct load calculations and design systems tailored to meet the specific needs of the building and its climate zone.
Once the design phase is complete, Hydrodynamics Inc. takes care of system testing and commissioning. Using calibrated instruments, they verify system performance and document compliance with energy and safety standards.
“Third-party certification ensures your retrofitted system meets energy efficiency, safety, and…” – Hydrodynamics Inc.
What truly makes Hydrodynamics Inc. stand out is their versatility. Whether it’s a small residential project or a large-scale commercial or industrial retrofit, they approach each job with the same level of expertise and attention to code compliance. The complexity may vary, but their commitment to quality never wavers.
Their dedication is reflected in glowing customer reviews. Emma K. from Drums, PA, shared, “It was a good choice. They were prompt and knowledgeable and efficient. Very pleased with their work”.
Hydrodynamics Inc. doesn’t just stop at completing the retrofit. They also offer ongoing maintenance plans, which include regular inspections and performance testing. This ensures clients can maintain the benefits of their retrofit investment while staying compliant with codes over time.
Conclusion: Meeting Standards and Improving Efficiency
Achieving retrofit standards isn’t just about meeting regulations – it’s about delivering real energy savings and ensuring long-term performance. To get there, you need careful planning, precise execution, and thorough testing at every stage.
Execution requires attention to detail. For example, duct sealing should limit leakage to less than 10% of the air handler’s flow, and ducts outside conditioned spaces need insulation rated at least R-8. Choosing the right materials is critical too. Mastics and aerosols create durable seals that last, unlike standard cloth tapes, which fail over time.
Testing and verification are where the results come to light. Air leakage tests confirm your sealing efforts are effective, while performance testing ensures proper airflow and temperature distribution throughout the system. A California retrofit project highlights this process: contractors reduced duct leakage to under 10%, insulated attic ducts to R-8, and corrected refrigerant charge. The result? Better comfort and less energy waste.
These upgrades don’t just enhance performance – they can also lead to energy cost savings of up to 30% for some property owners.
Keeping detailed records of materials, test results, and permits is just as important. This documentation proves compliance during inspections and becomes a valuable resource for future maintenance, upgrades, or even when selling your property.
Given the complexity of building codes, specialized testing equipment, and safety requirements, hiring professionals is a smart move. While it might seem like a significant investment upfront, the payoff comes in the form of better efficiency, warranty protection, and confidence that the work was done correctly.
Once these improvements are in place, regular inspections and timely repairs ensure your system stays efficient and aligned with changing standards. This proactive maintenance approach safeguards your retrofit investment and keeps your system running smoothly for years to come.
FAQs
What are the main differences between the International Mechanical Code (IMC) and ASHRAE Standard 90.1 for ductwork retrofitting?
The International Mechanical Code (IMC) and ASHRAE Standard 90.1 address different aspects of ductwork retrofitting, each playing a critical role. The IMC prioritizes safety, proper installation, and operational standards to ensure HVAC systems function reliably and safely. On the other hand, ASHRAE Standard 90.1 focuses on energy efficiency, offering guidelines to minimize energy use in HVAC systems. This includes recommendations for duct sealing, insulation, and airflow design.
When undertaking ductwork retrofitting, it’s crucial to comply with the IMC’s safety standards while also integrating ASHRAE’s energy-saving practices. Balancing both ensures the system meets local regulations and operates efficiently. For best results, consult a qualified professional to verify that your retrofitting project adheres to both sets of standards.
How do climate zones influence the materials and insulation used in ductwork retrofits?
Climate zones heavily influence the choice of materials and insulation when retrofitting ductwork. In colder areas, thicker insulation is essential to reduce heat loss and ensure the system remains energy-efficient. On the other hand, in warmer regions, the focus shifts to insulation that minimizes heat gain, keeping the cool air contained within the ducts.
The local environment also dictates material requirements. For instance, in humid areas, using moisture-resistant insulation can help prevent mold and mildew. Meanwhile, regions with extreme temperatures may call for tough, high-performance materials that can handle those conditions. Always make sure the selected materials align with regional retrofit standards to achieve the best results.
Why should I hire a licensed HVAC professional instead of doing a retrofit project myself?
Hiring a licensed HVAC professional is the smart way to ensure your retrofit project aligns with all local standards and safety regulations. These experts have the skills to evaluate your ductwork, make precise adjustments, and use specialized tools to ensure your system performs at its best. Trying to tackle a retrofit on your own can lead to expensive errors, energy inefficiencies, or even create safety risks.
Licensed technicians, like the team at Hydrodynamics Inc., also stay informed about the latest energy-efficient technologies and industry practices. This means they can help your system run more efficiently, ultimately lowering your energy bills over time. Choosing professional assistance not only brings peace of mind but also delivers lasting value for your home or business.